Introduction
The M720, along with other similar mice, tend to suffer from malfunctioning left and right click micro-switches after a couple of years of use. Often, the problem can be corrected by bending a spring inside the switch housing, however sometimes the spring may be too worn out for the switch the function reliably again.
This guide takes you through the process of disassembling your mouse and replacing the micro-switches, making your mouse as good as new!
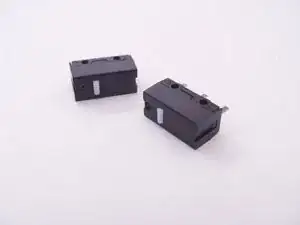
Parts
-
-
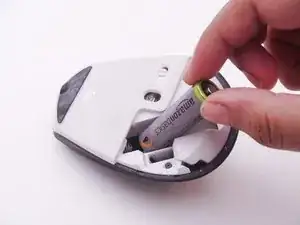
Begin disassembly by removing the battery
-
Peel off the sticker underneath the battery to reveal the small Philips screw underneath. As my particular mouse had already been disassembled, the sticker is not shown in the images
-
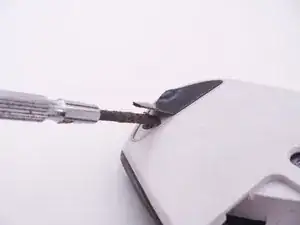
Using a flat blade screwdriver or similar instrument, peel off the rubber pad at the upper edge of the mouse to reveal two more screws
-
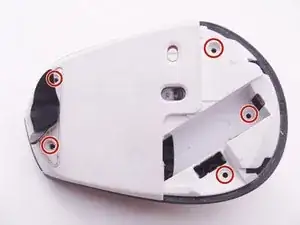
Unscrew a total of 5 Phillips head scews as marked
-
-
-
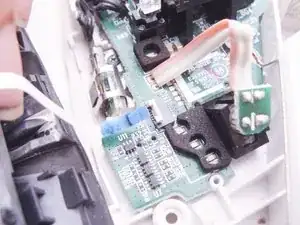
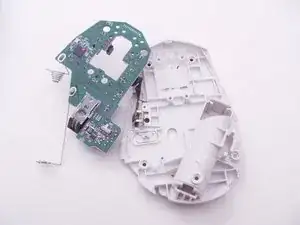
Gently separate the top and bottom parts of the mouse, being careful not to pull the two parts too far apart, so as to avoid damaging the small ribbon cable that connects the switches on the top housing to the main board
-
Un-clip and remove the ribbon cable from the main board as shown. The two parts of the mouse are now separate
-
-
-
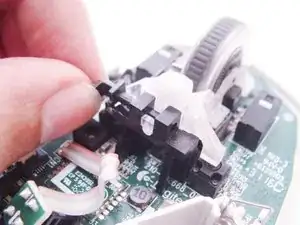
Remove the clip holding the translucent scroll wheel assembly to the black plastic piece
-
Lift of the scroll wheel assembly, making sure not to loose the two small springs underneath, towards the front. The springs were already missing in my mouse, but I have marked the location in red
-
Remove the two screws holding down the black plastic piece, to which the scroll wheel assembly was attached
-
-
-
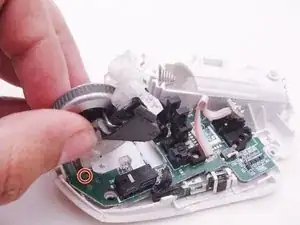
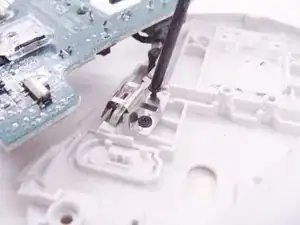
Lift off the main board and place it gently to the side, taking care not to damage the remaining ribbon cable attached to a small switch and bracket assembly on the bottom housing
-
Unscrew and lift off the metal bracket. The ribbon cable and small piece of PCB at it's end should now be free
-
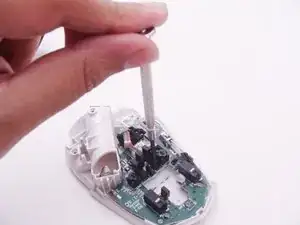
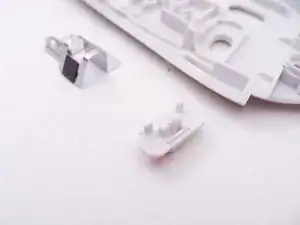
Make sure not to loose the small plastic on-off slider switch cover, which should now be free to fall out if the bottom housing is turned over
-
-
-
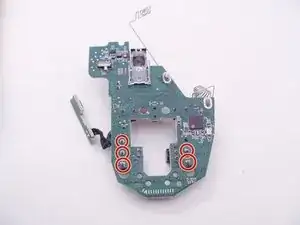
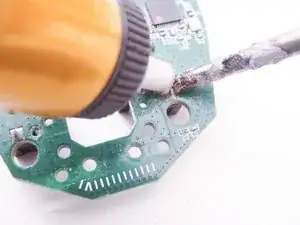
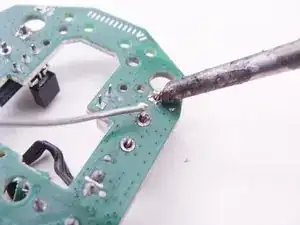
Identify and de-solder the micro-switch solder pads using your preferred de-soldering method, such as a solder pump or de-soldering wick. Your soldering iron tip should be clean and properly tinned, unlike my atrocious tip pictured here
-
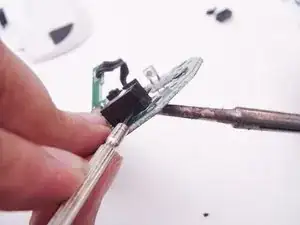
If required, pry the old switches off with a flat-blade screwdriver while applying heat to the solder pads
-
-
-
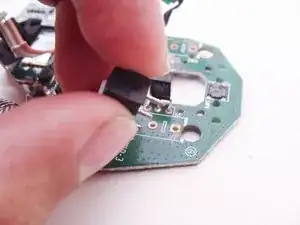
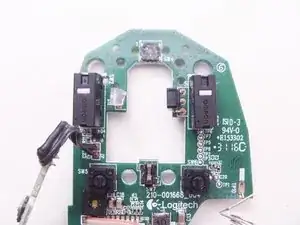
Install and solder the new switches
-
Again, be sure to use a correctly tinned and clean soldering iron tip. Your tip should not be as gnarly as mine is in these pictures
-
To reassemble your device, follow these instructions in reverse order.
3 comments
Next time show ALL screws, type and position.
On this mouse screws are not all similar and if somebody forget that your “guide” don’t help
Thanks for the guide! It helped so very much.
thank you! i only needed to open and clean the dust inside and it clicks well again.
mine was double clicking when i click and hold.
was about to unsolder and swap the left and right switches but didn't have to go all the way there.
screws are fine i think. just be careful and put them on a safe place with the same relative positions to make it easier to put back, as with all other devices when disassembling.
UPDATE: mine is double clicking again 1 month later, and just found out recently from reddit that breathing humidity to the switches will often fix the double clicking problem with these Omron switches inside. it's magic! i tried and it really fixed it.
ted -