
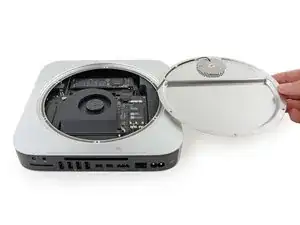
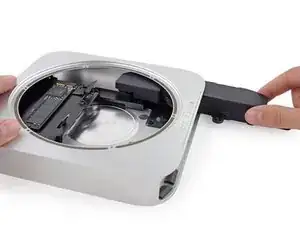
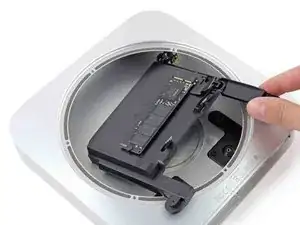
Introduction
Use this guide to replace the hard drive in your hard-drive-only or Fusion Drive Mac mini Late 2014.
This guide was made with a Fusion Drive Mac mini. If your Mac mini only has a hard drive, skip the steps about the PCIe SSD and its connector.
Tools
-
-
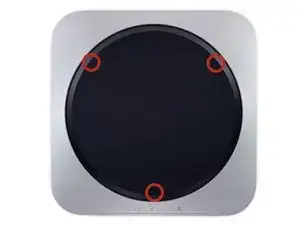
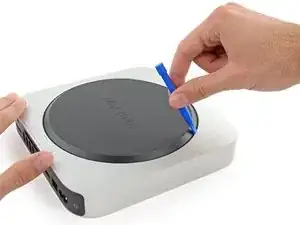
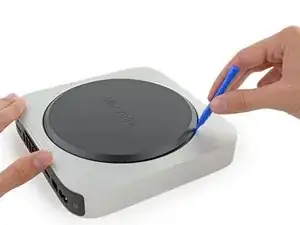
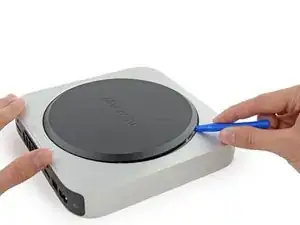
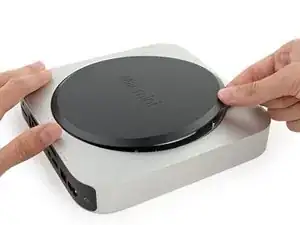
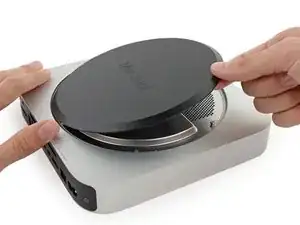
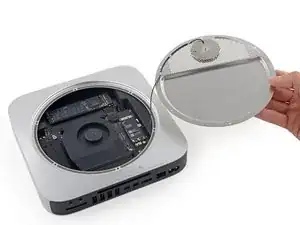
The bottom cover is clipped onto three screw posts.
-
Pry near, but not right on the screw posts.
-
-
-
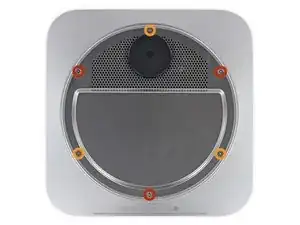
Remove the following TR6 screws from the antenna plate:
-
Three 4.1 mm screws
-
Three 1.9 mm screws
-
-
-
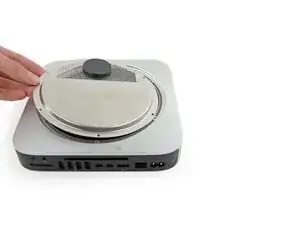
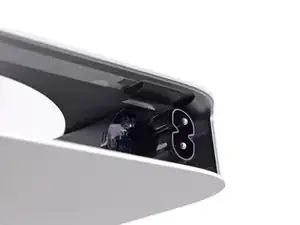
With the I/O ports facing you, flip the antenna plate to the right to allow access to the antenna cable connector.
-
-
-
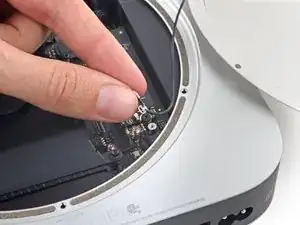
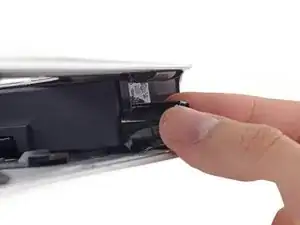
Use the point of a spudger to lift the antenna connector straight up off its socket on the airport card.
-
-
-
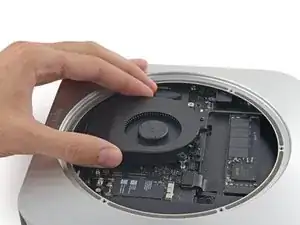
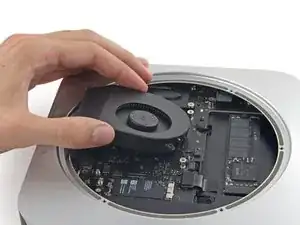
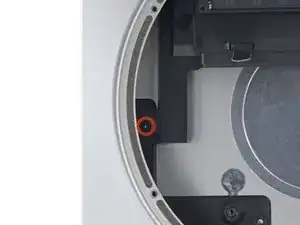
Remove the two 12 mm T6 screws from the fan.
-
Loosen the 27 mm T6 captive screw–it will get removed with the fan assembly.
-
-
-
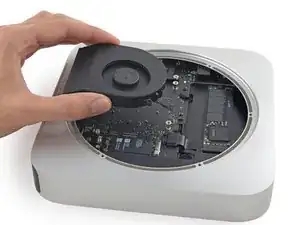
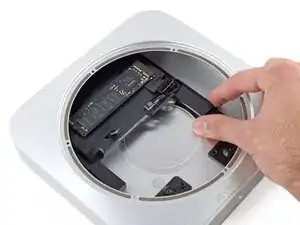
Lift the fan straight up to free the captive screw from its hole in the logic board.
-
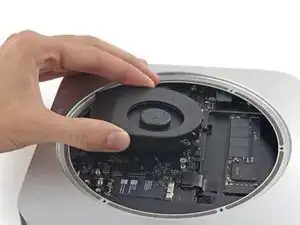
Pull the fan away from the SSD until you can easily access the fan connector.
-
-
-
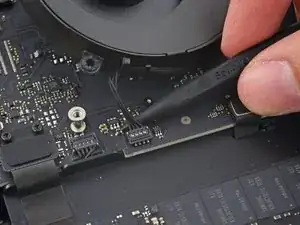
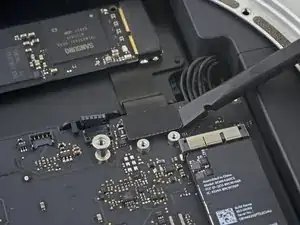
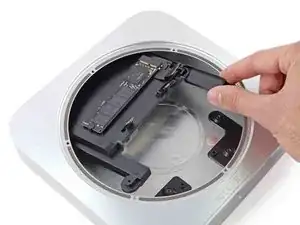
Use the point of a spudger to lift the fan connector straight up out of its socket on the logic board.
-
-
-
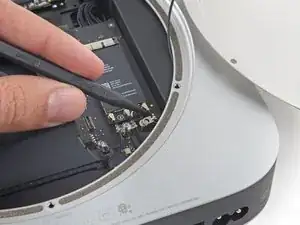
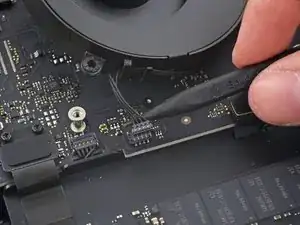
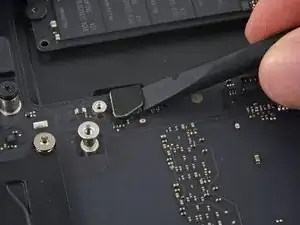
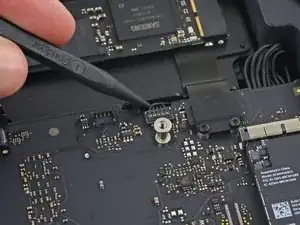
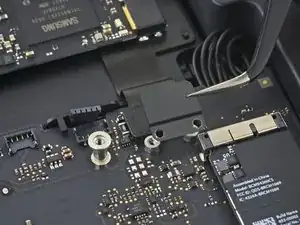
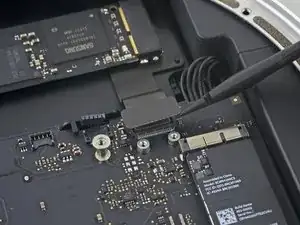
Use the flat end of a spudger to lift the SATA cable connector up off of its socket on the logic board.
-
-
-
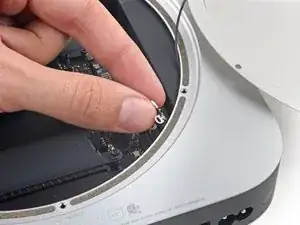
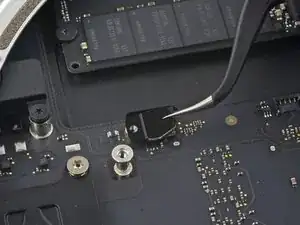
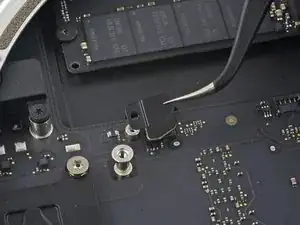
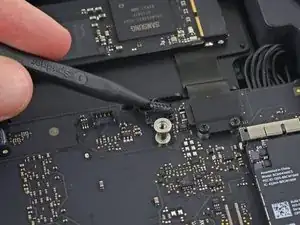
Use the tip of a spudger to disconnect the IR sensor cable connector by prying it straight up from its socket.
-
-
-
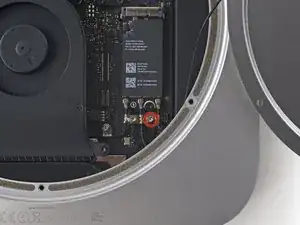
The following three steps only apply to Mac minis equipped with a PCIe SSD. Skip the next three steps if your Mac mini only has a hard drive.
-
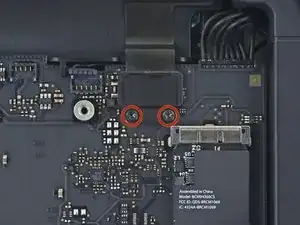
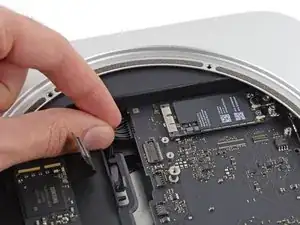
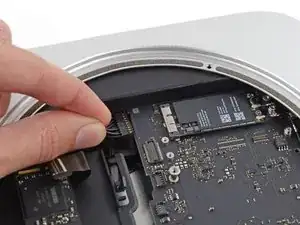
Remove the two 2.6 mm T6 screws securing the PCIe SSD cable bracket.
-
-
-
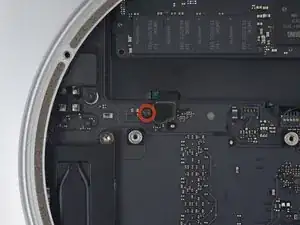
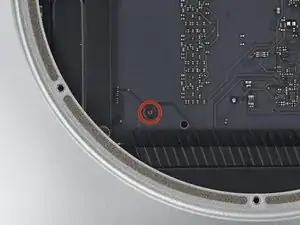
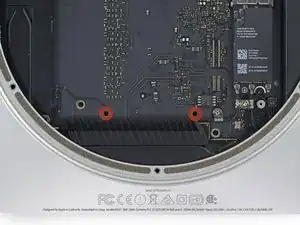
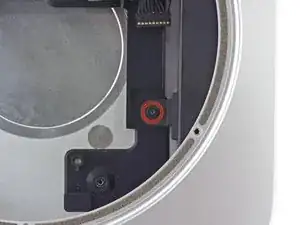
Insert the Mac mini Logic Board Removal Tool into the two holes highlighted in red. Be sure the rods make contact with the case under the logic board before proceeding.
-
-
-
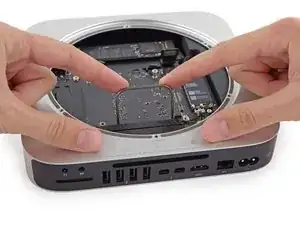
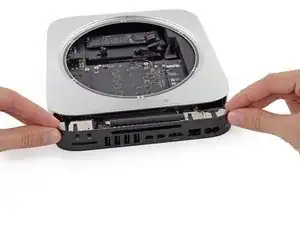
Carefully pull the tool toward the I/O board. The logic board and I/O board assembly should slightly slide out of the outer case.
-
Cease prying when the removal tool makes contact with the opening in the rear case.
-
-
-
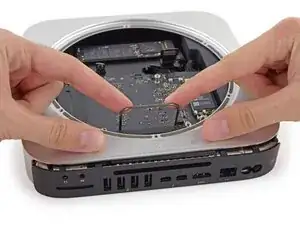
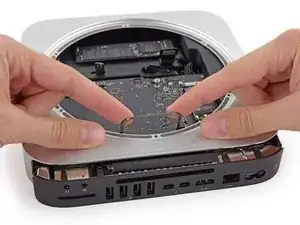
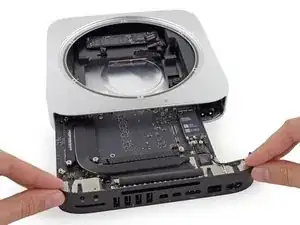
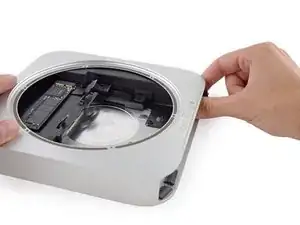
Carefully slide the logic board assembly out of the Mac mini, minding any cables that may get caught.
-
-
-
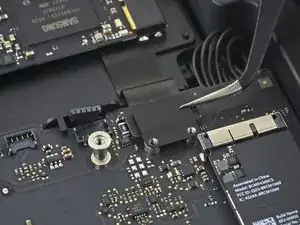
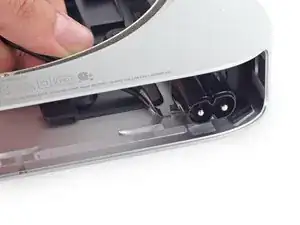
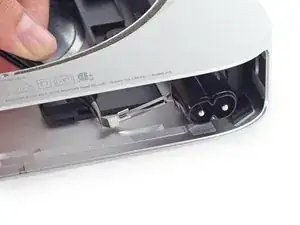
Use tweezers or your fingers to pull the clip away from the AC-in socket, and remove it from the Mac mini.
-
-
-
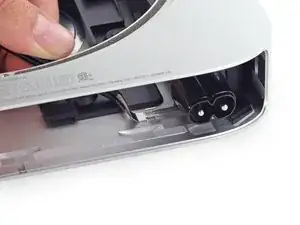
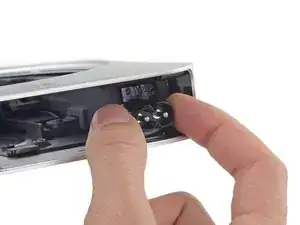
To free the power supply from the case, grab the AC-In connector, which acts like a latch.
-
Rotate the AC-In connector 90 degrees counter-clockwise.
-
-
-
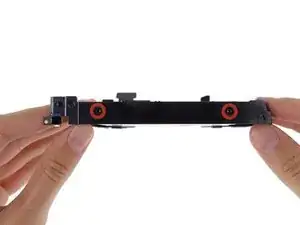
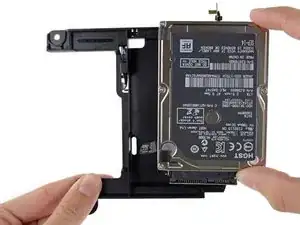
Remove the four (two on each side) 6.5 mm T8 screws securing the hard drive to the drive tray.
-
-
-
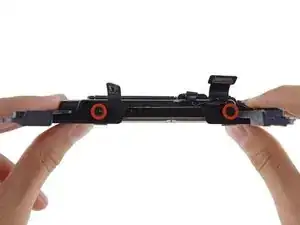
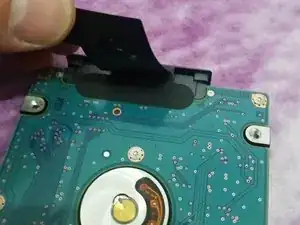
Lift up the ribbon cable and carefully peel away the black tape underneath. It secures the SATA cable connector to the PCB of the hard drive. Failing to remove the tape will almost surely cause the contacts soldered to the flex cable to rip from the connector housing, as the retention force of the contacts in the housing is quite low.
-
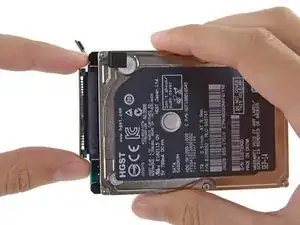
Pull the SATA cable connector straight out of the hard drive.
-
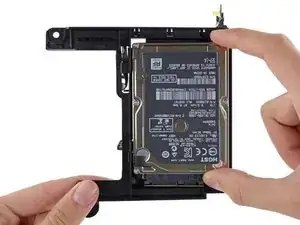
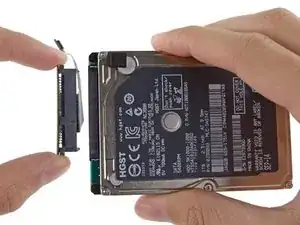
Carefully peel off the two black, square-shaped sticky pads (one visible in picture) from the corners of the hard drive, and stick them to your new hard drive in the same locations.
-


To reassemble your device, follow these instructions in reverse order.

220 comments
Hello, the following hard drive goes on the Mac Mini ??
no problem. but if you can get a evo 850 or a pro for the 2014 is better
All in all, this was a fairly terrifying process, however this guide was a massive help! Thankyou!!
geeksix -
This is exactly the reason I purchased their tools. They offer these guides which have helped me save several of my computers and a couple of my phones over the years. The $70 was a small price to pay for the help and I love the tools.
Ordered kit which arrived very quickly from Germany to UK. Only problem with taking it apart was with the IR sensor was difficult to lift up and I ended up pulling the whole fitting off glued it back on but now have no working IR sensor or front light but everything else works fine. Swapped SLOW HDD for SSD and now my Mac MIni is flying.
Andrew -
Read Me First: I purchased an SSD drive directly from Crucial and, of course, it came uninitialized. After going thru the entire tear down, installing the new drive, and rebuilding the mini, it refused to recognize the new drive. So, of course, I had to re-tear it down, remove the new drive, insert it into an external housing and format it using my Macbook. After that the mini recognized the new drive. A word to the wise: format the new drive before installing it.
tom -
How were you installing the OS? I am planning on booting into a USB drive with a copy of OS High Sierra on it, and I assume I will be able to format my new Samsung SSD using that?
Simon -
On my Samsung EVO 850, mac mini download system automaticly
Stefan Repac -
Pre-formatting is not necessary if you make a USB boot installation drive with macOS installer. During boot up, hold down the option key until the mac boot into the USB, formatting can then be done using disk utility running off the USB drive.
SBR249 -
I had the exact same experience as tom. I installed a brand new 2TB Samsung 850 EVO and it was not recognized by the Mac Mini. I booted from a portable USB drive with a bootable copy of macOS High Sierra but the 850 EVO SSD I had just installed was not shown as an option. I tore down the Mac Mini again, formatted the 850 EVO, rebuilt the Mac Mini, and booted off the same bootable High Sierra USB drive, and sure enough the 850 EVO was recognized.
maxim -
diskutil list
diskutil erasedisk [filesystem] [drivename] /dev/disk[disk number]
Paul Rodgers -
My drive (Evo 860) was also not initialized. I started in recovery mode and went to disc utility and from there selected the drive. I then was able to use the “erase” function on the drive. I just left the settings as default and as soon as it erased then the drive was ready to go.
Nathan Cooper -
Just completed this upgrade a few days ago, having purchased the 1 TB SSD kit from IFixIt. The kit arrived quickly and the tools and drive worked perfectly. The step by step guide posted here is pretty much flawless, but do pay attention to the specific comments from users on certain steps - they really help. As far as ensuring that the new drive will reboot and install MacOS, I watched 1-2 videos on YouTube about re-installing using the Internet Recovery tool and that worked perfectly. My MacMini is performing WAY better than it used to, for only a $200 upgrade kit and about 3 hours of work, all in. Thanks!
Joshua Rednik -
I’ve had Apple computers since the G3 machines and they have always been snappy.
Unfortunately this 2014 macmini has always been slow but this upgrade (6 years later) has changed that!
if you have a late 2014 macmini, do this.
I used a 860 Samsung.
Mike Hayes -
A quick comment to tell you that at every step, make sure to read the comments and be careful. I managed to do the process fast without any problems, but thanks to the comments that warned me enough on the risky steps.
Euronymous -
This guide surely helped me breath upgrade and bring some new life into my macmini. Thanks to all who contributed.
Cameron Hasell -
can one of you give me the link for the screw drivers please?
Gerardo Ramirez -