Introduction
Use this guide to completely replace your mini's hard drive.
Note that some of the connections in this Mac are more fragile to disconnect and more difficult to reconnect than in other Macs. This guide is thorough in explaining how to remove each part that's in the way of the hard drive, but experienced repairers may be able to move the fan and the antenna plate out of the way without disconnecting them to save time.
-
-
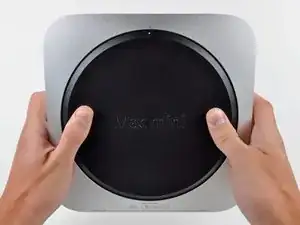
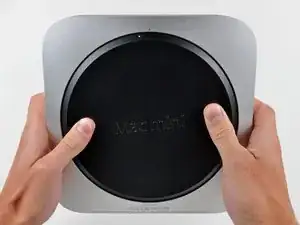
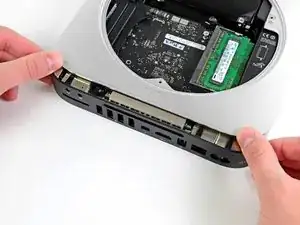
Place your thumbs in the depressions cut into the bottom cover.
-
Rotate the bottom cover counter-clockwise until the white dot painted on the bottom cover is aligned with the ring inscribed on the outer case.
-
-
-
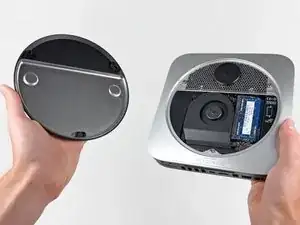
Tilt the mini enough to allow the bottom cover to fall away from the outer case.
-
Remove the bottom cover and set it aside.
-
-
-
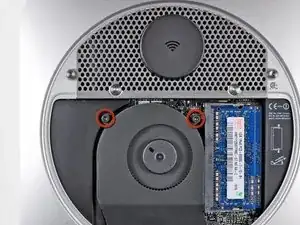
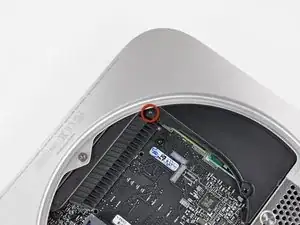
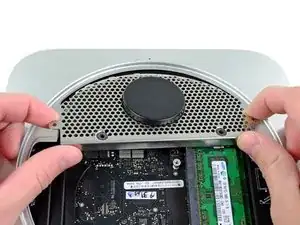
Remove the two 11.3 mm T6 Torx screws securing the fan to the logic board near the antenna plate.
-
-
-
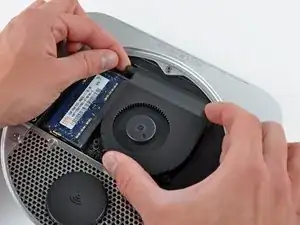
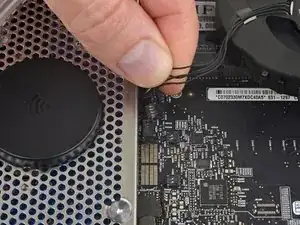
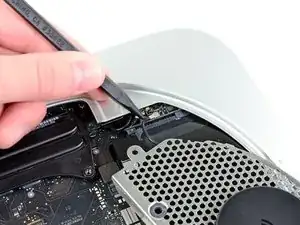
Lift the fan out of the mini for enough clearance to access its connector.
-
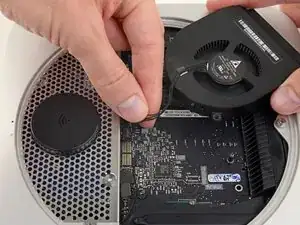
Grab all the wires at once and gently pull straight up to disconnect the fan from the logic board.
-
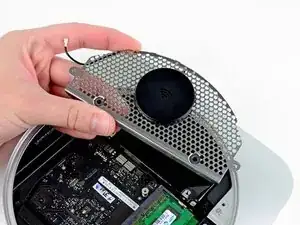
Remove the fan.
-
-
-
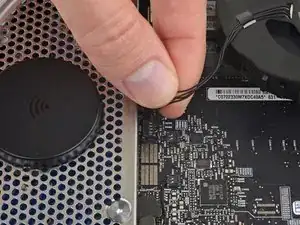
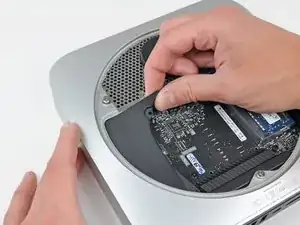
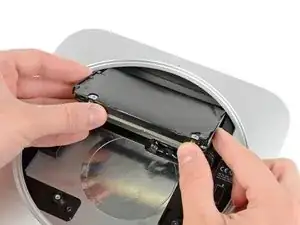
Lift the cowling from the end nearest the antenna plate.
-
Rotate the cowling away from the outer case and remove it from the mini.
-
-
-
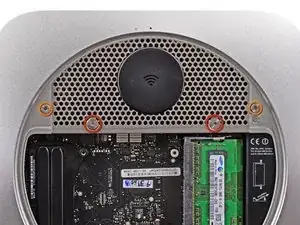
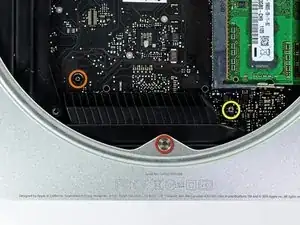
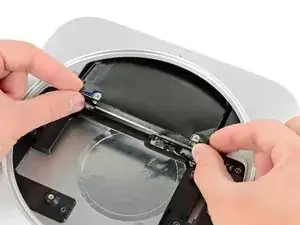
Remove the following screws securing the antenna plate to the mini:
-
Two 6.6 mm T8 Torx screws
-
Two 5.0 mm T8 Torx or 2.0 mm Hex screws (either screwdriver will work)
-
When putting back together:
-
-
-
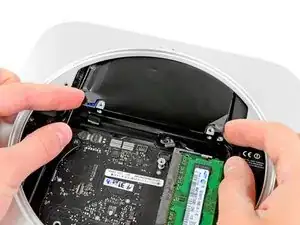
Slightly lift the antenna plate from the end closest to the RAM.
-
Carefully pull the antenna plate away from the circular rim of the outer case.
-
-
-
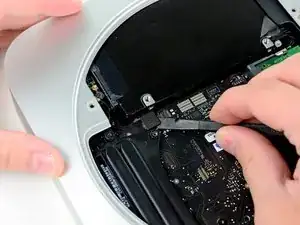
Use the tip of a spudger to carefully pry the antenna connector up from its socket on the AirPort/Bluetooth board.
-
-
-
Use the flat end of a spudger to pry the hard drive connector up from its socket on the logic board.
-
-
-
Use the tip of a spudger to lift the IR sensor connector up and out of its socket on the logic board.
-
-
-
Remove the following three screws:
-
One 5.0 mm T8 Torx or 2.0 mm Hex screw (either screwdriver will work)
-
One 16.2 mm T6 Torx screw
-
One 26 mm T6 Torx standoff
-
-
-
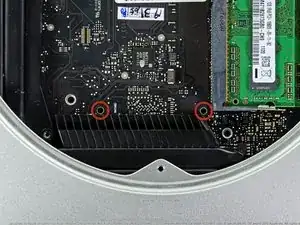
Insert the Mac mini Logic Board Removal Tool into the two holes highlighted in red. Be sure it makes contact with the top side of outer case below the logic board before proceeding.
-
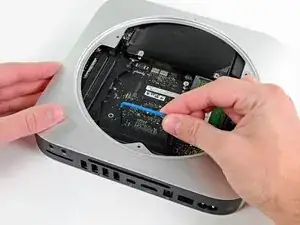
Carefully pull the tool toward the I/O board. The logic board and I/O board assembly should slightly slide out of the outer case.
-
Remove the Mac mini Logic Board Removal tool.
-
-
-
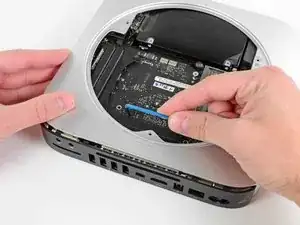
Simultaneously push the two plastic clips on the far left and right sides of the I/O board toward the middle of the I/O board and pull the I/O board away from the outer case.
-
Only pull the logic board assembly out of the outer case until the edge of the I/O board is about .5" away from the edge of the aluminum outer case.
-
-
-
Remove the hard drive cable.
-
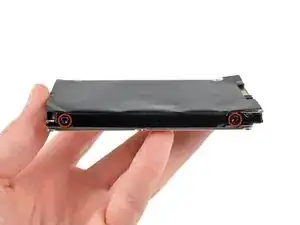
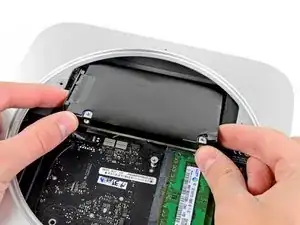
Remove the two 6.2 mm T8 Torx screws from the side of the hard drive.
-
-
-
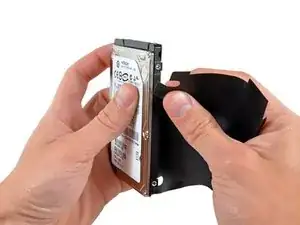
Carefully peel the hard drive cover off the hard drive.
-
Hard drive remains.
-
If you are installing a new hard drive, we have an OS X install guide to get you up and running.
-


To reassemble your device, follow these instructions in reverse order.

51 comments
Just a note, the OS X Install Guide is for 10.5 Snow Leopard. Maybe also include a install guide for 10.6 Lion?
Sherman -
That's right, steps 10-11 and 13-16 are not necessary.
It suffices to rotate the antenna plate out of the way without detaching its cable.
And after disconnecting the hard drive you can wiggle it out of the enclosure
without dealing with the logic board. Muc less hassle, and much less intimidating.
This is great advice! It worked fine for me, thanks!
This also worked for me. Follow machobbes advice - whole process took about 10 minutes. Easy peasy.
The one difficulty I had was getting the new SSD (or HDD) to lock back into the fixings inside of the casing. Best solution if you are having this problem is to turn the Mini upside down, ensuring that the antenna cable isn't stretched too far, and aided by the wonderful powers of gravity, get the new HDD unit fixed into place properly.
Good advice. I too just moved the antenna plate to the side and the drive was easily accessible.
work great for me! Ty for the tips!
Very useful guide. Keep up the good work ! I have replaced the hard drive on my Mac Mini mid-2011 with a Vertex 3 SSD, and to my surprise I did not have to mess with the logic board (step 13 onwards) to slide-in the new drive. So it took me less than 20 minutes to do the whole thing. After that, recovering the whole system from Time Machine was a breeze.
Fabio -
This took a lot of force on my Mac mini. A lot.
nh3 -
I agree. It took a crap ton of force from my thumbs to twist the bottom off.
sleeve -
I accidentally broke the little things that hold the cover to the case. Is there a cheap replacement to the cover? Those clips are held onto it very weakly.
Jacob Halton -
Don't just use your thumbs... Use your whole palm to twist it, with maybe a thumb in one of the recesses, applying slight downward pressure.
markbart -
Wish I would have read this comment before I did it!
I found that what markbart said works best. one palm one thumb (and my knees) My thumbs would do it. It was a bit at a time.
Same difficulty getting it back on.
Would be handy if this (difficulty) was mentioned in the guide
Also would be nice to mention the safe practice of pressing the power button for a few seconds after disconnected to rid the system of any residual power, working in a clean static free environment & they say on the crucial website to touch a metal surface of the machine before touching the RAM
Nancy -
I think it depends, I have seen some that are very difficult to open and some super easy. But I see them everyday. I wish there was a tool that fit in the holes.
Justin Weathersbee -
When seating the bottom RAM chip you may have to apply a little extra side force to get it to seat properly. I put in the new RAM and just got a beeping sound upon starting. I then put the old RAM back in and got the same result.
Here is the solution I found on the Apple discussion board.
"Take a small flat head screwdriver and after you put the memory in slot 0, put the screwdriver between the top of the mac mini and the memory then turn the screwdriver a little to exert pressure on the memory into the slot. Do it on both sides of the memory."
This worked for me.
littlemas2 -
I remember this when I was changing my memory ... I realized (after opening) that more you push, more force it take to open the cover. As you push down you force the cover "to rub" the casing and possibly other things inside. If you "lightly" hold the cover it comes right off ... Remember: less is more! :-)
Have fun!
Radek -
We found it hard to use the thumbs but if you put the casing on a carpet and one person is holding the case while the other is using his palm of one hand to turn the cover it comes off quite smoothly and without much downward pressure.
Alexander -
If you're upgrading to an SSD, before you even take this first step, I'd recommend putting the SSD into an external drive case, using USB and format the SSD first before trying to swap your existing hard drive or implementing a fusion drive. The external drive case will come in handy later so you can use the old drive as extra storage anyhow.
Once that SSD is internal, the Mac errors out during the formatting process. Once it was formatted externally, then installed inside the Mac again, there was no problem.
Orange Girl -
The first time I did this it hurt! The second time my mac mini 2012 had been running so was warm. VERY EASY WHEN WARM. No fun when cool!
Nancy -
Forget about those 2 circle indents. if you consider the 2 marked dots (open and close) as position 12 o’clock, place your thumbs at 11 and 1 o’clock on the outer rim of the cover and rotate from that position.
juicer52 -
No way was I getting the back off. So I made a tool. Took a large wrench longer than the Mac mini. Superglued 2 rubber feet on the wrench at the same location as the thumb indents. Put the Mac on the ground, between my knees and used my body weight to turn the cover. Worked like a charm.
Mark -