Introduction

Prereq for upper case (logic board is removed)

  1. D5RNY2buRu4Bsw31
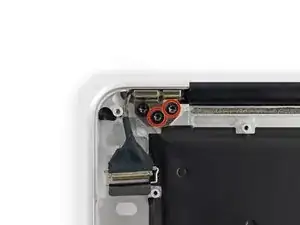
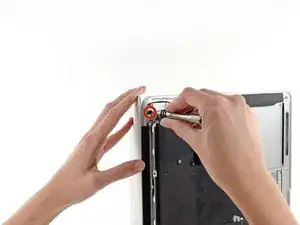
    • Remove the inner two 5.6 mm T8 Torx screws securing the right display hinge to the upper case.

    • Leaving the third screw in place for now will aid in rest of the procedure.

  2. QRMCxDWKWQRmGOmg
    • Open the display so that it is perpendicular to the upper case and place it on a table as shown.

  3. YPpXJ6WrqPbYk2Et
    • While holding the Air steady, remove the remaining 5.6 mm T8 Torx screw from the display bracket.

  4. 1wNRYIF1ZxwdTPOY
    • Flip the computer over so the last display screw is more easily accesible.

    • Before removing the final display screw, be sure to hold the display and upper case steady with your other hand. Failure to do so may allow the components to fall onto the table, causing potentially expensive damage.

    • Remove the last 5.6 mm T8 Torx screw securing the display to the upper case.

  5. VSrLZDPwS2ygvTfZ
    VSrLZDPwS2ygvTfZ
    ENAum1XRNAAL4SH2
    YHDpZsQeENgRqsBA
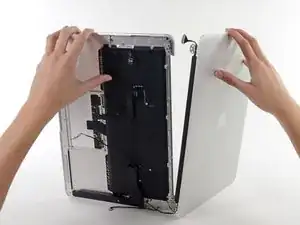
    • Open the Air slowly until the hinges slide out of their notches.

    • The antenna cables may still be routed through a channel in the upper case. Make sure the cables don't get snagged as you remove the display.

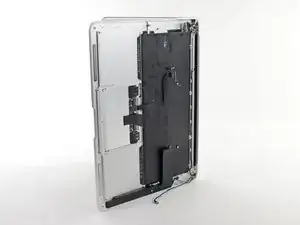
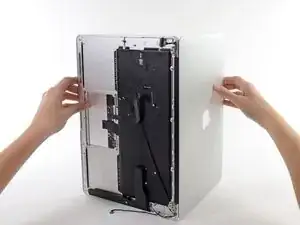
    • Once the two display hinges have cleared the upper case, remove the display and set it aside.

    MBA 2017: At this point I had to deroute the antenna cable from a channel along the back edge of the the upper case. Good to make note of this routing.

    Richard Garella -

Conclusion

To reassemble your device, follow these instructions in reverse order.

iRobot

Member since: 25/09/09

0 Reputation

0 comments