Introduction

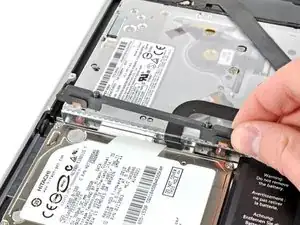
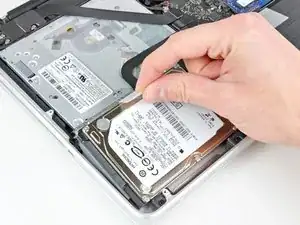
Internal prerequisite.

  1. QNuiLQgFkQq4lHQX
    • Remove the two Phillips screws securing the hard drive bracket to the upper case.

    • These screws will remain attached to the hard drive bracket.

    These were Philips #0 screws in my computer.

    Church Tucker -

    FYI my used Mac didn’t have the bracket or screws. 3D printed the bracket someone did (it’s on Thingiverse), M2x10mm screws were short but worked.

    sbierly -

  2. XoZgBtijMGxLjWhh
    • Remove the hard drive bracket.

    • The hard drive bracket may be firmly seated against the upper case.

    Don't miss this step: I almost did and of course couldn't get the disk out until I looked at the video !

    francistasset -

  3. vsRJ1GZKgUr2LdGt
    • Use the attached pull tab to lift the hard drive out of the upper case.

    • Don't try to completely remove the hard drive just yet. It is still attached to the hard drive cable.

  4. QIPPI6AGCpJFnMMH
    QIPPI6AGCpJFnMMH
    tgqxo1BVTnH6pBXk
    • Pull the hard drive cable away from the body of the hard drive.

    • Remove the hard drive.

    The hard drive cable is a recalled part on these machines. You may need to replace it before your drive will be read correctly. The Apple Store will replace your cable for free if it's problematic.

    Eric March -

    dont forget to save the torx T6 screws froom your old hard drive and install in your new one if you are replaceing the HDD at the same time

    Charlie -

Conclusion

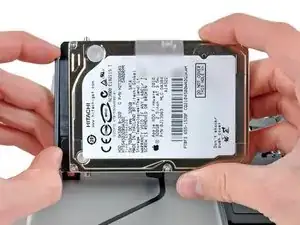
To reassemble your device, follow these instructions in reverse order.
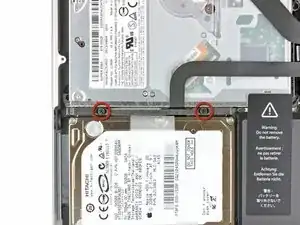
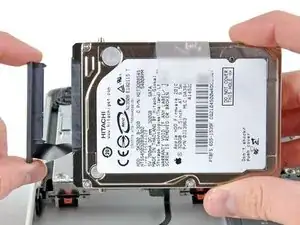
Andrew Bookholt

578096 Reputation

0 comments