Introduction
Pre-req only.
Tools
-
-
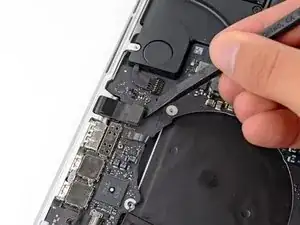
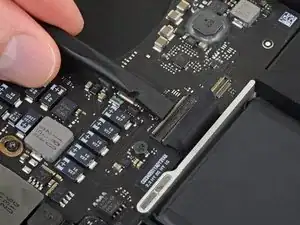
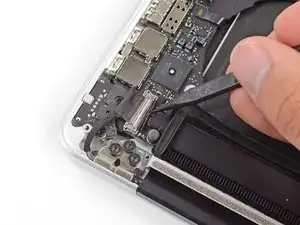
Use the flat end of a spudger to pry the headphone jack connector up from its socket on the logic board.
-
-
-
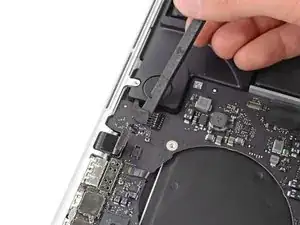
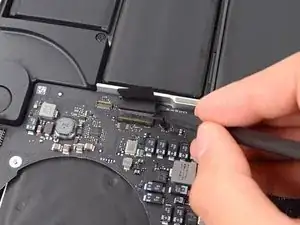
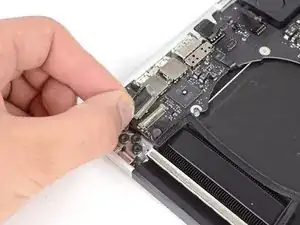
Use the flat end of a spudger to pry the left speaker connector up and out of its socket on the logic board.
-
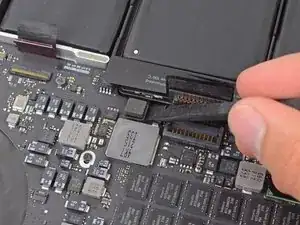
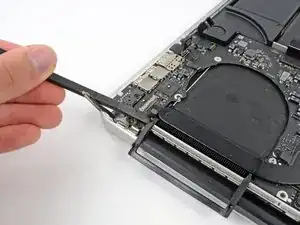
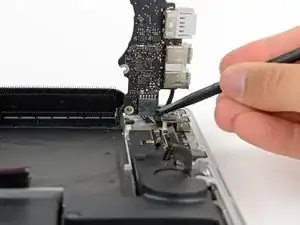
Use the tip of a spudger to pry the right speaker connector up and out of its socket on the logic board
-
-
-
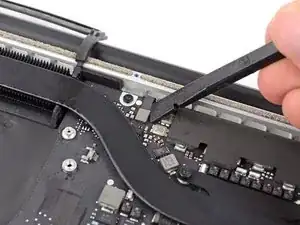
Use the flat end of a spudger to flip up the retaining flap on the keyboard ribbon cable ZIF socket.
-
Use the flat end of a spudger to gently back the keyboard ribbon cable out of its socket by pushing first at one side, then the other.
-
-
-
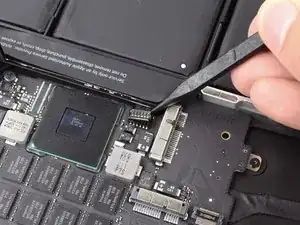
Use the flat end of a spudger to pry the trackpad ribbon cable connector up from its socket on the logic board.
-
-
-
Use the flat end of a spudger to pry the keyboard backlight connector up from its socket on the logic board.
-
-
-
Use the tip of a spudger or your fingernail to flip up the retaining flap on the microphone ribbon cable ZIF socket.
-
Pull the microphone ribbon cable out of its socket.
-
-
-
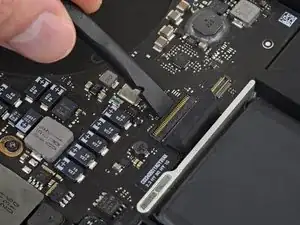
Use the tip of a spudger to pry the display data cable lock and rotate it toward the DC-In side of the computer.
-
Pull the display data cable straight out of its socket on the logic board.
-
-
-
Use the flat end of a spudger to carefully pry off the rubber screw cap on the raised screw head near to the MagSafe 2 connector.
-
-
-
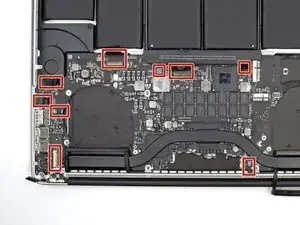
Remove the following six screws securing the logic board to to the upper case:
-
One 2.6 mm T5 Torx screw
-
Two 5.8 mm T5 Torx screws
-
One 3.8 mm T5 Torx screw
-
One 5.2 mm Raised Head T5 Torx screw
-
One 3.5 mm Silver T5 Torx screw
-
-
-
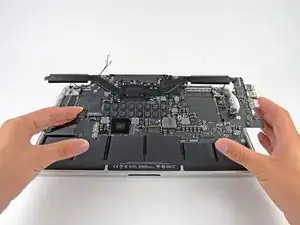
Lifting from the side nearest the battery, rotate the logic board toward the top of the MacBook Pro.
-
Using the flat end of a spudger, carefully push the MagSafe 2 connector out of its socket on the bottom of the logic board.
-
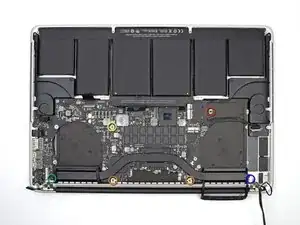
Clockwise from top: keyboard, trackpad, battery, right speaker, keyboard backlight, display, microphone, headphone jack, left speaker.
-


To reassemble your device, follow these instructions in reverse order.

After connect the cable aux is not working
deepak selvanathan -
Mine is not working as well after reconnecting, what to do now?
Guillermo Pichardo -
Strange, I'm working on the same model, and it doesn't have a flex here. It's soldered.
Ross Karnes -
Same as Ross. No cable to pry. It’s soldered. But looks like I can continue on anyway
Cameron Melvin -
Mine not soldered.
Paul Clarke -