Introduction
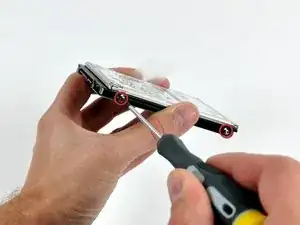
When replacing your hard drive, you must transfer the Torx screws from the old drive to the new one.
-
-
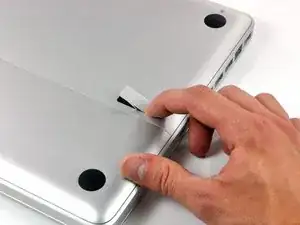
With the case closed, place the Unibody top-side down on a flat surface.
-
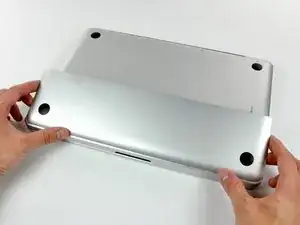
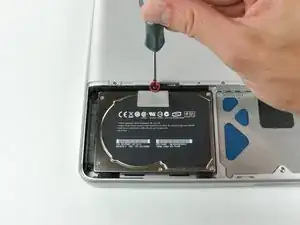
Depress the grooved side of the access door release latch enough to grab the free end. Lift the release latch until it is vertical.
-
-
-
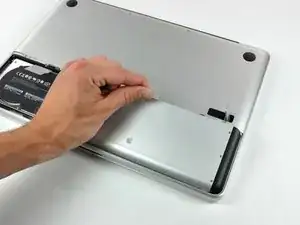
Lift the hard drive by its pull tab enough to grab and remove the retaining bracket.
-
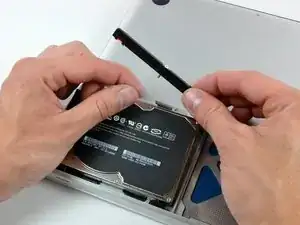
Lift the hard drive out of the chassis, minding the cable attaching it to the computer.
-
-
-
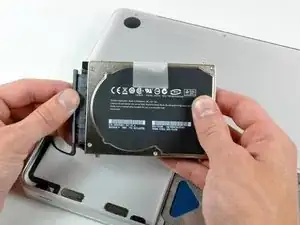
Remove the hard drive from its cable by pulling the cable connector straight away from the drive.
-
Hard drive remains.
-
To reassemble your device, follow these instructions in reverse order.

8 comments
Radio shack has a small kit with assorted bits that includes all of the t bits
Ryan -
just to be save a quick .. use super duper first on your new hdd to clone the old one... (if possible) and after installing... its like you have the same drive... no loss of files.... easy does it!
Britt -
Very easy and worth the upgrade
This is not a a1278 unibody MacBook Pro. A1278 MacBooks backs are one solid metal piece not two separate pieces. This guide is for a different MacBook Pro.
Brad Burgeson -
This guide isn’t for a pro; it’s a MacBook unibody.
Nicholas -
So, it turns out that Apple used the model code A1278 for quite a few different Mac models, including both Pro and non-Pro versions! This guide is for the non-Pro Macbooks. There’s also one for the Pro models with the same A1278 identifier.
tempelmann -