
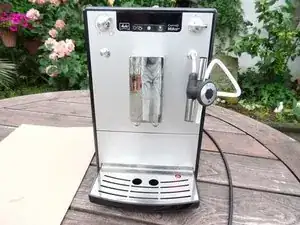
Introduction
If the grindstones are bold, the coffeebeans are more crushed than grinded. New grindstones improve the aroma substantially.
-
-
Remove the water tank and drainage tray.
-
Remove the side cover and remove the brewing unit.
-
Remove all coffee beans.
-
-
-
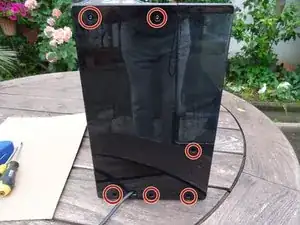
Unscrew and remove six Torx T10 on the rear.
-
Lever the rear cover off. It will most likely be quite stuck and you will need to apply some force. You must use plastic lever tools to prevent damaging the cover.
-
-
-
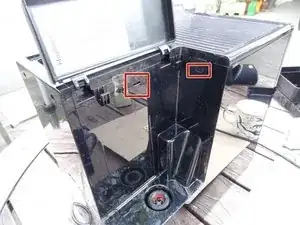
Press carefully into the slits on the sides using a minus screwdriver or a flat metal spatula, to release the clasps on the upper surface. These may be well tight and you have to use some force.
-
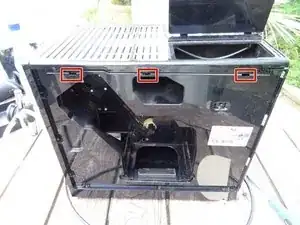
You should have created a separation between the upper surface and side panels. Now lever the upper covering away using a plastic tool. This may be quite stuck and you may apply some force.
-
-
-
Place a plastic tool in the crack between front panel and left side panel and widen it. Then push the side panel to the back. The side panel will be quite stuck and you may apply some force to do this.
-
Remove the hose from the water tank to the pump.
-
Remove the side panel.
-
-
-
Place a plastic tool into the crack between the front panel and the right side panel and widen it. Then push the side panel to the back. This may be quite stuck and you may need to apply some force.
-
Remove the side panel.
-
-
-
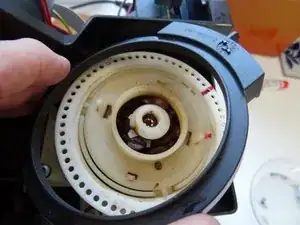
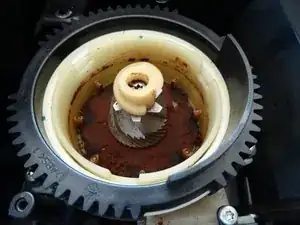
The grinder is situated on the top right rearside of the device. The adjuster and the outer ring can just be taken off, but this is only necessary if the grinder has to be completely replaced. Be careful and do not use excessive force.
-
The following pictures show a grinder of a Jura and there are slight differences. But since the grinder is the same, the repair is basically the same.
-
-
-
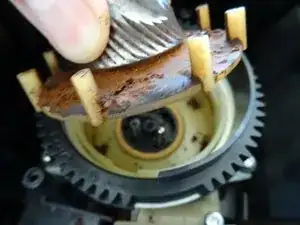
Now the grinder is free. Again take a picture, then pull out the axis of the adjuster with moderate force.
-
Depending on the model you will find a silicon sealing on top of the grinder ring, remove it.
-
Watch the fabrication signs , here green. This alignment must be restored later. Now turn the great black gear about 90 degrees counterclockwise. The grinder ring is free and can be lifted off.
-
-
-
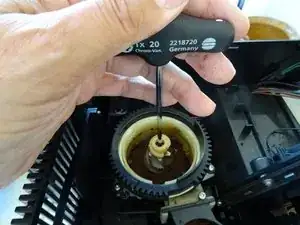
The grinding cone is fastened with a long Torx T20 screw. The screw head is often covered with remnants of coffee beans. Expose the head and turn the screw out counterclockwise.
-
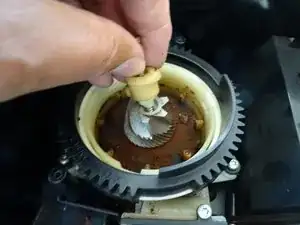
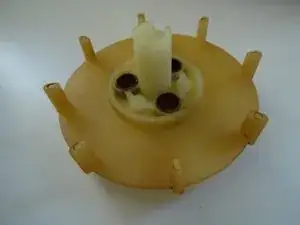
Now the bean feeder (the small white snail) can be removed. The grinder cone and drive can now also be lifted up carefully.
-
-
-
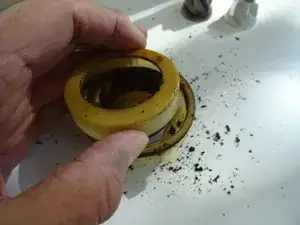
In most of the cases the mill is full of sticky old coffee powder. Clean everything thoroughly for excellent coffee aroma.
-
The felt ring around the drive axis can be pulled out carefully using a needle. Clean it. For the inner grinder use a paint brush and a wet cloth, the other parts can be cleaned with a brush and warm water. Each part must be dried well before reassembling it.
-
-
-
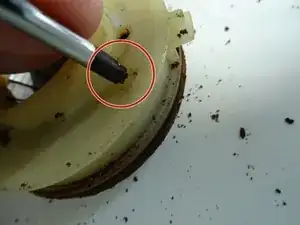
Push both of the small latches alternately. Then the ring cover should come out.
-
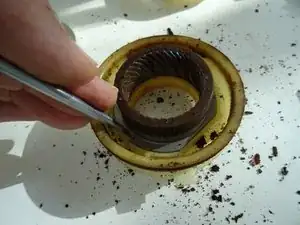
Two clamps hold the grinder ring in its place, push them aside and it should come free.
-
Again clean everything. Press the new ring and cover in its place. With that the grinder ring is exchanged.
-
-
-
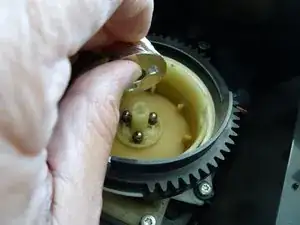
First insert the cleaned driver, then the three sleeves, springs and balls. Now fit the grinding cone on the three balls.
-
Then fit the auger, screw in central screws. When screwing in, push the cone downwards and make sure that everything meshes.
-
-
-
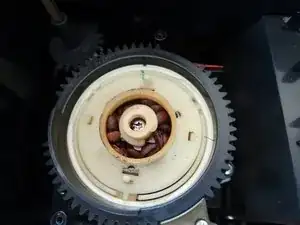
Insert grinding ring. The black gear is turned to the right again until the three marks are aligned. Then reinstall the adjuster drive shaft as it was originally.
-
Then install the remaining parts in reverse order.
-
You can set the grinding degree nicely by placing an empty roll of toilet paper perpendicular to the open mill and filling it with a few coffee beans. Plug in the plug (be careful!), choose a cup of coffee and watch as the coffee grounds fall out of the grinder.
-
-
-
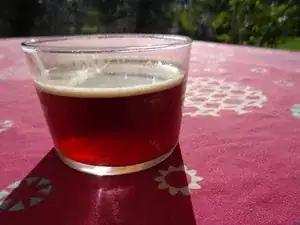
These two pictures are no fake: Before repairing the grinder the coffee is thin and transparent. With new stones the coffee is strong and has a fine crema. The repair was a real success!
-


To reassemble your device, follow these instructions in reverse order.
bei meiner Maschine muss ich die Schale 3-4 mal rausnehmen / einsetzten damit sich das Signal von „dauerhaft an“ auf „blinkend“ einstellt, deutet das daraufhin das der mikroschalter getauscht werden sollte. Übrigens, danke für das tolle Tutorial ..lg Tom
Hans-A Shole -
Problem ist behoben, Schalter getauscht, Position des Schalters ist bei der Caffeo Solo 950 sehr gut erreichbar. Alter Schalter konnte auch wieder gangfähig gemacht werden und dient nun als Ersatz.
Hans-A Shole -