Introduction

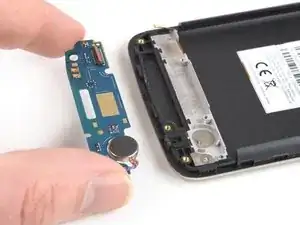
Use this guide to remove the daughterboard including the vibration motor in the Motorola Moto C Plus.

  1. RKUGTbjtiQMrpt1c
    RKUGTbjtiQMrpt1c
    4wJ4m5lwg5XxKpjw
    EOVLDjWqdqGBQsxv
    • Power off your phone before beginning disassembly.

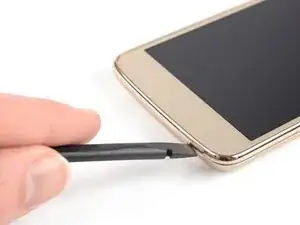
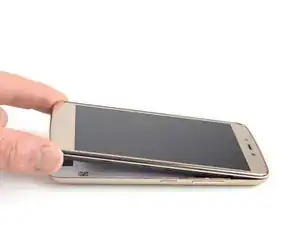
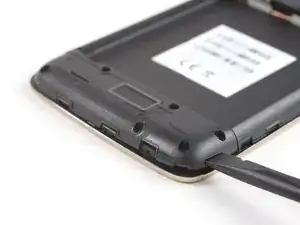
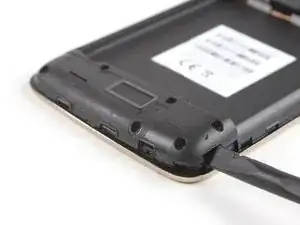
    • Insert a thumbnail, or spudger, into the notch on the bottom right to start separating the phone unit from the back cover.

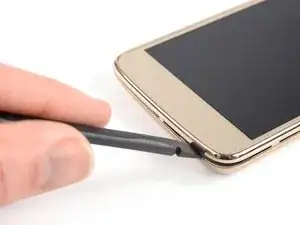
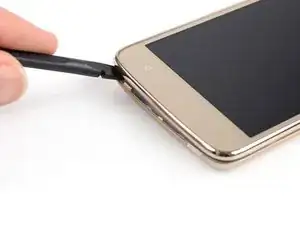
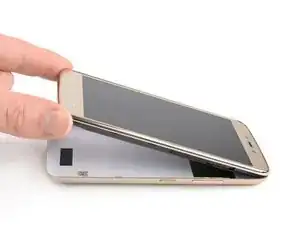
    • Move to the bottom left corner and pry the phone unit out of the back cover until you can get a good grip.

  2. TQ2xL5KeXZJadINA
    TQ2xL5KeXZJadINA
    IbmbjRYyqUcLPRLN
    • Lift the phone out of the back cover.

  3. MuDSBRGVmaw2EMlI
    MuDSBRGVmaw2EMlI
    2wHHtRyVPEnGcSXs
    ulqo1A4PRQoTUxs6
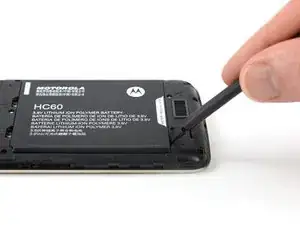
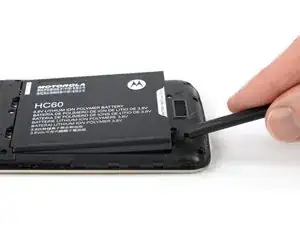
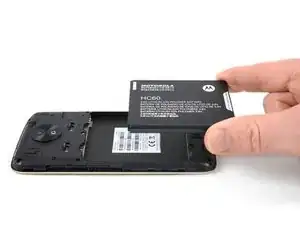
    • Use a spudger or fingernail to lift the battery starting at the notch on the bottom left.

    • Lever the battery out of its recess and remove it.

  4. UVsICbYlQCSbjcma
    • Remove the six 3.1 mm Phillips #00 screws securing the daughterboard cover.

  5. 4HvHCjcgAa5QYOlf
    4HvHCjcgAa5QYOlf
    tKyaHy6qQUmAZTtH
    Rt5Y6WKmJdYSmVqi
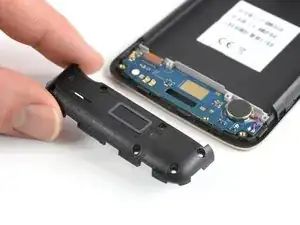
    • Apply a spudger to the right side of the daughterboard cover.

    • Twist the spudger sideways to pry up the daughterboard cover until you get a good grip.

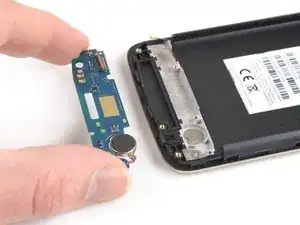
    • Remove the daughterboard cover.

  6. sDwhdScnVMI5fEHC
    sDwhdScnVMI5fEHC
    d1CTfnZvyVE2jgEb
    • Disconnect the antenna cable and fold it out of the way.

  7. WIMHtMafJPWpENbM
    WIMHtMafJPWpENbM
    E4kY6WJVmOeMtAcK
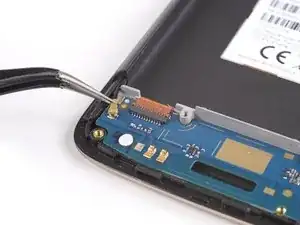
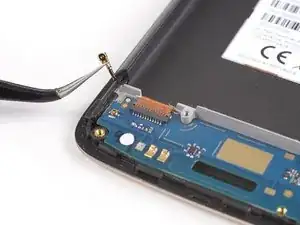
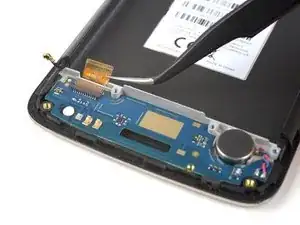
    • Use the tip of a spudger to open the brown flap of the ZIF connector that holds the interconnect cable in its place.

    • When reassembling make sure the white line on the cable aligns with the closed flap.

  8. AKsoQkDPVSNlpPfB
    AKsoQkDPVSNlpPfB
    q3bVUCafASIr2gIW
    • Use a pair of tweezers to pull the interconnect flex cable out of the ZIF connector.

  9. MSQLHDKAAPWZPn6R
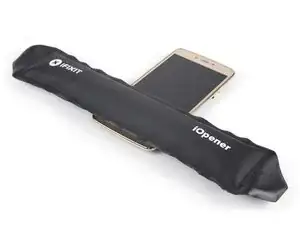
    • Prepare an iOpener and apply it to the bottom part of the display for at least two minutes to loosen the adhesive beneath the daughterboard.

  10. YRoLyXY2ZGcIy1yn
    YRoLyXY2ZGcIy1yn
    CZlTrXV542ELgM2d
    jYTSIikGXMSJJn2i
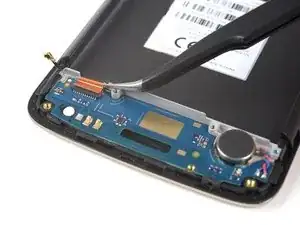
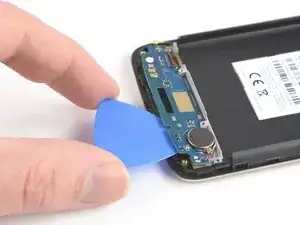
    • Apply an opening pick to the bottom edge of the daughterboard.

    • Carefully slide the opening pick under the daughterboard to cut the adhesive underneath.

    • Take care to cut the adhesive underneath the vibration motor.

    • Slide the opening pick from right to left to cut all the adhesive.

  11. crSVLEw4p5sEEK3e
    • Remove the daughterboard including the soldered-on vibration motor.

Conclusion

To reassemble your device, follow these instructions in reverse order.

Apply new adhesive where it’s necessary.

Dominik Schnabelrauch

Member since: 23/11/16

167336 Reputation

0 comments