Introduction

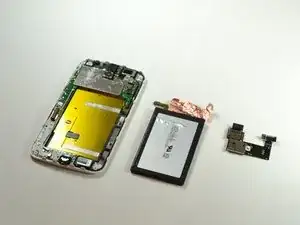
This guide will teach you how to replace the motherboard in your Moto G, in the event that it is malfunctioning. It may take a while, since the battery and SD/SIM card reader must be removed first, but all you will need are a T5 Torx screwdriver and a plastic opening tool.

  1. QtHONK4g2ZajCstS
    QtHONK4g2ZajCstS
    JhmVNqAQbZWB1JDW
    HMVrTcKNZvMGpmBT
    • Make sure your Moto G is turned off and that any SIM or SD cards are removed before beginning disassembly.

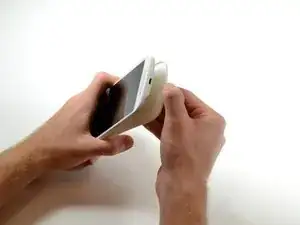
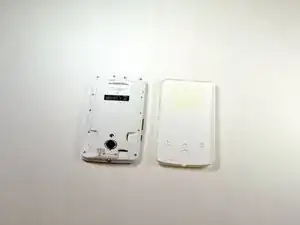
    • Starting at the USB port on the bottom, remove the rear cover by prying it off with your finger.

    • Work your way down the sides to avoid cracking the rear cover.

    Important - remove SIM cards before opening the phone.

    Wojciech Dyba -

  2. FNO2UT3VJwRQbL2u
    FNO2UT3VJwRQbL2u
    DTI5yptIECRYOSWY
    BHncB65JemqnEYwH
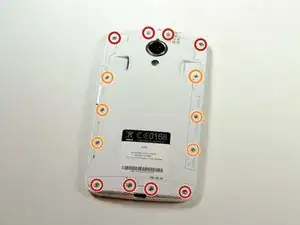
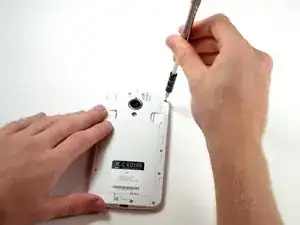
    • Remove the eight 4.2 mm screws at the top and bottom of the phone using a T5 Torx screwdriver.

    • Using the same screwdriver, remove the six 3.2 mm screws on the sides.

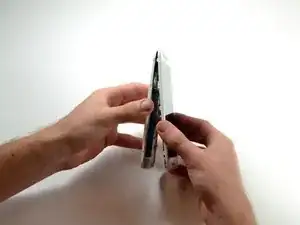
    • Remove the next layer of the phone by prying it off with your fingers.

    On mine, they’re all Torx T5

    Stanley Reynolds -

    You neglected to mention that the two buttons might fall out when you remove this part.

    Stanley Reynolds -

  3. GFCGVJxU3GZCKVoW
    GFCGVJxU3GZCKVoW
    FaftYIZ2SvsV4xBQ
    Ya6aRbDmEyeFeEQK
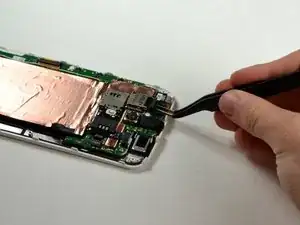
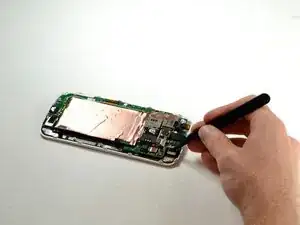
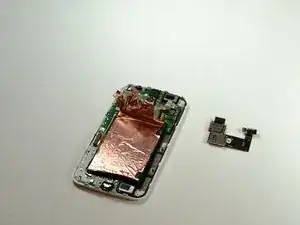
    • Using a plastic opening tool or tweezers, disconnect the SIM/SD card reader at the top of the phone.

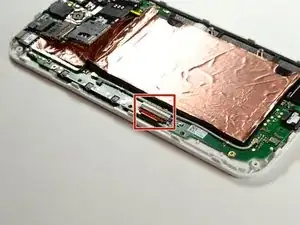
    • Disconnect the battery connector by prying it off of the motherboard.

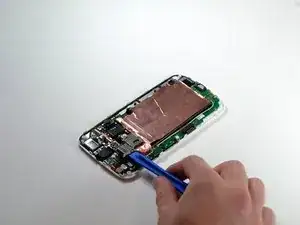
    • Disconnect the vibration motor by prying its connector off of the motherboard.

    sir when I put on for charging it shows 50% charging after 1 hour when I removed the charger its showin 0 and total is dead. what is the reason

    leela -

    moto g 2 completely dead what the reason

    leela -

    There's no need to remove the battery or motherboard to get to the speakers - they are accessible as soon as the back cover is removed. Skip this step and jump straight to step 10

    Paul Abraham -

    In fact it is not necessary to remove the simcard rack. I managed to remove battery with the rack on. It is possible to remove the foil startingfrom the bottom of the battery and once peeled off the battery can be removed. You only need to disconnect the battery from the mother board.

    Wojciech Dyba -

  4. DECeeVvsZVWIAibV
    DECeeVvsZVWIAibV
    cwAqKDnNRLXatKNk
    pfJNBTO6rhjFsOOm
    • Using a plastic opening tool, carefully pry off the entire SIM/SD card reader component.

    • Don't worry about ripping the copper foil a little bit, it is easy to put back on.

    • When reassembling the device, do not attempt to smooth the foil down with your finger. Metal foil can become sharp if folded in a certain way, and you may be cut.

    • The battery may be removed without removing the SIM/SD card reader. Simply peel back the copper foil from the opposite end of the device, stopping just before you reach the SIM/SD card reader.

    As mentioned in a comment on the previous step, you don’t actually need to remove the SIM/SD card reader at all.

    If you peel back the copper foil from the opposite end of the device, you can sneak the battery out (and the new battery in) by just sliding the battery ribbon cable out from under the SIM/SD card reader.

    David -

    Thx for the idea. I’ll let you know if it was working - I’ll my battery soon. regards!

    ausssiefan -

    Perfect as mentioned - just slide the cable foil under the sim rack - no need to remove the rack. Works flawlessly, quick repair.

    ausssiefan -

  5. ywGYmqT2iHpjqGMv
    ywGYmqT2iHpjqGMv
    jSVacEWd64EIGPYX
    a2WUMZDwSBNMiKTd
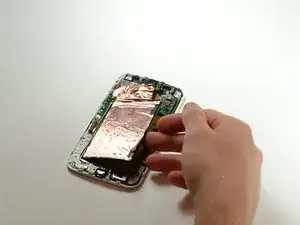
    • Peel off the two black stickers on the right side of the battery using your fingers.

    • Remove the battery by pulling the right side of it upwards.

    • The black stickers are the protruding ends of the two parallel adhesive strips which hold the battery in place. You can see the adhesive strips in the third image. Focus your effort on these regions.

    • If you did not remove the SIM/SD card reader in the previous step, you will need to carefully slide the battery ribbon cable out from under it once you have freed the battery from the adhesive strips.

    HINT: The ‘two black stickers’ are the ends of the two parallel adhesive strips which hold the battery in. There is no other adhesive holding the battery, so focus your attention on these regions when prying the battery out!

    David -

    If the copper foil is damaged beyond repair, what can be used to replace it?

    Xander Squier -

  6. QIFOEfakODgJSopN
    QIFOEfakODgJSopN
    MRYVRA5rsGhsxWtS
    fqkVKWBr1LSq65qo
    • Remove LCD connector by lifting the black plastic flap.

  7. stvt4ABAstqwJSPk
    stvt4ABAstqwJSPk
    Pj2morn3kiDSeYWu
    GTSsSsUKiaMlJSi1
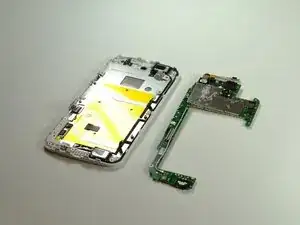
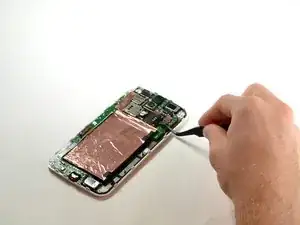
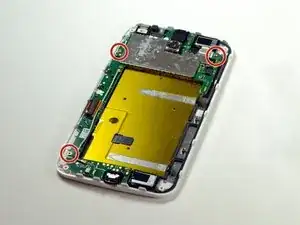
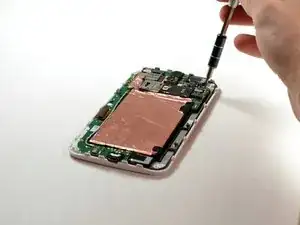
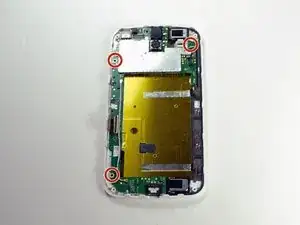
    • Using a T5 Torx screwdriver, unscrew the three 2.2 mm screws holding the motherboard in place.

  8. s3cxJDwPV3hxbUJF
    s3cxJDwPV3hxbUJF
    vBTRvTvWjZFJZfvB
    • Carefully remove the motherboard.

    from here ill get motherboard for g2

    prem surve -

Conclusion

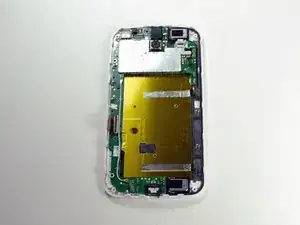
To reassemble your device, follow these instructions in reverse order.

Jared Geraets

Member since: 01/10/15

655 Reputation

4 comments

What about Android, it comes already flashed on a new motherboard or I need to flash it myself?

marcelmaximo -

Where can i buy mother board for moto g 2nd gen lte. Any idea?

kasi balaji -

Please give me moto g2 motherboard

Kvasu -

hi ...great guide thanks...Ihave a question Can a Motherboard from a Motorola Moto G2 XT1068 fit into a G2 XT1072 phone Thanks

Paul -