Introduction

Does your device not vibrate as it should? Do you think your vibration motor is broken? In this guide we will describe how to remove this part.

  1. QPpLrvtRffiRqbBT
    QPpLrvtRffiRqbBT
    EfaJYCnaOD6Vavif
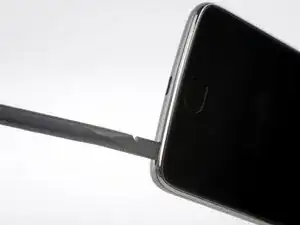
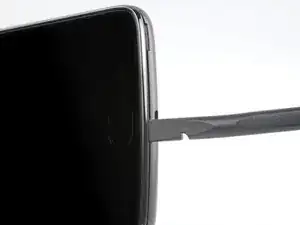
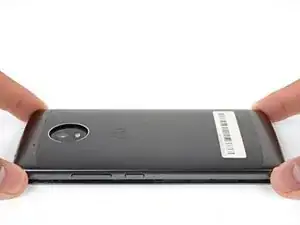
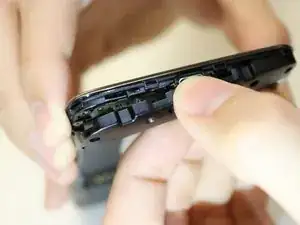
    • Insert your fingernail or the flat end of a spudger into the notch on the bottom edge of the phone near the charging port.

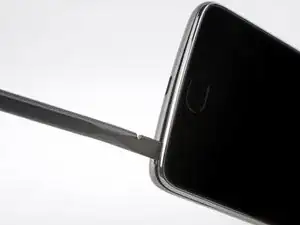
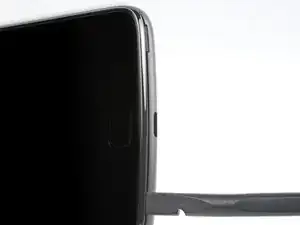
    • Pry with your fingernail or twist the spudger to release the back cover from the phone.

  2. JgXYhoUTNVPEPtpt
    JgXYhoUTNVPEPtpt
    cICqNvD55Qu6jKnC
    VFcmXWJhpXEoKViS
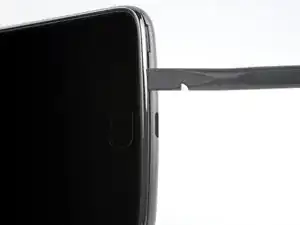
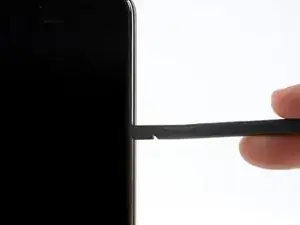
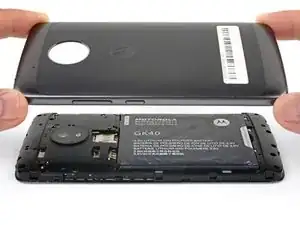
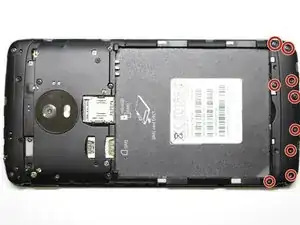
    • Insert the flat end of a spudger into the seam and slide it along the bottom edge to release the clips holding the back cover to the phone.

  3. clFCxMpfSdM1J1nt
    clFCxMpfSdM1J1nt
    GswdhfPeKNlwDk5t
    EJJV3tZgCVUjTMm3
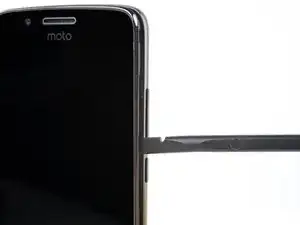
    • Continue sliding the flat end of the spudger along the seam for the remaining sides of the phone.

  4. 6EmZqDaSsyQirmEF
    6EmZqDaSsyQirmEF
    4ya3W2s5AUMeitqI
    • Lift the back cover and remove it from the phone.

    • To reinstall the back cover, align the cover with the phone and squeeze along the edges to snap the clips back into place.

  5. QE51LDtBH1unKP26
    QE51LDtBH1unKP26
    OLQxsToySfT1MTpt
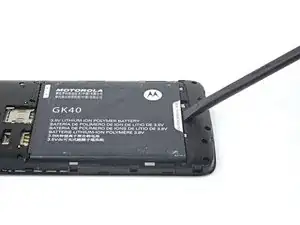
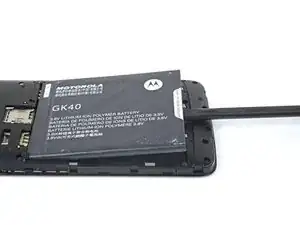
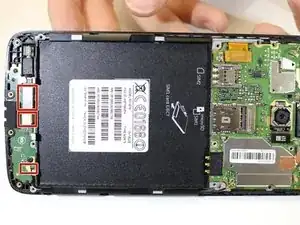
    • Insert your fingernail or the flat end of the spudger into the notch below the battery.

    • Pry with your fingernail or spudger until you free the battery from its recess.

  6. OPOKWdwjCgFIxNhs
    • Remove the battery.

    • When installing the battery, make sure the battery's contacts line up with the three gold pins on the top right.

  7. 52naCrRdCZErRExW
    • Remove the nine (9) 4mm Philips screws securing the daughterboard cover.

  8. EWgOEhgZvHrt2kvB
    • Remove the plastic casing on the bottom of the phone by gently pulling.

  9. LJIFeZludLTwC5wI
    LJIFeZludLTwC5wI
    Pfb5wPdDJHCsiyx1
    juR6XD6OnCIUytXy
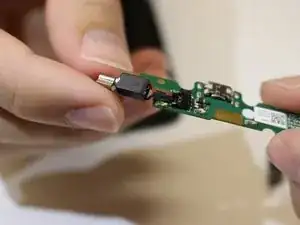
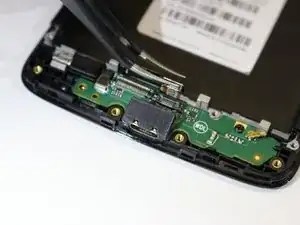
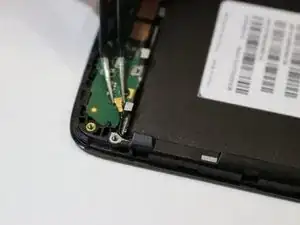
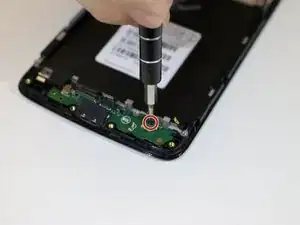
    • Remove the three connectors on the board below the battery slow by gently pulling on the small gold tab with a pair of tweezers.

  10. c2snWIMIIF5tyuML
    • Remove the 3.4 mm Philips screw securing the daughterboard to the frame.

  11. kr3KfdhXHlFCKYSI
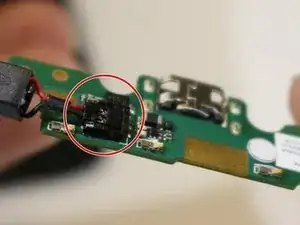
    • Use the point of a spudger to lift the vibration motor connector up out of the socket on the I/O board.

    • Be very careful to pry only on the connector under the red and black cables, not on the socket itself.

    Do not pull as shown o the picture!! Otherwise you will tear of the connector as well (actually as seen on the picture!!). You have to pull upwards so the vibration motor is unplugged an the socket stays attached to the board. If you do as shown on the picture you won't be able to reuse the charging board. Or at least I wouldn’t know how to re-attach a new vibration motor to the board as shown….

    I just replaced the usb charging socket/board since my Moto G5 stopped charging. In my case I did not need the board anymore, so I could have just pulled off the vibration motor as shown above. I suggest, however, to keep the socket for the vibration motor in place by simply pulling upwards.

    (But even if you broke the charging board - the replacement board cost me €10 ;-))

    Marko Stein -

    The procedure has been updated!

    Oh boy that was very incorrect procedure! I cropped the image and changed the text to hopefully be more clear. Thanks for catching that!

    Sam Goldheart -

Conclusion

To reassemble your device, follow these instructions in reverse order.

Miles Cobb

Member since: 24/01/18

364 Reputation

One comment

Is this also where the mic is located?

Matt -