Introduction
The machine in question is from Magimix. The other available version (Krups) is very similar and this guide should be applicable to those.
First of all consider your machine’s warranty (usually 2 years), after (partial) disassembly you’re not eligible for warranty anymore.
Unplug the machine and find a workplace that you’re not afraid to scratch, which I found out the hard way.
-
-
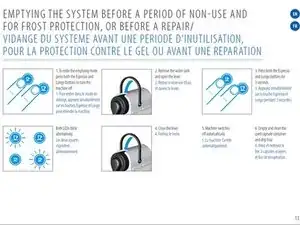
Remove all water from the system. (From the Nespresso manual.)
-
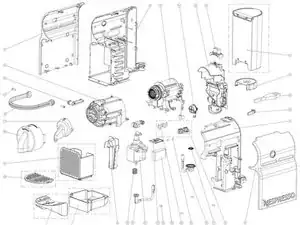
image 2: exploded view of the machine. Source: buyspares.com
-
-
-
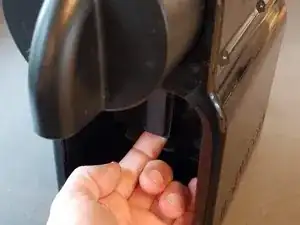
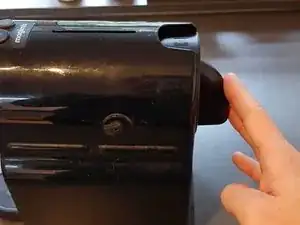
Pull straight forward with a fair amount of force.
-
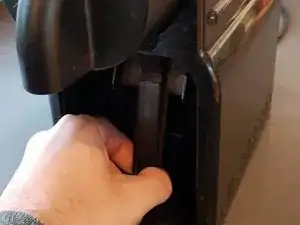
Once you hear a click, pull the part straight down. This should go easilly.
-
-
-
Close the cup-holder firmly.
-
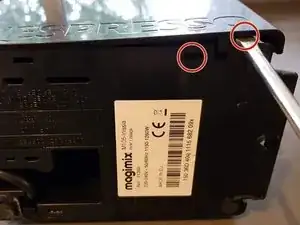
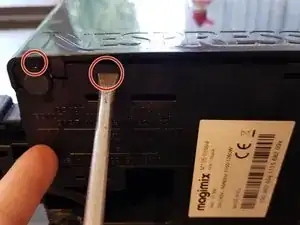
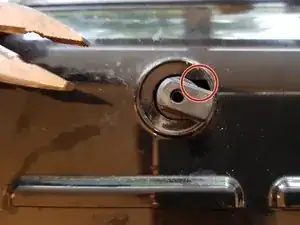
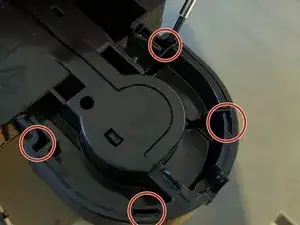
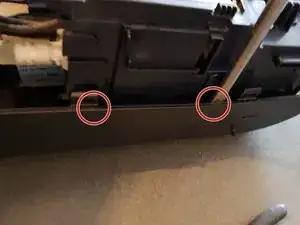
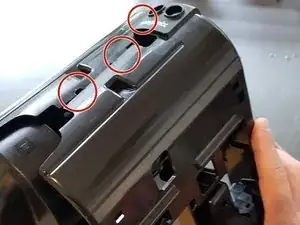
Photos 2 and 3, push the screwdriver in and wiggle a bit to undo the clips. There's a total of 4 clips.
-
-
-
Make sure the notch lines up.
-
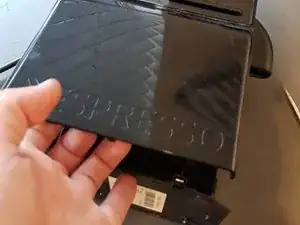
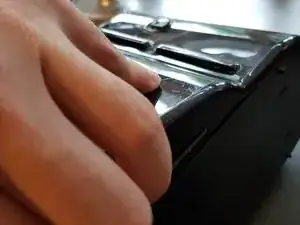
Pull the cover away. Once there's a little room, move your fingers up a bit and pull on the sides.
-
-
-
Unplug the device first! Remove ground, live and neutral wires.
-
Remove the whole wire from its slot.
-
-
-
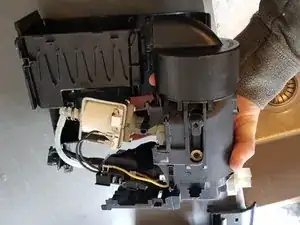
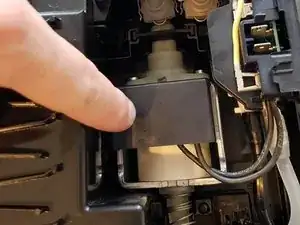
Photo 1: Using leverage, pull up.
-
Photo 2: unclip the two clips on the inside of the cover.
-
Photo 3: turn over and lift the cover off.
-
-
-
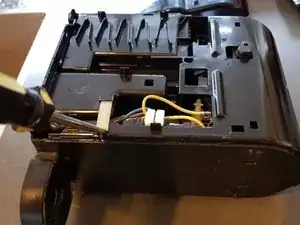
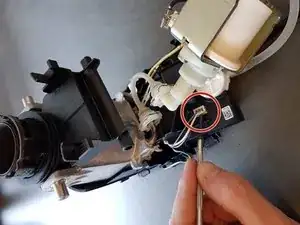
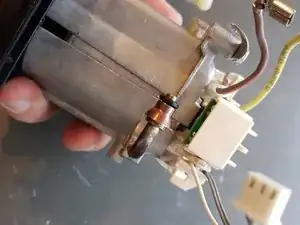
Mark one of the black leads for proper reinstallation.
-
Remove the yellow and brown wire.
-
And the white connector.
-
-
-
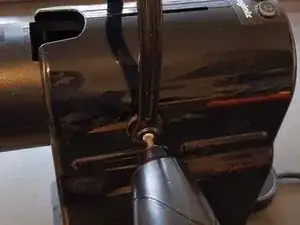
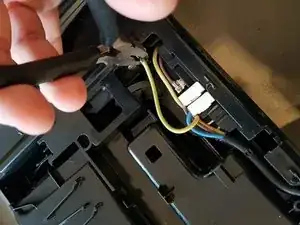
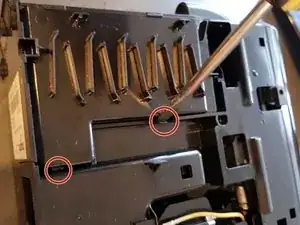
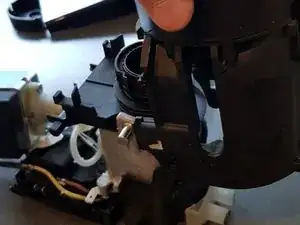
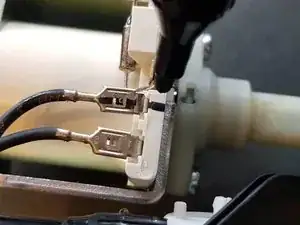
These clips are tricky to remove.
-
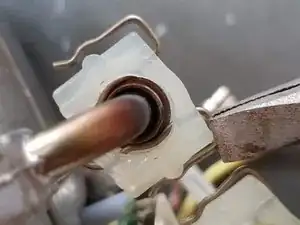
Photo 1: Pull open and down one of the ends.
-
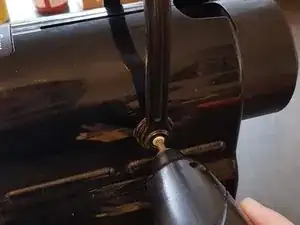
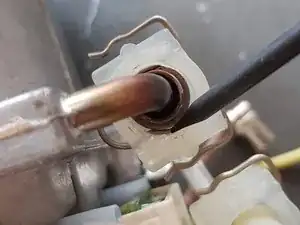
Photo 2: with a small/tiny screwdriver push the wire down as far as you're able to and hold firmly with your finger.
-
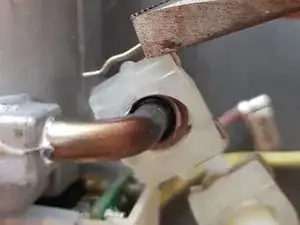
Photo 3: While holding the latter firmly, open up and move down the other part of the wire. This might require a few tries.
-
-
-
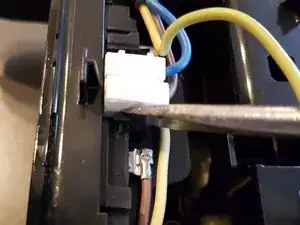
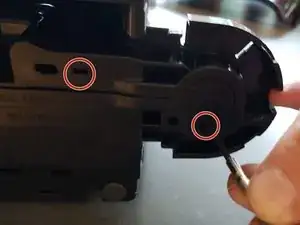
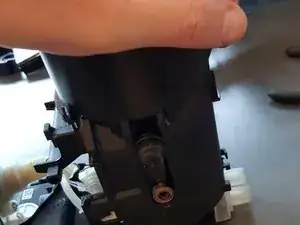
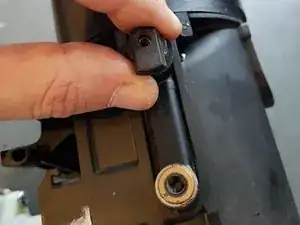
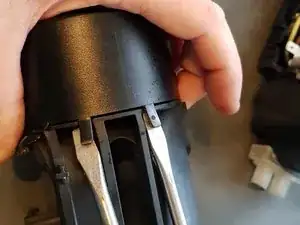
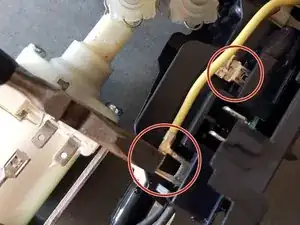
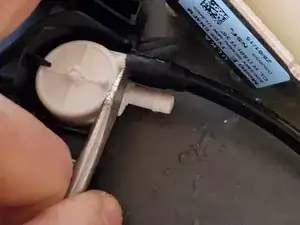
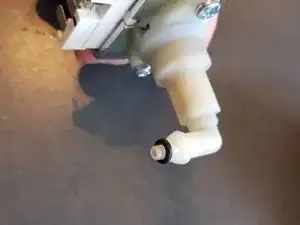
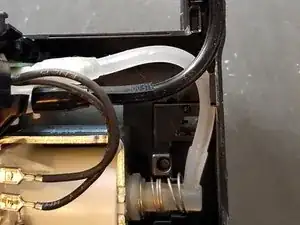
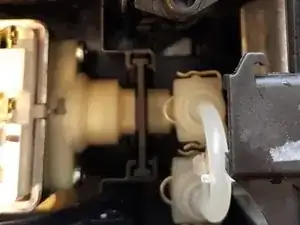
Photo 1 and 2, note the tapered edges, these hold the wire clip in place. Reinstallation is simple, just push the on again.
-
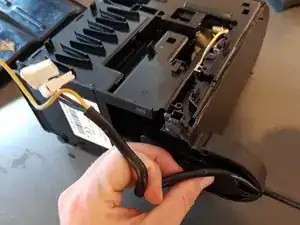
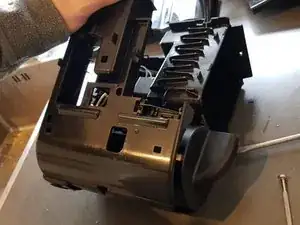
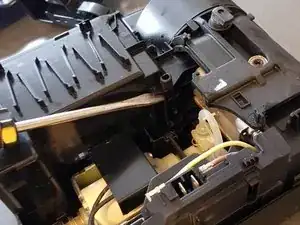
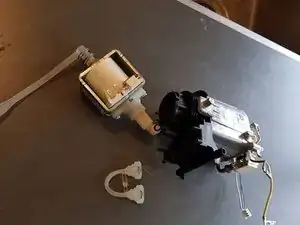
This was as far as I was able to go. In my case the part shown on the right in photo 3 was leaking in between the metal and plastic. Sadly it couldn't be disassembled any further.
-
-
-
Assembly is the reverse of disassembly. The next steps are some points of note.
-
Photo 1: reverse of step 11: The easiest way to reassemble the side is to lay it flat and lower the inner body onto the side.
-
Photo 2: reverse of step 11: Make sure the black line goes over the white one.
-
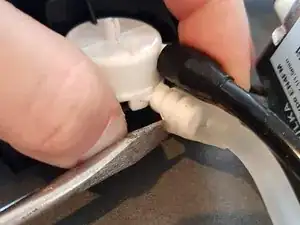
Fit the rubber collar back over the pump.
-
-
-
Photo 1: Don't forget this cover.
-
Photo 2: reverse of step 10: make sure the clips line up with the slots.
-


To reassemble your device, follow these instructions in reverse order, please take note of steps 19 and 20.
18 comments
I wanted to diagnose a leak so I took it apart to about step 10, set the water tank in place, plugged it in, and started a cycle. The heater got hot (the large metal assembly at the top) and when the pump came water gushed out of the joint with the tricky spring clip, the rear one that connects to the metal pipe leading into the heater.
I disassembled the clip (unplugged first and let it cool off) and found that the O-ring inside the joint was split. Now to find a replacement.
Hi Leon, thanks for taking the time to make this guide.
I followed to step 11. Then I noticed the boiler had lots of white limescale streaks on it, indicating a leak. I think this is the part you diagnosed as leaking for you. I’ve decided to give up unfortunately.
Cheers John
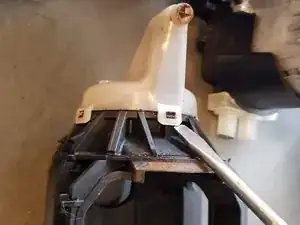
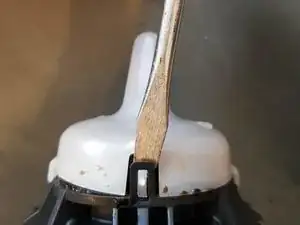
There's another stage you can go! The plastic moulding the pod fits into can be removed from the boiler casting. You need to rotate the moulding about 15° clockwise on the boiler using a bit of leverage between the trunions and the moulding both sides. It's rather stiff but once turned it releases a sort of bayonet fitting retaining the moulding to the boiler.
Inside there's another ‘O' ring, that can be suspect for a leak, and a plastic sleeve behind it.
Thank you! Great addition.
do you know the size of the o-ring?
Alex, I haven't measured or taken pictures. The ring is approx 8 mm in diameter (from memory!). Don't know is this is of much use for you, though.
Good luck!
the seal is 4.8x1.9mm
Well done Steven Wilkes
cuando pulso los botones,se encienden los dos haciendo pausas cada tres encendidos ,y no paran que puede ser el motivo ??, gracias
moy5099 -
Prueba esto: Apague la máquina, mantenga pulsado el botón derecho (vaso grande) hasta que el botón izquierdo parpadee 3 veces, listo. Si esto no funciona: Apague, desenchufe, espere 1min, enchufe y continúe como arriba.
Si tienes mala suerte, esta es la causa: Nespresso CitiZ Capacitors Replacement
VauWeh -
Nello spaccato manca la parte che sta a contatto con le capsule e la leggenda con i numeri di riferimento dei pezzi.
Riccardo Ricci -