Introduction

Patch your jeans with a reverse applique. This technique is great for holes that have a large chunk of cloth missing. You can cut any shape and use any color fabric for the patch, so long as it is heavy-weight fabric.

For replacement parts or further assistance, contact Patagonia Customer Service.

  1. GyRtZOt2x5XwkU2Z
    GyRtZOt2x5XwkU2Z
    Cn3mTZZGySUAMEQt
    wkAGmTKxtyaJO3LT
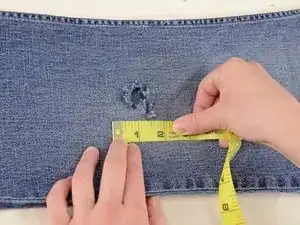
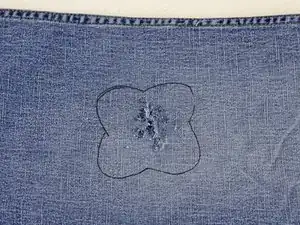
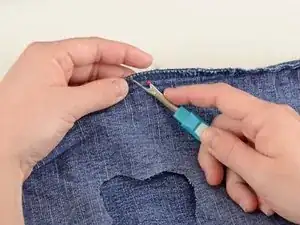
    • Examine the damage. Clip any long threads, and remove any debris from the hole.

    • Measure the damaged area.

    • In our case it looks to be 2" by 2".

  2. w2ZPDs1oEOYVspbe
    w2ZPDs1oEOYVspbe
    GVcdFwuMcGXmNN6E
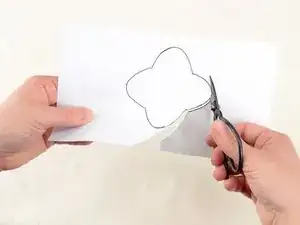
    • Draw any the shape you'd like your patch to be on a piece of paper. Be sure your design is at least 1/8" larger than the damaged area.

    • Cut out your design.

  3. JpKia4THKwfx2UAc
    JpKia4THKwfx2UAc
    jnrJPI5iss66bdtD
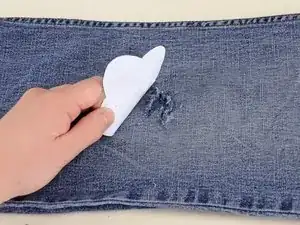
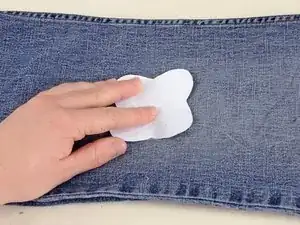
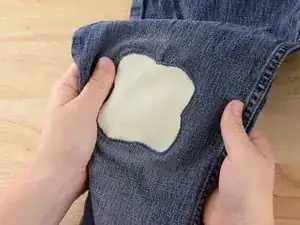
    • Lay the cutout of your design over the hole in the jeans to make sure that it is the correct size and looks how you want it to.

  4. bNTXfSNigY1Y4WF1
    bNTXfSNigY1Y4WF1
    vAxYJxoBSg6X5JlA
    FxAAN5n1ZiAqgKS5
    • Using a pencil, pen, or tailor's chalk, trace the design onto the jeans.

  5. nBYMVEe25BuiUsvc
    nBYMVEe25BuiUsvc
    PEc543PEuX3BUyJw
    1HEkSVR52MUvUxwm
    • Cut the design out of your jeans.

    • Be sure to only cut one layer of denim, or you will cut through the back of your jeans and need two patches!

  6. XcrtDsFFPvp6IDyW
    XcrtDsFFPvp6IDyW
    axarKoTdmaDM1d6n
    VWqtPmPu6LY1RMvq
    • Take the scrap of fabric you will use for a patch and insert it into the hole.

  7. PkRBmGtktIFJiaA4
    PkRBmGtktIFJiaA4
    EnYDCqxjpID2M5GX
    • Slide the pant leg with the patch over the arm of the sewing machine.

    • You may need to remove the sewing machine table for the pant to fit over the sewing machine.

    • If you are still having trouble getting the pant around the arm of the sewing machine, you can rip the side seam of the pant leg to allow room to sew.

    • Be sure that the pant leg is around the arm, and that you are not accidentally sewing the two layers of the pant leg together.

  8. VS3cg5ZSOLOKOFFG
    VS3cg5ZSOLOKOFFG
    AFZ2RMWHKDBA5Ete
    • Adjust the sewing machine for a zig-zag stitch.

    • Set the stitch length to just under 1/2.

  9. QqHXUJHo4DIeo4T1
    QqHXUJHo4DIeo4T1
    fyRF5JkkZeNsONDx
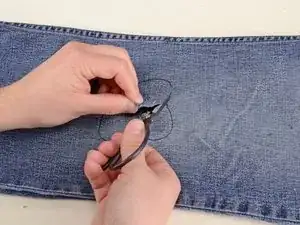
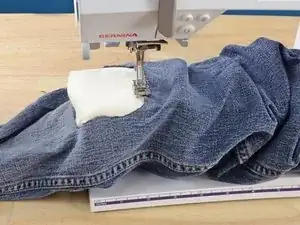
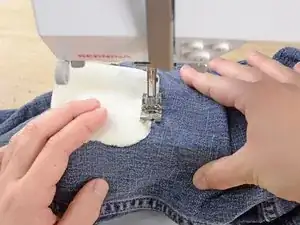
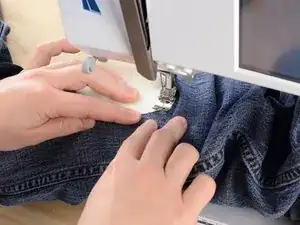
    • Align the edge of the patch with the center of the pressor foot.

    • Be sure that the patch is laying flat.

    • Lower the pressor foot.

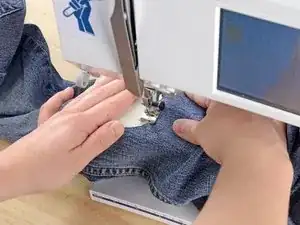
    • Begin sewing the zig-zag stitch, following the edge of the hole so that the zig-zag stitch covers the area where the two fabrics meet.

  10. VYW5MUErBuRXKSKH
    VYW5MUErBuRXKSKH
    2WYTbuoX5ZTwjnk3
    Rvp3dRYNYgCYxkEV
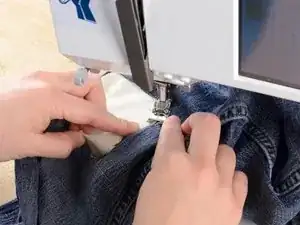
    • Sew all the way around the patch.

    • Overlap the stitching at the end with the first two or three stitches.

  11. BD24AtGxK5qmTRou
    BD24AtGxK5qmTRou
    Q154ZKQCsuGlEwgU
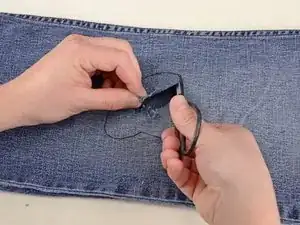
    • Lift the pressor foot and needle.

    • Slide the pant leg off of the arm of the sewing machine.

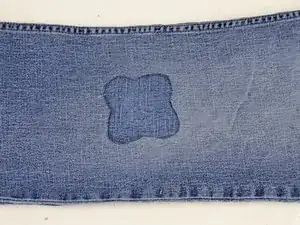
    • Clip any threads, and admire your work.

Brittany McCrigler

Member since: 05/03/12

88098 Reputation

2 comments

To keep the pattern from entirely fraying or catching on things, it may also help to flip the pants right-side-out and sew again around the pattern edge with the zigzag or a flat stitch.

Alisa -

worked! i’ve been wearing these torn pants for years. thanks so much!

Meenal Raval -