Introduction

Use this guide to replace the battery in your Samsung Galaxy S10e.

The battery is held in place with strong adhesive. High concentration (over 90%) isopropyl alcohol will make the battery removal process much easier.

For your safety, discharge your battery below 25% before disassembling your phone. This reduces the risk of a dangerous thermal event if the battery is accidentally damaged during the repair.

If your battery is swollen, take appropriate precautions and do not heat your phone.

  1. RYlDyYuZKYnLSdGA
    • Opening your phone will compromise its waterproof seals. Have replacement adhesive ready before you proceed, or take care to avoid liquid exposure if you reassemble your phone without replacing the adhesive.

    • Turn your phone off completely before you begin this repair.

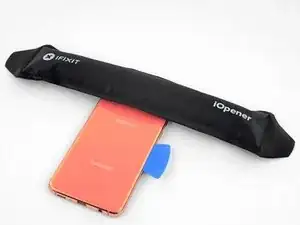
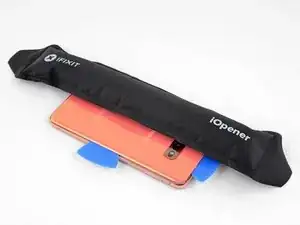
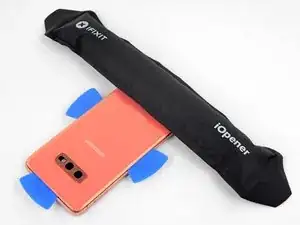
    • Prepare an iOpener and heat the back of the phone along the right edge for about two minutes. This will help soften the adhesive securing the back cover.

    • You may need to reheat and reapply the iOpener several times to get the phone warm enough. Follow the iOpener instructions to avoid overheating.

    • A hair dryer, heat gun, or hot plate may also be used, but be careful not to overheat the phone—the OLED display and internal battery are both susceptible to heat damage.

    L'écran OLED et la la batterie

    Isidore LECHAT -

    My s10e is 4 years old now and I found glue had weakend and heating was uneccissary.

    ervan.hady -

  2. WgNulxIYUqQiYs5a
    WgNulxIYUqQiYs5a
    QoB1vTltD5AnZMwV
    • In the following steps, you'll be cutting through the adhesive securing the back cover.

    • The adhesive is laid out as seen in the first image, which shows the inside of the cover after it has been removed.

    • As seen from the outside of the phone, you'll be slicing through the adhesive in the highlighted areas.

    • The adhesive is the thinnest on the right side of the phone, just below the Bixby button.

    glad to see Samsung has improved back glass quality since the tortilla chip on the Note 5. much friendlier to open.

    Steve B -

    My S10e was two years old so the adhesive was really weak, and it was really simple to open. Still, this guide was totally useful.

    Rafael Sánchez Treviño -

  3. wipE2wUqUAWtD34B
    wipE2wUqUAWtD34B
    jMiCSZVTACR1YiVH
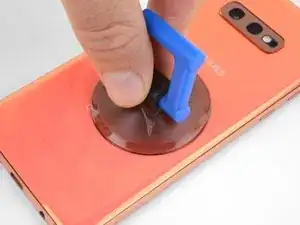
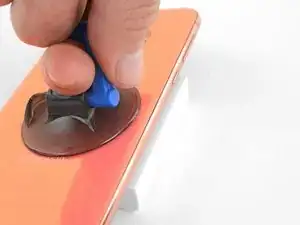
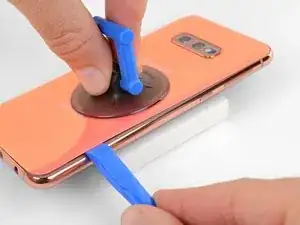
    • Secure a suction cup to the back cover, as close to the heated edge as possible, just under the Bixby button where the adhesive is thinnest.

    • The suction cup will not make a good seal on the curved portion of the glass, so avoid putting it on the very edge.

    • If the phone's back cover is cracked, the suction cup may not stick. Try lifting it with strong tape, or superglue the suction cup in place and allow it to cure so you can proceed.

    La ventouse n'adhérera pas correctement sur la partie incurvée de la vitre ,

    Sur la partie incurvée de la coque.

    Isidore LECHAT -

  4. ibRia3sRxmirKq3R
    ibRia3sRxmirKq3R
    SidBmgyn3NSdqejr
    ZTxO2THHS4IXqphH
    • Prop up the heated edge of the phone on something that is about 0.5 inches (13 mm) thick. This will angle the phone so that the opening tool is easier to insert.

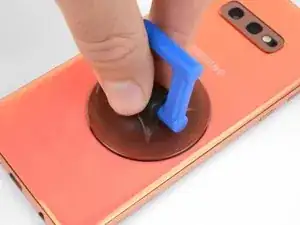
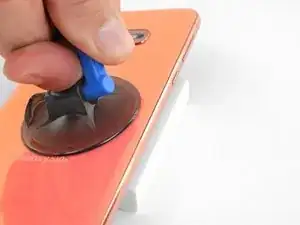
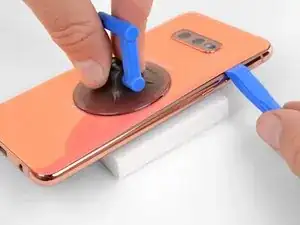
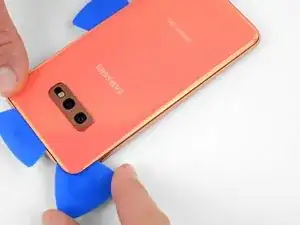
    • Lift the back cover's right edge with your suction cup, opening a slight gap between the back cover and the frame.

    • This may require a significant amount of force. If you have trouble, apply more heat to further soften the adhesive, and try again. The adhesive cools very fast, so you may need to heat it repeatedly.

    • If you're using an iOpener, follow the heating instructions to avoid overheating it, or the gel pack may burst.

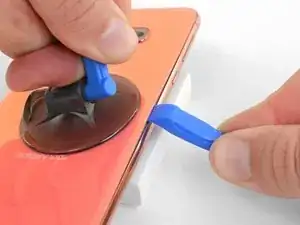
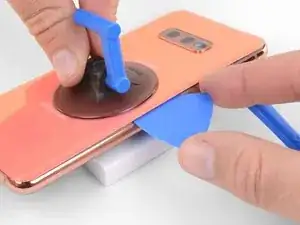
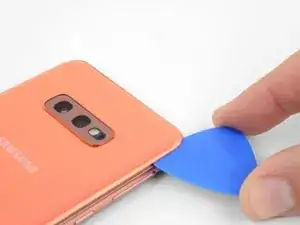
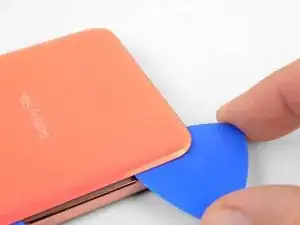
    • Press the edge of an opening tool into the gap.

    • The rear glass can break if you use too much force or attempt to pry with metal tools.

  5. qsHFt1fweURqHcTl
    qsHFt1fweURqHcTl
    Ypt5KfriEDhxXBVI
    JHNNmQSKmCIE55cg
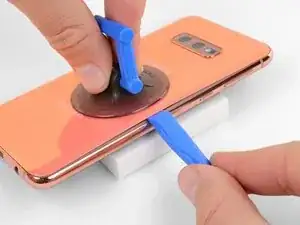
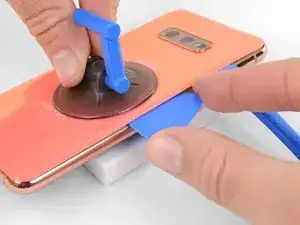
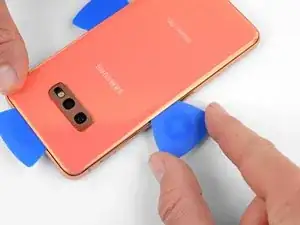
    • Slide the opening tool along the right edge of the phone to slice through the adhesive securing the back cover.

    I found that using opening picks for the entire repair was much easier then the pry tool, but that could just be me

    Jake Simek -

  6. CymkJTNoPNTeZUka
    CymkJTNoPNTeZUka
    aKLeT25rEdLpYZDc
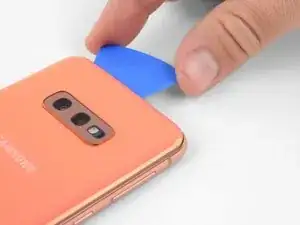
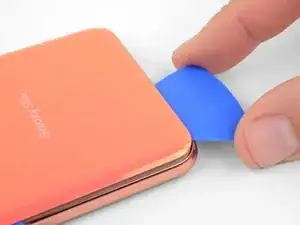
    • Insert an opening pick into the edge next to the opening tool. Leave the pick here to prevent the separated glue from re-adhering.

  7. DajMoKG3ZVtX2H13
    • Apply a heated iOpener to the top edge of the phone for two minutes.

  8. lvjkvNLjJpAFVWl6
    lvjkvNLjJpAFVWl6
    MTdMIIvoAaIAINRe
    rPKSLCevjL5MNVfR
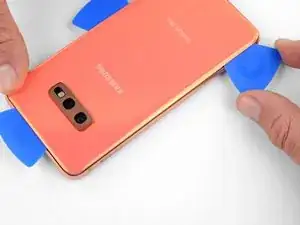
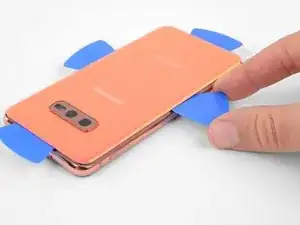
    • Insert an opening pick near the top right corner of the phone and slide it around the corner and across the top edge of the phone.

    • The glued area is larger here, so you'll need to insert your pick farther into the phone to separate it.

    • Leave the opening pick in place to prevent the adhesive from re-adhering.

  9. qhP1UXkqFmCwufXo
    • Apply a heated iOpener to the left edge of the phone for two minutes.

    Insérez un nouveau médiator à côté du bord

    Insérer un autre mediator

    Isidore LECHAT -

  10. oZx6joj2KDeKLxEe
    oZx6joj2KDeKLxEe
    o5XgEUsmvx5EEmDn
    PuNPkK45faEWJfJ1
    • Insert a new opening pick near the top left corner and slide it along the left edge of the phone.

    • Again, leave the opening pick in place in the left edge of the phone to prevent the adhesive from resealing.

  11. Fh2TG26nw2cGHX5K
    • Apply a heated iOpener to the bottom edge of the phone for two minutes.

  12. bnITFSXskpHsDNtt
    bnITFSXskpHsDNtt
    O3J2tKCsAQKMKJ4g
    ahpVJTbPhDpKgqJP
    • Insert an opening pick near a bottom corner of the phone, and slide it along the bottom edge of the phone to separate the adhesive there.

    • The glued area is larger here, so you'll need to insert your pick farther into the phone to fully separate it.

  13. EcddTJkeF1rNcZTZ
    EcddTJkeF1rNcZTZ
    EVXuMTykjnn1OkEB
    BbfxPHc36hsCeTBU
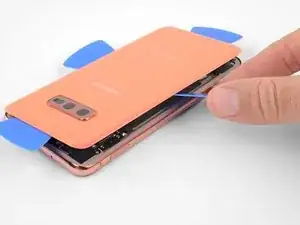
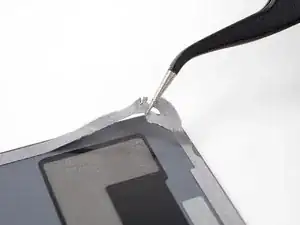
    • Use the opening picks to very carefully pry up the back cover.

    • If you encounter any resistance, stop prying and use an opening pick to cut any remaining adhesive.

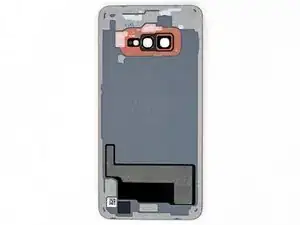
    • Remove the back cover.

  14. aFFmcJMKDdeYeKB4
    • Follow this guide to reinstall the back cover and replace the adhesive.

    • Be sure to turn on your phone and test your repair before installing new adhesive and resealing the phone.

    • If desired, you may reinstall the back cover without replacing the adhesive. Remove any large chunks of adhesive that might prevent the back cover from sitting down flush. After installation, heat the back cover and apply pressure to secure it. It won't be waterproof, but the leftover adhesive is usually more than strong enough to hold.

  15. VrNWnP6nMMSKFeFw
    • Remove the eight 3.9 mm Phillips screws securing the upper midframe to the phone.

  16. IDa2Iq4HaRdASA1d
    IDa2Iq4HaRdASA1d
    bIsuLnDFxGSePZ4S
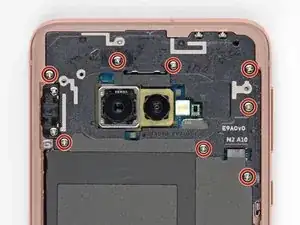
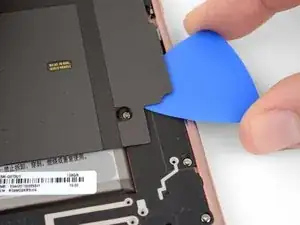
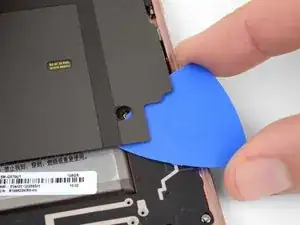
    • Slide an opening pick under the bottom right corner of the upper midframe to separate the adhesive holding it to the lower midframe.

  17. wqbmoM5oZ4OGl6KX
    wqbmoM5oZ4OGl6KX
    crcmA6ihTKRpPucJ
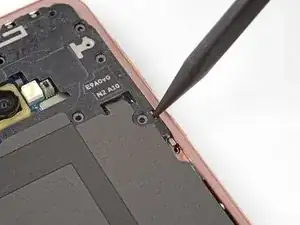
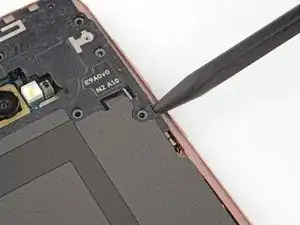
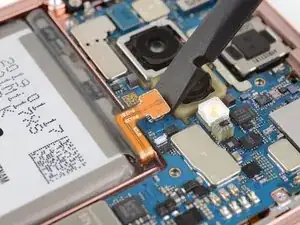
    • Insert the point of a spudger in the small cutout on the right edge of the plastic part of the upper midframe, near the Bixby button.

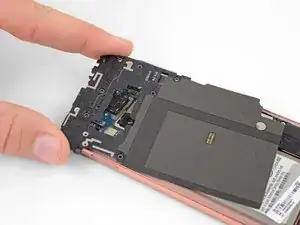
    • Use the point of the spudger to pry the midframe up from the phone chassis.

  18. naJQHs4K4goepoCk
    • Lift the midframe by the plastic section and remove it from the phone.

    • To reinstall, first insert the top edge of the assembly into the phone's frame, and then gently press down on the rest of the assembly to snap it into place.

  19. ao22gUSksYhVU4O1
    ao22gUSksYhVU4O1
    GBx52kUUqspTFd3U
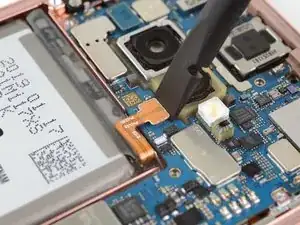
    • Use the flat end of a spudger to pry the battery connector straight up from its socket and disconnect it.

  20. SnwPcrljijWRiWmC
    SnwPcrljijWRiWmC
    4woraQtPDLKrqlV6
    • This step can be completed using either adhesive remover or high concentration (over 90%) isopropyl alcohol.

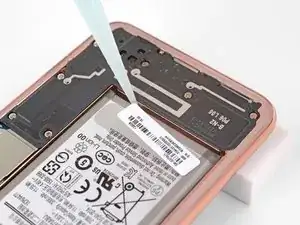
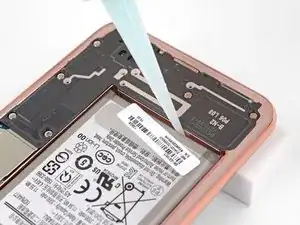
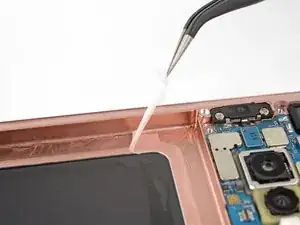
    • Prop the bottom edge of the phone up to angle the phone so that the adhesive remover will run from the bottom of the battery toward the top.

    • Apply isopropyl alcohol or adhesive remover along the bottom edge of the battery. Allow it to sit for several minutes to allow the adhesive to weaken.

    Advice: DO NOT USE TO MUCH ISOPROPANOL! This will damage your display and you will most likely have to replace it. If you know that you won't use this battery anymore just lever it out of the case. It is fairly easy to do with the ifixit Jimmy ( Item # IF145-259-1 ) or the metal spudger. Use these tools with much sensitivity as you could damage the battery case or the display that is right below the battery ( See Step 22 for additional pictures where the frame ends and the screen begins ). Good Luck!

    se7enty -

    I found the black levering tool did not provide enough force and damaged the tool. I found the blue picks gave me wider and safer leverage to get the battery out.

    Also a couple of passes with isopropanol was required before I could make any progress. Note that while you are prying from the bottom, I applied the isoproponal all around the battery as the glue is located all the way around.

    ervan.hady -

  21. mVfhBUBqRQhMf4FK
    mVfhBUBqRQhMf4FK
    kABBDJ5JYyA35Axn
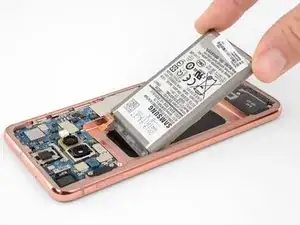
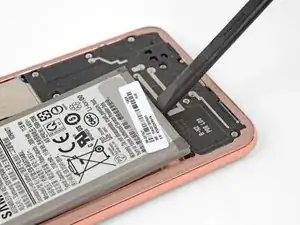
    • Use the flat end of a spudger to carefully pry the battery out of the phone.

    • Try your best not to deform the battery during this process. Soft-shell lithium-ion batteries can leak dangerous chemicals, catch fire, or even explode if damaged. Do not use excessive force or pry at the battery with metal tools.

    • If you encounter significant resistance or the battery starts to deform, repeat the last step to further dissolve the adhesive.

  22. eRpUhdb1pLdS3VGW
    eRpUhdb1pLdS3VGW
    VwRoOJNQg6oFubDH
    • Remove the battery.

    • Do not reuse the battery after it has been removed, as doing so is a potential safety hazard. Replace it with a new battery.

    • To install a new battery and adhesive, follow this guide.

Conclusion

To reassemble your device, follow these instructions in reverse order.

For optimal performance, calibrate your newly installed battery after completing this guide.

Take your e-waste to an R2 or e-Stewards certified recycler.

Repair didn’t go as planned? Check out our Answers community for troubleshooting help.

Adam O'Camb

Member since: 11/04/15

178589 Reputation

8 comments

I was going to publish this guide but somebody did it already for me. Thanks!

By the way the color of that phone in the guide is hideous in my opinion.

Dinan Blueje -

When you say “moderate” difficulty, how what’s making it difficult or where is the risk coming from? With the right tools, patience, and even a small bit of experience replacing a screen in an admittedly easy Nokia Lumia phone, what could go wrong, and what would you recommend?

Mark Stretton -

Hi Mark, the hardest part of this guide is dealing with all the adhesive without damaging anything. The back cover and the battery are both heavily glued down. To get the back cover off without cracking it, I’d recommend plenty of heat and very patient and gentle prying. If the prying gets really tough, try heating the back a little more. Removing the battery can be tough as well, but using adhesive remover helps a lot. Follow the steps in the guide and make sure you give the adhesive remover a few minutes to soak in. If prying gets difficult, add a little more adhesive remover and wait a couple minutes before continuing. Hope that helps!

Adam O'Camb -

We ran into the problem of the octa not seperating with the back glass. We were using the AoD JIG. What do u recommend as the next step in that instance?

rfralin -

If I buy the kit from ifixit, are the battery going to be relatively new? or the batteries have been seating in shelves since OEM days.

Reaz Tahmidur Rahman -

Yes, I bought a kit about a month ago and the manufacting date of the s10e replacement battery was 28 August 2022.

ervan.hady -

Hello. After 3+ years of using S10e, I would like to replace the battery. I live in Europe and the battery replacement kit is not available on the EU store website. I cannot order the kit from the States because of shipping restrictions.

Can you please tell me where can I buy the replacement kit for my device? Is it possible to order one to EU store somehow?

And why is one not available in the EU store? I'm not being entitled, just puzzled and curious.. I see kits for devices older than mine so I can only guess.

Ivan Kusturin -

I also have this phone for 3+ years. Battery is overheating a lot, especially with high screen brightness in summer, and does not last so much anymore. I am also looking into ordering a new battery, back cover, and repair kit for my Samsung S10e in Europe (Belgium).

Cyril Dewez -