Introduction
-
-
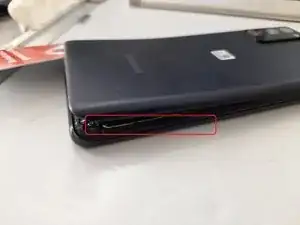
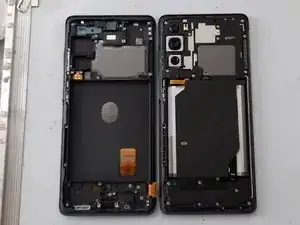
Heat up the back cover with a heat gun
-
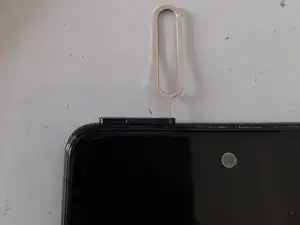
Slide a thin plastic tool between the back cover and mid frame to work the adhesive loose.
-
Work around the whole of the frame to release the back cover.
-
-
-
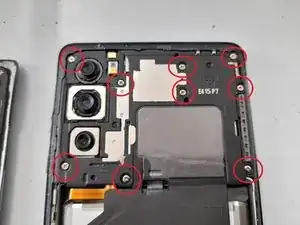
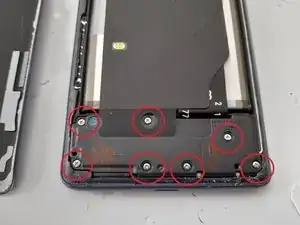
Remove the 9 screws holding the antenna module in place, but do not try to remove the module itself yet.
-
Remove the 7 screws holding the lower portion of the plastic protective cover in place on the bottom of the phone
-
-
-
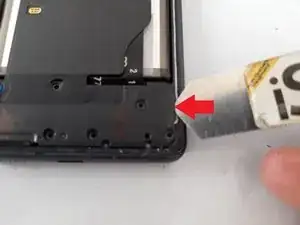
Insert a thin pry tool in the side of the lower plastic cover, to release it.
-
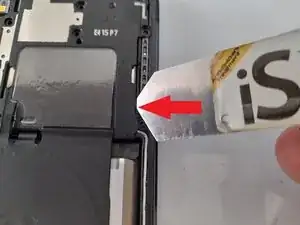
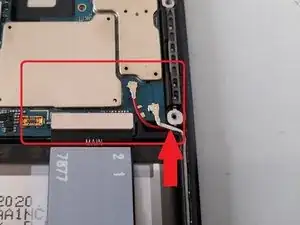
Insert a thin tool in the side of the antenna module to loosen it, but do not pull it off yet.
-
Fold the antenna module over towards the battery.
-
Underneath there is the battery connector and a connector for the antenna module. Use a spudger to pry both of these off.
-
Now the antenna module can be removed.
-
-
-
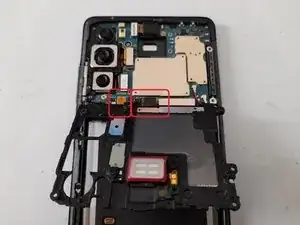
Use a spudger to release the rear camera and remove it from its housing.
-
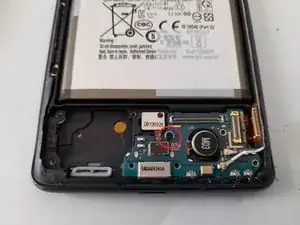
Using a Philips screwdriver, remove the retaining screw for the mainboard.
-
Use a spudger to release the cable connecting the mainboard and sub-board.
-
The red and white cables can also be pried free, without needing to remove the connectors from the mainboard itself.
-
-
-
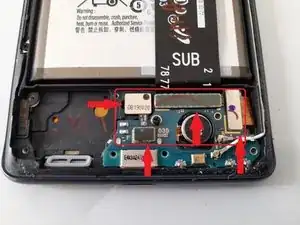
Use a spudger to remover the connectors for the display, fingerprint sensor and main-sub board.
-
The fingerprint sensor can be pried from the side to release it and remove it.
-
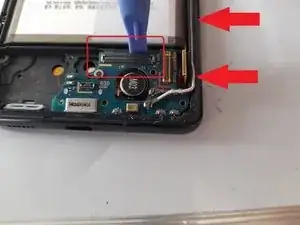
Remove the retaining screw for the sub-board.
-
Use a spudger to pry the sub-board loose.
-
Once loose, pry the cables up to release them from the channel going up the side of the frame.
-
Once the board and cables are loosened, the mainboard, sub-board and cables can all be removed together. This is one possibility, if you are not comfortable trying to remove everything with the cables still attached, then disconnect the cables from the sub-board and mainboard first.
-
-
-
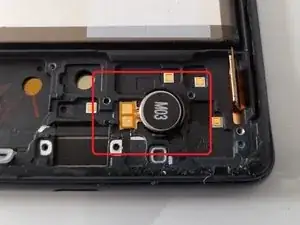
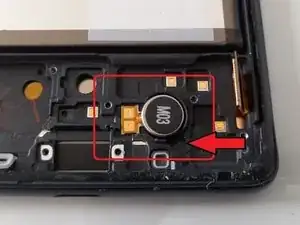
Use a heat gun on the front side of the display to loosen the adhesive holding the vibrator motor in place.
-
Once heated, insert a small flat tool at about five O'clock position to pry the motor loose.
-
-
-
Remove the two screws holding this part in place.
-
On the S20FE this looks like a space filler for the frame and doesn't appear to have any function. On the S20 Ultra, this piece is an actual antenna.
-
Transfer to the new frame
-
-
-
Use a heat gun and heat up the front side of the display to loosen the adhesive holding the battery in place.
-
Insert a thin , flat, flexible tool to release the adhesive between the battery and frame. Caution is needed here to ensure that the tool does not go through the batter casing.
-
Work slowly and reheat the front side if the adhesive does not feel as if it is coming loose.
-
Work along the side of the battery and eventually it will start to come loose.
-
Once one side is free, you can do the same on the other side and should be able to life the battery up and out.
-


To reassemble your device, follow these instructions in reverse order.
2 comments
how to remove screen lol?
It wos amezing thanks