Introduction
If your Samsung Galaxy Tab 2 10.1 is stuck in a reboot loop, your motherboard may need to be replaced.
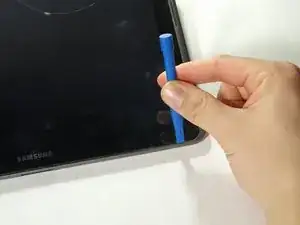
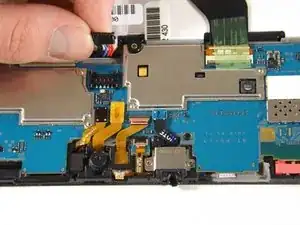
Caution: Some images display the steps using a metal spudger. Use the heavy-duty spudger instead to avoid damaging your circuits.
For more information on connectors, visit this page.
-
-
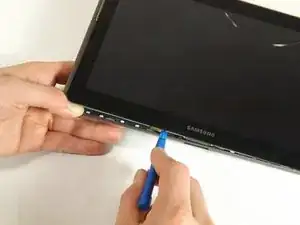
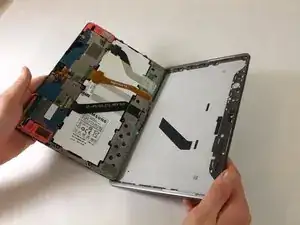
Insert the plastic opening tool between the glass screen and the back cover so the curved end of the plastic opening tool is under the glass. Gently pry the back cover away from the glass screen.
-
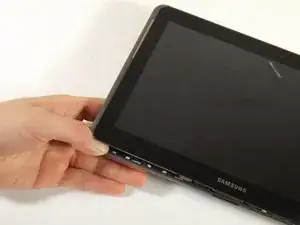
Be sure to lift the entire display from the body and that you are not are lifting the glass from the display. You will need to reach down a little further for the correct removal.
-
Continue inserting the plastic opening tool around the whole device screen to completely separate the back cover from the glass screen.
-
-
-
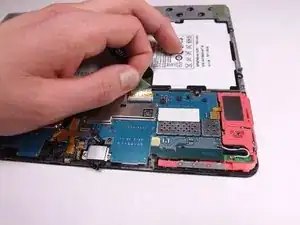
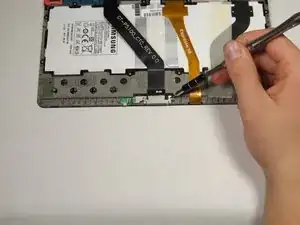
Insert the flat end of the heavy-duty spudger between the wires and underneath the battery connector. Carefully lift the black battery connector up to disconnect it from the motherboard.
-
-
-
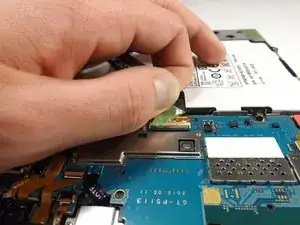
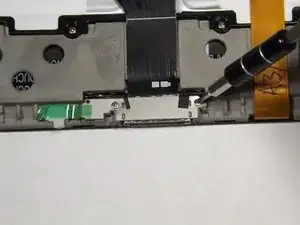
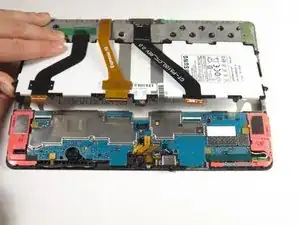
Gently lift the gold cable connector with the flat end of the heavy-duty spudger to disconnect it from the device.
-
-
-
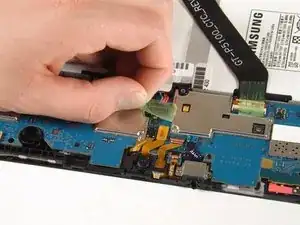
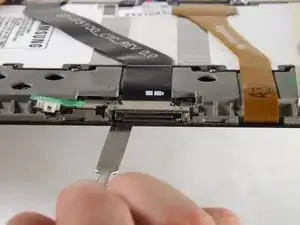
The charging port cable is the black cable connected to the charger port. Using your fingers, peel the green tape off of the charging port cable connector.
-
-
-
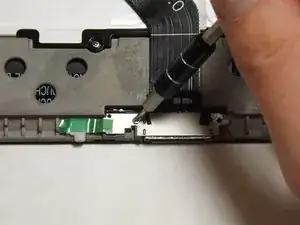
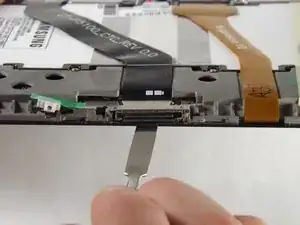
Using the flat end of heavy-duty spudger, carefully lift the black tab that holds the charger port cable in place.
-
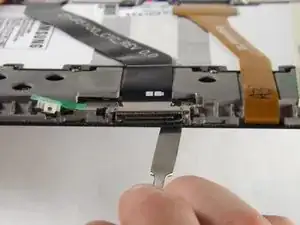
Slide the cable out.
-
-
-
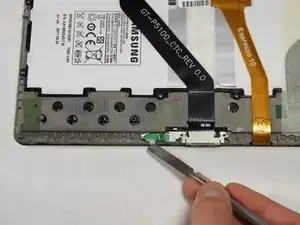
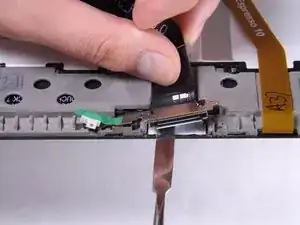
Use the Phillips 000 screwdriver to unscrew the two 3mm screws holding the charger port in place.
-
-
-
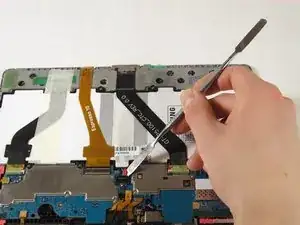
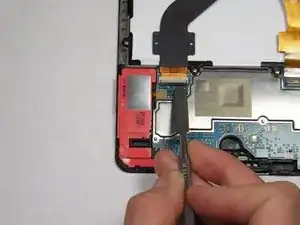
Use the flat end of the heavy-duty spudger to lift the white microphone piece until it is removed from its socket.
-
-
-
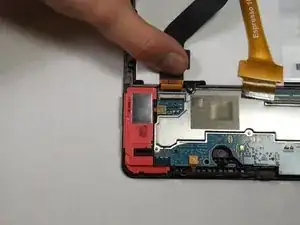
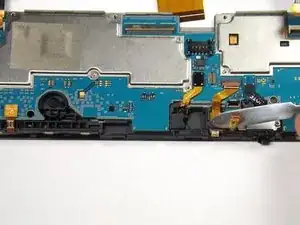
Slide the flat end of the heavy-duty spudger under the charger port.
-
Make sure the spudger is all the way to the back of the cavity and slide horizontally across the bottom to break the adhesive.
-
-
-
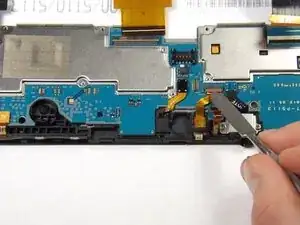
Lift the charger port with the flat end of the heavy-duty spudger and remove it from the device.
-
-
-
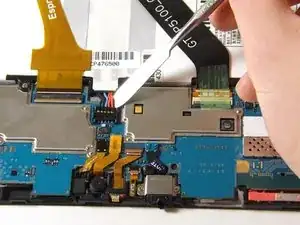
Using your fingers, remove the green tape holding the three ribbon cables down.
-
Using the flat end of the heavy-duty spudger, carefully lift the black tab that holds the leftmost, black ribbon cable in place. Repeat this step for the gold ribbon cable and the black ribbon cable.
-
Using your fingers, gently slide each of the three cables straight out of the connectors.
-
-
-
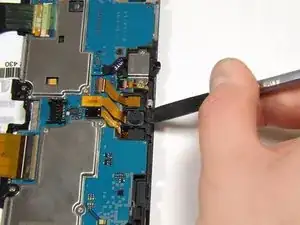
Using the flat end of the heavy-duty spudger, lift up the black ribbon lock directly left of the headphone jack from the black side.
-
After lifting up the lock, insert the heavy-duty spudger underneath the gold ribbon and slide to disconnect the gold ribbon.
-
-
-
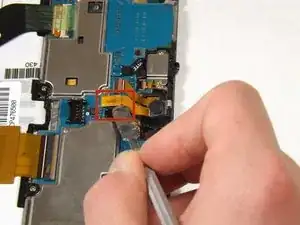
Using the flat end of the heavy-duty spudger, gently lift up the ribbon lock directly above the one in the previous step from the brown side.
-
After lifting up the lock, remove the gold ribbon with the heavy-duty spudger as you did in the previous step.
-
-
-
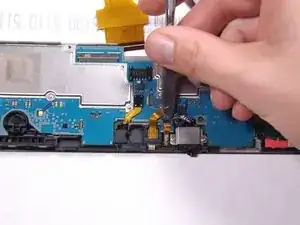
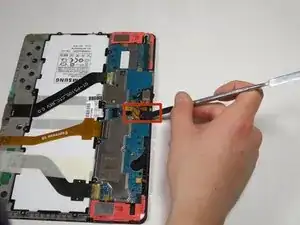
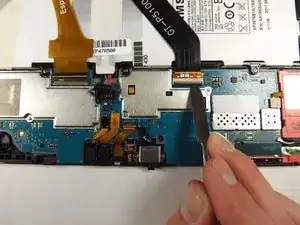
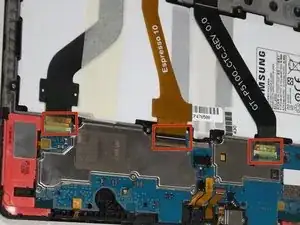
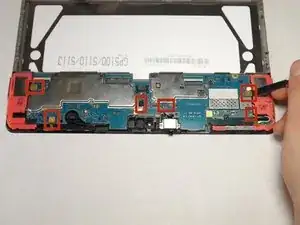
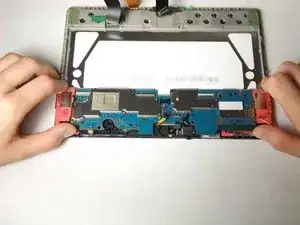
Use the flat end of the heavy-duty spudger to pop off and disconnect all the marked connectors attached to the motherboard.
-
-
-
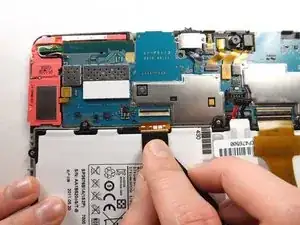
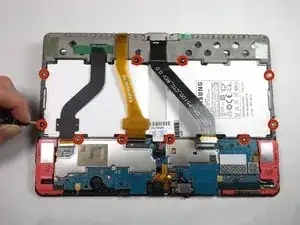
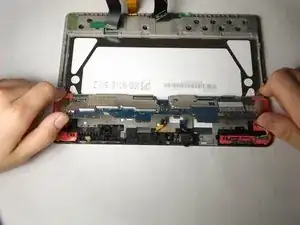
After disconnecting all of the connectors, push up on the motherboard with your thumbs to dislodge it from the tabs fastening the bottom of the motherboard. Then lift up the motherboard to carefully remove it from the device.
-

To reassemble your device, follow these instructions in reverse order.
5 comments
Is there any sodering required to install it?
All connections with other components come via cable connectors at different points on the board, but all components of the motherboard come complete already on the board, many with EMI shields.
Here is the link to the part product page which can give you pictures of the part itself which looks like the final picture of Step 19
The Instructions and illustrations were very helpful to follow and replace Motherboard for Samsung galaxy tablet S2 10.1,
I will need to purchase the part at our local elecrtonics shop and hopefully might find one and do the replacement following your instruction guide.
If not able to find at our local shops then I would place order with you and purchase part from you.
Thank you very much for kind assistance,
Regards,
Charlie Jay Klobill,
Wabag, Enga Province, PNG - 29/03/2020
Note that the headphone port protrudes into the back cover framing. Hence the rest of the back needs to be unclipped and taken off first.
Levi Howard -
I had problems getting it to separate at first. Pushing down with my thumb on the very edge of the case from the front while pushing up with my fingers from the back flexed it enough to get a very small jeweler’s screwdriver in the gap. From there I worked it until I could get the little bread wrapper plastics clips in the space. When it needed something stronger a 1 or 2 inch plastic putty knife from Walmart did the trick.
William H Bowers -
I replaced the battery and nothing no screen nothing. the batt was 3.7 V though.
The old one had 0V. I might have messed up the ribbon cables?
I put back the cover on it.
Held on the power button for 10 seconds, nothing. Held the power button and the volume up button for 10 seconds… also nothing..
I am leaving it charge for a while now. Even though if your battery is like full (3.7V measured) it should come on… but nothing..
Lets wait and see. Or this will be garbage…
xbox40489 -