Introduction

  1. uPo3AEtVjGUOXlda
    uPo3AEtVjGUOXlda
    mwuqER61PwOt1uE6
    2mwhXcw14Cve5xpk
    • Push the gold bar, located in the top of the device, out of the carbonating block.

    • You can use the end of your screwdriver to push this piece out.

    We could,remove this covee, without sliding the assembly out ofbthe case. There was NO gold bar in the system…

    Robert Coles -

    ….. no gold bar either in my device…. ??????

    hbergeron -

  2. GphQUg1qNkEDRTcT
    GphQUg1qNkEDRTcT
    3NxQEZirCDyytuUo
    qf5UgdCjM4uZKNKH
    • Slide the yellow battery cover up and away to remove it from the device.

    Careful! I had springs and retainers go flying on this step

    Felicia Renaud -

    Yep…same here. Took me a good minute to figure out where they came from!?

    Rodney Davis -

    Fun fact: The lights on the SodaStream are simply a timer. They are in no way linked to a pressure gauge. If you want more bubbles it doesn't mean you have to press on the activation mechanism harder. you can press gently and just wait longer. This way the water will not spill out over the top and leak all over the table. Ignore the lights and just wait for the safety release valve to activate as you are filling the bottle. that's how you know you have reached the limit.

    Ken Ostrovsky -

  3. MyqGNupIls4esFYK
    MyqGNupIls4esFYK
    SoBGKXxOyqRVkDdg
    • Unhook the bottom piece of the plastic arm on each side of the device.

  4. hKsCCevvmGpuqCOj
    hKsCCevvmGpuqCOj
    IeXvoBOnR1oDwP1a
    • Lift the top of the plastic arm with the spudger and remove it on both sides.

    Slot screwdriver works just fine for these next two steps

    Scott -

  5. WplpmtfCWF3Yhvag
    WplpmtfCWF3Yhvag
    6oJEPbASQJCQ35YI
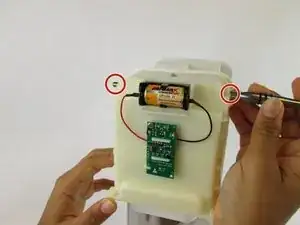
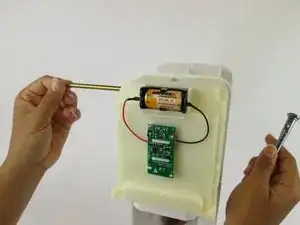
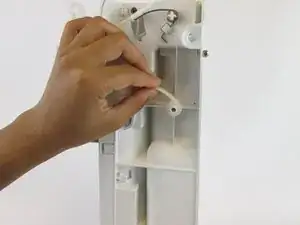
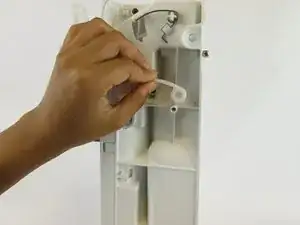
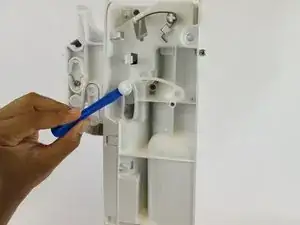
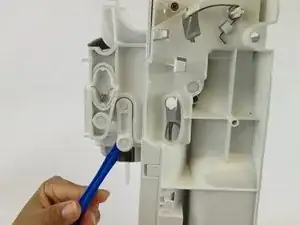
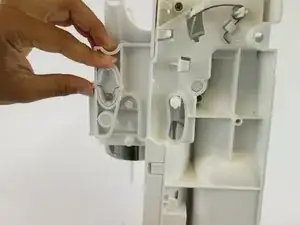
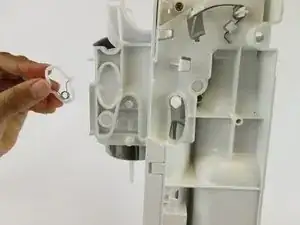
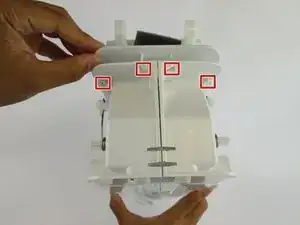
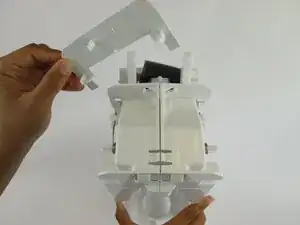
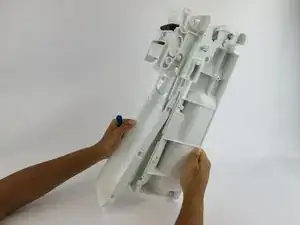
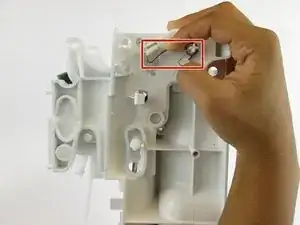
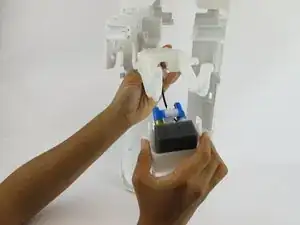
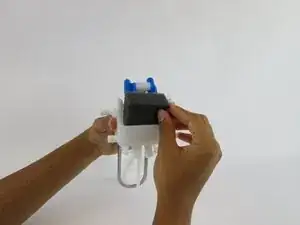
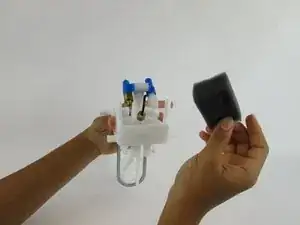
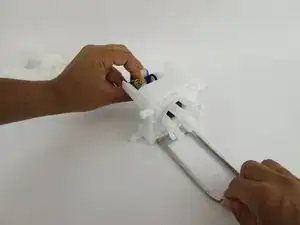
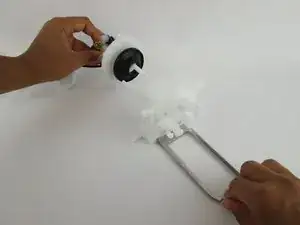
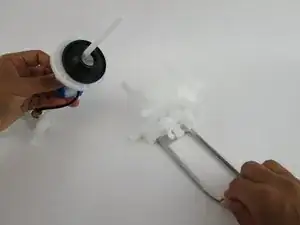
    • Remove the plastic piece, located near the front of the carbonating block, from both sides of the device using a plastic opening tool or nylon spudger.

    Be careful…they will fly off across the room!

    Rodney Davis -

  6. DaRJ6MhBiBihfSJt
    DaRJ6MhBiBihfSJt
    RZygY4bEgNJsDSvK
    • Remove the plastic oval and the spring within it.

    Do not have this piece on mine?

    ronkellington -

    nor do I. They must have made some changes.

    Scott -

    This piece exists on my 2013 metal chassis version, but not on my 2016/17 plastic chassis.

    Darryl Marko -

  7. XHqPTJfYlsRZRWpD
    XHqPTJfYlsRZRWpD
    Y1nZCpBr1gbrMw62
    • Pull the loader tab cover down and away from the rest of the carbonating block.

  8. QZYhTiECMNFJ4yun
    • Remove the three 17.9 mm screws located on the right side.

    • These screws may be difficult to access.

    Should this be four screws? I followed all directions (I think) and had one extra screw to remove, just above the bottle mount, before I could split the two halves apart

    Phil Wilkes -

    Yes I had a 4th screw at this step too. Going backwards the missing fourth screw in the instruction messed me up and I had to redo it!

    Daniel Sylvester -

    Yes the 4th screw still isn't mentioned - and just below it is the rare-earth magnet that can fall out when the halves are separated. This magnet activates the LEDs when the carbonating block is pushed down - no magnet, no lights.

    Malcolm Noble -

  9. tRskmIiswd2dIWWT
    tRskmIiswd2dIWWT
    YVheV5LUOmF2vEIU
    • Unhook the four clips on the top of the carbonating block and remove the plastic cover.

  10. Kpo2GkMvnSPDLHlJ
    Kpo2GkMvnSPDLHlJ
    cN32IXyu2cZUQYPk
    1OsWloFwisA2OA2E
    • Lift the clips located on both sides with the plastic spudger. Slide the front cover off.

  11. jEnRGH6ULh4rYv6F
    jEnRGH6ULh4rYv6F
    vtIDqL1hraJfUYUa
    • Unhook the silver spring arms on both sides of the device by pushing down.

  12. HNUK2PBMpGYJJPgP
    • Grip the right and left sides of the device and pull it into two identical halves.

    • Once these two pieces are apart, all remaining internal components will fall out of the device.

    what happens to the middle white piece?

    Noah Langer -

    Yeah there's a step missing here…between 17 & 18

    Daniel Sylvester -

    Is it better to lay it on its side?

    Gareth White -

    I hope someone will document the missing step of what it looks like if you separate the halves without having all the parts fall out.

    What does it look like and where do they go? Kinda' important for reassembly.

    Joe -

    I've added a photo to this step showing just this, fingers crossed it gets approved

    lizzbeeton -

    Liz - would you post a link to your pic here so we can see it even though it's not approved yet?

    Joe -

    Re: "missing step"

    On the newer models, (at least 2016/17) the valve is attached to the left side and it's two Phillips head screws must be removed.

    These instructions are correct for earlier models where the valve is in the middle, so there is no missing step.

    Darryl Marko -

    Se voce deitar o aparelho com cuidado, nada cairá e as peças ficarão no lugar

    J.Poppa -

    Thanks to this guide, I’ve taken a part my SodaStream Source a few times now. Like others have mentioned, during reassembly, this step tripped me up every time. It’s definitely missing details about the part orientation. I took some additional photos in efforts to help others. Please find the album here.

    Mitch -

    Thanks Mitch!! That's exactly what I needed! been pulling my hair out trying to figure out how that white piece went back in.

    KayLynn Mathews -

    You’re very welcome! I’m so glad it helped you out!

    Mitch -

  13. JWdRZrQqWysjWsVd
    JWdRZrQqWysjWsVd
    DXtYONVnU6D22mK2
    keuLcodMFNVLKBR1
    • Pull the foam pad up and remove it from the front side of the carbonation component.

    Any source for spare parts known? Ebay and Amazon does not help here!

    lutz Ziffer -

    no foam pad on mine either

    Scott -

    What is the name of the part that is in blue? Mine is broken and I would like to replace it

    Tony R -

    The part on mine that was broken is the plastic cap/nut that connects the black hose to the canister holder.

    Going to try and superglue it. Wonder if there's a source for this nut?

    Joe -

    I wish it was that simple. The hose has a brass ferrule crimped on it, and the nut cannot be replaced without being able to remove and crimp a new ferrule to the (new?) hose. I have found a listing (eBay Europe?) for a split brass nut that allows replacement, but...

    https://www.google.com/url?sa=t&source=w...

    https://picclick.co.uk/Messing-Mutter-f%...

    Darryl Marko -

  14. FVBvef2ilBWlEBsU
    • Remove the six 17.7 mm screws from the underside of the loader tab piece.

  15. WA4F2d2O2T61TZDG
    WA4F2d2O2T61TZDG
    K5COTeJWIAfAPx4F
    lE4HAFSWo3RD1OWx
    • Pull the loader tab out of the nozzle.

    Dove posso acquistare il tubo dell'aria del gasatore?

    zorzi.corrado2 -

Conclusion

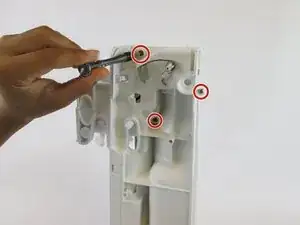
To reassemble your device, follow these instructions in reverse order.

Angela Mossgrove

Member since: 20/02/17

976 Reputation

2 comments

Bonjour j'ai une pièce à l'intérieur dont je ne retrouve pas du tout la position au remontage.

Pouvez vous m'aider ?

Delphine Renard -

De quelle partie s'agit-il, peux-tu prendre une photo ?

Toon Konings -