Introduction
This guide will show you how to unscrew the LCD screen housing from the back of the camera and disconnect the screen's circuitry from the circuitry of the rest of the camera. This requires using a Phillips #00 screwdriver and a plastic opening tool to remove the screen. It is very helpful to use a magnetic pad to organize and keep track of all the screws removed from the camera.
-
-
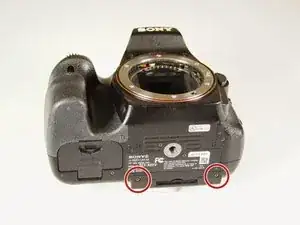
Remove the two 4.0 mm Phillips #00 screws on the base of the camera.
-
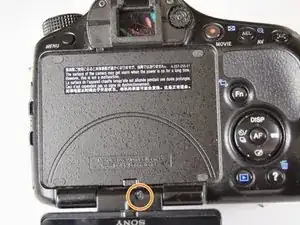
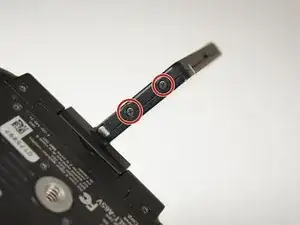
Remove the 3.0 mm Phillips #00 screw on the hinge of the screen.
-
-
-
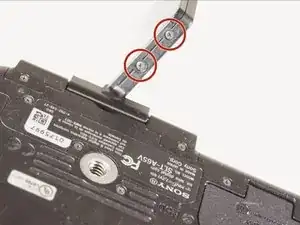
Remove the two 2.0 mm Phillips #00 screws on the bottom-right side of the screen.
-
Remove the two 2.0 mm Phillips #00 screws on the bottom-left side of the screen.
-
-
-
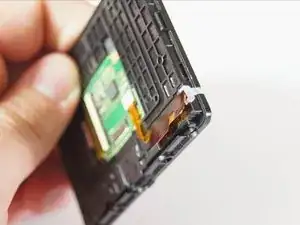
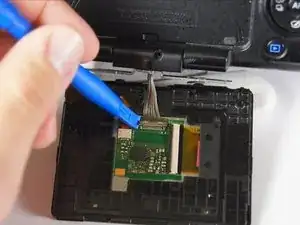
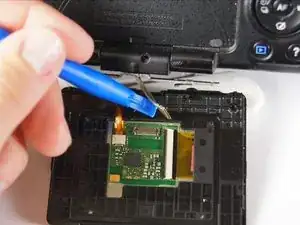
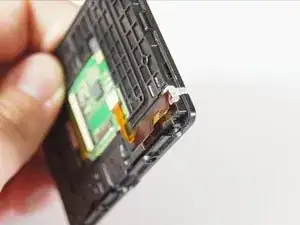
Use a plastic opening tool to disconnect the silver wires from the screen's circuitry and completely remove the screen from the camera.
-

To reassemble your device, follow these instructions in reverse order.
2 comments
hello everyone, thank you so much for this repair, I did that with my sony camera but it doesn’t work, how to know if its not the motherboard behind the screen that doesnt work or the flex cable, because the camera works perfectly just no screen, thank you in advance
Acèn -
my father used to repair black and white tv in the 80's here in the country of PERU, so I thought, my father repairs tv I must have inherited the skill so I will repair my a77v camera, result = I messed up more xD.
At the moment the screen did not emit an image, it went all black, when I uncovered the screen I found a pcb which was missing a component, I started cleaning with a toothbrush and 2 more components came off, I could not identify if they are resistors, capacitors or diodes, I looked for the schematic on the web but I didn't find anything related, could you help me identify which components are missing? Is there a way to upload an image here to show where they came off? I will be very grateful, ATTE: a friend from Peru.