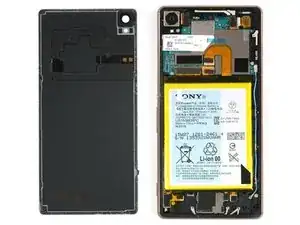
Introduction

prereq for display guides

  1. IBVhVNAcgUXkELdR
    IBVhVNAcgUXkELdR
    6JK4olH1QPKLLwOa
    HUQ2FtAZb6BU55OX
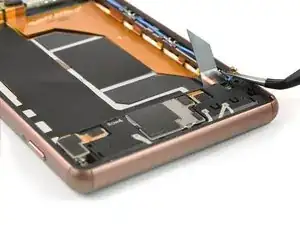
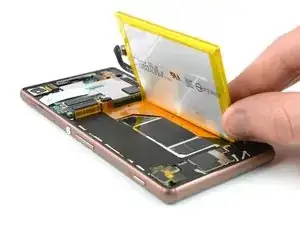
    • Heat the back cover of your Xperia Z3 to loosen the adhesive underneath.

    • If you use an iOpener, follow these instructions for use.

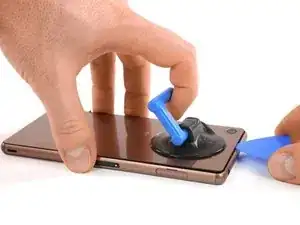
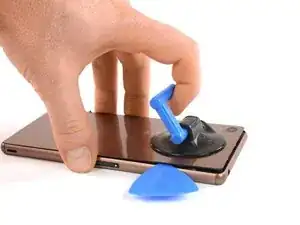
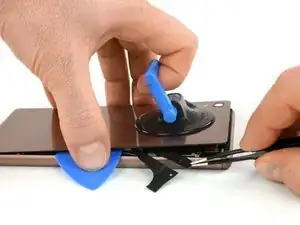
    • Lift up the back cover with a suction handle and put an opening pick in the gap.

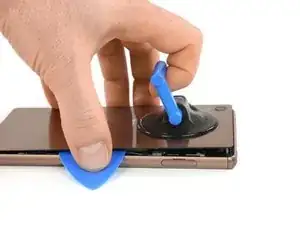
    • Move the pick carefully around the edges to loosen the adhesive on every side of the phone.

    • Don't put the pick in too deep under the back cover to not damage any parts inside the phone.

    How hot (how many C) should the iOpener be? I think it would be safer / more accurate to heat the iOpener in an oven with accurate temperature control.

    Magnus Myklebost -

    Careful here. The back cover cracked in two places. Once when I exerted pressure with the suction handle, and in the corner when moving the pick around the edges- even though I was very gentle. The battery was adhered firmly to the back cover.

    Joseph Doyle -

    I cracked the back cover instantly. Make sure to buy a spare one before opening!

    raffaelecaroppo -

  2. gAPs2OKNE2jFrYEo
    gAPs2OKNE2jFrYEo
    ZWXMfEZUoFXZNtsY
    • There are two adhesive strips in the center of the phone connecting the rear case to the battery, you'll need to remove them to open the phone.

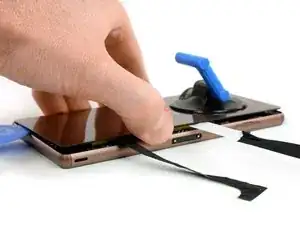
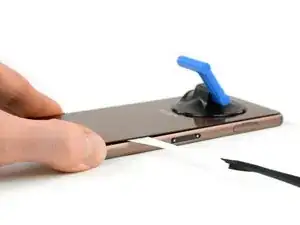
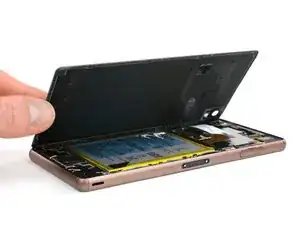
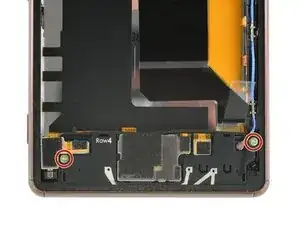
    • When the edges of the cover are free from adhesive, tilt it to allow access to the battery tabs.

    • Use tweezers to pull the two black adhesive strips out of the phone but don't pull just yet.

    Careful during this bit. My old Z3 back cover couldn’t take it and split into lots of pieces (probably weakened over the years!). Just order a replacement for £3 off ebay before doing it ;-)

    Bruce Wiggins -

    Merci pour ce tuto. Excellente procédure. Travaux réalisés en 20 minutes sans aucun problème. Attention: au remontage, il n'y a plus d'adhésif sur la batterie, la coque arrière peut éventuellement tomber. Je ne l'ai pas fait mais il faut peut-être mettre un petit double face sur la batterie.

    Patrick Prel -

  3. InbaMOV3DWrHJVIa
    InbaMOV3DWrHJVIa
    meP2FFCEEUXJ2oL1
    • Gently pull out both of the adhesive tabs out of the phone, parallel to the rear cover.

    • If the adhesive tabs break, try to use a thin flat plastic tool such as a plastic card to remove the last of the adhesive. If the adhesive is stubborn, heat it with an iOpener or hair dryer and pry again.

  4. RaESkTApChpTNMDs
    RaESkTApChpTNMDs
    Fut6DNQrqXXALvsP
    • After pulling out the adhesive tabs, you can lift the back cover and remove it.

  5. oDgQiiMN4YTyHo2E
    oDgQiiMN4YTyHo2E
    jgVRsCU2JSMV5Ufd
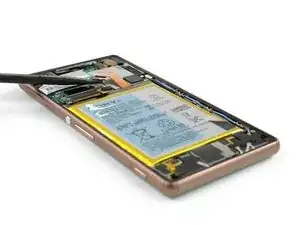
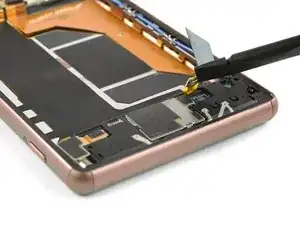
    • Unplug the battery flex connector.

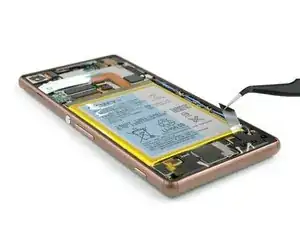
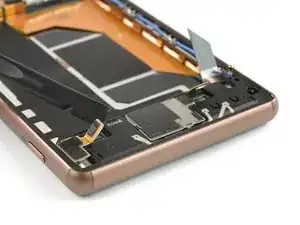
    • Use a tweezer to gently pull off the adhesive strip on the bottom part of the battery.

  6. RKmlYKT6k54PTcuC
    RKmlYKT6k54PTcuC
    XUTjqjATMmWYD61p
    • Use a spudger on the left side of the frame to lever out the battery.

    • Be careful with the spudger - there are cables beneath the battery!

    • Remove the battery.

  7. JtgRW6HGhYjucRKH
    • Unscrew the two Phillips #00 screws.

  8. B3xtXod3O1wkWGKI
    B3xtXod3O1wkWGKI
    BsNQZYUMXXeRFC4p
    4WLACPcXBxg4Tmx1
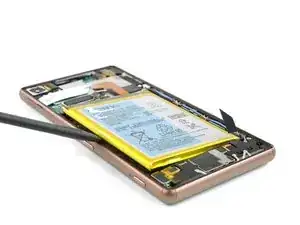
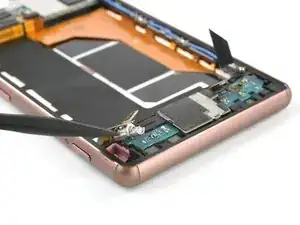
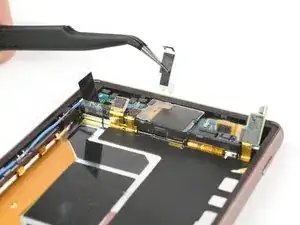
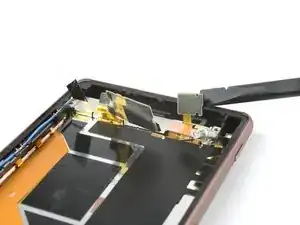
    • Unplug the antenna cable with a tweezer.

    • Use a Spudger to unplug the main flex connector and the flex connector of the vibration motor.

  9. 5RcrlIV5wjBnvOCA
    5RcrlIV5wjBnvOCA
    SOVCemy1kcQ4KvDS
    tHMgLiIrcwwrlFxb
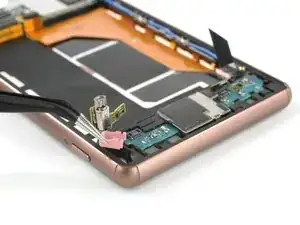
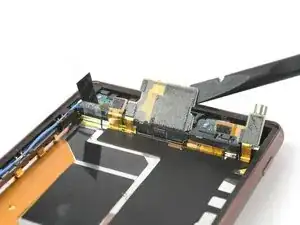
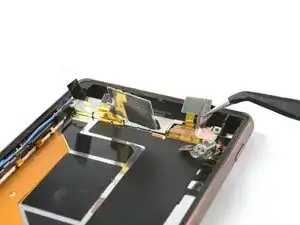
    • Remove the cover on top of the loudspeaker assembly.

    • Use a spudger to pull out the vibration motor and remove its rubber gasket with a tweezer.

  10. gEtwbMsKUpetuYJM
    gEtwbMsKUpetuYJM
    1o1MLsmUG3SMETRO
    K3XjSc1HVsxVtiap
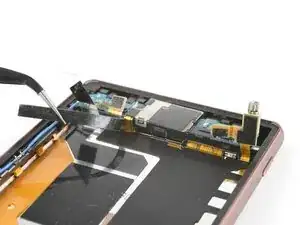
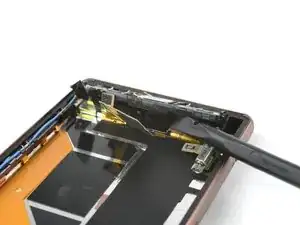
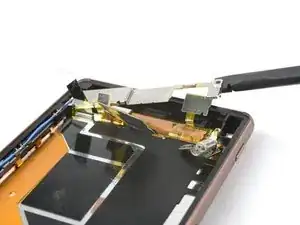
    • Use a tweezer to remove the adhesive strip of the loudspeaker assembly.

    • Pull up the metal clamp at the upper end of the loudspeaker assembly by using a tweezer and remove it.

  11. LXNSMThsh4HKCGka
    LXNSMThsh4HKCGka
    KKkmwWndZduQhWTH
    Uel35C2BmAapCJlq
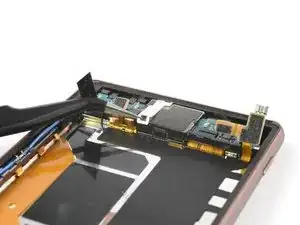
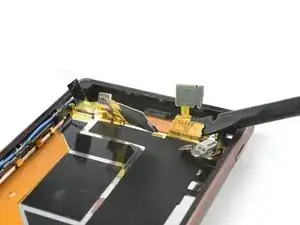
    • Lift up the main flex cable covering the loudspeaker assembly with a Spudger

    • Take care to not damage the loudspeaker. The flex cable is attached to the assembly with adhesive and is a little bit sticky.

    • Lift up the whole loudspeaker assembly with a spudger and remove it.

  12. O6XQcTvQBg3EFyJc
    O6XQcTvQBg3EFyJc
    hITZdWTEJGeI2nPS
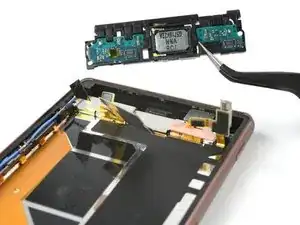
    • Use a spudger to lift up the end of the main flex.

    • Remove the bronze foil covering the connector of the main flex with a tweezer.

  13. BYels2DChGIAxYvS
    BYels2DChGIAxYvS
    jdWCDvpcHFhrBqGq
    URvdWUBI1MliePYg
    • Lift up the metal plate which is placed beneath the loudspeaker assembly and remove it.

    • Unplug the main flex cable.

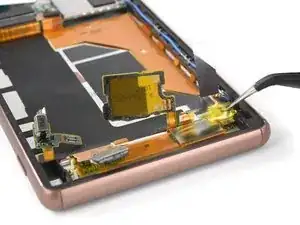
    • Use a tweezer to remove the yellow adhesive foil covering the display flex cable.

Conclusion

To reassemble your device, follow these instructions in reverse order.

Dominik Schnabelrauch

Member since: 23/11/16

167372 Reputation

0 comments