Introduction

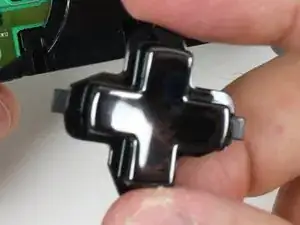
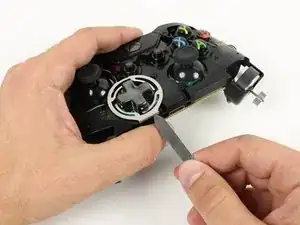
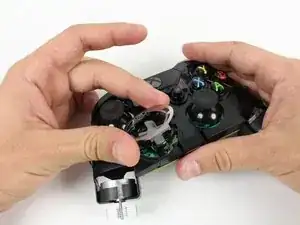
This guide will teach you how to replace the D-pad.

  1. nCPWIVIPPnPioQek
    • Remove the battery pack cover.

    • Remove batteries.

  2. BCoOrGwESawovJpX
    BCoOrGwESawovJpX
    CYTch3arFkuHOaol
    • We recommend using a nylon spudger for this step. A metal spudger is shown.

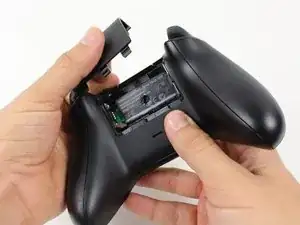
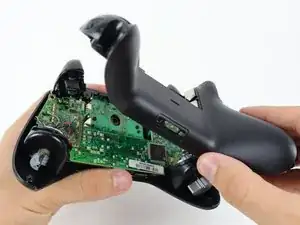
    • Grip the controller firmly to remove the side handles, wedging a spudger into the seam between the front and handle plates.

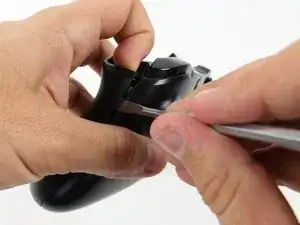
    • Pry the side plate away from the front plate by moving the spudger back and forth. You will need to do this all the way around the side plate's seam.

    Start prying the side plate off underneath the trigger, this makes it easier to disconnect the other clips connecting the side plate to the backplate.

    Brandon -

    One you take it off, is it possible to click it back in?

    Aiden Bear -

    As long as you don’t exceed the couple tons you need to take it off you should be able to put it back.

    Brandon -

    I don’t have a squdger

    TimidFerret4982 Gaming -

    getting those handles back on seems impossible, they just dont fit as well, a gap remains even after snapping into place.

    Dont think ill be doing this in the future

    Spoutin Wyze -

    edit: wiggled the bo9ttom middlewith the handles off and somethign finally “clicked” into place for that extra 1/4 mm for the down arrow on my D-Pad to click back up into place!.

    Spoutin Wyze -

  3. NIQhMF4yRuvR3EOl
    NIQhMF4yRuvR3EOl
    JPprWqFDRTUcXoCS
    • There is a hidden screw located in the middle of the controller behind the label.

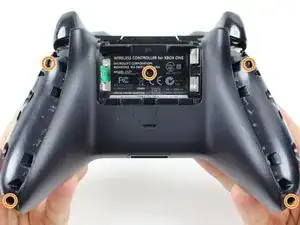
    • Use a screwdriver and punch a hole directly in the center of the label.

    • You may also lift the label if you do not want to puncture it.

    • Remove the five 10mm screws located on the back of the controller using the T8 Security Torx Screwdriver.

    i damaged my screws. how do i get the screws out?

    tenzin -

    wait. i just watched a video guide on ifixit's youtube channel about damaged screws. i'll try those methods.

    tenzin -

    It's a t8 or t9 security bit btw, I got the top two out with a regular T8, but the bottom two and middle needed a T9 Security bit.

    David Loper -

    All five faceplate/backplate screws in the controller I disassembled were T8 security fasteners.

    John Dziedzic -

    Am I doing something wrong because I got the tool it said I needed and got the middle screw out but the others have a bump or something in the center of the screw and it won't fit.

    kolton77 -

    The T8 is only good for the middle screw on my One S controller. The others require something bigger

    Matej Skelo -

    These requires SECURITY Torx bits (they have a cannulated hole in the driver). I don't believe the iFixIt branded driver is cannulated but you can buy a set of bits from DeWalt DWAX200 which is overkill but has what you need.

    jhighsmith -

    The driver that iFixIt sells is cannulated.

    jhighsmith -

    where do you get this dumb ass screw driver

    Jake Zweier -

    iFixit Store #IF145-027-3

    VauWeh -

    You can bypass it with a 1.5mm flathead.

    Marianne Sandling -

    thank you for this. worked for me

    Mr Anderson (Evolluisionist) -

    These screws required a T10, not T8.

    Armand -

    TR9. A $10 kit from Walmart has the bit/driver in it and extra goodies to make life simple.

    Matt Martin -

    As weird as it sounds, the top 2 came out for me with a flathead- but the bottom two and the middle one wont

    macybrooksevans -

    If you damage the middle part of the screws you can still take it out with the same screwdriver.

    Kev God -

    Thank-You :)

    Isaiah -

    needed a T8H, not easy to see.

    on a grey green xbox one controller

    Michael -

    You need a T8 and the kit is not $10 it’s $13.88 Hyper Tough Electronic Kit. In the hardware section at WalMart it a T8 because I tried everything and only a T8 fit it like a magnet. And the dumbass that wrote the article there is only 1 freaking screw.

    Bear Darazs -

  4. CN1rEMvQC3myRLyq
    • Remove the backplate.

  5. hWBUR3YZiAAiU3As
    • Remove the faceplate.

  6. NNC6LRJq6xI5qdZZ
    NNC6LRJq6xI5qdZZ
    Z4CxCEY4hOGMHRyJ
    • Pry off the metal frame around the D-Pad.

  7. ntI1OwRAQWeTlgPp
    • Lift the D-Pad out of its housing.

Conclusion

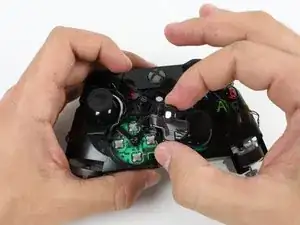
To reassemble your device, follow these instructions in reverse order.

Garrett George

Member since: 22/01/15

5775 Reputation

6 comments

Can you show me how to replace xbox one controller 3.5mm stereo jack dpad

Arief Hidayat -

This model of the xbox one controller does not feature a 3.5mm headphone jack. Please look at the guides for later models of the xbox one controller.

Brandon -

it's exactly the same like shown above :)

David Schmidt -

How do u fix one of the silver things behind the d-pad?

Bob -

How do fix the silver things behind each d-pad

Bob -

I had a unresponsive left-button on my D-pad. It worked consistently only if I pressed very hard. l fixed mine, not with a new D-pad, but by adding a few layers of plastic tape over the press-sensitive “cushion” (the one that the button plastic part of the left d-pad should trigger). That made it much more responsive. It feels slightly different pressing down on the button now, but I can live with that trade-off.

john lastson -