
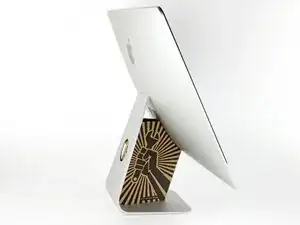
Introduction
Use this guide to replace or upgrade your hard drive.
-
-
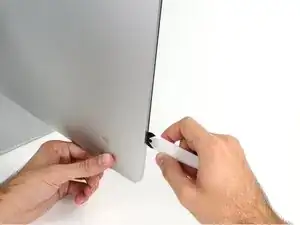
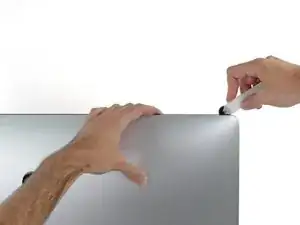
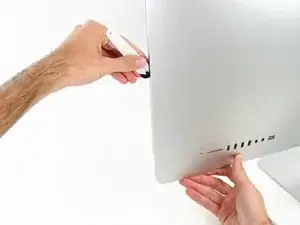
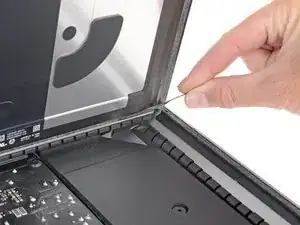
Starting on the left of the display, near the power button, insert the iMac Opening Tool into the gap between the glass panel and the rear enclosure.
-
-
-
Use the tool like a pizza cutter—roll it along through the gap, and it will cut the foam adhesive through the center.
-
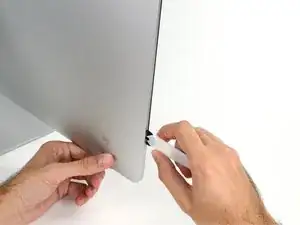
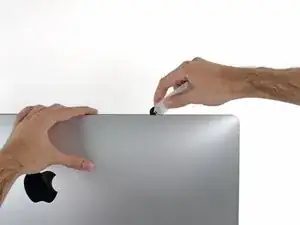
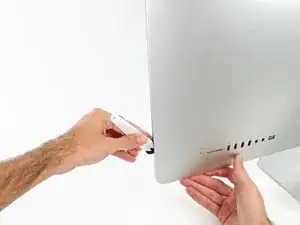
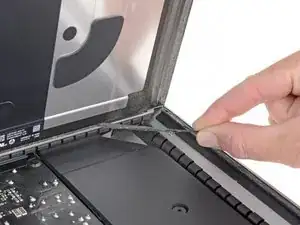
Run the tool up along the left side of the display.
-
-
-
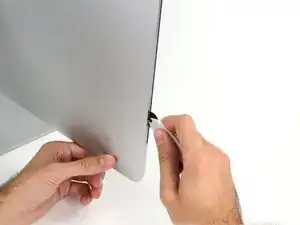
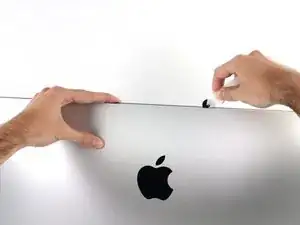
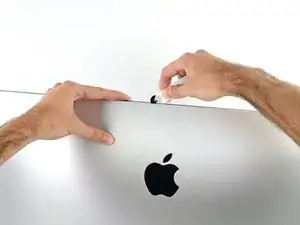
Continue along the top of the display.
-
You may want to run the tool back and forth through what you've already cut a few times, to ensure you get as much of the adhesive separated as possible.
-
-
-
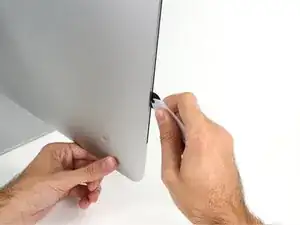
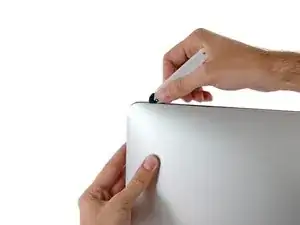
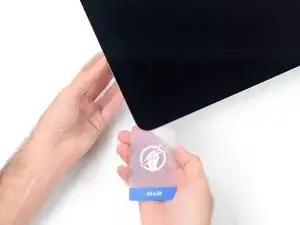
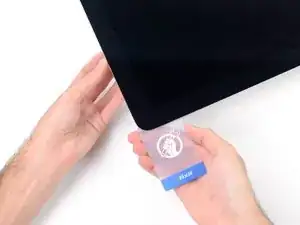
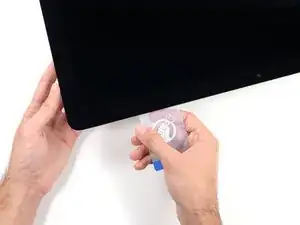
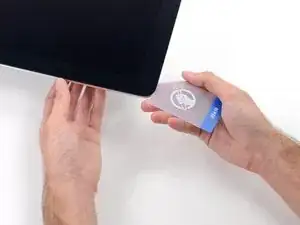
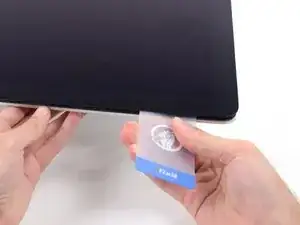
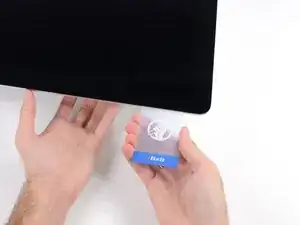
Starting from the top right corner of the iMac, wedge a plastic card between the display and frame.
-
-
-
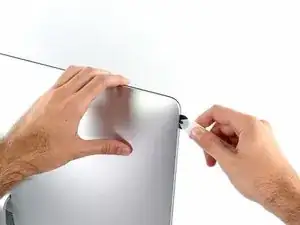
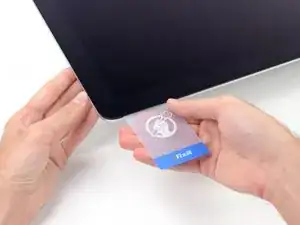
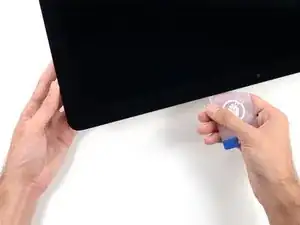
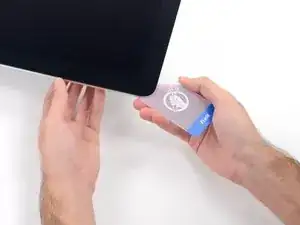
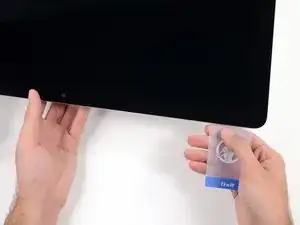
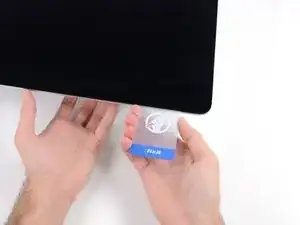
Gently twist the plastic card sideways to create a gap between the display and frame.
-
Move slowly and be careful not to stress the display glass too much—you only need to make a gap of about 1/4".
-
-
-
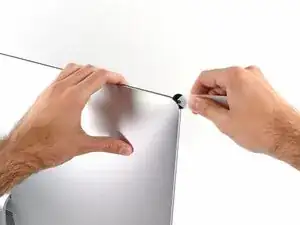
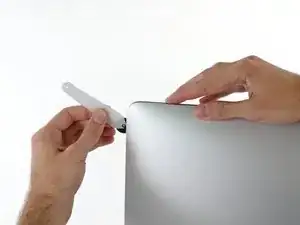
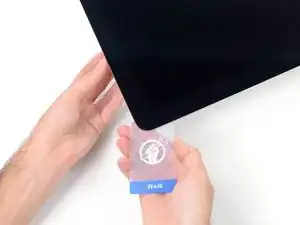
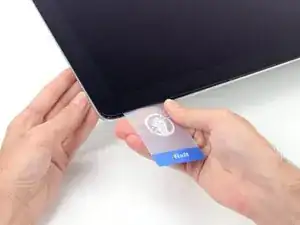
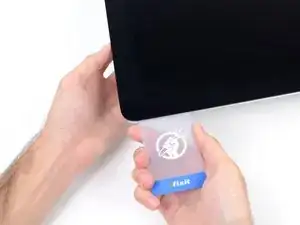
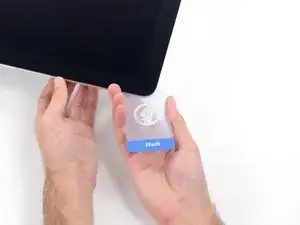
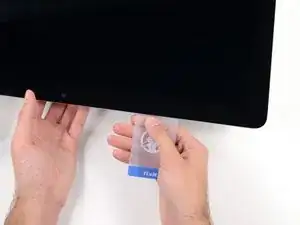
Slide the card toward the center of the display to cut any of the remaining adhesive along the top right corner of the iMac.
-
-
-
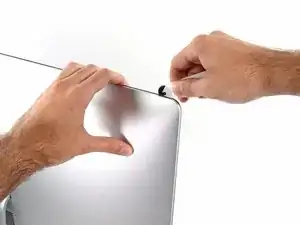
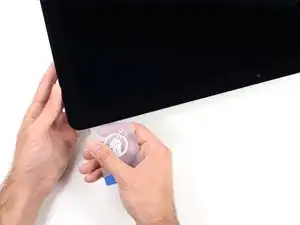
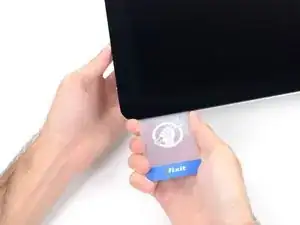
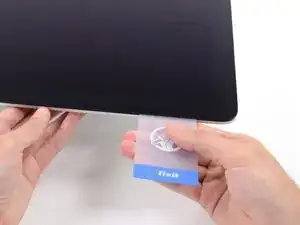
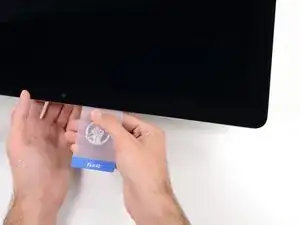
Wedge the plastic card into the top right corner once again and let it stay there to keep the adhesive from resettling.
-
-
-
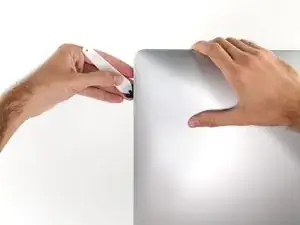
Insert a second plastic card into the gap between the display and frame located at the top left corner of the iMac.
-
-
-
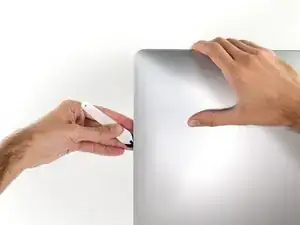
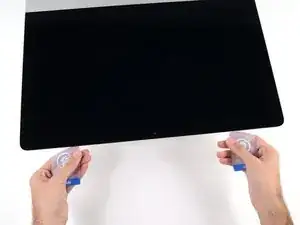
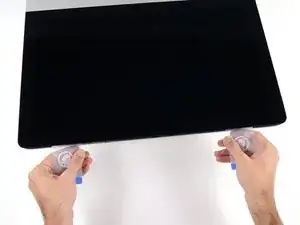
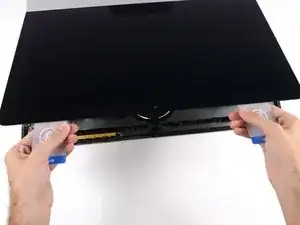
With both plastic cards inserted as shown near the corners, gently twist the cards sideways to increase the gap between display and case.
-
Begin to lift the top of the display up from the frame.
-
-
-
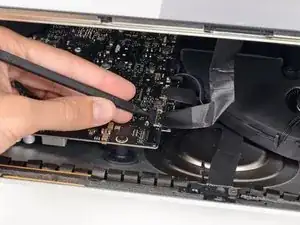
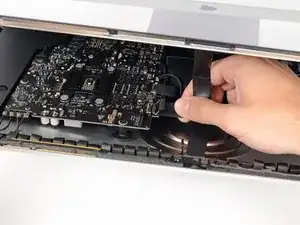
While holding the display up with one hand, use the other hand to unplug the display power cable. Make sure that you pull the cable out from the plastic tab, and not by pulling on the color wires.
-
-
-
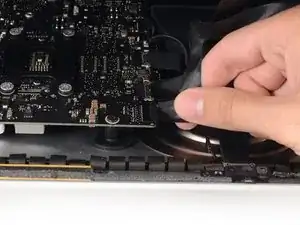
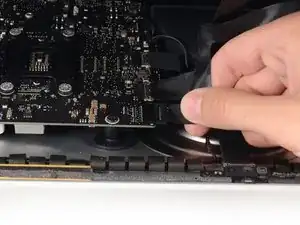
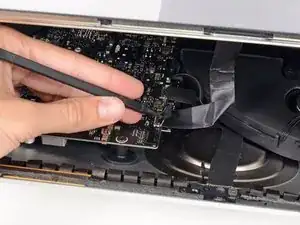
Use the tip of a spudger to flip up the metal retaining bracket on the display data cable.
-
Carefully pull the display data cable from its socket on the logic board.
-
-
-
Grasp the small tab at the end of one of the bottom edge display adhesive strips and pull the adhesive toward the top of the iMac to remove it.
-
Repeat this step with the other adhesive strip and remove it.
-
-
-
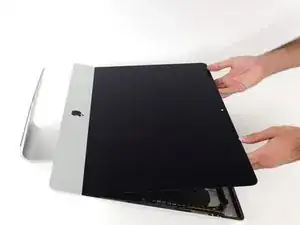
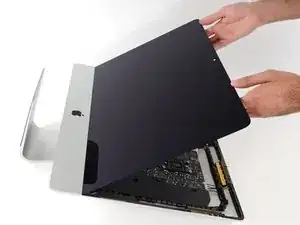
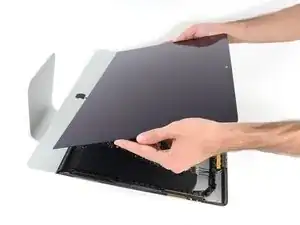
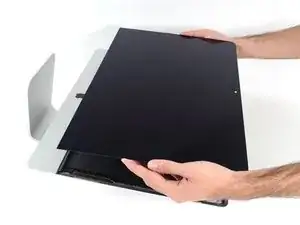
Lift the display up from the frame and remove it from the iMac.
-
It may be necessary to slowly lift from one side, to peel against the remaining adhesive.
-
-
-
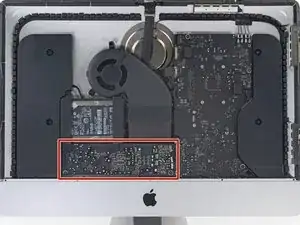
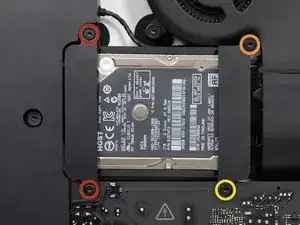
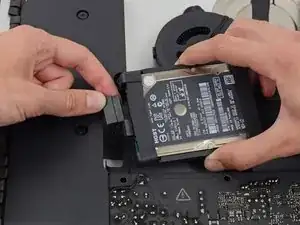
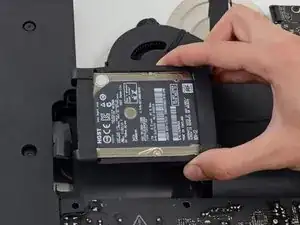
Remove the following screws securing the hard drive bracket to the rear enclosure:
-
Two 21 mm T10 Torx screws from the left-hand hard drive bracket.
-
One 9 mm T10 Torx screw.
-
One 27 mm T10 Torx screw.
-
-
-
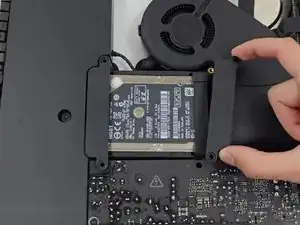
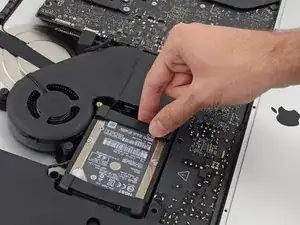
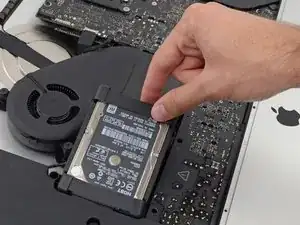
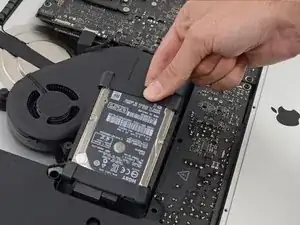
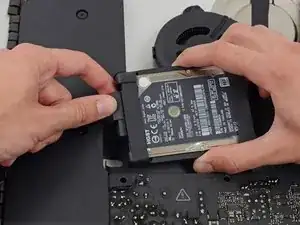
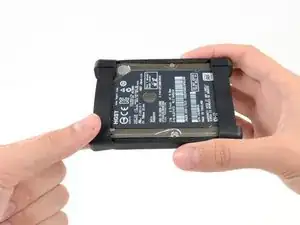
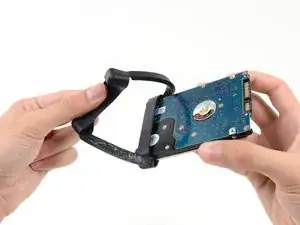
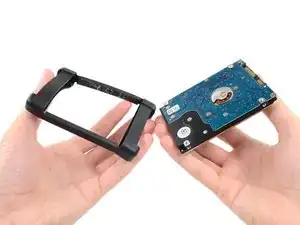
Continue peeling the hard drive sleeve off the adhesive securing it to the hard drive.
-
Remove the sleeve from the hard drive.
-
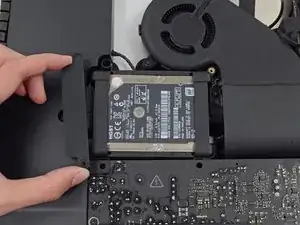
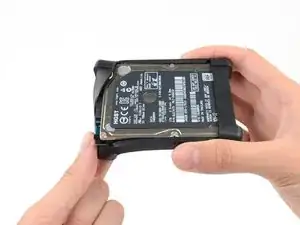
Hard Drive remains.
-


To reassemble your device, follow these instructions in reverse and use our Adhesive Strips Guide to reattach the display glass.

40 comments
I used the iMac Opening Tool just as shown in this guide to separate the tape. DISASTER! The screen cracked! I used the tool slowly and carefully and despite this, the screen cracked. I should have simply used a guitar pick. That said, while I was inside my iMac replacing the Harddisk with a SSD, which was pretty easy to do, I decided to also see if I could replaced the 8GB RAM with 16GB RAM WITHOUT removing the logic board, as shown in other instructions on this site. I found that by simply removing the fan assembly, this makes enough room to reach behind the logic board and unclip the 2 memory modules. I installed 2 8GB modules (1600MHz DDR3L SO-DIMM PC12800 204 Pin) without much trouble. I used a plastic stick to reach behind the logic board and unclip the existing memory modules, then carefully inserted the new ones and clipped them into place. This is much easier than removing the power supply and logic board and all of the associated connectors and screws.
gcortesi -
I had to replace the HD as it failed after less than two years. It was a good opportunity to increase the RAM from 8 to 16 GB. So I ordered the RAM chips from Kingston and a 256 GB SSD from Angelbird.
The repair went smoothly: to anyone trying this, please carefully follow the iFixit step-by-step guide. I recommend reading at least twice the whole procedure *before* beginning. Check all the photos. During the operation itself, I had the guide open before my eyes on my iPad and followed it step by step. The opening tool is a bit fragile, the wheel got damaged after the operation, but I guess it was designed to be used only once. After all, the adhesive strips can also be used only once!
For those replacing the hard-disk with an SSD: I highly recommend the Angelbird model "SSD wrk for Mac" (http://www.angelbird.com/en/prod/ssd-wrk...), for several dollars more you spare yourself the need to use additional software to enable TRIM or persuade the fans of your Mac that the HD's temperature is Ok.
lix -
Thanks for the tip on the Angelbird, working smoothly so far!
Elling -
Hi! Thanks for the tip! Do you know if can I put an SSD on an imac 21.5 in late 2012 ?
after changing the hard drive the monitor no longer works. Apple won't fix it because I opened it, and third-part wants to charge me $300-500. Hope you guys have better luck!
max -
I have (21.5 inch, mid 2017, 2.3 ghz) base model same as this but not 4k. How much max ram can I install in my iMac??
Narendra Verma -
This guide contains many extra steps for what should be a straight forward, simple parts replacement without disturbing more than the display, left hand speaker and removal of 4 logic board screws for play. Nothing else except for the left hand speaker wire & iSight cable from logic board, the lower support bracket and loosening the speaker so as to move it around a bit.
For the ram, I bent a pair of cheap tweezers long ago supplied with these replacement kits to the perfect angle for holding, locating and inserting the ram into the slots under the logic bd after moving each retainer w/spudger and popping out the old. Pay attention to the orientation of the ram when removing/inserting the ram! An automotive mirror is handy along with a small flashlight for closeups. Once the ram is aligned properly substitute your fingers for the tweezers, ease it into the slot, push up & engage! Reinstall screws and all else. I have done this job successfully this way countless times. For a tweezers pic contact me!
Ross Elkins -
Additionally, if a blade is present, I install the OSx system on the blade and everything else, apps and home folders on the new SSD. You get the very fast boot off of the blade and the full ssd for all else!
Ross Elkins -