Introduction

Prereq to remove heat sink for replacing CPU

  1. ClBFCYgI6U1uWgGa
    ClBFCYgI6U1uWgGa
    hxFxURx1JUQla5jN
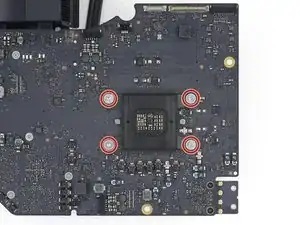
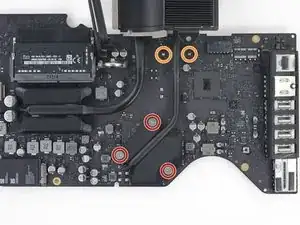
    • Peel off the four black tamper-evident stickers covering the heat sink mounting screws.

    • Remove the four T10 screws that secure the heat sink from the backside of the logic board.

    • During reassembly, tighten these screws one full turn at a time, alternating in a cross pattern. This will gradually increase the clamping pressure evenly across the surface of the CPU. Continue gradually tightening the screws until they're snug and the entire spring plate lays flat against the logic board.

  2. BYWrI4IZZLWR3diV
    BYWrI4IZZLWR3diV
    Qlulc6wRxL2ZvVM1
    • Lift the heat sink retaining spring and its bracket off the logic board.

  3. weK1cPOq2aXmXbDH
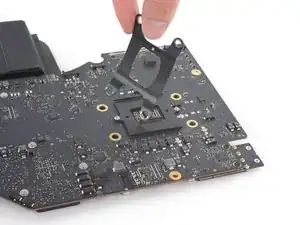
    • Fully loosen the three captive T8 screws securing the heat sink over the GPU.

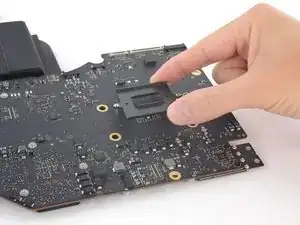
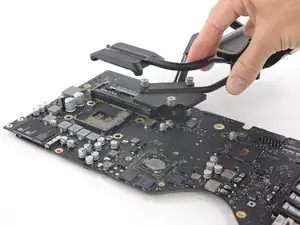
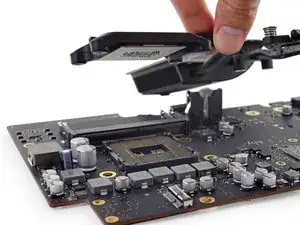
    • Remove the two 5.4 mm T8 screws securing the heat pipe to the logic board.

  4. OFfJVIdyiLW5nqCE
    OFfJVIdyiLW5nqCE
    P1yTOJKJamutJKle
    • Note that the CPU will most likely remain stuck to the underside of the heat sink as it's lifted out. Take care not to damage it.

    • Lift and remove the heat sink assembly from the logic board.

Conclusion

To reassemble your device, follow these instructions in reverse order.

Adam O'Camb

Member since: 11/04/15

178568 Reputation

0 comments