Introduction

Prereq for removing the display.

  1. xew1BWp2BZwFMbWh
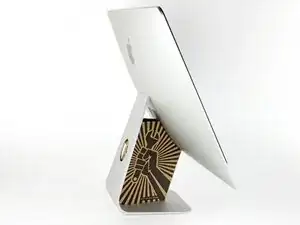
    • With the hinge free to move, the iMac will be unbalanced and hard to work on. Place an iMac service wedge, in the stand to stabilize the iMac.

    • If you are using the iFixit cardboard service wedge, follow these assembly directions to put it together.

    • Before beginning any work on your iMac: Unplug the computer and press and hold the power button for ten seconds to discharge the power supply's capacitors.

    • Be very careful not to touch the capacitor leads or any exposed solder joints on the back of the power supply. Only handle the board by the edges.

    Maybe your directions should suggest fixers to buy RAM cards in pairs. I wanted 32 Gig of RAM, and I bought and installed one 32 G RAM and while it seems fine, one source told me it would be 5-10% faster if I had put in two 16 RAM cards. Is that accurate?

    BRUCE CLARKE -

    it would at least be that much faster, in theory some applications should run twice as fast

    blakebest -

  2. M42hmSlBUbk6PbHC
    M42hmSlBUbk6PbHC
    YmEFhp4dqiXysxIN
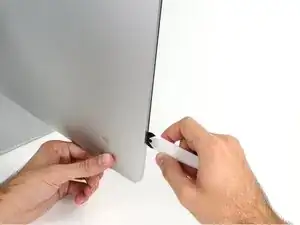
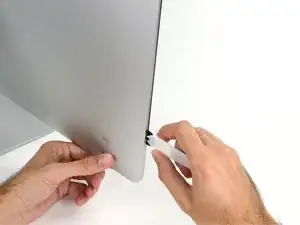
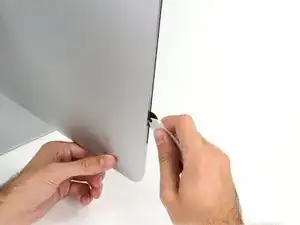
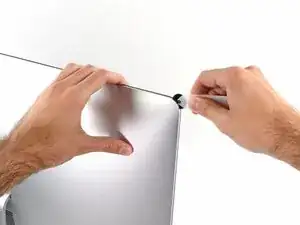
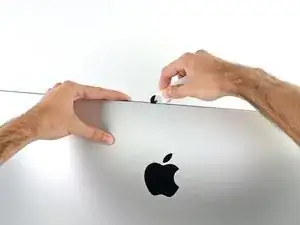
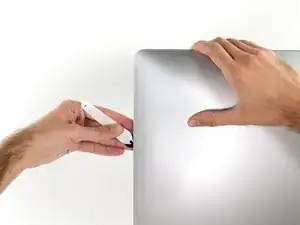
    • Starting on the left side of the display, near the power button, insert the iMac Opening Tool into the gap between the glass panel and the rear enclosure.

    • The hub on the iMac Opening Tool will keep you from pushing the wheel in too far. If using a different tool, insert no more than 3/8" into the display. Otherwise, you risk severing antenna cables and causing serious damage.

  3. cOVEfbnXgUttrW2b
    cOVEfbnXgUttrW2b
    FlMUC3pRXZOFhcoB
    tKQWoCGakrogQTPD
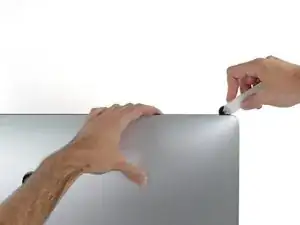
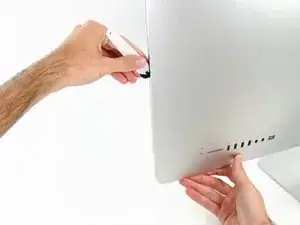
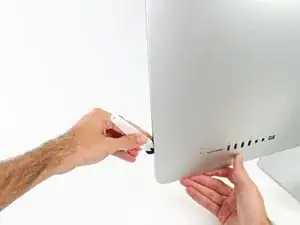
    • Use the tool like a pizza cutter—roll it along the gap, cutting the foam adhesive in between the frame and display.

    • Be sure to always push with the cutting wheel forward. If you pull, the wheel might get pulled out of the handle.

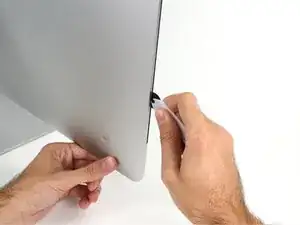
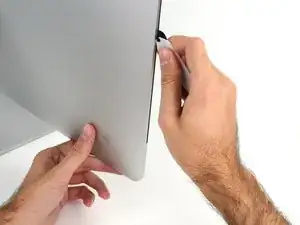
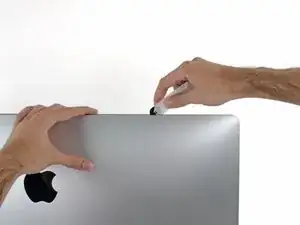
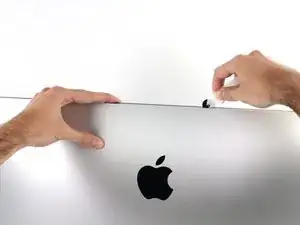
    • Run the tool up along the left side of the display.

  4. tSAS3Jn3qghgZJDe
    tSAS3Jn3qghgZJDe
    KCyqluPop5fjDYAE
    IqxfhhMDuT5ibx1P
    • Continue running the tool up around the top left corner.

  5. Gr5frklRP5SSCfcs
    Gr5frklRP5SSCfcs
    ja4mM4JMGPU2UVrV
    • Cut the adhesive along the top left of the display.

  6. NZSSQT4P2YuyMtAf
    NZSSQT4P2YuyMtAf
    BudRMK2UCrSCEYOO
    • Continue along the top of the display.

    • You may want to run the tool back and forth a few times to ensure you completely cut through the adhesive.

  7. AFpWIRNam5smLYMl
    AFpWIRNam5smLYMl
    RXhs3VgToDNZiJpM
    gxF3JYbbkAp4VTJN
    • Push the tool around the top right corner of the display.

  8. RZ6ybv2fcA12MLAL
    RZ6ybv2fcA12MLAL
    yfJAyWOQtfxUkTCE
    • Push the tool down along the right side of the display.

  9. MbfslBJoWVDXS5kR
    MbfslBJoWVDXS5kR
    NoNsLWkB1JuDpsvo
    • Finish pushing the opening tool to the bottom of the right side of the display.

    • At this point, you'll want to run the tool back around the entire display, to ensure you cut as much adhesive as possible.

  10. 1OOl3uQ3SUHBD5XD
    1OOl3uQ3SUHBD5XD
    65vvKRUNKxVKGOwY
    lPpjVUkv1sMMaSav
    • While the opening tool cut most of the adhesive, the display will still be slightly adhered to the case. A plastic card will be necessary to free up the last of this adhesive.

    • Set the iMac face-up on a table.

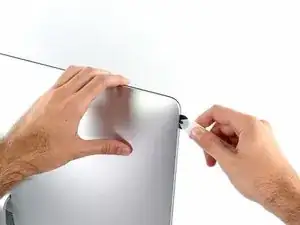
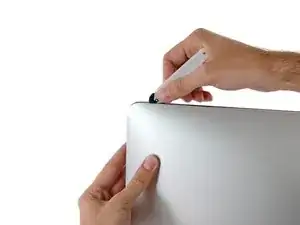
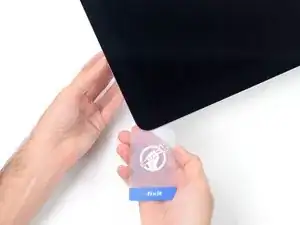
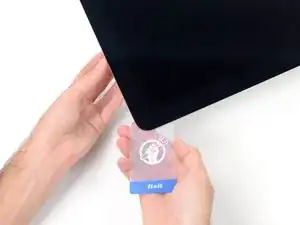
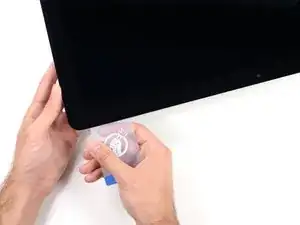
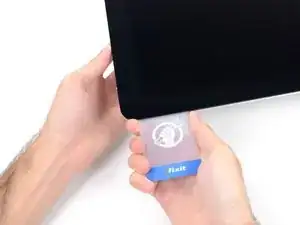
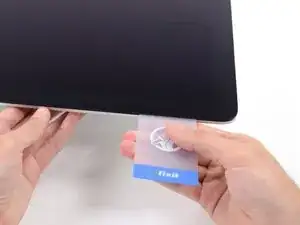
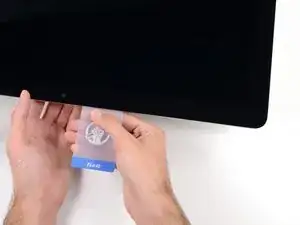
    • Starting from the top right corner of the iMac, wedge a plastic card between the display and frame.

    • Be careful not to insert the plastic card more than 3/8", or you may damage internal components.

    9.5mm in the rest of the world

    Tal Glazer -

  11. TwUkxBqp3WUU5SQM
    TwUkxBqp3WUU5SQM
    nMscaGHNZwiXWGTU
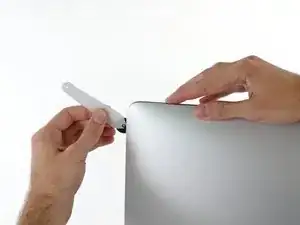
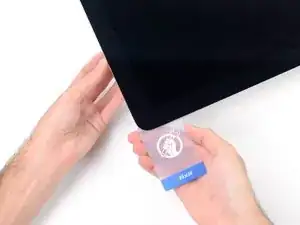
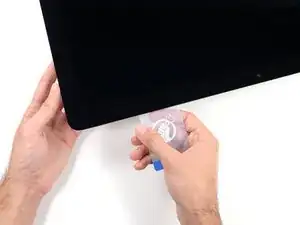
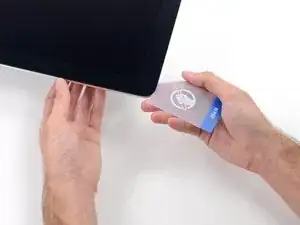
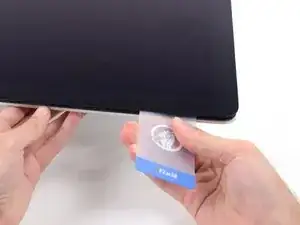
    • Gently twist the plastic card sideways to create a gap between the display and frame.

    • Move slowly and be careful not to stress the display glass too much—you only need to make a gap of about 1/4".

    Which is around 6.5mm

    Tal Glazer -

  12. 5H2mrXvL1GqHCbMH
    5H2mrXvL1GqHCbMH
    JAkiWZj5Ho4yNTYo
    EskKkKR4VOrJcuhl
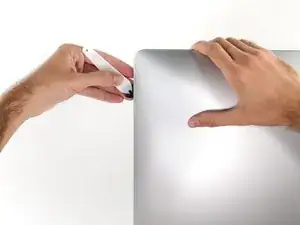
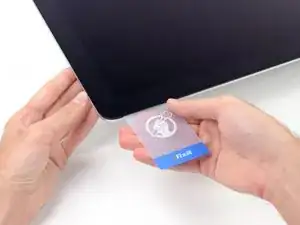
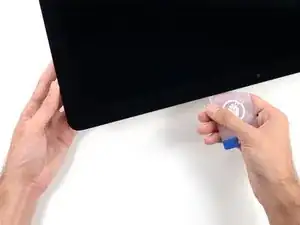
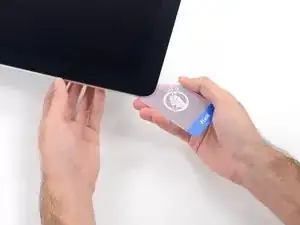
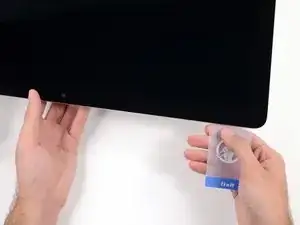
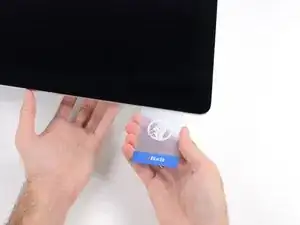
    • Slide the card toward the center of the display to cut any of the remaining adhesive along the top right corner of the iMac.

    • Be sure to stop before the iSight camera, or you may damage it.

  13. QVKUQYp4K6pmbyjX
    QVKUQYp4K6pmbyjX
    OgKJPO6IXFXkEDtt
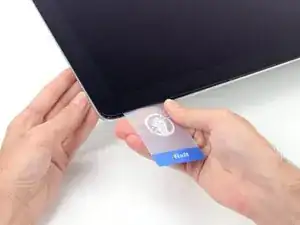
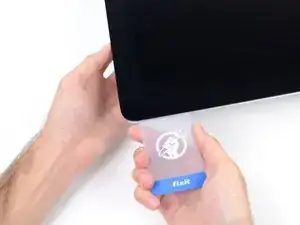
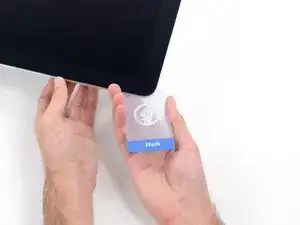
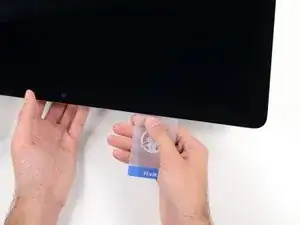
    • Wedge the plastic card into the top right corner once again, and leave it there to prevent the adhesive from resticking.

  14. YLlxXZGUiVKXEPX1
    YLlxXZGUiVKXEPX1
    d2mHEVkqOtcoxt62
    aybCLgwrfPOFlWjR
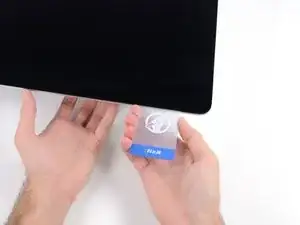
    • Insert a second plastic card into the gap between the display and frame near the top left corner of the iMac.

  15. WfyVK51oSKrP4Zmm
    WfyVK51oSKrP4Zmm
    Hcaw4qZgJJXva4Ls
    • Gently twist the card upward, slightly increasing the space between the display and frame.

    • As with the other side, twist slowly to allow the adhesive time to separate, and be careful not to over-stress the display glass.

  16. yXDZaJkjPkEAcVep
    yXDZaJkjPkEAcVep
    iGsPuW6mkoqZTeWO
    YFQAcDZXTypgc4kn
    • Slide the plastic card toward the center.

    • Stop sliding just before the iSight camera to avoid damaging the camera.

  17. 6eIbW1PCSMq6Bers
    6eIbW1PCSMq6Bers
    pd3AFHwUgYpc4dtt
    • Wedge the plastic card back into the top left corner.

  18. GOUrhY1NeK1fcLaC
    GOUrhY1NeK1fcLaC
    QRPTMuatYNuyUKMD
    NfjmyRMmXDIgiVec
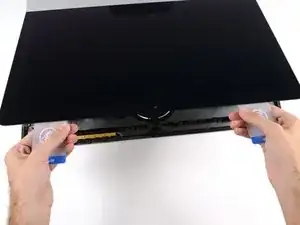
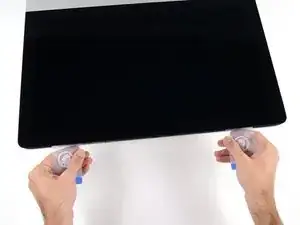
    • With both plastic cards inserted as shown near the corners, gently twist the cards sideways to increase the gap between display and case.

    • If there are any sections that seem to stick and won't separate, stop twisting and use one of the cards to cut the remaining adhesive.

    • Begin to lift the top of the display up from the frame.

    • Only lift the display a few inches—the display data and power cables are still connected to the logic board.

Conclusion

To reassemble your device, follow these instructions in reverse order.

Adam O'Camb

Member since: 11/04/15

178619 Reputation

0 comments