
Introduction
Use this guide to replace a worn-out or dead battery in your iPhone 14 Plus.
iPhone batteries are rated to hold 80% of their capacity for up to 500 charge cycles, which lasts roughly 18-24 months for most users. After that, your iPhone may need to be charged far more frequently, and iOS may warn you that performance is affected (in other words, your phone will run slower).
This guide was created using the A2886 (international) model. If you're fixing a different iPhone 14 Plus model, there may be some visual discrepancies, but the procedure should be the same.
For your safety, discharge the battery below 25% before disassembling your device. This reduces the risk of fire if the battery is accidentally damaged during the repair. If your battery is swollen, take appropriate precautions.
Note: After the repair, your iPhone may display a warning about the “genuineness” of the battery, even when using original Apple parts. If your iPhone functions normally, you can safely ignore the warning.
You’ll need replacement adhesive to reattach the battery and the screen when reassembling the device. Your device will function normally, but will most likely lose its IP (Ingress Protection) rating.
-
-
Power off your iPhone before beginning disassembly.
-
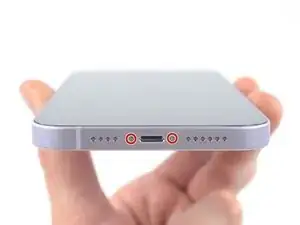
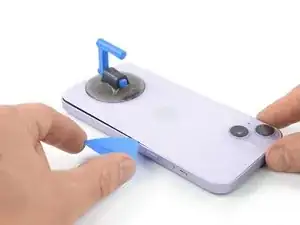
Remove the two 6.8 mm-long pentalobe P2 screws at the bottom edge of the iPhone.
-
-
-
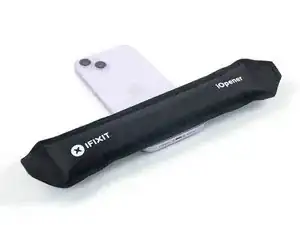
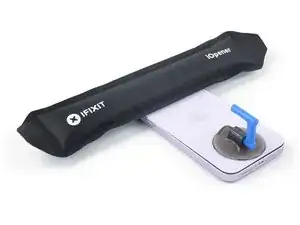
Apply a heated iOpener to the bottom edge of the rear glass to loosen the adhesive underneath. Apply the iOpener for at least 2 minutes.
-
-
-
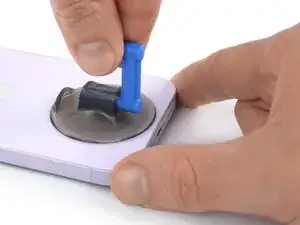
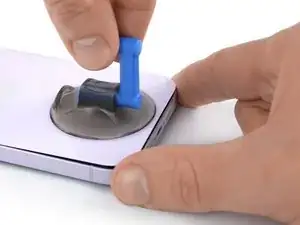
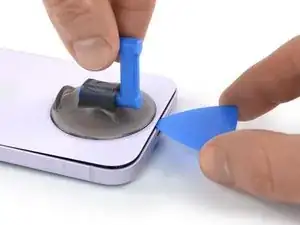
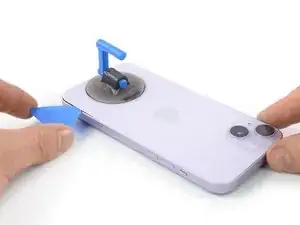
Apply a suction handle to the bottom edge of the rear glass, while avoiding the very edge of the glass.
-
Pull up on the suction cup with firm, constant pressure to create a slight gap between the rear glass and the case.
-
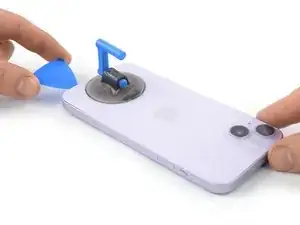
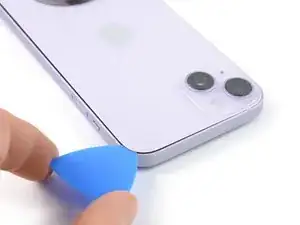
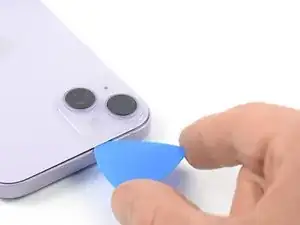
Insert an opening pick into the gap.
-
-
-
Apply a heated iOpener to the left edge of the rear glass to loosen the adhesive underneath. Apply the iOpener for at least 2 minutes.
-
-
-
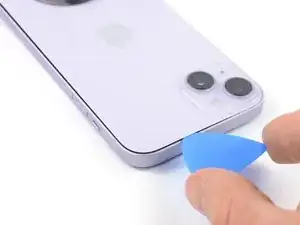
Slide the opening pick around the lower left corner and up the left edge of the iPhone, slicing through the adhesive holding the rear glass in place.
-
-
-
Apply a heated iOpener to the right edge of the rear glass to loosen the adhesive underneath. Apply the iOpener for at least 2 minutes.
-
-
-
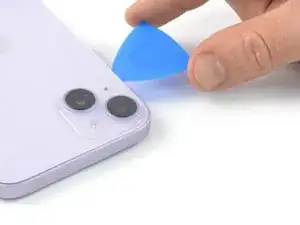
Re-insert your pick at the bottom edge of the iPhone, and slide it up the right side to continue separating the adhesive.
-
-
-
Apply a heated iOpener to the top edge of the rear glass to loosen the adhesive underneath. Apply the iOpener for at least 2 minutes.
-
-
-
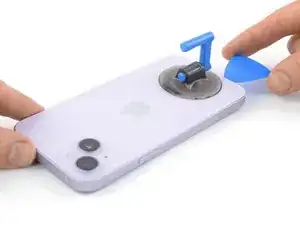
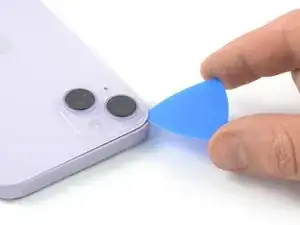
Insert your pick underneath the top right edge of the phone. Slide it around the top-right corner and halfway across the top edge.
-
-
-
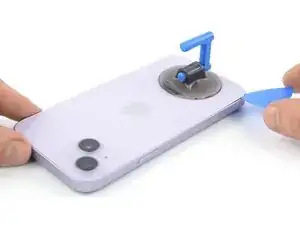
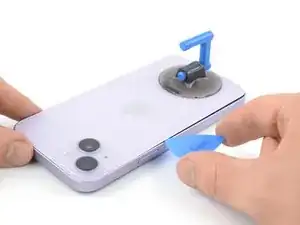
Insert your pick underneath the top-left edge of the phone. Slide it around the top-left corner and halfway across the top edge.
-
-
-
Remove your suction handle from the rear glass.
-
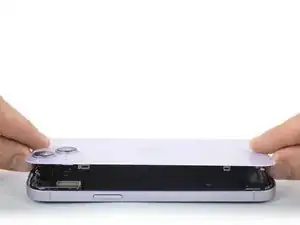
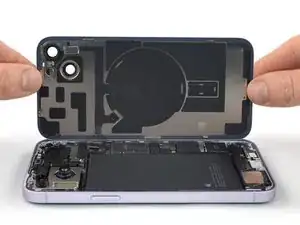
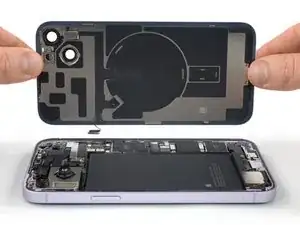
Slowly open your iPhone by swinging the rear glass up from the left side, like the back cover of a book.
-
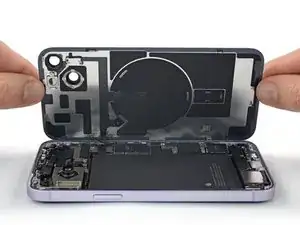
Lean the rear glass against something to keep it propped up while you're working on the phone.
-
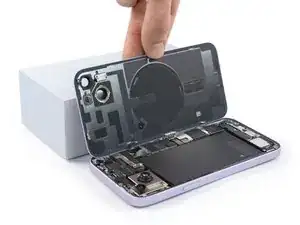
If you don't have anything at hand to lean the rear glass against, your suction handle can do the trick.
-
-
-
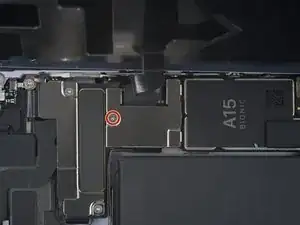
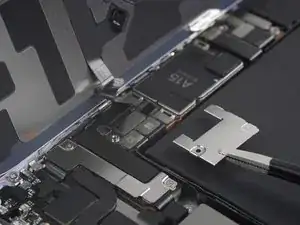
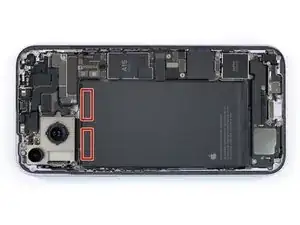
Use a Y000 screwdriver to remove the two 1.3 mm-long screws securing the battery connector cover.
-
-
-
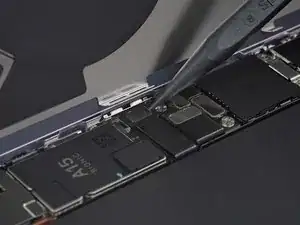
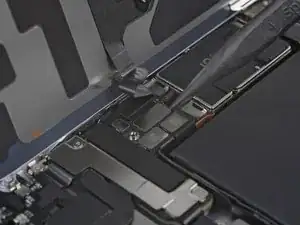
Use the pointed end of a spudger to disconnect the battery cable by prying the connector straight up from its socket.
-
Bend the connector slightly away from the logic board to prevent it from accidentally making contact with the socket and providing power to the phone during your repair.
-
-
-
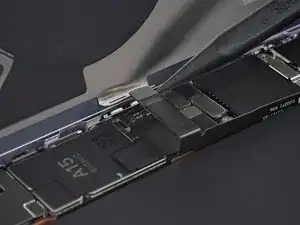
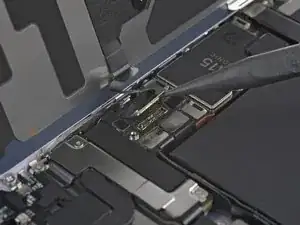
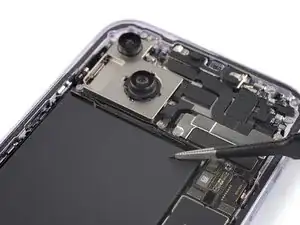
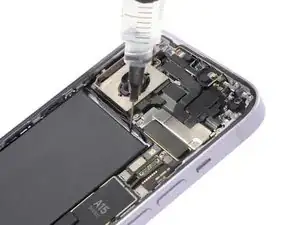
Use a Y000 screwdriver to remove the single 1.0 mm-long screw securing the charging coil connector cover.
-
-
-
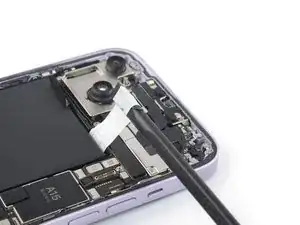
Use the pointed end of a spudger to disconnect the charging coil cable by prying the connector straight up from its socket.
-
-
-
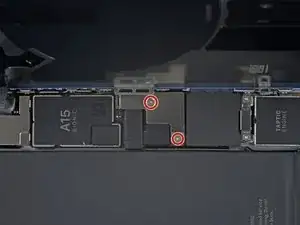
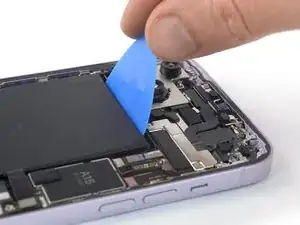
Each adhesive strip has a black pull-tab at the end, which is lightly adhered to the edge of the battery.
-
-
-
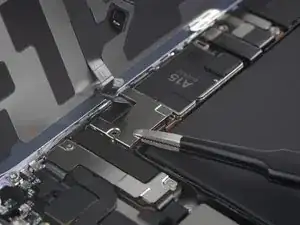
Use a pair of blunt-nosed tweezers to peel up the two battery adhesive pull-tabs along the top edge of the battery.
-
-
-
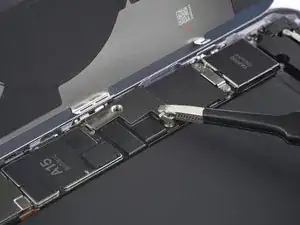
Grab the first pull-tab with your fingers or wrap it around a spudger and slowly pull it away from the battery, toward the top of the iPhone.
-
Pull out hard enough to maintain tension on the strip, but don't force it. Give it plenty of time to stretch and un-stick from under the battery.
-
Don't press down on the battery but hold the iPhone firmly by its sides.
-
Keep the strip flat and unwrinkled. Try to pull evenly on the whole strip, rather than pulling mainly in the middle or on one side.
-
If the adhesive strip breaks off, try to retrieve it using your fingers or blunt tweezers, and continue pulling—but do not pry under the battery.
-
-
-
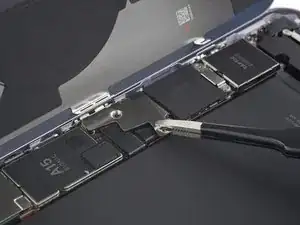
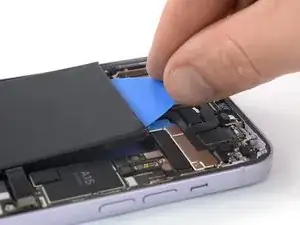
Grab the second pull-tab with your fingers or the center of a spudger and pull it away from the battery, toward the top of the iPhone.
-
Follow the same procedure as with the previous strip: don't press down on the battery, keep the strip flat and unwrinkled, and pull at a low angle.
-
If the adhesive strip breaks off, try to retrieve it using your fingers or blunt tweezers, and continue pulling—but do not pry under the battery.
-
-
-
If you're still having trouble removing the battery, apply a few drops of high concentration (90% or higher) isopropyl alcohol under the edge of the battery in the area of the broken adhesive strip(s).
-
Wait about one minute for the alcohol solution to weaken the adhesive.
-
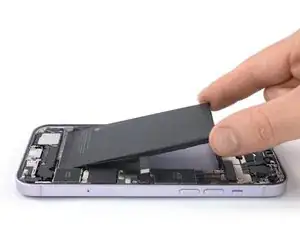
Use an opening pick or the flat end of a spudger to gently lift the battery.
-


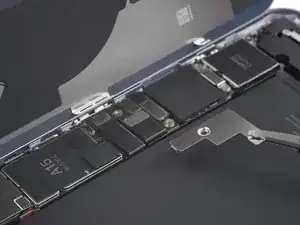


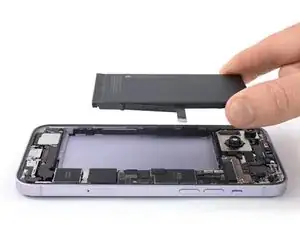
If possible, turn on your device and test your repair before installing new adhesive and resealing.
To reassemble your device, follow these instructions in reverse order. During reassembly apply new adhesive where necessary after cleaning the relevant areas with isopropyl alcohol (>90%).
For optimal performance, calibrate your newly installed battery after completing this guide.
Take your e-waste to an R2 or e-Stewards certified recycler.
Repair didn’t go as planned? Try some basic troubleshooting, or ask our Answers community for help.
