Introduction
Internal prerequisite.
Tools
-
-
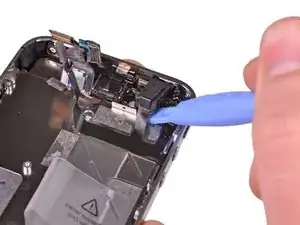
Use a plastic opening tool to start to pry the headphone jack out of its recess in the rear case.
-
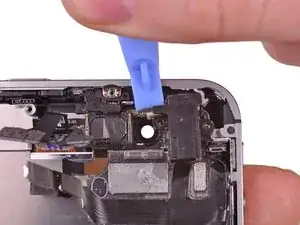
Then use the opening tool to gently peel the microphone up from the adhesive securing it to the top of the rear case.
-
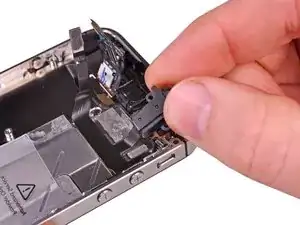
Remove the headphone jack assembly from the rear case, being careful not to tear the microphone flex cable.
-
-
-
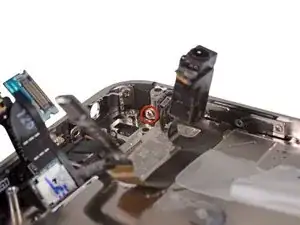
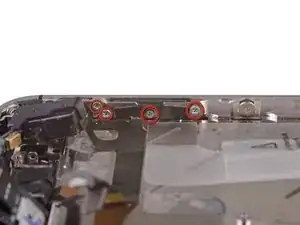
Remove the four 1.5 mm Phillips screws securing the volume button and silent switch brackets to the outer case.
-
-
-
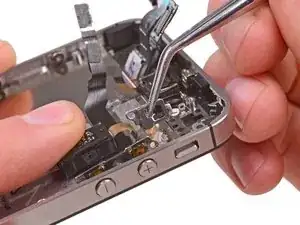
Carefully peel the headphone jack/volume button cables off the adhesive securing them to the rear case.
-
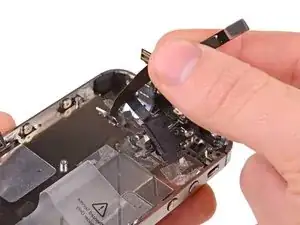
Remove the headphone jack cable assembly from the iPhone.
-
Conclusion
To reassemble your device, follow these instructions in reverse order.

Pay really careful attention to the position of the Microphone on the upper left side of the headphone jack. I managed to break it twice. It is sturdy but it cannot be twisted .
My biggest problem was I didn't quite remember where it fit in, and the images do not clearly show it, so look carefully at that before you remove it.
keitarusm -
When I took out the old headphone jack assembly the secondary mic was still attached to the housing because there was so much adhesive on it. be very careful when taking the old unit off so as not to remove the adhesive part unless you have more of it.
Nephew -
As the other comments say, you have to be very careful about removing the secondary (top) mic at the same time as the headphone jack. The secondary mic is tethered very tight to the jack with a flex at the very top of the phone housing, and it is easy to break this connection. This is important to pay attention to if you are following this guide in an attempt to move the headphone jack out of the way for another repair.
cpwittenberg -
The part is very small but if you are replacing the headphone jack, the mic is part of it. It it's important to know the position of of how the ribbon cable is bent. I used tweezers to pry the mic from the mic box but an exacto blade would had done a cleaner job. I got a good pic but at the time of this comment I was into fixing the phone. ;'D
rhinotek1 -
There should be a warning in this step. The mic is actually a part of the headphones jack. it is not mentioned in the guide, and when you're pulling out the jack you're ripping off the mic ribbon that sits below the jack.
ducatipatataj -
Here's another one who tore off the secondary mic. :/ I came here to pop out the headphone jack so I could replace that corner 1.5 mm Philips, in the process of a screen replacement. So now I have another job! I don't mind since it was my own f-up, but I'll add a comment on the other process in order to draw attention to the secondary mic being easy to tear off.
Another problem: strangely, the headphone jack won't fit back in. I'm fearful of pressing too hard, in case something else gets messed up - but in preparation for replacing it, I wanted to practice getting the jack in.
I think the tiny metal part of the frame (with a small circle in it, visible right above the headphone outlet in step 31) is bent, somehow. Any advice for me?? I would appreciate it!
suzanneb -
Any tips on doing what was done in picture 2?
Lua Tech -