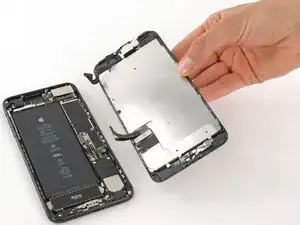
Introduction
Prereq only for detaching the display assembly.
-
-
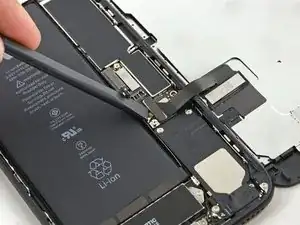
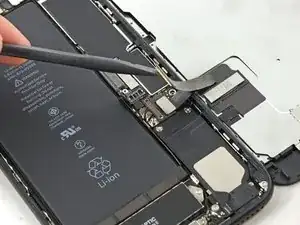
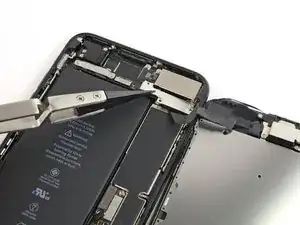
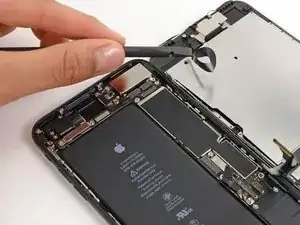
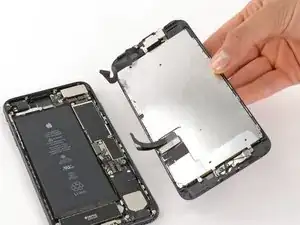
Use the flat end of a spudger or a fingernail to disconnect the two lower display connectors by prying them straight up from their sockets on the logic board.
-
-
-
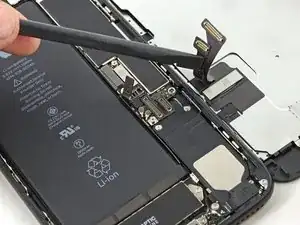
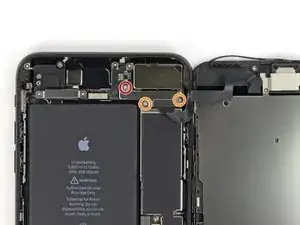
Remove the three tri-point Y000 screws securing the bracket over the front panel sensor assembly connector:
-
One 1.3 mm screw
-
Two 1.0 mm screws
-
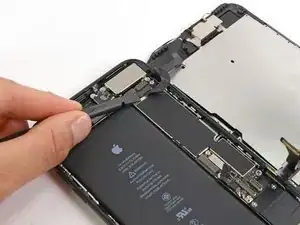
Remove the bracket.
-

Conclusion
To reassemble your device, follow these instructions in reverse order.

The note about the danger of pressing on the connector incorrectly is very legitimate. Though I find it more practical to use a wide (1.5 cm) case opener tool to press it down all at once. Minimizes risk of bending the connector.
Talon -
What can happen if the battery is not disconnected before the two lower display connectors?
Alextay -
Hello, by my expierence and what i have learned iphone repair videos you can ‘blow up’ capacitors which one in logic board, screen is sensetive with voltages and etc….
Darius Varanavičius -
what are my options if the display connector broke? can it be replaced or do I need to get a whole new screen?
matomach -
When I removed the lower display cable bracket in step 12, the top connector stuck to the bracket and became disconnected.
Grant Crawford -
My replacement screen wouldn't sit in the display connector properly, (wouldn't clip in both sides at same time) so I made sure it sat on one and it was lined up and got a thin piece of dense sponge and placed that over the connector, then proceeded to install the connector shield and screen works perfectly fine without a hitch. Very good tutorial just earnt me £25 lol
Joshua Driscoll -
have the same issue, sometimes it doesn’t sit on the left side, other time not on the other, the difference is iphone not starting at all or looping with apple logo reboot…
ibisiki -
Bent the pins on the connector out of place, worked them very carefully back with fine nose tweezers. This was by far the crux of the repair for me.
nicO Gurney -