Introduction
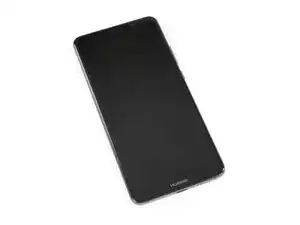
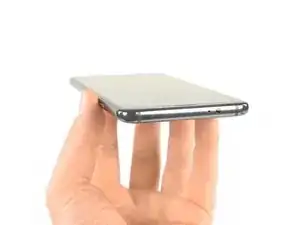
Christmas is ahead and it has got a little bit wintry in flagship harbor these days—but we've been waiting patiently at the end of the dock for the Mate 10 Pro to sail in from Chinese smartphone maker Huawei. And we don't stand in the cold for nothing—after a warm welcome, this new smartphone is going straight to the teardown table. Join us as we examine Huawei's latest offering, piece by piece.
Can't get enough flagship teardowns? Get friendly with us on Facebook, tweet along via Twitter, and hit us up on Instagram to stay up-to-date on all things repair!
-
-
Let's start this teardown with a
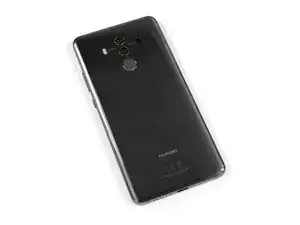
brittlehard fact — Huawei added a glass back to the Mate Pro 10 to align more closely with its competition. -
Does that mean we'll find wireless charging underneath the IP67 certified case? Not according to the specs:
-
Octa-core Kirin 970 and Mali-G72 MP12 GPU
-
6.0" AMOLED Display with a resolution of 1080 x 2160 (402 ppi)
-
Dual 20 MP and 12 MP, ƒ/1.6 main camera unit by Leica
-
8 MP ƒ/2.0 selfie camera
-
Configured with 128 GB storage and 6 GB RAM or 64 GB storage with 4 GB RAM
-
Ships with Android 8.0 Oreo and EMUI 8.0
-
-
-
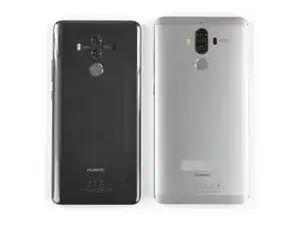
Before we start to deconstruct the Mate 10 Pro, we line it up next to one of its predecessors, the Mate 9—which we also tore down—for a quick comparison.
-
At first glance, differences are fairly minor: there's the new Leica Dual camera with Optical Image Stabilization, and the round fingerprint sensor right beneath it.
-
More noticeable is the new ergonomic curved glass back and a signature stripe highlighting the dual lens cameras.
-
We feel a little bit sad that the camera lenses now go their Separate Ways. But hey, it is a necessary sacrifice to embrace the new Digital Frontier.
-
-
-
We still remember the opening of the Mate 9 and reach for our screwdriver, only to have a shocking realization—there's nothing here to unscrew!
-
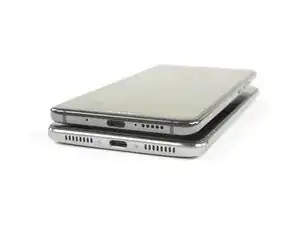
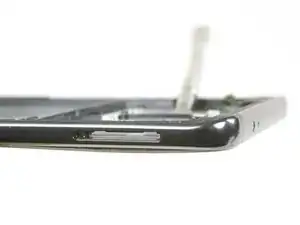
A moment later we make another shocking discovery – there is no headphone jack! It seems we can't listen to music whilst we pry the 10 Pro open.
-
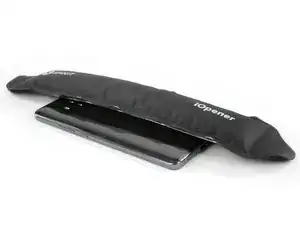
In the absence of any twistable fasteners, we drop an iOpener and start heating the back of the phablet. Given that IP67 rating, perhaps we should have expected a bit of trouble.
-
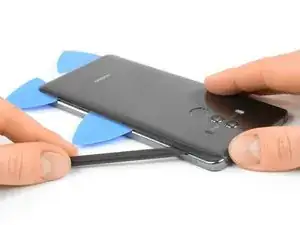
We position an iSclack and start to slice around the aluminum frame with a Halberd Spudger...
-
-
-
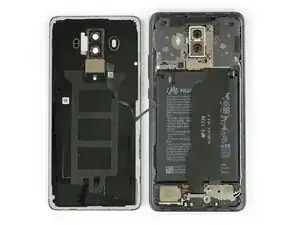
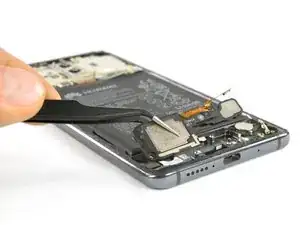
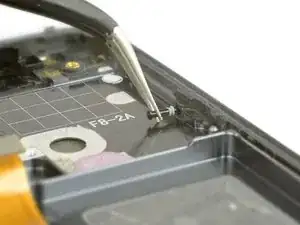
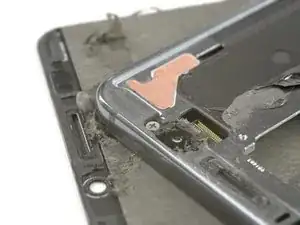
Surprisingly, the heated adhesive doesn't stick too well to the back cover, and with the use of some Opening Picks we separate it from the main body. Is this the reason for the liquid damage indicators on the back cover and this beefy fingerprint sensor cable bracket?
-
Like the Mate 9, the 10 Pro's fingerprint flex cable still tethers the back cover to the rest of the phablet.
-
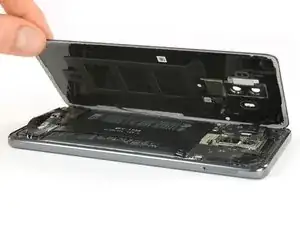
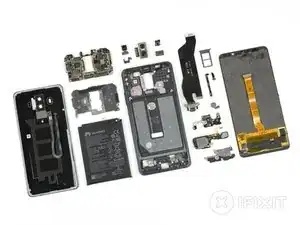
Behold, the wonderful inner workings of Huawei's new flagship! The first thing to catch our eye is a huge flex cable running from the daughterboard up to the main board, where all the exciting chips live.
-
-
-
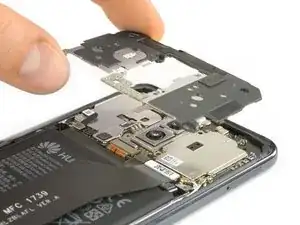
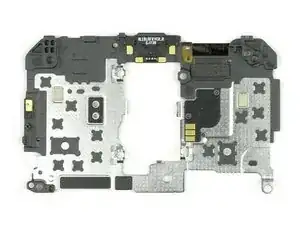
The Mate 10 Pro's valuables are well protected, and covered with a large metal shield.
-
Proceeding with our teardown, we remove one of the many liquid indicators and all the Phillips screws we can find, as well as a small metal shield covering the flex connection for the fingerprint sensor.
-
With everything duly unscrewed, we gleefully rub our hands in anticipation of what we'll find. Next to come out: the large shield holding the dual-LED flash, which protects all flex connections and contacts on the motherboard.
-
-
-
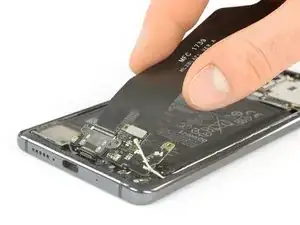
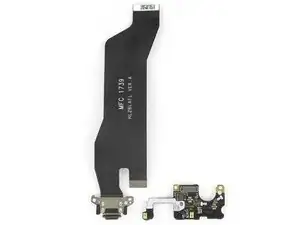
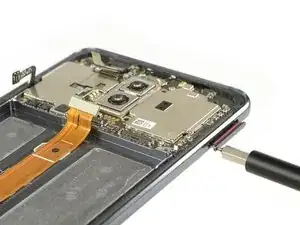
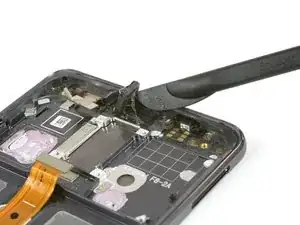
Next point on our checklist—a huge flex cable we've never seen before!
-
After the removal of another metal shield and two antenna cables, we go on and lift out the flex cable.
-
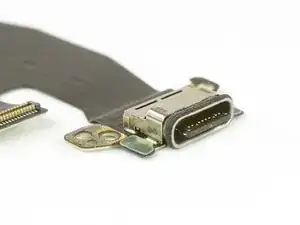
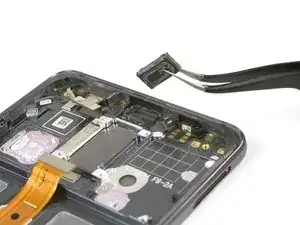
To our surprise, we get not only the flex cable but the complete daughterboard as well. It's glued to the USB-C port, which is equipped with an IP67-approved rubber gasket.
-
-
-
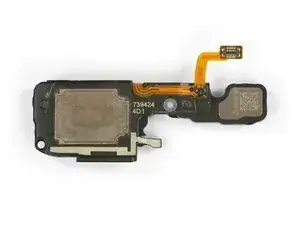
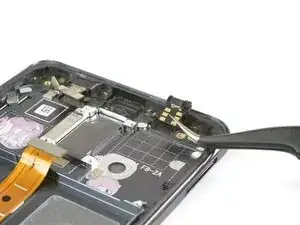
Moving on, we remove the loudspeaker and find a bright red gasket and a very fine mesh membrane protecting it from dust and water!
-
At this point we can remove the vibration motor as well, although it looks to be a pretty standard coin-style affair.
-
-
-
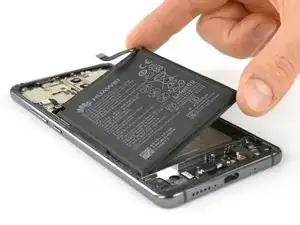
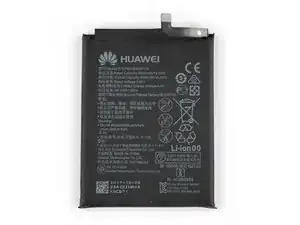
We're excited to cleave our way down to the motherboard, but first we spot something worthy of a quick detour—the battery!
-
A big slab of adhesive spans nearly the entire bottom of the battery. With some heat and a bit of help from a Plastic Card, we can extract this 4000 mAh beast.
-
With its 3.82 V and up to 15.3 Wh of power, the battery is the same as in the Mate 9. It is coupled with smart battery management that learns from user behavior in order to minimize wasted power and maximize battery life. Huawei promises a full day of use with just a 20-minute charge.
-
-
-
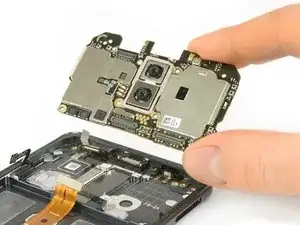
Only a few more steps separate us from that new and highly anticipated HiSilicon treasure!
-
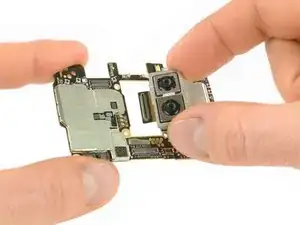
We remove the SIM card tray (and pat Huawei on the back as we see another red rubber gasket) and then easily lift out the motherboard with the dual camera system.
-
Even the little pin that ejects the SIM card comes equipped with a tiny gasket.
-
-
-
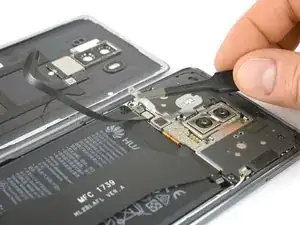
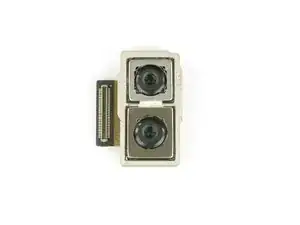
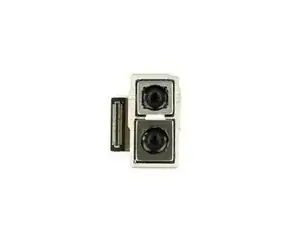
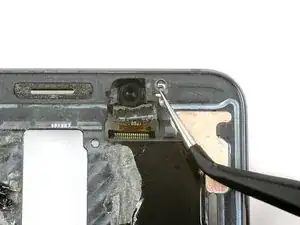
Before we start the chip fest, we examine the Leica addition to this new Huawei flagship: one module with a 20 MP monochrome sensor, and a second 12 MP RGB module.
-
-
-
Additionally, the camera system comes with optical image stabilization, which is important for many reasons, not least of which is that you can poke it and make it wiggle.
-
-
-
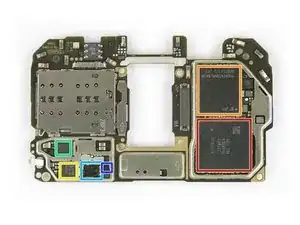
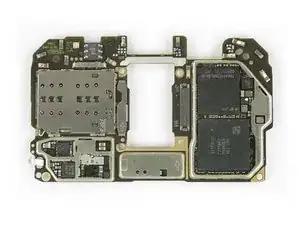
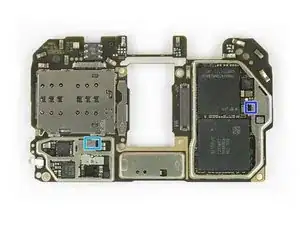
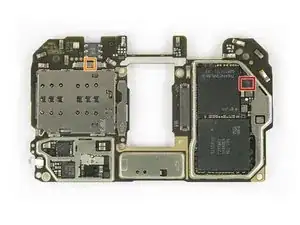
Our long journey nears its finale with a close look at the chipset of the Mate 10 Pro!
-
4 GB (optionally 6 GB) of Samsung RAM (K3UH6H60AM-EGCJ), with the new Kirin 970 SoC layered underneath
-
Toshiba THGAF4T0N8LBAIR 128 GB NAND flash memory
-
NXP Semiconductor PN548 NFC controller
-
Skyworks SKY7360-2A RF module
-
HiSilicon Hi6523 battery charger
-
ON Semiconductor NCP392D overvoltage protection controller
-
-
-
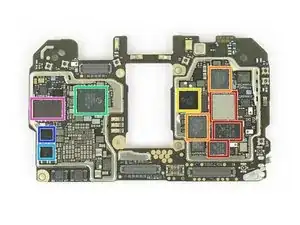
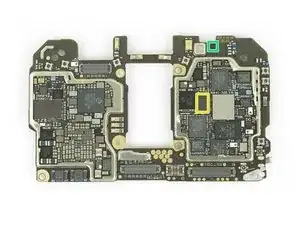
And on the back:
-
Skyworks SKY78113-14, SKY78114-61, and SKY78117-14A front end modules for WCDMA / LTE bands
-
HiSilicon Hi6363 RF transceiver
-
HiSilicon Hi6403 audio codec
-
HiSilicon Hi6421 power management
-
HiSilicon Hi6422 envelope tracker
-
HiSilicon Hi6423 power management
-
Broadcom BCM43596XKUBG WiFi/BT module
-
-
-
IC Identification, pt. 2:
-
Broadcom BCM47531 GNSS receiver
-
Skyworks SKY85203-11 2.4 Ghz, 802.11ac switch/low noise amplifier front-end
-
HiSilicon 6H01S/6H02S RF switch/LNA
-
Texas Instruments TPS65633B AMOLED display power supply
-
NXP Semiconductor TFA9872C class-D audio amplifier
-
Texas Instruments TPS61256A 1 A boost converter
-
likely Ricoh DC-DC converter
-
-
-
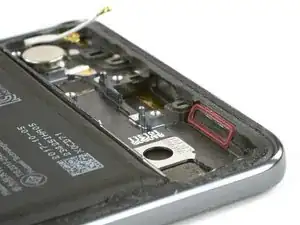
We slowly recover from the chip party and head over to the power and volume buttons.
-
Here the IP67 rating is achieved, sadly, with small breakable plastic sealing parts. Not especially repair friendly.
-
-
-
The earpiece speaker is glued in quite well, but the teardown gods blessed us with a bladed spudger and we know how to use it.
-
Compared to the earpiece speaker, the IR blaster is a piece of cake to remove and literally jumps out in our hands.
-
-
-
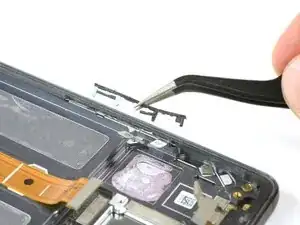
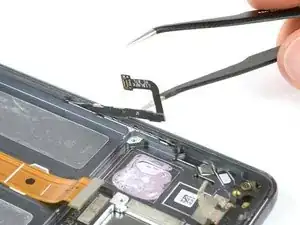
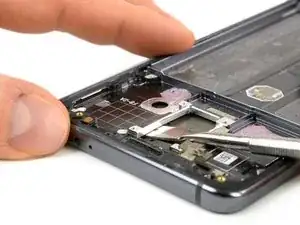
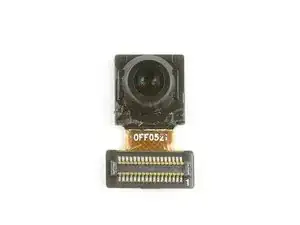
When it comes to the front-facing camera, we're not quite so pleased—it's very tightly secured in the midframe of the Mate 10 Pro. It wiggles a little, but removing it cleanly is going to be a challenge. So we focus on the display first.
-
But getting in between the display and the frame also looks to be a near-impossible task. No amount of heating, pulling, or prying saw any success. The front panel is glued tight and the tolerances are so small that there is simply no gap.
-
Our only chance is the hole in the midframe for the dual camera. And after using most of the wedging arsenal starting with a Halberd Spudger to an Opening Tool to a regular Spudger we end up with a metal Spudger. And finally a small gap opens up.
-
-
-
Again we grab the Halberd Spudger and slide around the edge to free the display just to discover the reason for the intractable front camera—one single screw.
-
With the screw removed we realize that the bracket and the camera itself can only be accessed from this side. So no front camera repair without forcing off the display. We wonder who has to walk the engineering plank for this.
-
-
-
This is as far as we get. Time to rate our experience aboard this
flagship. This could have been a jolly cruise.
-
-
-
The Mate 10 Pro earns a 4 out of 10 on our repairability scale (10 is the easiest to repair):
-
Despite the IP67-rated seals, the back cover is fairly easy to open.
-
The USB port, loudspeaker, and motherboard are easy to remove.
-
The Mate 10 Pro has very few screws, all standard Phillips but unimpressed by magnetism—except for one, which is buried underneath the display.
-
With only one big cable, the Mate 10 Pro is cleanly arranged—although that cable is soldered to the USB port.
-
A damaged front camera means switching the whole display including the frame, or damaging the display while trying to remove it.
-
And replacing the display—the most common repair—means taking out almost every component.
-