Introduction
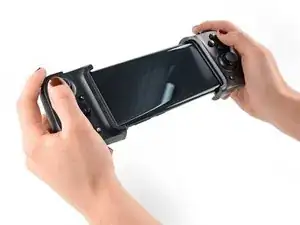
Quarantine turned you into a gamer? Lucky for you, Razer’s new Kishi Universal Controller is here to turn your smartphone into a play-anywhere system, with real buttons and joysticks. Join us as we tear down this stretchy controller to take a closer look at its inner workings and evaluate its repairability.
Want more exciting news and teardowns? Follow us on Twitter, Instagram, and Facebook, or sign up for our newsletter.
-
-
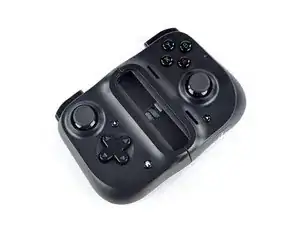
Let's see what the Razer Kishi brings to the smartphone gaming ... game.
-
Standard A-B-X-Y buttons, two clickable analog thumbsticks, one 8-way D-pad, plus a shoulder button and a trigger button on each side)
-
Direct connectivity to your phone via USB-C or Lightning connector (depending on which model you buy)
-
No internal battery, no Bluetooth, and no headphone jack
-
Compatible with Android 8 Oreo/iOS 9 or higher, supporting device dimensions of 145.3–163.7mm (H), 68.2–78.1mm (W), and 7.0–8.8mm (D)
-
-
-
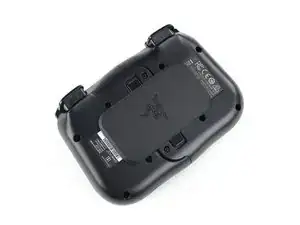
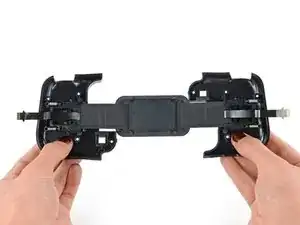
Two slide locks on the back of the Kishi secure both halves of the controller, keeping it compact when there's no phone attached.
-
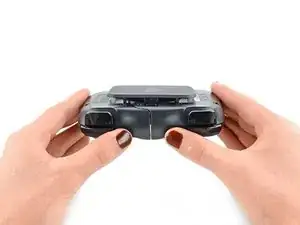
Pulling outward on both inserts releases the clip, so you can extend both sides of the Razer Kishi until your phone fits in between.
-
-
-
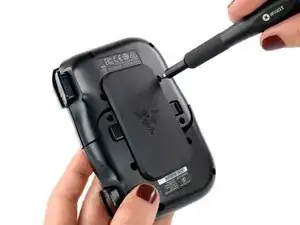
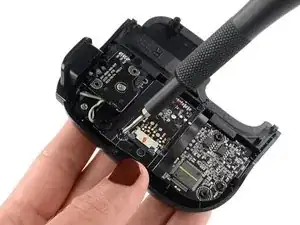
Game time started—we blast off ten Tri-point screws from the rear side. Thankfully we came equipped with 64 bits of Mako Driver Kit goodness. We're leveling up already!
-
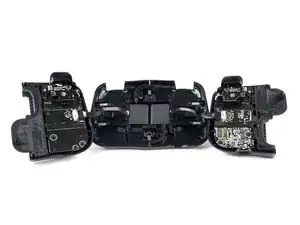
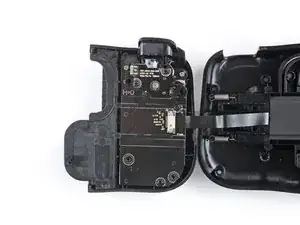
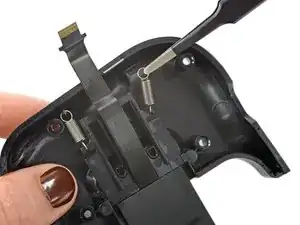
Beneath the back cover, we find two Steam-ish booby-trap interconnect cables—each one snaking off to a separate circuit board.
-
-
-
Instead of the tricky Tri-points found in other portable gaming options, we find regular Phillips #0 screws inside of the handles.
-
Normally each new level gets more challenging, but here it seems Razer gave us a break. Or is it just a distracting side quest? Regardless, we're happy to go on a Phillips fetch quest.
-
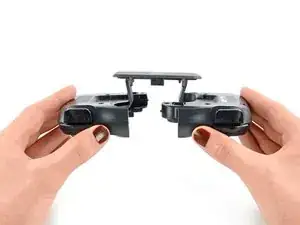
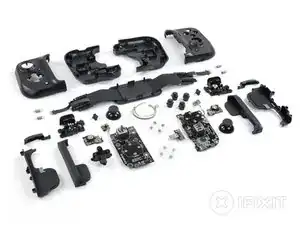
There's no boss battle here yet—just a couple boards, which we quickly extract.
-
-
-
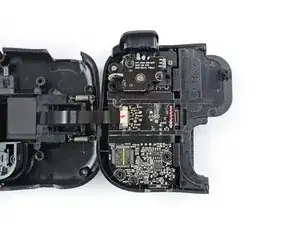
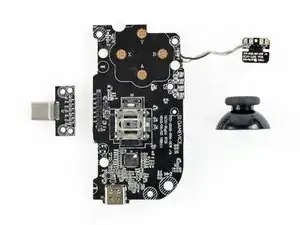
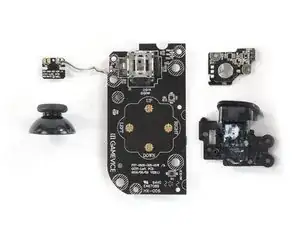
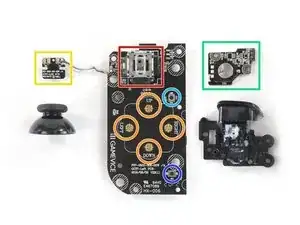
The right board contains the following bijous:
-
Fresco Logic FL7102, USB3.1 Type-C PD3.0 Controller
-
Soldered-on USB Type-C charging port
-
Soldered-on joystick controller (hello Oculus Touch and Xbox One S)
-
Plug-in phone connector (in this model USB-C)
-
Soldered-on breakout board for one of the shoulder buttons
-
"Forward" button
-
Indicator LED
-
-
-
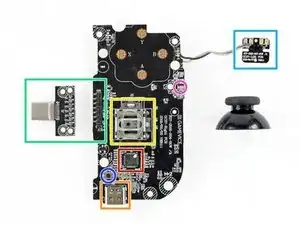
On the back of the board we discover:
-
-
Broadcom (formerly SiByte) 4407 DA9N1S microprocessor
-
A breakout board for the second shoulder trigger, which is attached separately and is therefore easier to repair.
-
This one seems to use some sort of rotary knob offering not only an on/off status but a gradual push depth of the shoulder trigger.
-
-
-
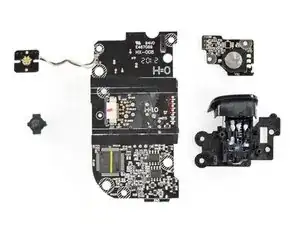
Extracting the left circuit board reveals:
-
Another joystick, which is also soldered in place
-
Four golden contacts for the D-pad (similar to the ones on the first circuit board)
-
Soldered-on shoulder button
-
Another shoulder trigger breakout board
-
"Back" button
-
"Home" button
-
-
-
What remains is the telescoping slider mechanism that supports your phone when attached to the Kishi.
-
It includes a folding rubber cushion, which attaches to the back cover with small springs. That's what saves you from worrying about scratches on the back of your phone while gaming.
-
-
-
Quest complete! That's one more adventure mastered. Is it time to start working on a speed run? Let's recap what we've learned:
-
One final question: Can it post a high score?
-
-
-
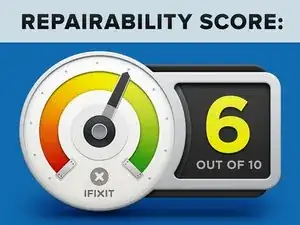
The Razer Kishi earns a 6 out of 10 on our repairability scale (10 is the easiest to repair):
-
No adhesive was used and components are attached with screws.
-
The controller's relatively modular construction means replacing most components will be a simple task.
-
One of the most strained parts—the phone connector—is plug-in and easy to replace.
-
We always say screw before glue. But using two different types of screws—one of them being Tri-point—is unnecessary and a bit annoying.
-
The most likely-to-fail components—both joysticks—are soldered directly onto the circuit boards, as is the passthrough USB-C charging port.
-


22 comments
Nice teardown! Looks like a DIY Nintendo Switch with the phone on, even down to the joystick/main button locations.
Very useful. I wonder if there's any unused traces on the ribbon cable: thinking of adding stereo speakers using a small Bluetooth module (though it seems rather packed).
That’d be nice tinkering. Please share if you find anything.
Huuu miy buena idea amigo compartirias el proyecto??? Para intentarlo serianear con sonido estereo
Ubon BT40 kit