I am new to Ubuntu and am just feeling my way around. The first few days have certainly been bumpy, and one of the issues I am facing is that I can't record streaming audio on Audacity.
How can I do that?
I am new to Ubuntu and am just feeling my way around. The first few days have certainly been bumpy, and one of the issues I am facing is that I can't record streaming audio on Audacity.
How can I do that?
I understand your question as "how can I use Audacity to record audio that is being streamed to me?" There are a lot of good answers here and I recognize that this question was from a while ago, but they don't quite touch on how I usually do it, so I felt I'd contribute.
It's easy if you've got Pulse Audio Volume Control (though Pulse has gotten a little bit buggy in recent years). You can get it on just about any Ubuntu-based distro through the software center, or via:
sudo apt install pavucontrol
...along with its dependencies, which are probably already on your machine.
Open it and you'll find a few tabs; Playback and Recording, which cover program terminals; and also Input and Output, which are about detected hardware, and last Configuration, which is pretty self-explanatory and not something you'll usually need to worry about.
After pressing Record on Audacity, Audacity will show up under the Recording pane. From there, you can use a drop-down to switch which input it is listening to. Some of those inputs are what's called "monitors", which is basically a watch on what's coming out of your speakers or moving to any other output device. Usually you'll want "Monitor of Built-In Analog Stereo", or your equivalent, and Audacity will start recording what's leaving your speakers.
This is admittedly very similar to what was suggested by Dario Salvati, and more and more distros are duplicating Pulse features in their default sound; but I've found them to be a bit sketchy on monitors. Pulse more-or-less gets you a virtual rack with a GUI.
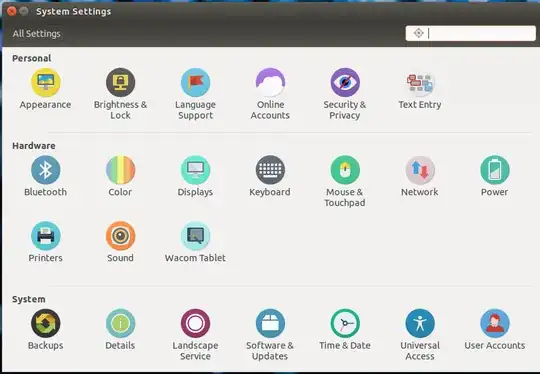
Try this: go on System Settings, then Sound as follow
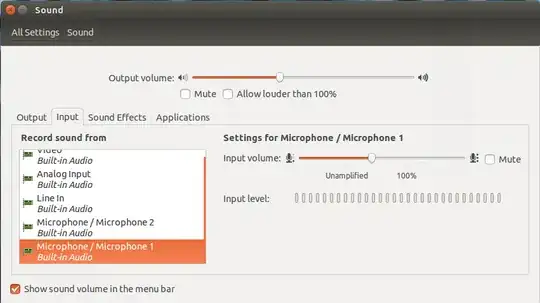
Now, go to the Input section and select the source device.
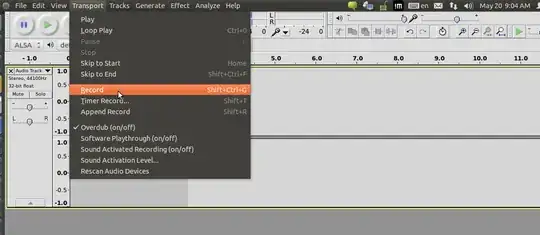
Then, start recording from Audacity like you used to.
lsusb and press Enter. Then, post the output here.
–
May 26 '15 at 11:21
Bus 002 Device 002: ID 8087:0024 Intel Corp. Integrated Rate Matching Hub Bus 002 Device 001: ID 1d6b:0002 Linux Foundation 2.0 root hub Bus 001 Device 005: ID 0c45:649a Microdia Bus 001 Device 004: ID 0bda:0129 Realtek Semiconductor Corp. RTS5129 Card Reader Controller Bus 001 Device 006: ID 0cf3:0036 Atheros Communications, Inc. Bus 001 Device 002: ID 8087:0024 Intel Corp. Integrated Rate Matching Hub
– Nikhil Jayakrishnan May 28 '15 at 16:06Recording audio with Linux Mint 17.
There are lots of posts and tutorials about this subject, and it is fraught with challenges. My project involves copying all my old VHS tapes to DVD. The usual video capture hardware based on the Empia 2861 chipset produces rubbish audio, noisy, distorted and full of glitches and dropouts. The solution is to use the 2861 hardware to record the video, and record the audio via the computer line input. This involves purchasing or making up an adaptor cable from twin RCA connectors to miniature stereo jack.
The application of choice for recording audio appeared to be Audacity. The problem is that on long recordings (over an hour), Audacity has a nasty problem of stopping, locking up or dropping periods of recording. Changing focus appeared to knock it out of record mode, and even when I left the computer alone with only Audacity running, it still dropped out of record mode. When I tried to splice the resulting clips, Audacity just sneered at me and crashed.
After a lot of research I discovered that arecord is built into our Linux distros. It is a very simple command-line application, which can be persuaded to show a VU meter of sorts. This has proven to be very reliable, and makes nice (huge) WAV files from the line input. The screenshot shows an arecord session in the terminal window at top left.
The -c 2 parameter puts arecord into stereo mode. -f cd sets the resolution (16 bits) and the sample rate (44.1 kHz) to the normal PCM standard. -V stereo produces the VU meter on the line after the command.
This generates about 10.6 Mbyte per minute. Ctrl+C terminates the recording.
Next thing is to adjust the level on the line signal. Click on the speaker icon in the system tray left of the update status, and select “Sound Settings.” This produces the screen at lower right: select the “Input” tab. This allows you to set the level to give a reasonable fill of the level meter without clipping. Beware: the “Input Volume” slider is very sensitive; but once selected, you can inch it up and down with the left- and right-arrow keys on the keyboard.
Now we can record, but we can't hear what is being recorded. For music videos, I was finding it much better to record the sound track separately and sync it to the video later, so I could not look at the video to see where things had progressed to. This is where Audacity comes into its own. You can see my Audacity session at upper right of the screenshot. The input is selected as “default: Line:0” and the output as “ALSA.”
Pull down the “Transport” menu and make sure that “Software Playthrough” is checked. This effectively connects the line input to your speakers.
Click the down-arrow next to the microphone icon, and select “Start Monitoring.”
Lo and behold, the level meters come to life, and you can hear what is coming into your line input. I find the Audacity level meters a bit more informative than the command-line jobbie attached to arecord. Again, simple things knock Audacity out of monitoring mode, but you can switch monitoring off, then back on, and it carries on working. Audacity's shenanigans do not appear to affect the recording made by arecord.
Don't touch the Sound Settings applet whilst recording. This will introduce snaps, crackles and pops into your recording.
Type ctrl+alt+t to open the terminal, then type in alsamixer to open the control panel. Here use the arrow keys to move to mic boost and activate it. Problem solved!
Simply press the shortcut Shift+Ctrl+G or open the menu Transport > Record
This will start recording your streamed audio.