Einleitung
Over time the dashboard clock in your 1999 Toyota RAV4 may have come to the end of its life. This guide will walk you through the process of repairing the digital dashboard clock without having to buy a replacement clock.
This guide is specifically for a 1999 model because the process for earlier models involves removing the steering wheel column and the dashboard. For this model all you need is to remove the screws that hold the dashboard in place in order to access the clock which is connected to the backside of the dashboard. The process itself is not overly difficult if the guide is properly followed, however you are required to know how to solder.
-
-
Use a Phillips #3 screwdriver to remove the 17.0 mm screw at the top of the instrument cluster trim.
-
Remove the instrument cluster trim by pulling it up and out.
-
-
-
Use a Philips #3 screwdriver to remove the two 17.0 mm screws located underneath the radio trim.
-
Gently pull the radio trim off.
-
-
-
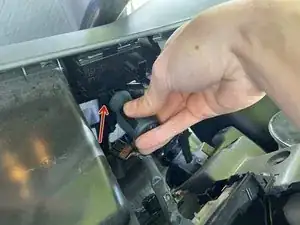
Place your fingers behind the three dashboard buttons to remove them slightly.
-
Unplug the dashboard buttons from the connectors.
-
-
-
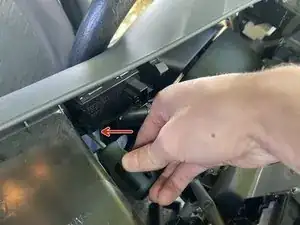
Gently pull the dashboard outwards to gain access to the backside of the clock.
-
Unplug the connector for the clock.
-
-
-
Use a Philips #3 screwdriver to remove the three 15.0 mm screws that are holding the clock onto the backside of the dashboard.
-
Remove the clock.
-
-
-
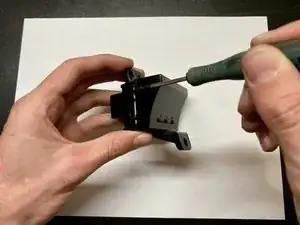
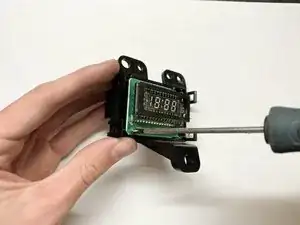
Use a spudger and gently pry the tabs on the side of the case of the clock.
-
Remove the top case of the clock.
-
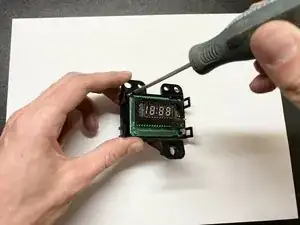
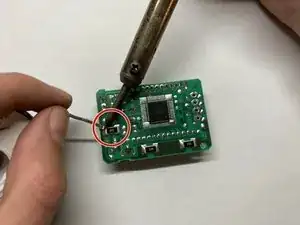
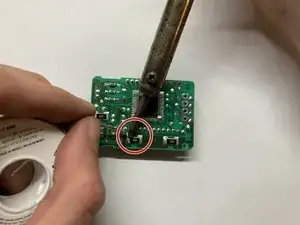
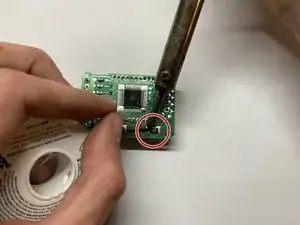
Use a Phillips #0 screwdriver to remove two 9 mm screws that secure the circuit board.
-


To reassemble your device, follow these instructions in reverse order.