
Einleitung
Hier wird der Austausch des kombinierten Thunderbolt und MagSafe Kabels im Apple Thunderbolt Display gezeigt.
-
-
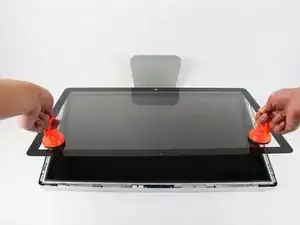
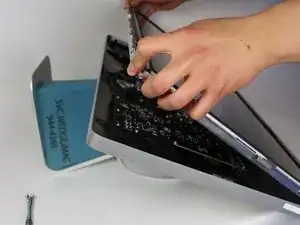
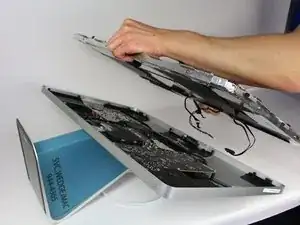
Lege das Display mit der Bildschirmseite nach oben ab.
-
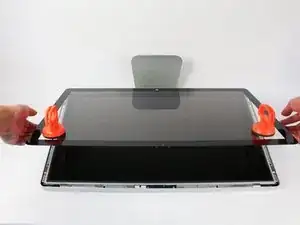
Bringe die Saugheber auf beiden Seiten oben fest am Bildschirm an.
-
Die Glasscheibe ist am restlichen Bildschirm mit kleinen Magneten befestigt. Hebe langsam an, bis sie sich ablöst.
-
-
-
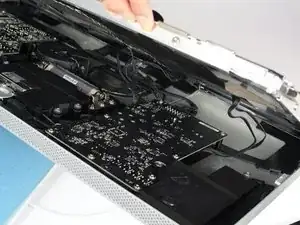
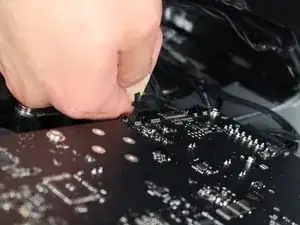
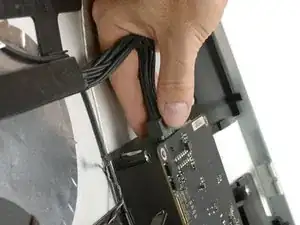
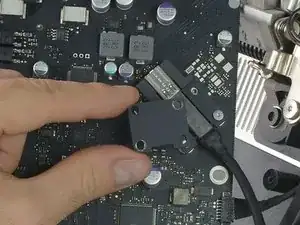
Fasse den Stecker des ersten Kabels (das, was am weitesten von dem mit Schrauben befestigten entfernt ist) an und ziehe ihn langsam heraus.
-
-
-
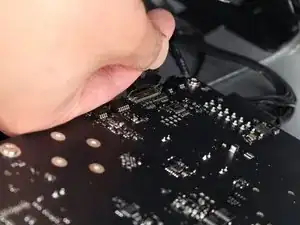
Um an den Stecker vom nächsten Kabel, direkt neben dem eben gelösten, zu gelangen, musst du erst an einem Stück Klebeband an einer Metallleiste ziehen.
-
Benutze das Klebeband als Griff und klappe die Metallleiste herum.
-
Fasse dann den Stecker und ziehe ihn langsam aus dem Anschluss auf dem Logic Board ab.
-
-
-
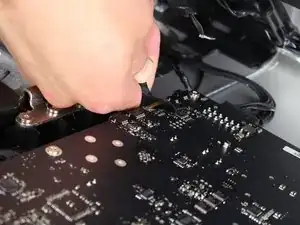
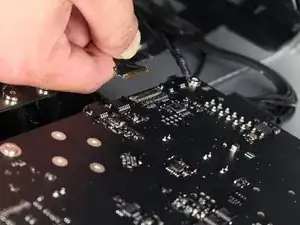
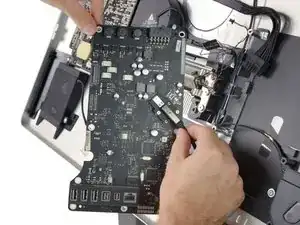
Fasse behutsam den Stecker auf der anderen Seite des Logic Boards unten an und ziehe ihn vom Board ab.
-
-
-
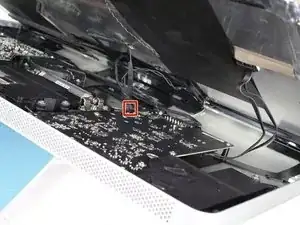
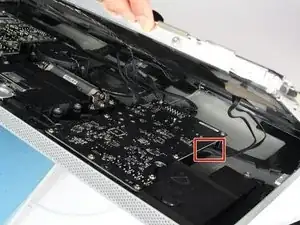
Genau in der Mitte des Gerätes kannst du den EMI-Filter sehen. ( Er wird von anderen Bauteilen festgehalten).
-
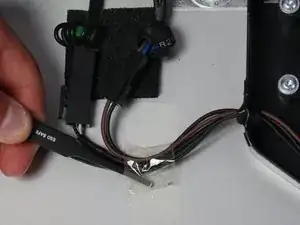
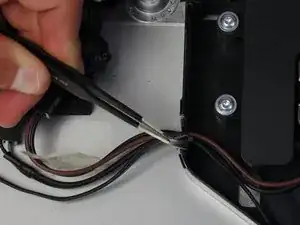
Verfolge die Kabel die vom Netzanschluss unten nach links verlaufen.
-
Entferne mit einer Pinzette das Klebeband, mit dem das Kabel am Gehäuse befestigt ist.
-
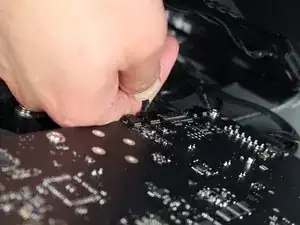
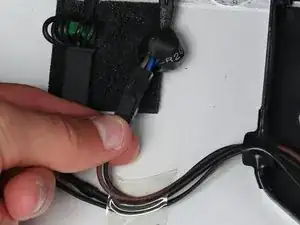
Du musst nur einen der Stecker entfernen. (auch wenn es zwei weitere direkt daneben gibt)
-
Fasse den Stecker unten an und ziehe ihn behutsam aus seinem Anschluss heraus.
-
-
-
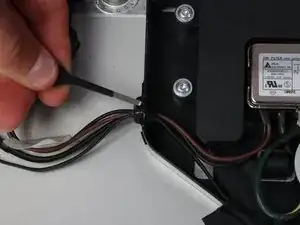
Entferne dann das Stück Isolierband, mit dem einige Kabel vom Netzanschluss am Gehäuse festgeklebt sind.
-
-
-
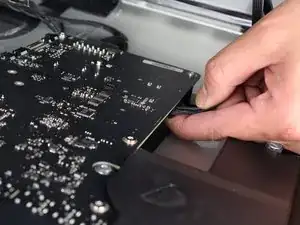
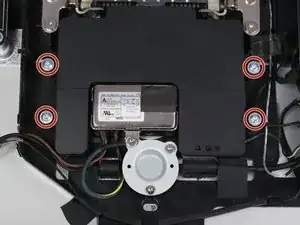
Die darumliegende Lautsprechereinheit (die schwarze Box) um die Versorgungsleitungen muss ausgebaut werden.
-
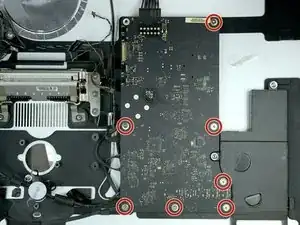
Entferne die vier TR10 Schrauben.
-
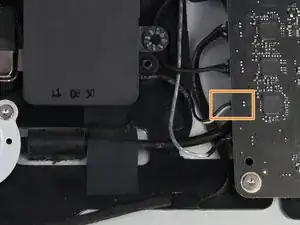
Ziehe vorsichtig am Plastikende des Lautsprecherkabels und trenne ihn vom Logic Board ab.
-
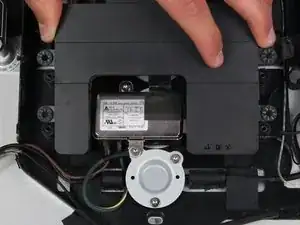
Entferne den Lautsprecher.
-
-
-
Wenn der mittlere Lautsprecher weg ist, ist EMI-Filter leicht zugänglich.
-
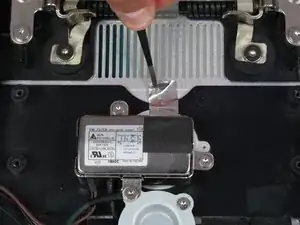
Entferne das silberfarbene Klebeband oben vom Filter.
-
-
-
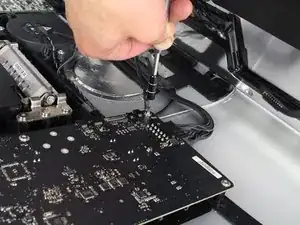
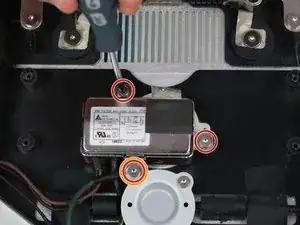
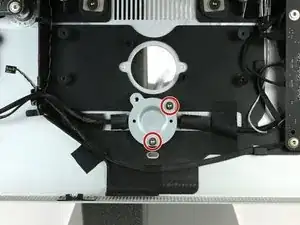
Der EMI-Filter ist mit drei T10 Schrauben befestigt. Drehe sie heraus.
-
Die Schraube, die sowohl den Filter als auch ein Kabel befestigt, hat eine andere Länge. Bewahre sie so auf, dass du sie von den anderen beiden unterscheiden kannst.
-
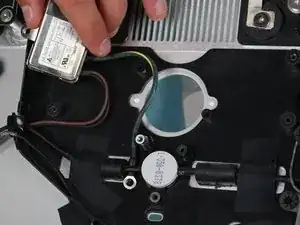
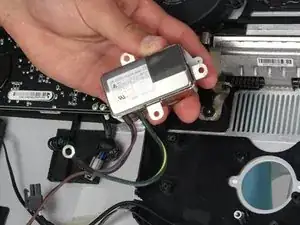
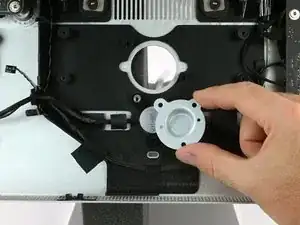
Das grün-gelbe Kabel, welches von dieser Schraube befestigt wurde, ist hinter andere n Bauteilen festgesteckt. Um es herauszubekommen musst du es hinter das schwarze Kabel drücken, dann lässt sich der Filter vom Gehäuse entfernen.
-
-
-
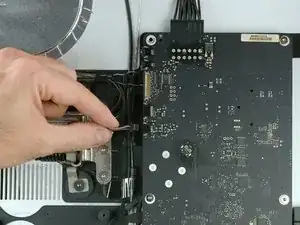
Die Kabel werden von einer Metallplatte festgehalten. Entferne die beiden T10 Schrauben, mit denen die Metallplatte befestigt ist.
-
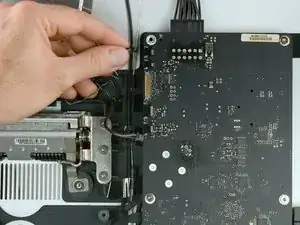
Entferne die Metallplatte.
-
-
-
Lasse die drei Stecker an den Kabeln behutsam aus ihren Anschlüssen auf dem Logic Board "herauswandern" , halte sie dabei an ihrem Plastikende fest.
-
Lüfterkontrollkabel
-
Temperatursensorkabel
-
Versorgungskabel
-
-
-
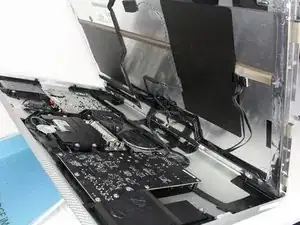
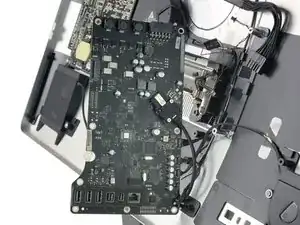
Benutze die restlichen Kabel als Scharnier und klappe das Logic Board nach links. Der Displayanschluss wird zugänglich.
-
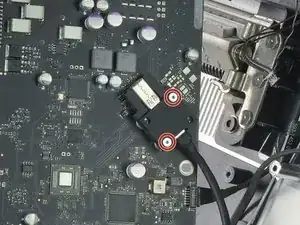
Der Stecker des Displayanschlusses ist mit einer Metallplatte befestigt, die von zwei Torx T6 Schrauben gehalten wird. Drehe die Schrauben heraus.
-
Entferne die Metallplatte.
-
-
-
Löse das Thunderboltkabel vom Logic Board ab.
-
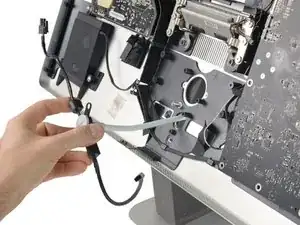
Fädle das restliche Thunderbolt und MagSafekabel durch den Ausschnitt im Rückgehäuse.
-


Um dein Gerät wieder zusammenbauen, folge den Schritten in umgekehrter Reihenfolge.

60 Kommentare
Unbelievable amount of very detailed and careful work to replace a Thunderbolt cable which is attached on the inside to a standard Thunderbolt socket! Why not just have the socket on the back of the unit?????
You can actually use the socket on the back of the unit as an input if your octopus cable is dying, as long as you are connecting directly to a Thunderbolt 1 or 2 Mac. If you are using the Thunderbolt-3-to-Thunderbolt-2 adapter, you have to use the built-in cable.
Tim -
In reply to Tim - This is not true - I am running a 2018 Mac Mini using the Thunderbolt 3 to Thunderbolt 2 adaptor and a standard Thunderbolt 2 cable connected to the external thunderbolt connector on the Thunderbolt Display - It works fine.
Me as well. Was dreading the repair until I plugged a spare Thunderbolt 2 cable from a Thunderbolt 3 (to 2) adapter to the back of the display. Thanks!
Jim Hoyt -
Nice one Tim! Saves me opening the screen! Thanks!
Me too! I was just about to start dismantling my display when I noticed this tip - I’d even bought some suction cups. Thanks Tim!
Oh, my, yes! What a useful comment. It makes sense that this would work but I would not have thought of it. @timgostony Thank you very much indeed!!!!!
At the top of this guide for the Apple Thunderbolt Display Thunderbolt & MagSafe Cable Replacement, it says that there are “No Parts Required” I beg to differ. I need this guide because I need to Replace my Apple Thunderbolt Display Thunderbolt & MagSafe Cable because the connector at the computer end is sketchy and if touched causes the image to glitch and go out. I know its the cable because this issue is not present with any other display or projector I plug into the same port on my computer. So, I ask, do you have a reliable source for an Apple Thunderbolt Display Thunderbolt & MagSafe Replacement Cable so I can use this guide and fix my monitor once and for all?
Answered my own question. http://a.co/d/bOlf4s0
Hi Stephen, You’re right, the wording is somewhat confusing. Of course you need a replacement part to replace something ;) This has been forwarded and we’ll hopefully change it soon to provide proper information. Thanks for the parts link; i’ll put this into the “parts” section for the time being.
Instead of $14 foam block, I used a full roll of paper towel and two pillows. While it worked, if I ever did this again, I would buy the block of foam. Since you’re removing a power cable, you need to be able thread it through and I think the foam block would make that easier.
Josh Miller -
You can also use a single handle, double cup floor lifting suction cup. Just place it in the centre of the screen near the camera and lift slowly.
Steve A -
I just used a toilet plunger to remove the screen and it worked like a charm!
Philip Jacob -
That’s what I call resourceful—made my day. I hope your repair was successful.
Tobias Isakeit -
Great idea, thanks a lot!
Yvan Sandoz -
The glass lifted off the magnets quite easily after just using my fingernails. No suction cups or toilet accessories needed.
Adrian Gropper -
I had the same problem and after removal of the fan and a bit of work with the vacuum, the fan is quiet. Thanks to ifixit for the great instructions that made this easy.
John Perser -
To keep the screen up, other soft objects might work, but it's important that the hole in the back isn't covered because you will need to thread the new Thunderbolt/MagSafe cable through it and it would be a hassle to do it after everything's been set up.
Thomas -
Anybody got any links to glass screen replacement supplier for the A1407 Thunderbolt Display? Im finding it impossible to find a replacement without it being crazy money.
Michael McMillan -
Instead of a wedge, I used 4 rolls of toiletpaper, one under each corner.
jnbruin -