Einleitung

This guide will go over the process of removing and replacing the CPU fan and heat sink assembly.

  1. PVLQ1xQrAJiZDcwK
    • Make sure the device is turned off and unplugged from the charger.

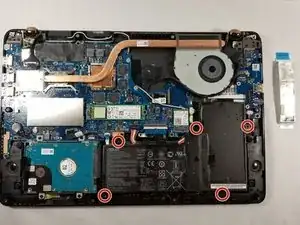
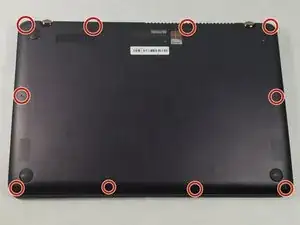
    • Use a T5 screwdriver to remove all 10 screws that secure the bottom cover.

    • Pull off the back cover of the laptop.

    • A pry tool may be needed to pull off the back cover.

  2. ocvbQkHqaYWh2m5a
    ocvbQkHqaYWh2m5a
    wJpbOBHZNnqwlvOU
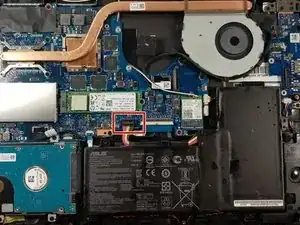
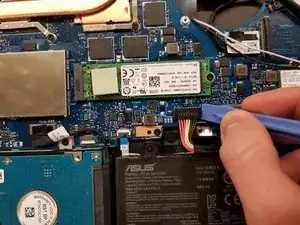
    • Wedge an opening tool under the battery's bundled cable connector, and gently pry the connector up and to disconnect the battery.

    Awesome step!

    Mi Pa Si -

    Thanks yet again!!

    syellon -

    Step 2 I did not realize that the pictures to the right were enlarged for easier understanding of the step. Great walk through even a 66 year old man could understand and do it. Got the I Fix It tools which made opening the case and working with the tiny screws a breeze.

    Steven CARTER -

  3. BSnApIEWZ3CshKUe
    BSnApIEWZ3CshKUe
    QQGf1rbLUjTOimZD
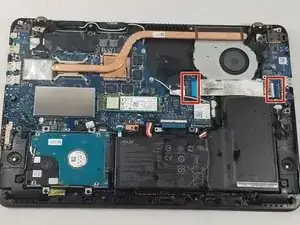
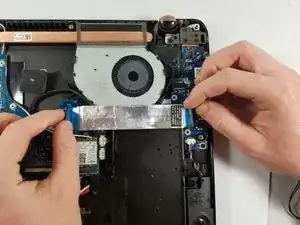
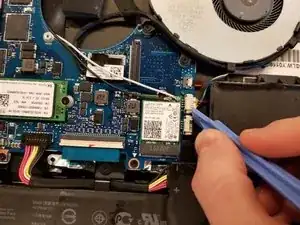
    • Lift up the black tab next to the silver ribbon cable.

    • Pull lightly on the blue tabs until the silver cable is free.

    Before doing anything here I would highly recommend disconnecting the buttery. I didn't do it myself at the beginning and when removing this ribbon cable I caused sparks going off the right connector.

    Alex Vasko -

    Great suggestion, Alex! This guide should now reflect a safer and more accurate procedure. Thanks for the heads-up.

    Richard Suovanen -

    To clarify: you need to flip up the black plastic tab of the recepticle, not the cable. Then don't pull the blue tab up, you need to angle it up just a little bit, about 15 degrees, then slide the cable out.

    Gaspard van Ko -

  4. VSnxwkgDh2DyQ2IQ
    • Use a Phillips #00 screwdriver to remove the 5 marked screws.

    • Gently remove the battery.

    • Do not bend or puncture the laptop's lithium-polymer pattery.

  5. jKFqiGvXuHFfrWir
    jKFqiGvXuHFfrWir
    Y6AMl4GvYHVMInkg
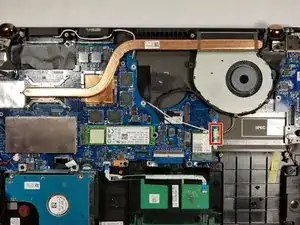
    • Using the iFixit opening tool, gently pry the CPU fan connector out of the socket.

  6. XB1D2fPhsTRJWkCU
    XB1D2fPhsTRJWkCU
    MEpQi3nwhGhQvHJx
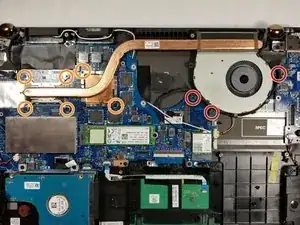
    • Move the black cable located around the CPU fan out of the holder.

    • Remove the following 9 screws:

    • Three Phillips screws

    • Six Phillips screws

    • Make sure not to mix up both types of screws.

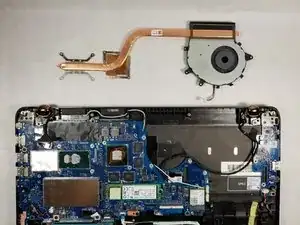
    • Gently pull vertically on the CPU fan/ heat sink assembly until it is free.

    • Before placing a new CPU fan/heat sink assembly, the CPU and GPU surfaces must be cleaned off and thermal compound must be reapplied.

Abschluss

To reassemble your device, follow these instructions in reverse order.

mmedina

Mitglied seit: 07/04/16

749 Reputation

Ein Kommentar

Is it possible to replace the fan only without removing the full heatsink or is it fused together as one unit?
Bork Bois -