Einleitung

  1. W3S3ZXWL4hrkCsNr
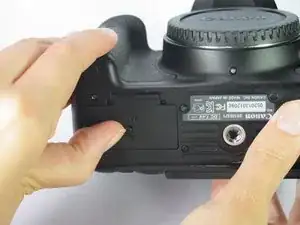
    • Mache die Akkuabdeckung unten an der Kamera ausfindig.

    • Drücke die schwarze Entriegelungsfläche, um die Abdeckung zu öffnen.

  2. h4eicfKdNYOZACkT
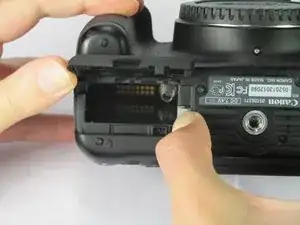
    • Drücke auf die graue Fläche rechts des Akkus.

    • Entferne den Akku aus dem Slot.

  3. UFk1lUVuV3Lgn3mT
    UFk1lUVuV3Lgn3mT
    ZtkY5Px1i2yDG3jC
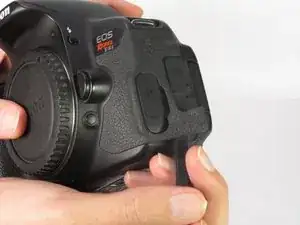
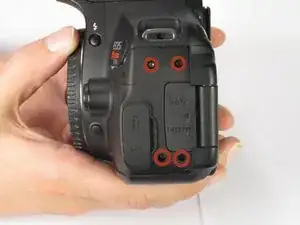
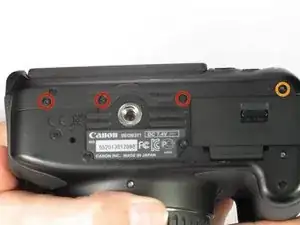
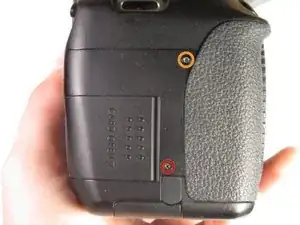
    • Benutze einen Spudger, um den Gummigriff zu entfernen und die Schrauben offenzulegen.

    • Löse die vier 5,5 mm Torx T6 Schrauben.

  4. 5Fvbc5HZpmOAvnBy
    5Fvbc5HZpmOAvnBy
    d1WARhdsp4FyMSn4
    EjOmht5XGSsOeNtd
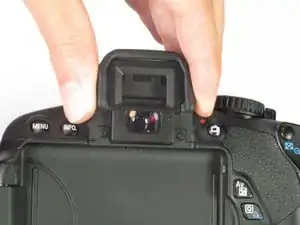
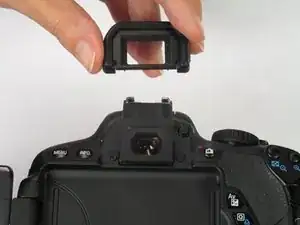
    • Entferne die Plastikabdeckung von dem Sucher.

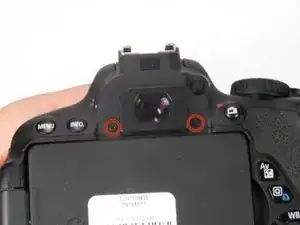
    • Löse die zwei 3,4 mm Kreuzschlitz #00 Schrauben.

  5. GvyMpVtrIyPJEFFY
    • Entferne die folgenden Schrauben:

    • Drei 3,4 mm Kreuzschlitz #00 Schrauben

    • Eine 5,9 mm Kreuzschlitz #00 Schraube

    On my camera, both the outer screews were 5.9 mm long.

    Geir Atle Storhaug -

    I can confirm the comment from 03/14/2015: Both outer screews are long.

    Erikk -

  6. Ofg2Hk6TmGcDOjnB
    • Entferne die folgenden Schrauben:

    • Eine 3,4 mm Kreuzschlitz #00 Schraube

    • Eine 5,9 mm Kreuzschlitz #00 Schraube

  7. YhcTaDldIMSE32UP
    • Entferne die Rückwand von der Kamera.

    • Einige empfindliche Kabel sind an der Innenseite der Wand angebracht, entferne sie deshalb vorsichtig.

  8. DZMNeSCJ3eOeXjZ2
    DZMNeSCJ3eOeXjZ2
    1ovsgVLbgDLPTgBg
    apoOhG5vyCbGdxva
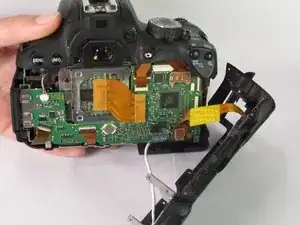
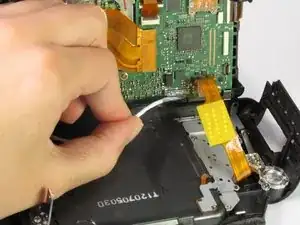
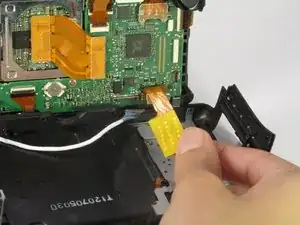
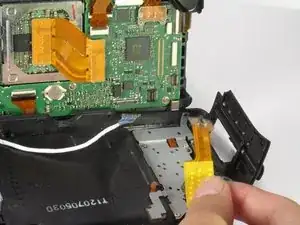
    • Trenne das blaue Kabel in der rechten unteren Ecke des Motherboards.

    • Dann trenne das Flachbandkabel, das vom Motherboard bis zur Rückwand reicht.

  9. f3EticRaShjxUdJI
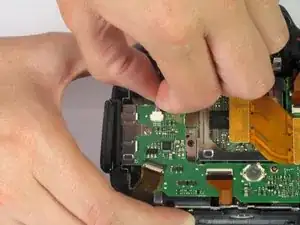
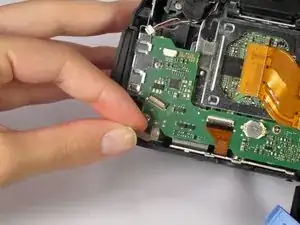
    • Entferne das kleine mehrfarbige Kabel vom Motherboard, das sich in der oberen linken Ecke befindet.

  10. KP5GeIXMFvSAQcOO
    KP5GeIXMFvSAQcOO
    o44OJWSvCVU5KRKy
    Y1aCxdOu31Asd6yV
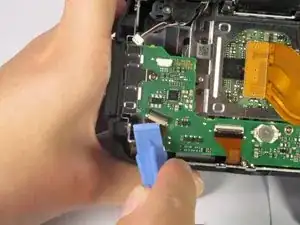
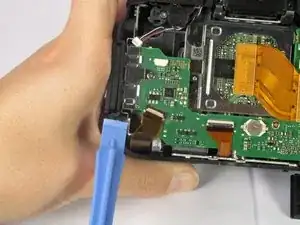
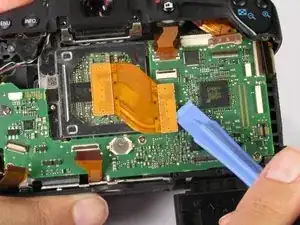
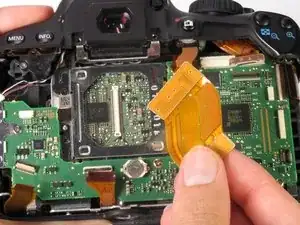
    • Benutze ein Plastic Opening Tool, um den Anschluss des Flachbandkabels hochzuklappen.

    • Trenne das Flachbandkabel vorsichtig, indem du es vom Motherboard wegziehst.

  11. TCOc6EKCGFgrhe1Y
    TCOc6EKCGFgrhe1Y
    IGpOWJ55xda2gfKv
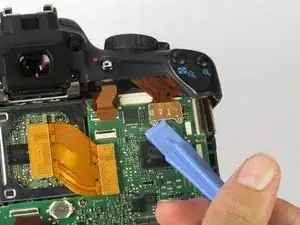
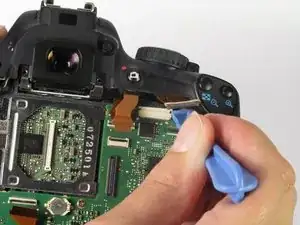
    • Benutze ein Plastic Opening Tool, um den durchsichtigen Kabelanschluss zu entfernen, der sich in der oberen rechten Ecke des Motherboards befindet.

  12. qMuOfuaD2jg51A4y
    qMuOfuaD2jg51A4y
    54GhOSir1GTaVcmP
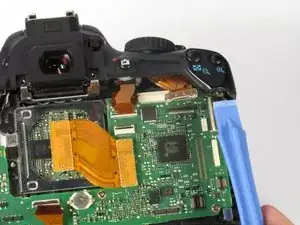
    • Benutze ein Plastic Opening Tool, um das Flachbandkabel zu entfernen, das den Bildsensor mit dem Motherboard verbindet.

  13. NVINKa5sXsXVY3RO
    NVINKa5sXsXVY3RO
    5gNpaJO3wOPlw5w6
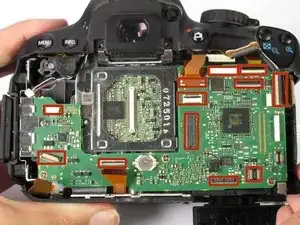
    • Benutze ein Plastic Opening Tool, um durch Drücken der Kerben in der Kunststoff-Abdeckung diese vom Motherboard zu trennen.

    • Stelle sicher, dass alle Kabel vom Motherboard getrennt sind.

  14. yrYD1XxUAeOWMDEG
    yrYD1XxUAeOWMDEG
    vCUnlBRH6uYVOsWA
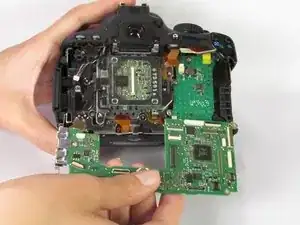
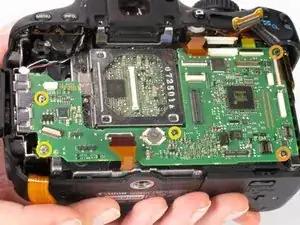
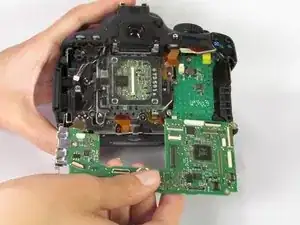
    • Entferne die folgenden Schrauben mit einem Kreuzschlitzschraubendreher (Phillips #00) vom Motherboard.

    • Zwei 3,9 mm Kreuzschlitzschrauben

    • Drei 2,9 mm Kreuzschlitzschrauben

    • Ziehe das Motherboard vorsichtig aus der Kamera heraus.

    I was wondering how did you get to loosen the 3.9mm Phillips screw on the top right.

    lucato -

    Fixed that, the orange marker was a bit off, it was on an alignment pin instead of the actual screw which was just a bit more to the right.

    Flying Dutchman -

    I cannot reach the 3.9mm screw with any tool because it is underneath of the plastic body that holds the zoom +/- buttons. How old you remove that top right motherboard screw?

    Jeff Ramsey -

    I hate to bring up an old question, but did you ever manage to get this screw off with your camera? I am working on mine yet I am about to simply drill through the plastic under the zoom buttons.

    jeremy cohan -

    You have to remove the top part of the camera body to reach the screw. It is also much easier to reconnect flat cables.

    Max -

    Where can I find a replacement board. I cannot find one anywhere!

    Matt Jones -

    Same here, how to remove this top-right orange 3.9mm phillips screw?

    If top has to be removed, how to do that? It’s not visually obvious to me at the moment.

    Also, really where to get the replacement MB?

    Giorgi -

    That last top-right screw is actually impossible to remove - need to take off the top cover. Follow this guide:

    Canon EOS Rebel T3i Top Casing Replacement

    Giorgi -

Abschluss

Arbeite die Schritte in umgekehrter Reihenfolge ab, um dein Gerät wieder zusammenzubauen.

Jordan Rabold

Mitglied seit: 14/04/14

774 Reputation

2 Kommentare

This guide gets an upvote.

It's the first camera disassembly guide I've seen so far on ifixit that includes the single most important precaution: the camera has a body cap fitted to avoid dust, dirt or other objects getting into the mirror box. Bravo!

Flying Dutchman -

Where can we buy the parts?

tjt263 -