Einleitung

Replacing the RGB lights in the earcups is a technical process that includes disassembly and soldering. This guide walks you through each of the steps to replace the lights in the righthand earcup. For this guide, you will need a soldering kit and a screw driver kit.

  1. ajprhlKy4PdPQNoK
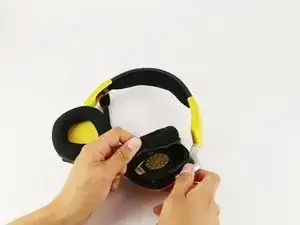
    • Carefully remove earmuff from headphones by getting a grip under the earmuff cushion and peeling up over the lip that keeps it in place.

  2. BIumAmJYynXU2jEk
    BIumAmJYynXU2jEk
    DmUAOBCER6IuhN1g
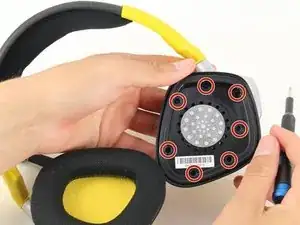
    • Using the Phillips #0 screwdriver, unscrew the seven 6.4 mm screws holding the black speaker cover in place.

    • If you are disassembling the lefthand earfmuff, there will be eight 6.4 mm screws to remove.

  3. yEdxnKLpjX3IH44q
    yEdxnKLpjX3IH44q
    LxTxTP6u1aaFSPYG
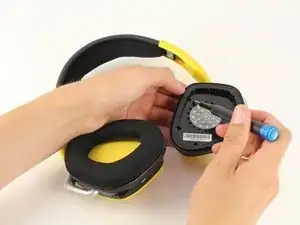
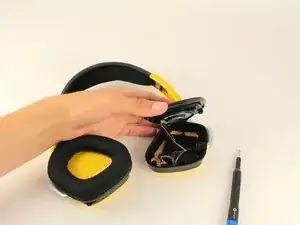
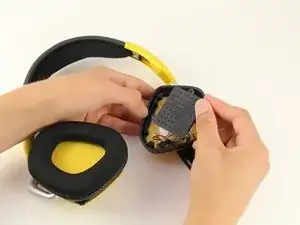
    • Remove and set aside the black panel, taking care to keep the wires attached.

    • The panel should lift up without much force. If the panel does not budge, carefully use the iFixit plastic opening tool to dislodge the piece.

  4. QoCnrohcQDMfJ4Ej
    QoCnrohcQDMfJ4Ej
    dZkYWdRpKBAEDtVS
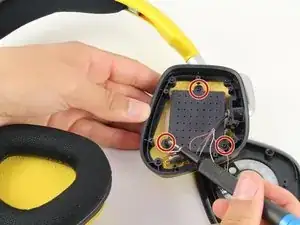
    • Using the Phillips #0 screwdriver, remove the three 6.4 mm screws on the black plastic panel with the grid of holes.

  5. kLwEGGGx1EIxwAT6
    kLwEGGGx1EIxwAT6
    G4CngFUGbdRNyqbE
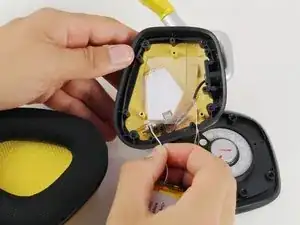
    • Carefully unplug the wire that connects the battery pack to the headphones.

    • This should not take too much force.

  6. WcYEqIFPpEOphwNP
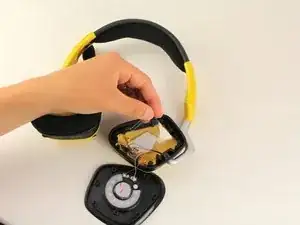
    • Remove the clear plastic covering and set aside.

    Hola Gianna, cómo estás?

    Te consulto: mis auriculares de repente dejó de funcionar bien el auricular izq (el del micrófono), se escucha muy bajo y cuando no hay sonido hay una especie de fritura de fondo aunque la PC esté apagada. Desarmé el auricular derecho para comprobar el estado de la bateria y veo que ésta está hinchada. Crees que la falla mencionada anteriormente, puede deberse a la batería en mal estado o nada tiene que ver una cosa con la otra? Desde ya muchas gracias y muy útil y clara la guía.

    Horacio -

  7. XkFfWSWHLIqxTPSo
    XkFfWSWHLIqxTPSo
    wjHPTDskgyXnvjlp
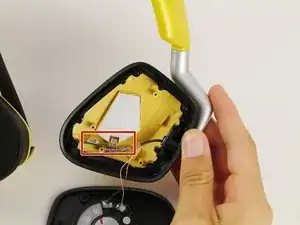
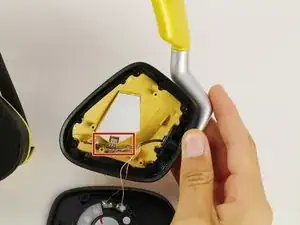
    • There is a small circuit board near the bottom of the muff.

    • Using a Phillips #0 screwdriver, unscrew the single screw holding the circuit board in place.

  8. 1DwFsPQSFmUxoQWB
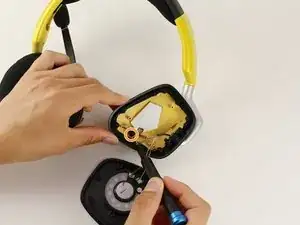
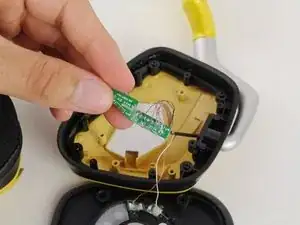
    • Remove the circuit board from its plastic slot.

    • If this is the first time the lights have been removed from the headphones, you may need to wiggle the circuit board out of place or use plastic tweezers to loosen it from the manufacturer's adhesive.

  9. npj65TjLfGJFkgOW
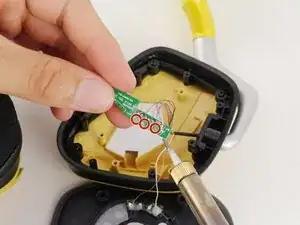
    • Desolder the three points where the wires connect to the circuit board. For detailed instructions on soldering, see this helpful guide.

    • Take note of where each of the wires goes to simplify the resoldering process.

    • Follow these steps again to replace the light on the other earcup.

Abschluss

To reassemble your device, follow these instructions in reverse order.
Gianna Nobili

Mitglied seit: 15/04/19

827 Reputation

0 Kommentare