Einleitung
-
-
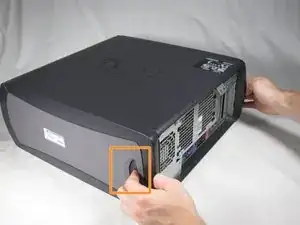
Lay the Dell Optiplex GX260 down on a clean flat surface with the rear towards you.
-
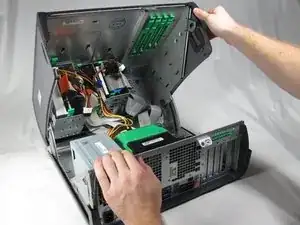
Push the oval shaped buttons located on the top and bottom of the PC simultaneously and lift the case straight up.
-
-
-
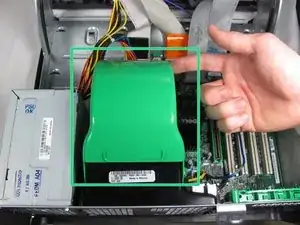
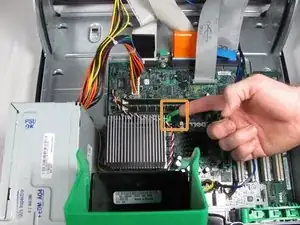
Flip the green fan cover up towards you to reveal the CPU heatsink.
-
Lift the heat sink release lever
-
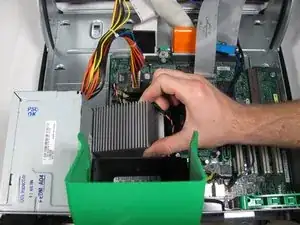
Remove the heat sink from the CPU and lift it out.
-
-
-
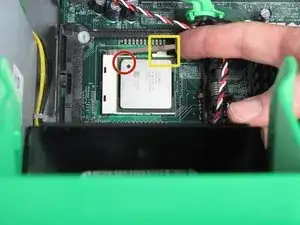
Carefully release the ZIF socket - push the lever backwards to release it from the hold down tab and lift it up and to the left until it stops (roughly 90 degrees).
-
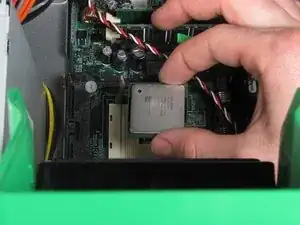
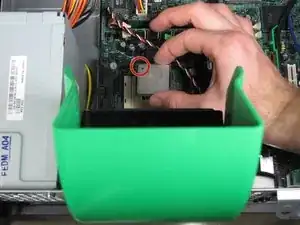
Gently lift the CPU straight up and out of the socket. There should be no resistance.
-
The CPU will only fit into the ZIF socket in one orientation so take care when reinserting it. make sure that pin A1 is located correctly
-
To reassemble your device, follow these instructions in reverse order.
cool de faires des sites comme ca :)
baptiste Prando -
Excellent - Only comment - do the the green brackets come with a new hard drive or should I leave them inside the case for the next owner - Removing to donate to recycling
sheila_jones -
I got this yesterday....up and running now....how on earth do I MERGE the 18GB partition D with C....there is just NO option there.
Elvis 1357 -
I got this yesterday....up and running now....how on earth do I MERGE the 18GB partition D with C....there is just NO option there.
Also, want to add another HD....but, there are no cables at all?
Elvis 1357 -