Einleitung
Diese Anleitung zeigt, wie der Akku in der Fitbit Alta ausgetauscht werden kann. Wenn du deine Fitbit längere Zeit liegen lässt,sie nicht korrekt auflädtst, oder sie einfach schon alt ist, dann kann der Akku am Ende sein. In diesem Fall kann es sein, dass sich das Gerät nicht einschaltet oder lange an bleibt, wenn es vom Netzgerät genommen worden ist.
Bei dieser Reparatur werden innere Bauteile der Fitbit freigelegt, der Akku abgelötet und entfernt und dann ein neuer Akku angelötet.
Achtung: Wenn die Lötarbeiten nicht richtig durchgeführt werden, funktioniert die Fitbit nicht mehr. Schließe die Drähte nicht an den falschen Lötstellen an und bringe nicht zu viel Hitze auf die Platine.
Du brauchst einen Torx T2 Schraubendreher, eine Pinzette, eine Rasierklinge, einen Lötkolben und Lötzinn.
Ersatzteile
-
-
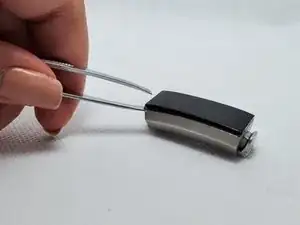
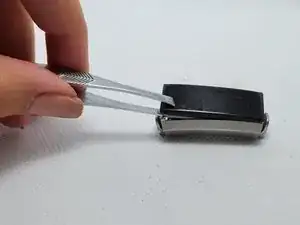
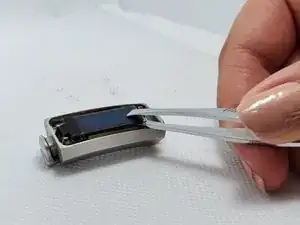
Drücke die Pinzette in eine der Ecken zwischen dem Metallgehäuse und dem Display hinein. Zwänge die beiden Teile mit der Pinzette auseinander. Wiederhole das Ganze an allen vier Ecken.
-
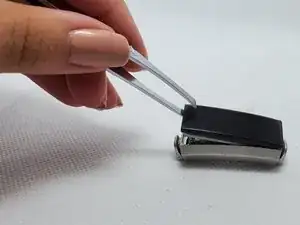
Wenn das Display ab ist, sollte es wie im dritten Bild aussehen.
-
-
-
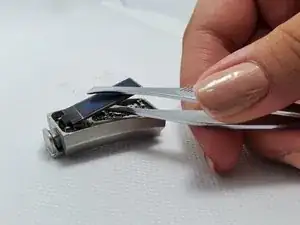
Das Displayist zum Teil an der Platine festgeklebt, schiebe deswegen die Pinzette behutsam unter dem Display entlang, um es abzulösen, hebe es dann hoch.
-
-
-
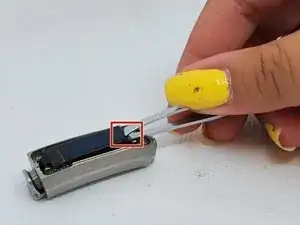
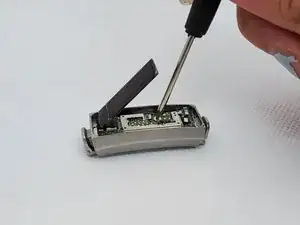
Wenn das Display hochgeklappt ist, wird die Platine sichtbar.
-
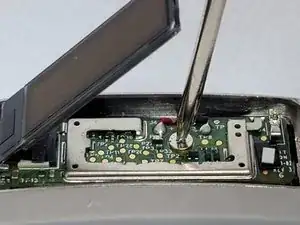
Entferne die Torx T2 Schraube in der Mitte der Platine.
-
-
-
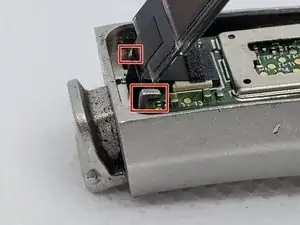
Die Platine wird noch von zwei kleinen Haken festgehalten. Lasse das Display nach links aufgeklappt, drücke dann die Platine behutsam nach unten und schiebe sie nach rechts. Wenn sie frei von den Haken ist, dann hebe sie hoch.
-
-
-
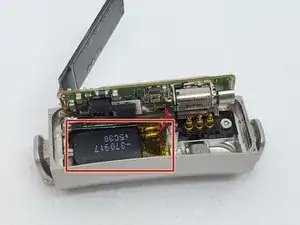
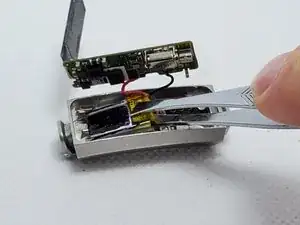
Wenn die Platine hochgehoben ist, kannst du den Akku (unten links) vom Gehäuse ablösen. Beachte, dass der durchsichtige gelbe Abschnitt zum Akku gehört.
-
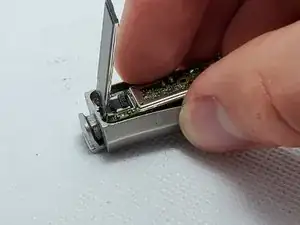
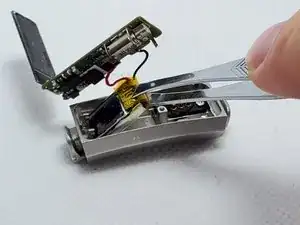
Wenn der Akku entfernt ist, dann hebe die Platine und die daran angeschlossenen Bauteile aus dem Gehäuse heraus.
-
-
-
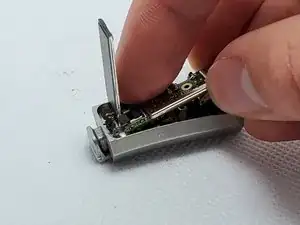
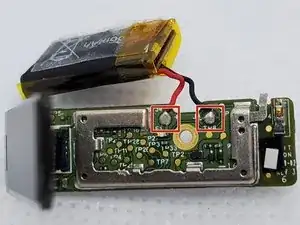
Die Akkuanschlüsse musst du mit einem Lötkolben vom Akku abtrennen.
-
Schneide die Kabel am neuen Akku auf die richtige Länge zu und entferne die Isolation an den Kabelenden.
-
Löte den neuen Akku an der Platine fest.
-
-
-
Wiederhole die Schritte 3 - 5 in umgekehrter Reihenfolge.
-
Um das Display wieder zu befestigen, musst dues erst am Metallrand ausrichten und dann vorsichtig festdrücken. Enferne alle Spuren von Staub oder Fingerabdrücke vom Display mit einem Tuch, bevor du weiterarbeitest.
-
-
-
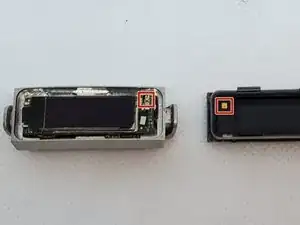
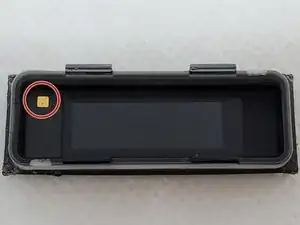
Setze die Displayabdeckung wieder ein, wobei du darauf achten musst, dass der Goldkontakt der Abdeckung genau den entsprechenden Kontakt in der oberen rechten Ecke der Platine trifft.
-
Jetzt sollte die Fitbit wieder länger funktionieren.

14 Kommentare
How about screen replacement? Is there a replacement part for that?
Hi, Tom.
I haven’t seen anything about replacement screens online. To the best of my knowledge, Fitbit doesn’t offer replacement parts for any of their devices.
My Fitbit Alta HR has no center screw. The battery connects from the end of the mother board and there are two very small screws on the other end. It is virtually impossible to solder the new battery in without shorting to the two hold down clamps. Virtually Junk…
Keith -
Maybe try getting a few really small pieces of electrical tape to cover the clamps?
Keith,
Your Fitbit may be an Alta HR, rather than an Alta. I have the same situation you do. The PCB in the HR is different, and in the center has a very small flat-flex cable to the HR sensor below. If you are very careful, you can fold back a small piece of tape holding the flex flex in place (look closely, it is very hard to see), and then you can gently disconnect the HR sensor. The connector lifts straight up, perpendicular to the surface of the PCB. After you have disconnected, you can remove the two screws and slide out the screen, PCB, and battery assembly as a single unit. The HR sensor will remain behind in the case. I would recommend using a plastic tweezers for this process rather than metal, as if the PCB is powered you could damage it in the process.
I took some photos, but I don’t believe I can post them here.
jmmull -
jmmull,
Thank you for describing the differences between Alta vs Alta HR. The main guide was helpful with pictures. I was able to spot the differences with your detailed description. I successfully completed the battery swap for Alta HR. I found a heat gun very handy for removing the screen cover and prying the LCD screen. Note that the solder points for the battery are next to the hooks on the frame where you hook the PCB into for installation.
ganbare6 -
Io per togliere lo schermo ho usato la punta del taglierino facendo attenzione a non scalfirlo, seguendo con la lama tutt’intorno perché la cornice sotto è incollata.
Claudia Spatafora -