Einleitung

Diese Anleitung wurde von iFixit-Mitarbeiter:innen verfasst und ist keine offizielle Reparaturanleitung von Google. Hier erfährst du mehr über unsere Qualitätsstandards.

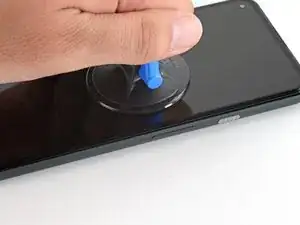
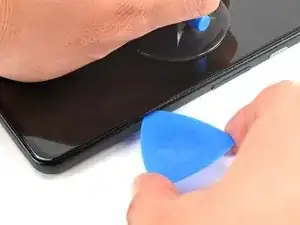
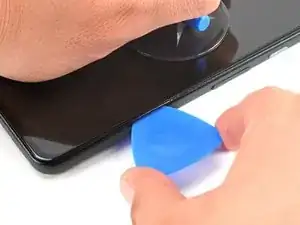
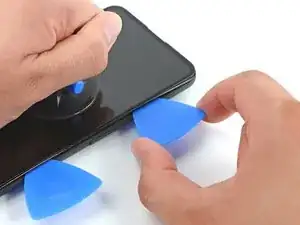
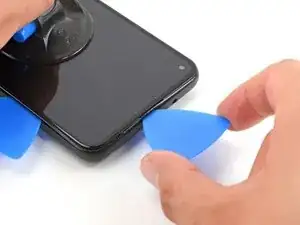
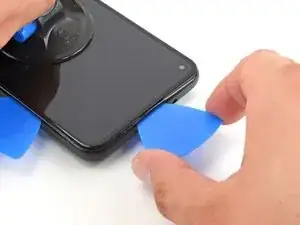
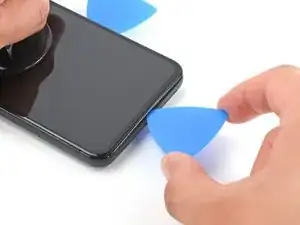
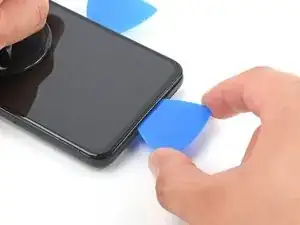
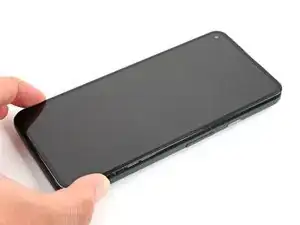
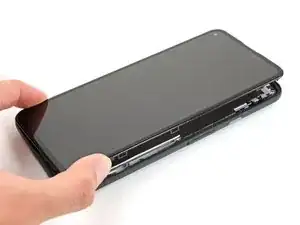
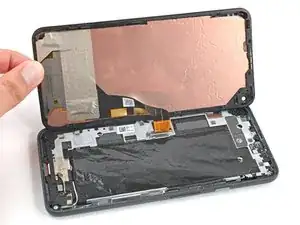
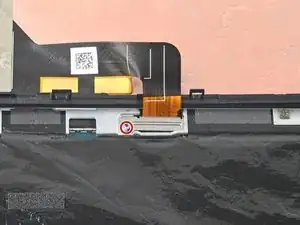
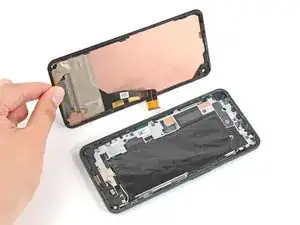
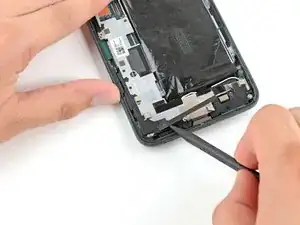
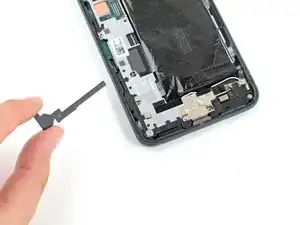
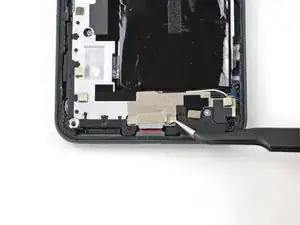
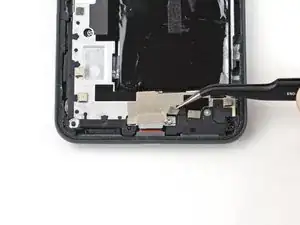
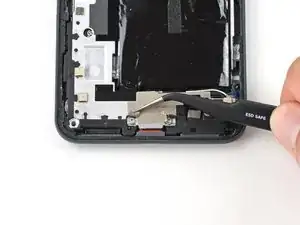
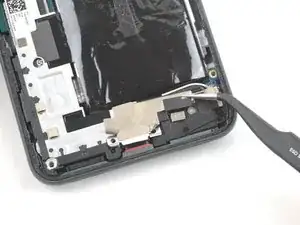
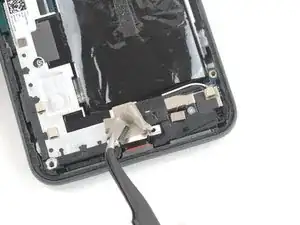
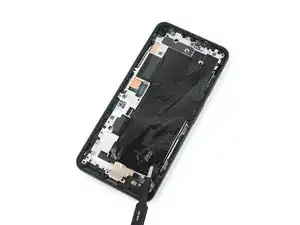
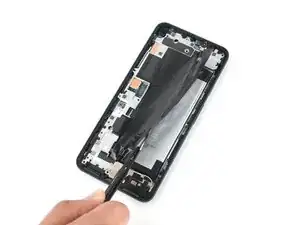
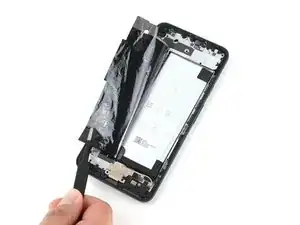
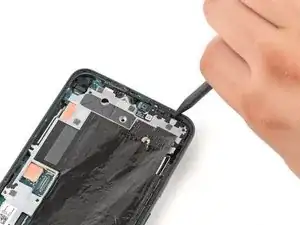
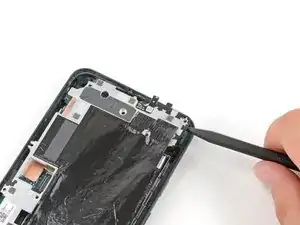
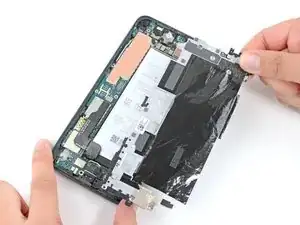
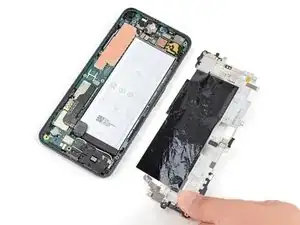
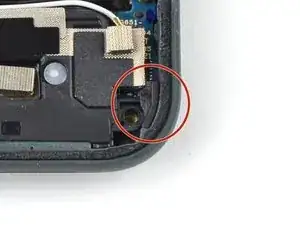
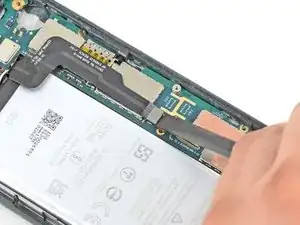
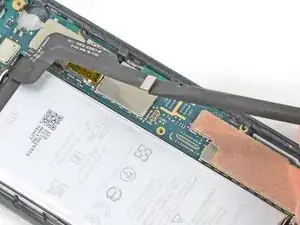
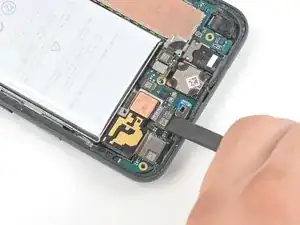
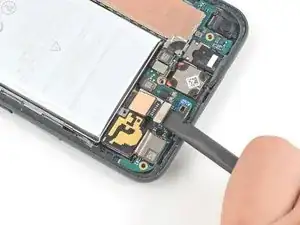
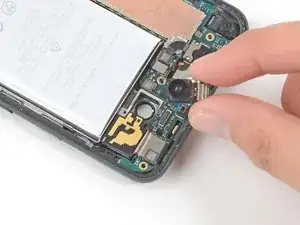
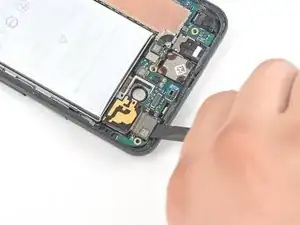
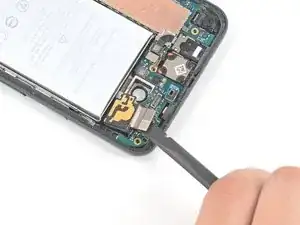
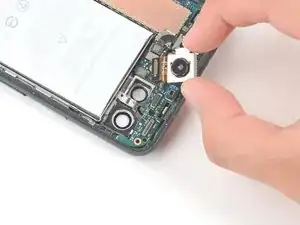
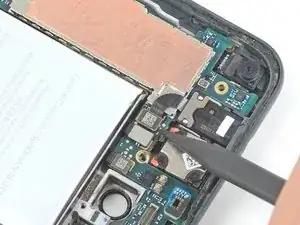
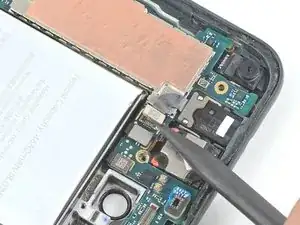
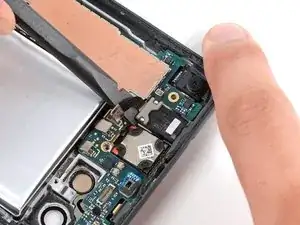
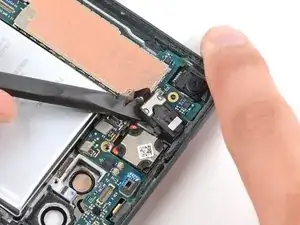
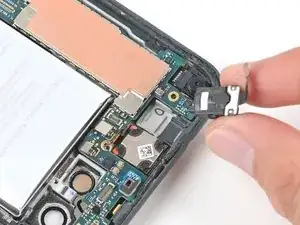
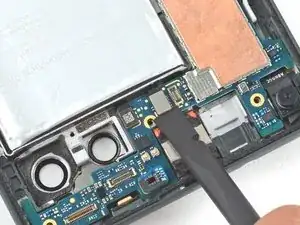
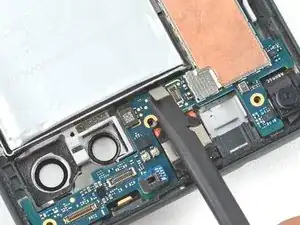
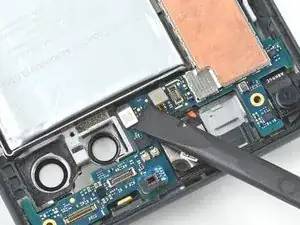
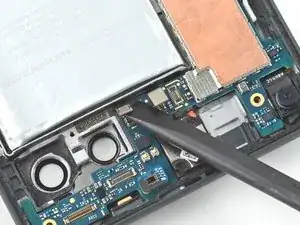
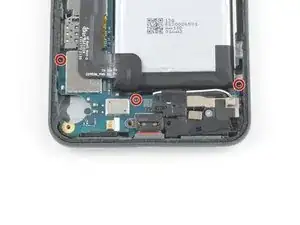
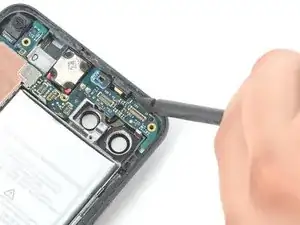
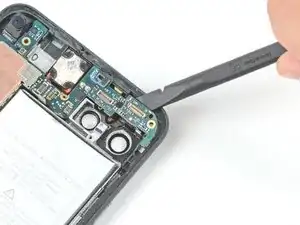
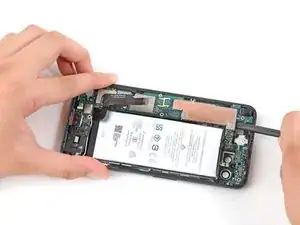
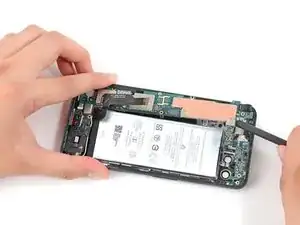
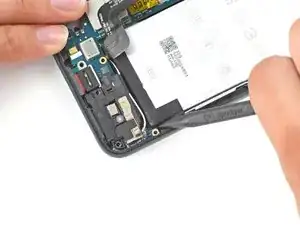
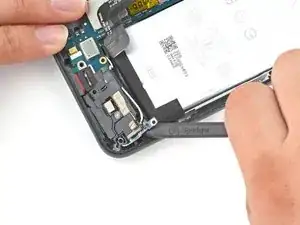
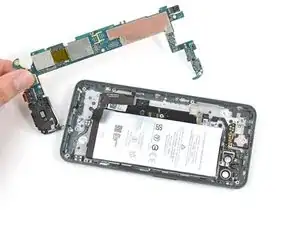
Diese Anleitung zeigt, wie die Frontkamera im Google Pixel 5a ausgetauscht werden kann.

Entlade zur Sicherheit den Akku vor Reparaturbeginn auf unter 25%. Dadurch reduzierst du das Risiko eines Brandschadens während der Reparatur. Wenn der Akku aufgebläht ist, musst du entsprechende Vorsichtsmaßnahmen treffen.

  1. sMfOjErTKBjFwEt2
    sMfOjErTKBjFwEt2
    WBjdRTWhYNCoPheH
    wGsWJkQDKiEI6vPH
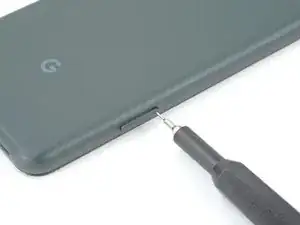
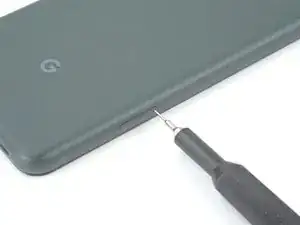
    • Setze ein SIM-Auswurfswerkzeug in die kleine Öffnung an der rechten Rahmenseite ein.

    • Das Standard-SIM-Auswurfwerkzeug ist vielleicht zu groß. Drücke das Werkzeug nicht mit Gewalt hinein, verwende eine kleine aufgebogene Büroklammer oder ein passendes Werkzeug,wie z.B. das SIM-Auswurf-Bit.

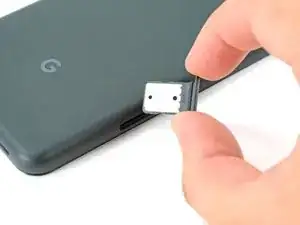
    • Drücke fest hinein, dann kommt der Einschub heraus.

    • Entferne den SIM-Einschub vom Smartphone.

    My sim car tray broken inside my mobile

    jaikumawat431 -

    Any option to take out from my mobile

    jaikumawat431 -

  2. fX42PHSMxaPL3GMb
    fX42PHSMxaPL3GMb
    6jVUHksrsjD6AYrP
    • Schalte das Gerät vor Reparaturbeginn aus.

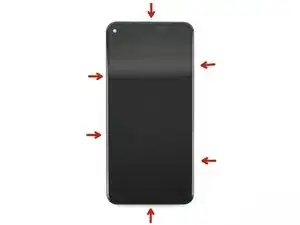
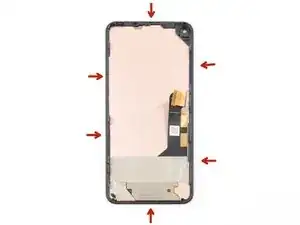
    • Um das Display zu entfernen, muss es hochgehebelt werden. Lies zuerst sorgfältig folgende Hinweise, bevor du anfängst.

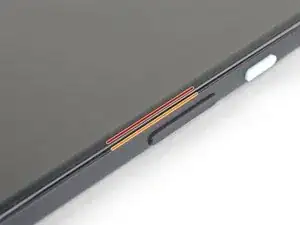
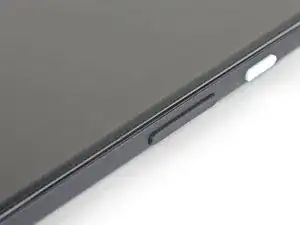
    • Schaue dir genau die beiden Nähte an den Kanten des Gerätes an:

    • Displaynaht: diese Naht befindet sich zwischen dem Display und dem restlichen Gerät. Heble nicht an dieser Naht.

    • Blendennaht: diese Naht befindet sich zwischen der schützenden Kunststoffblende und dem Rahmen. Sie ist durch Rasten befestigt. Hier musst du hebeln.

    This will be clear if you examine your replacement part first.

    bcling -

    True, but one may be disassembling the device prior to receiving their replacement 😉

    Niels Klassen -

    I'm not sure why it's recommended to pry at the bezel seam. I followed this guide but the bezel that's held in by clips, provides some additional housing for the front facing camera as well as the ear-speaker grille. I ended up separating the old screen from the bezel and putting the bezel back into the phone first, before installing the replacement screen.

    Kevin Kim -

    My replacement screen did not come with the bezel, and I had to remove it from the old screen. I didn't notice this until i attempted to replace the screen. Be sure to look at your replacement screen prior to reassembly. It will save you some heartache. All was good though and the phone is working.

    jak ll -

  3. GZIYSPIQxNHkQ6Yr
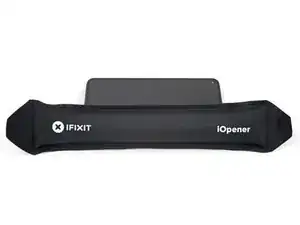
    • Erwärme den rechten Displayrand eine Minute lang mit einem erwärmten iOpener.

    • Je nachdem, wie stark der Kleber an deinem Smartphone ist, musst du den iOpener eventuell mehrfach wieder erwärmen und auflegen.

    • Optional kann hierfür auch ein Haartrockner, eine Heißluftpistole oder eine Heizplatte verwendet werden. Hierbei muss jedoch darauf geachtet werden, dass das Smartphone nicht überhitzt wird. Sowohl das Display als auch der interne Akku sind anfällig für Hitzeschäden.

    Use the full length of the iOpener to soften the adhesive on the right edge and top or bottom. My repair required three applications of the iOpener.

    bcling -

    I needed about 4 applications of the iOpener before the adhesive was weakened enough to stick the opening pick in.

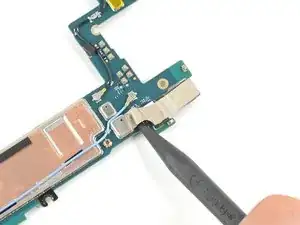
    Ibukunoluwa Amusan -

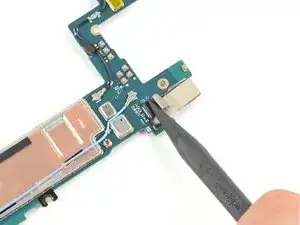
    Do you have to wait 10 minutes between each application?

    Joey -

    I heated the iopener twice for 30sec (weak microwave) then applied for a couple minutes without success. Then reheated iopener for 30 more sec. Then used the blue tool supplied in kit to help push down on bezzle and that did the trick to separate enough to get the picks in.

    Ilya Pittel -

  4. 5DUi2kWQhyIOgxBE
    5DUi2kWQhyIOgxBE
    1xEVsm3hjC1fXsQZ
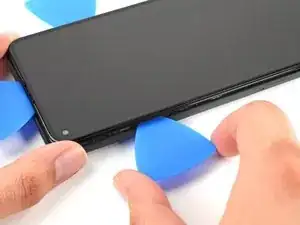
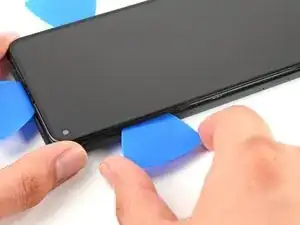
    • Um das Display zu entfernen, musst du Plektren bei den schwarzen Rasten einschieben, mit denen die Blende am Mittelrahmen befestigt ist.

    • Beachte die Stellen, an denen die Plektren am Besten eingesetzt werden sollen.

    Use an old credit card or hotel key card to provide additional thickness and leverage to pop the bezel off.

    bcling -

  5. GZ1fbKOGAqkxKTIf
    GZ1fbKOGAqkxKTIf
    SSCqlsTeddwiTGRV
    • Sollte dein Display stark gebrochen sein, kann durch ein Überkleben des Displays mit durchsichtigem Paketband der Saugheber besser halten. Alternativ kann entweder mit Panzertape ein Griff geklebt oder der Saugheber mit Sekundenkleber auf das Display geklebt werden.

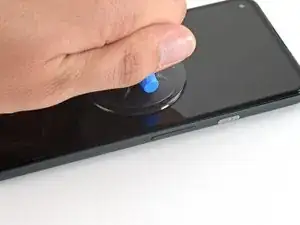
    • Platziere einen Saugheber so weit wie möglich an den rechten Bildschirmkante.

    • Ziehe den Saugheber fest und gleichmäßig nach oben, bis ein kleiner Spalt zwischen Mittelrahmen und Blende entstanden ist.

    Do we use the suction cup before inserting the picks? After applying the I opener 3 plus times, I am having difficulty removing the broken screen. Any tips?

    William Maniss -

    This was the most difficult part. What really helped was putting a piece of packing tape on the screen. It has to be wider than the suction cup. If there is any hint of a crack where the suction cup is located, it will not stick. I had to warm the right side and the top a couple of times to get the screen to give a little bit. It will only give just a little bit and you have to to slide the pick in with more force than I was comfortable with.. It really would help to have a third hand to hold the phone, pull the suction cup and the other to slide the pick in. I had to use my ring finger to apply force to the suction cup and with the same hand slide the pick between the phone and the screen. After this step it was easy peasy!

    Dustin Ashberry -

    Agree this was the hardest part. I heated the right edge of the phone multiple times with the iOpener before the glue was soft enough to flex. My screen only had a crack, was not shattered. I had to wet the suction cup to get it to hold strong enough to pull up to open a gap to insert the pick. Once the first pick was in, heating the other edges and moving around the phone was fairly easy.

    Lisa McManis -

    The screen itself has a large lip that makes it harder to insert the picks. what worked for me was pulling up the screen just enough to insert the pick slightly. next I rotated the pick towards the phone and pushed it down (the phones chassis has a bezel that will catch the tip so you can use a bit more force). Once the pick is inserted like that you can rotate away from the phone, pulling up the screen easily.

    Mason Tate -

    Ended up using Gorilla tape on the screen, a more powerful suction cup from a windshield phone mount, moving it back 1/2 inch from the edge so the tape wouldn't peel from the edge when I pulled.

    Scott Chaney -

    You definitely need a third hand to get the pick in, have someone nearby to help if possible.

    This is the step that requires the most energy.

    Ibukunoluwa Amusan -

    This was by far the most difficult part of the repair hands down. I heated the phone several times before the adhesive softened enough to stick a pick in

    Niels Klassen -

  6. asHyCDKsG4yji5Fe
    asHyCDKsG4yji5Fe
    jUNOIOHOXGBaNKZl
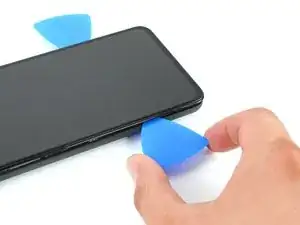
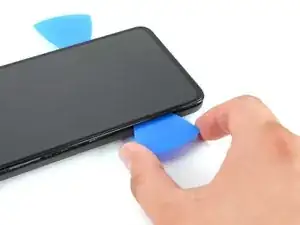
    • Die Blende ist mit dem Mittelrahmen durch eine Reihe von Plastikrasten verbunden. Um diese zu lösen, musst du ein Plektrum mit der Spitze entlang der Naht einsetzen.

    • Setze die Spitze eines Plektrums ungefähr 4 - 5 cm von der Unterkante des Smartphones entfernt in die Blendennaht ein.

    Angling the opening pick downward helped with the initial opening

    barely_diy -

  7. mS2wgYAtWH4DdKMW
    mS2wgYAtWH4DdKMW
    fZhjnvKUSrtCg4rZ
    • Setze die Spitze eines Plektrums ungefähr 3 - 4 cm von der Oberkante des Smartphones entfernt in die Blendennaht ein.

  8. 3JuiDEjApfsvZMyY
    3JuiDEjApfsvZMyY
    5o3k6kB1WhiBnrUG
    • Setze die Spitze eines Plektrums an der Oberkante des Smartphones in die Blendennaht ein.

    • Wenn das nicht leicht geht, dann schiebe das Plektrum um die obere rechte Ecke des Smartphones herum, bis der Spalt an der Oberkante groß genug für ein Plektrum ist.

  9. DwlHOpRXErlgGARH
    DwlHOpRXErlgGARH
    jxBHgsEXpF5lFNht
    • Setze die Spitze eines Plektrums an der Unterkante des Smartphones in die Blendennaht ein.

    • Wenn das nicht leicht geht, dann schiebe das Plektrum um die untere rechte Ecke des Smartphones herum, bis der Spalt an der Unterkante groß genug für ein Plektrum ist.

  10. 16NYBGQThq6OQYWF
    16NYBGQThq6OQYWF
    uXfBAHoMTjEiJwr1
    • Setze die Spitze eines Plektrums ungefähr 2 cm von der Unterkante des Smartphones entfernt in die Blendennaht an der linken Seite ein.

  11. XKFXWfI3ITIMXgNq
    XKFXWfI3ITIMXgNq
    qhZkNuNgUFReXQqH
    • Setze die Spitze eines Plektrums ungefähr 3 - 4 cm unterhalb der Frontkamera in die Blendennaht ein.

  12. IwDnYZSfsesPABtr
    IwDnYZSfsesPABtr
    pABb1qrEZjBGAVUO
    IuGC2HDdXdKxPQgC
    • Überprüfe, ob alle Rasten gelöst sind. Trenne alle Kleberreste mit einem Plektrum auf.

    • Klappe das Gerät von rechts her wie ein Buch auf.

  13. bn2XsPBnxwGGDFwk
    • Drehe die 4,6 mm lange Torx T3 Schraube heraus, mit der die Halterung des Displaysteckers befestigt ist.

    • Achte währende der gesamten Reparatur darauf, dass deine Schrauben gut sortiert bleiben, und hinterher wieder an genau die Stelle zurückkommen, wo sie vorher waren.

    There is just this one screw.

    bcling -

  14. EEhHcXvoBwWPeKwE
    EEhHcXvoBwWPeKwE
    rOTkyQT1VnH4eMYM
    • Entferne die Halterung des Displaysteckers mit einer Pinzette.

  15. XQFGXqnTUPrFtPYl
    XQFGXqnTUPrFtPYl
    VjciX1nAWKBhhJxS
    • Heble das Flachbandkabel zum Display mit der Spudgerspitze hoch und trenne es ab.

    • Um Druckstecker (Press-Fit-Verbinder) - so wie diesen hier - wieder anzuschließen, musst du ihn erst an einer Seite andrücken, bis er einrastet. Wiederhole das dann an der anderen Seite. Drücke nicht in der Mitte. Wenn der Stecker schlecht sitzt, können die Kontakte verbogen und dauerhaft beschädigt werden.

    This was the most tedious part for me when reassembling. I used the gold colored corners on the board to line up the connector. Also, I recommend using your finger and not the spudger for pressing down when you reattach (even if you don't have small hands); this helps you feel the slight click when it's in place.

    Additionally, you can use the suction cup as a sort of kickstand so you have enough ribbon cable to work with (because there's not a lot.)

    Lol No -

    Just successfully completed my screen replacement & agree with the comments above. This guide would be improved if there was a close-up picture showing the gold alignment marks. Sorry, I would have posted a picture of this myself, but my phone was being operated on at the time. LoL

    CRAIG MCKAY -

    Operation success! Had some trouble when disconnecting and removing the old screen because I didn't know how much range I had when opening it up like a book. Ended up bending the connector on the old screen and bent the connector on the motherboard a little. Be very careful when opening up the screen while the screen is still attached to the frame. Only open it up like 30 degrees at first to see what the cable is doing and how much slack you have.

    This led to me trying to straighten out the pins on the motherboard connector for like 3 painstaking hours because every time I tried to insert the new connector by clicking down on one side at a time it kept popping up on the opposite end and shifting up/down a little bit. Assumed the pins were still misaligned with the screen connector and eventually got frustrated enough to just push down the connector in the middle, which explicitly contradicts the instructions. The connector still popped off with some light pressure but I just put the bracket on & it all works!

    A Husk -

  16. QD4rdj6JKP6NgSL6
    • Entferne das Display vom Smartphone.

    • Folge beim Zusammenbau dieser Anleitung, wenn du vorgestanzte Klebestreifen verwendest.

    • Beim ersten Systemstart nach dem Zusammenbau durchläuft das Display einen Kalibrierungsprozess. Berühre das Display dabei nicht, es könnte falsch kalibriert werden, dadurch könnten Probleme mit dem Touchscreen entstehen.

    The ribbon connector is a little tricky to attach to the pcb. Just be patient with the spudger and it will connect. The precut adhesive strip is such a nice touch for finishing the project.

    Dustin Ashberry -

    I also struggled with the ribbon connector. Be patient. It is hard to see the alignment so is done by feel and some outline guides on the pcb. I plugged in the new screen, tested by powering up the phone, then unplugged the screen to install the pre-cut adhesive. There were no instructions with the pre-cut adhesive sheet. First remove EVERY trace of old adhesive. I used the spudger plus isopropyl alcohol on a lint free wipe. Once the old glue was gone, I aligned the pre-cut adhesive with the clear plastic side down, folded down about 1", confirmed my alignment, then pulled on the clear plastic and secured as I removed the clear liner. Then I removed the large blue plastic liner, then there was a very small blue pull tab that exposed the top sticky side of the adhesive. Carefully pull on that to removed. Be sure to re-install the metal latch and screw over the ribbon connector before snapping the screen back onto the phone. I forgot it and had to re-open the phone. Face-palm!

    Lisa McManis -

    Custom cut adhesive is great. No instructions.

    Do not reattach the ribbon cable before applying the adhesive.

    Check the alignment of the adhesive with the clear plastic down.

    Carefully remove the clear plastic. This can be done all at once or gradually starting at the bottom of the phone.

    Apply the adhesive starting at the bottom of the phone pressing the adhesive in place and rechecking alignment as you go.

    Once the adhesive is in place, press the adhesive down again.

    Remove the blue plastic using the tabs at the top and down each side.

    Reattach the display cable by pressing the connector down from one side and then the other. The alignment of the connector is difficult since it is not visible, but starting at one side makes alignment easier.

    Reinstall the connector retaining plate and screw.

    Remove lens and connector tape from the top of the new screen

    Reinstall the screen and press down firmly on all of the edges making sure there are no gaps around the bezel.

    Power on without touching the screen to calibrate.

    craig potts -

    Precut adhesive is installed in 3 steps:

    1. Place adhesive before attaching cable. Remove clear plastic from adhesive and align with phone. Place adhesive onto phone using camera hole as starting point. Make sure blue plastic is properly aligned with edge of phone around entire perimeter

    2. Once adhesive is aligned and fully on, remove blue plastic starting from top right corner. A rectangular tab there can be lifted and used to remove blue plastic. Thin blue plastic strip will remain on adhesive after removing blue sheet. Leave it on to prevent damaging adhesive while screen is being installed

    3. Attach screen cable and retaining clip. Remove thin blue plastic strip starting from bottom. Two tabs there can be used to get started. Align and attach screen

    When attaching cable, hold screen perpendicular to phone with screen facing bottom charging port. This will give the cable more slack to work with. Two corner outlines are printed next to the plug on the phone that can be used to help with cable alignment

    barely_diy -

    The display connector's snaps are quite weak and will come undone easily. The connector's bracket seems to be the only thing keeps it in place. Try to get the connector to snap in as best you can (as others have said it's about feel) then install the bracket to lock it down. Lastly, the ribbon cable is fragile but it can be gently bent to help with installation. I bent mine outwards around 120 degrees and had no issues.

    Mason Tate -

    Remember after the cable retainer plate but before the screen is laid down, peel the proximity sensor protective film, and the tiny red tab on the camera peephole protective film.

    Then you can start to pull a little bit on the thin blue strip tab so it hangs out, rest the screen clips in position but do not push down.

    This will leave enough gap for you to now fully pull out the thin strip. Then click the screen down.

    I had a bit of a scare, during 1st power on test screen just showed snow, super long pressed to turn it back off but there was no feedback to tell me it had done so. Un&re-plugged screen and got a bigger scare when it wouldn't turn on. Insanely super long press and it did come on to a normal boot sequence and a beautiful screen.

    Stephen Cass -

  17. NTnbTZFoIuqvFObj
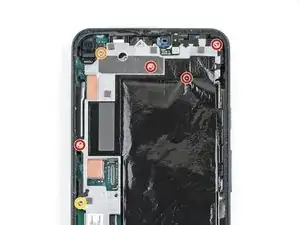
    • Entferne sechs der Torx T3 Schrauben, mit denen der Mittelrahmen an der Hauptplatine befestigt ist:

    • Vier 4,6 mm Schrauben

    • Eine 4 mm Schraube

    • Eine 2 mm Schraube

    • Die Schrauben sind verschieden lang. Halte sie gut geordnet und achte beim Zusammenbau darauf, dass jede an ihren Platz zurück kommt.

    One of the 4.6mm screws in this step is different. The one closest to the graphite sheet has a different color head and is smaller.

    John Peterson -

  18. YhyYUaskVRhrCTmS
    YhyYUaskVRhrCTmS
    IGDtvWT2rqebrayd
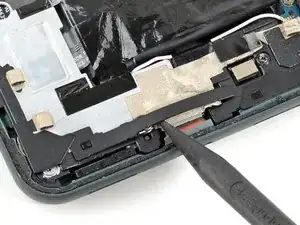
    • Heble die schwarze Kunststoffabdeckung unten links im Smartphone mit der Spudgerspitze hoch.

  19. ZYSNZEljHWt65Oqj
    ZYSNZEljHWt65Oqj
    CqUYXKKEfJOIOwXy
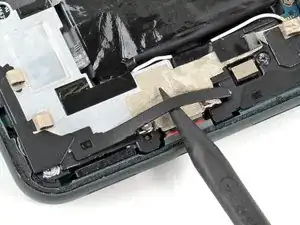
    • Schiebe die Spudgerspitze nach links, bis die Kunststoffabdeckung komplett vom Mittelrahmen gelöst ist.

    • Entferne die Kunststoffabdeckung vom Mittelrahmen.

  20. CDdW1NOAwRXD3pSZ
    CDdW1NOAwRXD3pSZ
    pQRgNbgypk2BbclE
    IFFiQPyTD2jQIDm3
    • Ziehe mit einer Pinzette das Klebeband zurück, mit dem die beiden Schrauben an der Halterung der Ladebuchse überdeckt sind.

  21. JHreMM3xFCJUt2ir
    • Entferne die restlichen vier Torx T3 Schrauben, mit denen der Mittelrahmen an der Hauptplatine befestigt ist:

    • Drei 4,6 mm Schrauben

    • Eine 4 mm Schraube

  22. fRrxj2FBCZ3E1WAX
    fRrxj2FBCZ3E1WAX
    RlDttsMMsMRWQ1EO
    • Ziehe mit einer Pinzette das Klebeband zurück, mit dem die Halterung der Ladebuchse an der Lautsprechereinheit befestigt ist.

    • Achte darauf, den Akku nicht anzustechen oder zu verbiegen. Ein angestochener oder verbogener Akku kann gefährliche Chemikalien verlieren oder in Brand geraten.

  23. I4CwtvKE5mb5rTfx
    I4CwtvKE5mb5rTfx
    61acNCAAUI5MXuOI
    bgXQYuu5V3B21Wx3
    • Ziehe mit einer stumpfen Pinzette vorsichtig die Graphitschicht zurück, mit der der Akku bedeckt ist

    • Arbeite sorgfältig und beschädige nicht versehentlich den Akku, wenn du die Graphitschicht abziehst.

  24. uSqZuIZrZqCZyPae
    uSqZuIZrZqCZyPae
    o5WMm5a1wZ2EuX6R
    • Setze die Spudgerspitze unter die obere rechte Ecke des Mittelrahmens ein.

    • Der Mittelrahmen ist oben am oberen Ende des Rahmens eingerastet. Um die Raste zu lösen, musst du den Mittelrahmen mit einem Spudger nach unten ziehen und hochhebeln.

  25. OG4Pr1QSUoRDBSW1
    OG4Pr1QSUoRDBSW1
    aH6LEGgCJfLEbPfG
    • Entferne den Mittelrahmen.

  26. XTpSK5N4BsEOWn5P
    XTpSK5N4BsEOWn5P
    13IFS1gZgCL2ygBn
    iBWkcPWNYwQbw4hM
    • Zwei Kunstoffstücke helfen den Mittelrahmen festzuhalten. Achte darauf, dass sie nicht verrutschen oder verloren gehen, wenn der Mittelrahmen weg ist.

    • Achte beim Zusammenbau darauf, dass sie an der richtigen Stelle sind, bevor du den Mittelrahmen wieder einbaust.

  27. x2wwhKQg3Psoedgf
    x2wwhKQg3Psoedgf
    QfMKYQ22m12Xr46c
    • Heble den Akkustecker mit dem flachen Ende des Spudgers nach oben und trenne ihn ab.

  28. y24OLZDSUT5MhFac
    y24OLZDSUT5MhFac
    Mfmguh2asTLouE4t
    JfenSn255246TKDJ
    • Heble den Stecker zur 16 MP Ultraweitwinkelkamera mit dem flachen Ende des Spudgers hoch und trenne ihn ab.

    • Entferne die 16 MP Ultraweitwinkelkamera.

  29. aerkmYExhWikLvBa
    aerkmYExhWikLvBa
    BfBZZySAJsfHrOa2
    CYXsJyOSIPZaAV3o
    • Heble den Stecker zur 12,2 MP Weitwinkelkamera mit dem flachen Ende des Spudgers hoch und trenne ihn ab.

    • Entferne die 12,2 MP Weitwinkelkamera.

  30. 2UKAtJnUPf4AZ1qN
    2UKAtJnUPf4AZ1qN
    4KWKAQQXqFOhOoFG
    • Heble den Stecker zur Kopfhörerbuchse mit der Spudgerspitze hoch und trenne ihn ab.

  31. sRmVIDbixqVd1qpC
    sRmVIDbixqVd1qpC
    aioGPg2whKoAxlSM
    cADKJQaTMh3Arxd2
    • Heble die Kopfhörerbuchse mit dem flachen Ende des Spudgers hoch, bis sie herausspringt.

    • Entferne die Kopfhörerbuchse.

  32. P6kxOVIMOIqjSVsL
    P6kxOVIMOIqjSVsL
    Y5FiYbvUY1Q3UDU5
    • Heble den Stecker zum Fingerabdrucksensor mit dem flachen Ende des Spudgers hoch und trenne ihn ab.

  33. U3YbAsDoxhYKyICe
    U3YbAsDoxhYKyICe
    JIHSy5GLUTGcbeDT
    • Heble den Kamerablitz-Stecker mit dem flachen Ende des Spudgers hoch und trenne ihn ab.

  34. WVWt1XYEmC2mGiTf
    • Entferne die drei 2,9 mm Torx T3 Schrauben, mit denen die Hauptplatine am Rahmen befestigt ist.

  35. 2LOuybKCMleDMaLL
    2LOuybKCMleDMaLL
    3f1HQ4OJYAEnBcmb
    • Setze das flache Ende des Spudgers unter die rechte obere Ecke der Hauptplatine und hebe sie aus dem Rahmen heraus.

    • Die Hauptplatine wird auch vom SIM-Karteneinschub festgehalten. Überprüfe nochmals, ob er wirklich entfernt worden ist.

  36. KlNMNOSJbM1BlPV4
    KlNMNOSJbM1BlPV4
    ZZPpUa6dtrPttFUF
    • Setze das flache Ende des Spudgers unter die linke obere Ecke der Hauptplatine und hebe sie aus dem Rahmen heraus.

  37. uoAVhrKXromyTnil
    uoAVhrKXromyTnil
    pVtVCLaS1AkvTThs
    • Setze die Spudgerspitze unter die Öffnung für die Schraube oben rechts an der Lautsprechereinheit und schiebe sie vom Rahmen weg.

    • Verbiege nicht den Akku, wenn du an der Lautsprechereinheit hebelst.

  38. sKeG6eOa6FsQ4YAu
    • Entferne die Hauptplatine und die Lautsprechereinheit.

  39. f4iNYtsWkaAML2bT
    f4iNYtsWkaAML2bT
    aKmsTFeqrCKXLBDV
    • Drehe die Hauptplatine herum.

    • Ziehe das Klebeband vom Stecker der Frontkamera mit der Spudgerspitze zurück.

  40. l3UjPpnNJuhfWGyv
    l3UjPpnNJuhfWGyv
    phQ1SeFddTnhHOSM
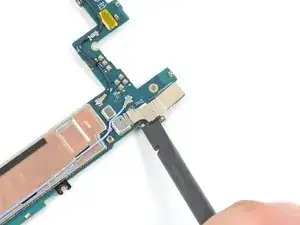
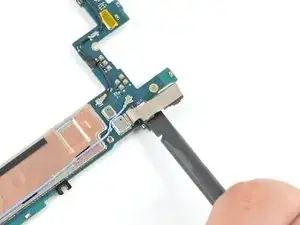
    • Trenne die Frontkamera mit dem flachen Ende des Spudgers ab.

  41. xSjaqDpDtP6VwCmC
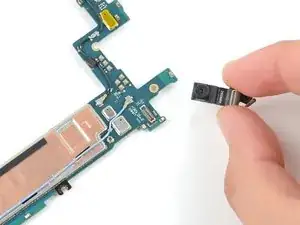
    • Entferne die Frontkamera.

Abschluss

Um dein Gerät wieder zusammenzubauen, folge den Schritten dieser Anleitung in umgekehrter Reihenfolge.

Entsorge deinen Elektromüll fachgerecht.

Lief die Reparatur nicht wie geplant? Probiere zunächst einige grundsätzliche Lösungen oder frage in unserem Forum nach Hilfe bei der Fehlersuche.

Vergleiche das Ersatzteil mit dem Originalteil. Möglicherweise musst du fehlende Bauteile übertragen oder Schutzfolien vom Neuteil abziehen, bevor du es einbauen kannst.
Clay Kim

Mitglied seit: 16/02/21

6899 Reputation

0 Kommentare