Einleitung

Diese Anleitung wurde von iFixit-Mitarbeiter:innen verfasst und ist keine offizielle Reparaturanleitung von Google. Hier erfährst du mehr über unsere Qualitätsstandards.

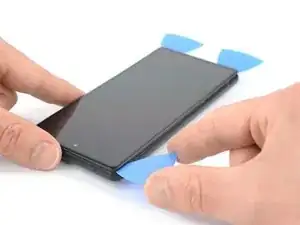
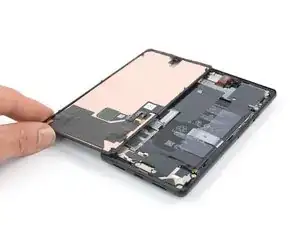
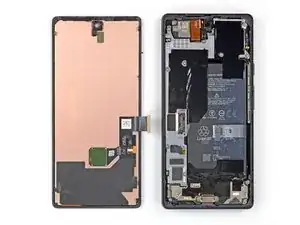
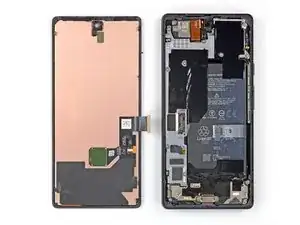
Diese Anleitung zeigt, wie ein defektes Display im Google Pixel 6 ausgetauscht werden kann.

Dein Ersatzdisplay ist mit einem neuen Fingerabdrucksensor ausgestattet. Wenn er nicht vorhanden ist, musst du den bisherigen Fingerabdrucksensor auf das neue Display übertragen und ihn danach neu kalibrieren, sonst funktioniert er nicht richtig.

Wenn der Rahmen verformt ist, musst du ihn ebenfalls austauschen. Das neue Display passt nur dann ohne Beschädigung, wenn es nicht ungleichmäßig festgedrückt wird.

Bevor du dein Handy auseinanderbaust, achte darauf dass der Akku unter 25 % entladen ist. Wenn dein Akku aufgebläht ist, darfst du dein Handy auf keinen Fall erhitzen. Angeschwollene Akkus können sehr gefährlich sein und geraten leicht in Brand.

Achtung: Das Pixel 6 enthält Laser der Klasse 1. Wenn du es auseinandernimmst, könntest du unsichtbarer Infrarotstrahlung ausgesetzt sein.

Hinweis: In dieser Anleitung wird nur der Austausch des Displays inklusive des Platikschutzrahmens gezeigt. Es kann aber sein, dass manche Ersatzdisplays nicht zusammen mit mit dem Rahmen ausgeliefert werden. Dafür muss ein anderes Verfahren verwendet werden. Achte darauf, dass du das richtige Ersatzteil zur Verfügung hast.

Ob dein Gerät nach der Reparatur noch wasserdicht ist, hängt davon ab, wie gut du es beim Zusammenbau versiegelst. Die IP-Zertifizierung wirst du jedoch verlieren.

Halte zum Zusammenbau die passenden Klebestreifen für das Display bereit.

  1. NQKD1XK5SEyZ2pcK
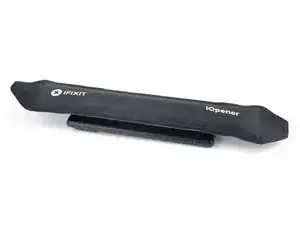
    • Lege einen erwärmten iOpener zum Lösen des Klebers mindestens drei Minuten lang auf das Display.

    • Du kannst auch einen Haartrockner, ein Heißluftgebläse oder eine Heizplatte verwenden, achte aber darauf, dass du das Gerät nicht zu stark erwärmst.

    what area of the phone do i apply it to?

    middle, edges, diagonal?

    johnathandoe -

  2. JUojptYOCPfWpKwR
    JUojptYOCPfWpKwR
    cEjg4oaAxWtdSyNK
    mCNbPLvWQcfdwfQA
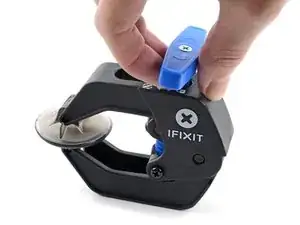
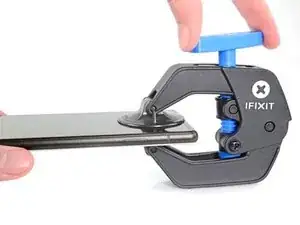
    • Die nächsten beiden Schritte zeigen die Benutzung der Anti-Clamp. Wenn du sie nicht verwenden willst, überspringe die nächsten zwei Schritte und folge einer anderen Methode.

    • Genaue Anweisungen, wie die Anti-Clamp benutzt wird, findest du hier.

    • Drücke den blauen Griff zum Scharnier hin, um den Öffnungsmodus zu deaktivieren.

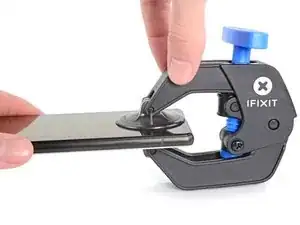
    • Bringe die Saugheber nahe an der Unterkante des Smartphones an, einen auf der Vorderseite, den anderen auf der Rückseite.

    • Drücke die Saugheber auf den Oberflächen fest.

    • Wenn die Saugheber nicht gut auf den Flächen haften, dann klebe Paketband darüber.

  3. VwGYDWrrA1dIjBEl
    VwGYDWrrA1dIjBEl
    d5sfAYICGD2KDOsD
    qZXEXv2DvKDkHJsR
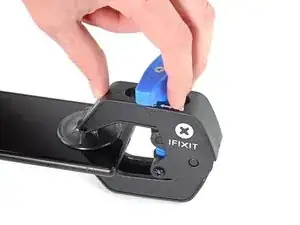
    • Drücke den blauen Griff vom Scharnier weg in die Stellung für den Öffnungsmodus.

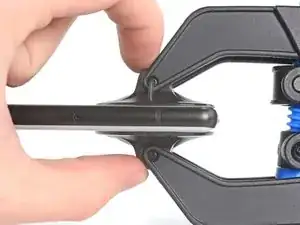
    • Drehe den Griff im Uhrzeigersinn, bis du merkst, dass sich die Saugheber dehnen.

    • Achte darauf, dass sich die Saugheber weiterhin gegenüber stehen. Wenn sie sich nicht mehr gegenüber stehen, dann löse die Saugheber ein wenig ab und schiebe sie in die richtige Position.

    • Warte eine Minute, damit sich der Kleber allmählich ablösen kann und sich das Display unten löst.

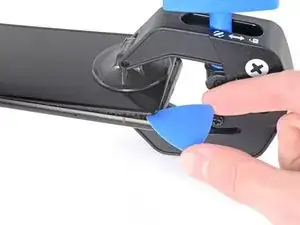
    • Wenn der Spalt groß genug ist, dann setze ein Plektrum unter den Displayrahmen ein.

    • Wenn es nicht gelingt, mit der Anti-Clamp einen ausreichenden Spalt zu erzeugen, dann erwärme die Stelle nochmals und drehe den Griff eine halbe Umdrehung im Uhrzeigersinn weiter.

    • Drehe den Griff jeweils nicht mehr als eine halbe Umdrehung weiter und warte jedes Mal eine Minute lang. Gib der Anti-Clamp Zeit, ihre Arbeit zu erledigen.

    • Überspringe die nächsten zwei Schritte .

  4. cYyiIKFogElwfati
    cYyiIKFogElwfati
    UW31YPIdylgY3D2H
    TfSLnFsLfwnF1A2V
    • Wenn das Display so heiß ist, dass du es kaum noch anfassen kannst, dann bringe einen Saugheber am unteren Displayrand an.

    • Wenn das Displayglas stark zerbrochen ist, dann sorgt eine Schicht von durchsichtigem Klebeband dafür, dass der Saugheber besser haftet. Du kannst auch sehr kräftiges Paketband anstelle des Saughebers verwenden. Wenn gar nichts davon geht, dann kannst du den Saugheber mit Sekundenkleber festkleben.

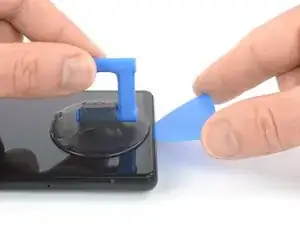
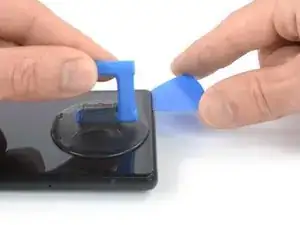
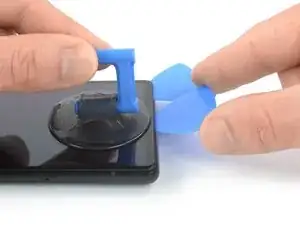
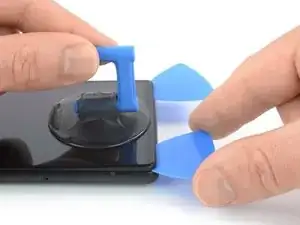
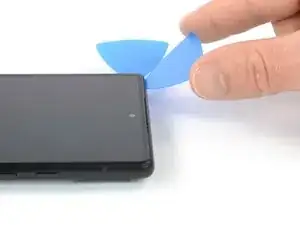
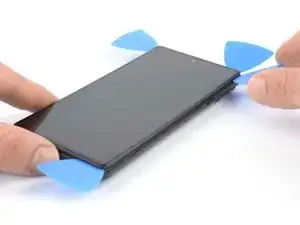
    • Hebe das Display zusammen mit dem Schutzrahmen mit dem Saugheber hoch, bis ein kleiner Spalt zwischen dem Display und dem restlichen Smartphone entstanden ist.

    • Setze ein Plektrum in diesen Spalt ein.

    • Achte darauf, dass das Plektrum so eingesetzt wird, dass es nicht das Display vom Schutzrahmen, sondern vom restlichen Smartphone ablöst.

    • Schiebe das Plektrum zum Auftrennen des Klebers zur rechten unteren Displayecke hin.

    • Lasse das Plektrum stecken, damit sich der Kleber nicht wieder verbinden kann.

  5. VgYxHhOv2ANdZhBj
    VgYxHhOv2ANdZhBj
    T6sO3hSXwWPrGMLR
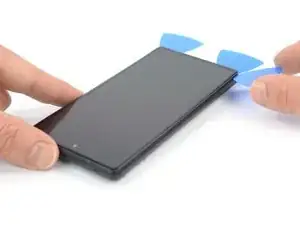
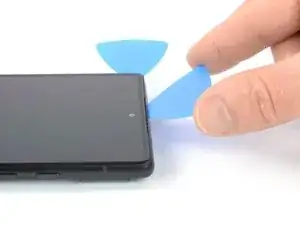
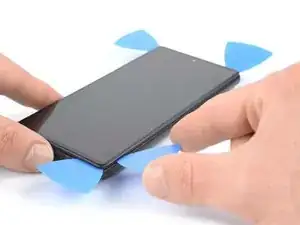
    • Setze ein zweites Plektrum an der Unterkante ein und schiebe es zum Auftrennen des Klebers zur unteren linken Displayecke hin.

    • Lasse das Plektrum stecken, damit sich der Kleber nicht wieder verbinden kann.

  6. cJwEmdUkAHVMxuGa
    cJwEmdUkAHVMxuGa
    lZvbIkb6yRvLCHNY
    bILZg3nTYhAgEAYD
    • Beim Google Pixel 6 ist das Display nicht nur verklebt, sondern wird auch noch von kleinen Kunstoffrasten festgehalten. Wenn dein Plektrum beim Ablösen blockiert wird, hast du es wahrscheinlich zu tief unter das Display eingeschoben. Setze das Plektrum zum Auftrennen des Displayklebers nur mit der Spitze etwa 3 - 4 mm weit ein.

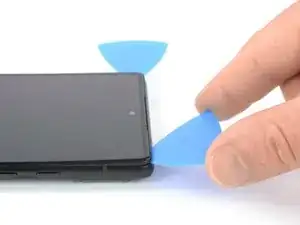
    • Setze ein drittes Plektrum unter die linke untere Displayecke ein.

    • Schiebe das Plektrum zum Auftrennen des Klebers an der linken Displaykante entlang .

    • Lasse das Plektrum in der linken oberen Displayecke stecken, damit sich der Kleber nicht wieder verbinden kann.

  7. 1My5XLwo1mBpLmTW
    1My5XLwo1mBpLmTW
    WqGUe6d5wnaAVGDy
    DoXGAU6d5H44FI4b
    • Wenn der Kleber zu zäh zum Auftrennen geworden ist, hat er sich wahrscheinlich zu sehr abgekühlt. Erwärme ihn nochmals 1 - 2 Minuten lang mit dem iOpener oder dem Heißluftgebläse.

    • In der Nähe der Frontkamera darfst du das Plektrum nur etwa 2 - 3 mm tief mit der Spitze einsetzen, damit die Kamera nicht beschädigt oder verschmutzt wird.

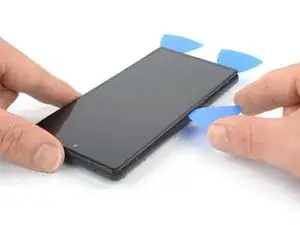
    • Setze ein viertes Plektrum unter die linke obere Displayecke ein.

    • Schiebe das Plektrum zum Auftrennen des Klebers an der Displayoberkante entlang .

    • Lasse das Plektrum in der oberen rechten Displayecke stecken, damit sich der Kleber nicht wieder verbinden kann.

  8. oc26Ut2TqOXsSApn
    oc26Ut2TqOXsSApn
    GRRyAxb5PErHCLEj
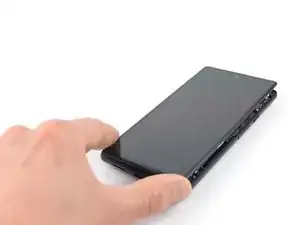
    • Setze ein fünftes Plektrum in die rechte Displaykante ein. Schiebe es unter der rechten Kante zum Auftrennen des restlichen Klebers entlang.

    • Entferne das Display noch nicht ganz, es ist immer noch am Gerät angeschlossen.

  9. RuEUIInW6MLASrru
    RuEUIInW6MLASrru
    banNiywUPAjPnNOY
    r1hEEeZcCNUrSiW3
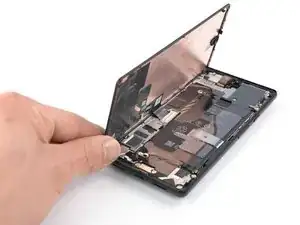
    • Belaste die Kabel bei der folgenden Prozedur nicht zu stark.

    • Klappe das Smartphone behutsam wie ein Buch von der rechten Displayseite her auf.

  10. hvjCSMnSLpvKtTLC
    hvjCSMnSLpvKtTLC
    RHNWK5RKHyUOC4Sy
    uD4WvXdPvX2tNSw3
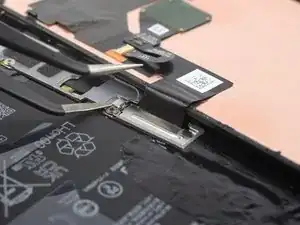
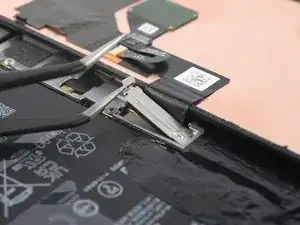
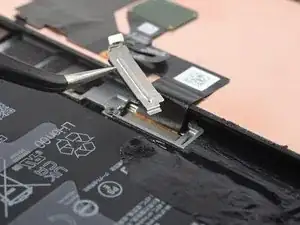
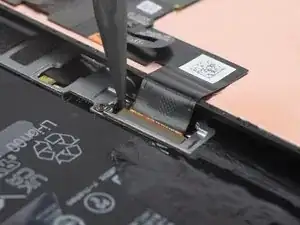
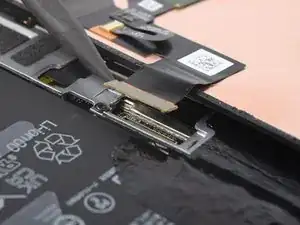
    • Über dem Displaykabelstecker befindet sich eine Metallhalterung. Hänge die Halterung des Displayskabels vorsichtig mit einer Pinzette aus und entferne sie.

    • Bewahre dieses Bauteil gut auf, du benötigst es beim Zusammenbau.

  11. Vl25352xbMJOyJf2
    Vl25352xbMJOyJf2
    JlXiF4IOKQTRHBit
    • Heble den Displaykabelstecker mit einem Spudger senkrecht nach oben aus seinem Anschluss heraus und löse ihn ab.

  12. DLLMweSo6ZRPrLYE
    • Entferne das Display

    • Bringe an den notwendigen Stellen neuen Kleber an, nachdem du diese mit Isopropylalkohol (mindestens 90%ig) gereinigt hast.

    • Wenn du beim Zusammenbau fertig zugeschnittene Klebestreifen verwendest, dann schaue in diese Anleitung.

    • Wenn du beim Zusammenbau vorgestanzte Klebestreifen verwendest, dann schaue in diese Anleitung.

    • Beim ersten Bootvorgang nach der Reparatur wird das Display eine Kalibriersequenz durchlaufen. Berühre es dabei nicht, es könnte sonst falsch kalibriert werden, was zu Problemen mit dem Touchscreen führen kann.

    • Wenn du einen anderen Fingerabdruckleser einbaust, musst du ihn nach der Reparatur neu kalibrieren, sonst funktioniert er nicht richtig.

    Has the issue with the fingerprint not working after screen replacement been sorted?

    Nigel -

    I bought the repair kit that included the adhesive & fingerprint module. If that's what you bought as well, you will have to use the google repair tool. https://pixelrepair.withgoogle.com/udfps. I had to manually download the google usb drivers & install them on Windows 11 because the phone wasn't being detected by the pixel repair tool.

    Kwame Bailey -

    Hello, fingerprint does'nt work now.... any tips ? thank !

    willy kedziora -

    I had the screen on my 6A replaced at a U-BreakiFix got home fingerprint reader does not work. It says enrollment not complete. Go to your repair facility. I guess they must have some magic that makes it work again due to security issues

    Lynne Ayers -

    Great directions, would be helpful to have a section on Google Pixel 6 Display-Klebestreifen (Original-Ersatzteil)

    Troy O'Connor -

    This guide is clear and easy to follow. The other one where you actually replace the screen and put the new adhesive is much less easy to follow, and takes much more time to complete because you have to remove all traces of the old adhesive. I used GooGone and a 2mm flat head screwdriver as a scraping tool and it worked well.

    The fingerprint reader was not working after the upgrade, but I got it to work by visiting https://pixelrepair.withgoogle.com/udfps and since I'm using Ubuntu, I had to run those two commands:

    sudo usermod -aG plugdev $LOGNAME

    sudo apt-get install android-sdk-platform-tools-common

    And then reboot my computer before my phone could be connected. I rebooted my phone manually after the upgrade and all was working normally. In fact, the new fingerprint sensor works better than the one I got before. The new one is actually usable.

    My Pixel 6 is like new! (except perhaps for the water resistance)

    Francois Lord -

    Great tips! I wish I had thought of Goo Gone. By far the longest part of the procedure was cleaning out the old adhesive, and using alcohol swabs (including a few spares on hand) was slow and not very effective.

    After Chrome on ubuntu was unhappy with recognizing my phone I had to resort to using a Mac, but I would prefer your solution.

    Gary Smith -

    Easy enough and excellent guide! Thank you!

    Jason -

    The guide was very helpful, but could be improved somewhat. I made the mistake of removing the screen without the bracket & didn't realize until I had attached the adhesive & tried to put the new screen on. So I had to remove the adhesive & the bracket before the new screen would fit, since it has it's own bracket. Another tip would be to include the instructions for getting the fingerprint module to work. Including https://pixelrepair.withgoogle.com/udfps & downloading & installing the google usb driver.

    Kwame Bailey -

Abschluss

Folge diesen Anweisungen in umgekehrter Reihenfolge, um dein Handy wieder zusammenzubauen.

Falls möglich, mach dein Handy an und teste deine Reparatur, bevor du neuen Kleber anbringst und dein Handy wieder abdichtest.

Entsorge deinen Elektromüll fachgerecht.

Deine Reparatur ist nicht so gelaufen, wie du dir das vorgestellt hast? Probiere zunächst  grundsätzliche Lösungen, oder schaue in unserem Antwortenforum vorbei, wenn du Hilfe bei der Fehlerbehebung brauchst!

Dominik Schnabelrauch

Mitglied seit: 23/11/16

167866 Reputation

30 Kommentare

Ordered the official Google Pixel 6 display part from iFixit and followed this guide, which worked well. However, it's probably worth adding that you may need to manually calibrate the display once it's installed if the phone is throwing up fingerprint reader errors (which is what happened to me). You can do that via this tool from Google: https://pixelrepair.withgoogle.com/udfps

Mark Walton -

The guide worked great, thanks! :D

Warning to others though: Careful what you buy! The genuine display was out of stock so I bought from a different source which didn't come with a fingerprint reader or display adhesive. My fault for not paying attention when buying, but fair warning to everyone else to double check. I hadn't even considered the reader being glued to the screen but not included on replacement parts. The adhesive is an easy purchase, but not sure how hard the fingerprint reader will be. I might be back to unlocking with a pin like some kind of caveman!

Jonathan Michaud -

Nvm, found the guide for the fingerprint reader replacement. Hopefully I can just move this one over.

Jonathan Michaud -

Bought the screen with repair kit from iFixit. Be aware, the custom cut adhesive guide they recommend for reattaching the screen is WRONG. It says you hold the tabs to align and place the adhesive strip. That's NOT the case with the one included here. The side with the tabs actually has to be pulled off first. Had to order another one from iFixit. Now without my phone a couple days while waiting for the new part to arrive. Now without my phone for a few days waiting for the new adhesive to arrive. Not great.
Ravi Chopra -

For those who are not able to get the Pixel 6 detected in the "Fast Boot Mode" on the website https://pixelrepair.withgoogle.com/udfps you need to install the Driver. First and foremost on Device Manager you should see Pixel 6 or other device, and then update driver, install the driver from the downloaded w/ instructions from https://developer.android.com/studio/run.... Update Driver and point the driver to this location where you just downloaded the driver. (unzipped version). Once you are done the device gets recognized immmeidately on the Chrome Repair Website.

And one more important steps, make sure this is in Fast Mode (not safe/recovery/rescue). Second after you see successful installation on Chrome, you need to restart the Pixel 6, the automatic first restart does not work, you need to restart manually. And then go to finger print and setup again. This is very important!!

Venu Reddy -

Thanks, useful info Venu.

Bill Tolbert -

Thank you. Your solution worked perfectly. I'm glad I saw it before I started the repair otherwise I would have been stressed out.

Justin Farischon -

Couldn't find the unique calibration software for this deviceCouldn't find the unique calibration software for this device
i get thhis messege
did you know how to fix it ?

giorgos pelekanos -

Soooooo good! Got a dude screen on Monday. Thought I screwed up and was sweating. Tested the broken screen and realised it still worked. Support came back to me in 24 hours and put me on the list for the next part available. Got it today (Thursday) and now I have a working phone again. Very easy and fun fix. Used the heat pack and a hairdryer, Take your time opening it and do as best you can on cleaning out the glue on the edge. Also, recommend using some books or other gentle clamps to close after. Finally, like Mark, I needed to use https://pixelrepair.withgoogle.com/udfps and it worked after I restarted manually.

#RightToRepair #FTW so happy. Saved 45% of the cost to repair in a shop and got a little more comfortable with my phone and own skills.

Denis Hoctor -

So I have two pixel 6 phones with physical damage to one causing the display to have a "black ink spot" eventually overtake the screen, and the other with water damage that initially seemed inconsequential, but within an hour rendered the screen unusable(due to not being able to see what's displayed. Dropped it in a toilet 😑 fully submerged for all of one second).

Both phones work perfectly well otherwise. Will this replacement work(fix the phone), or is this something one cannot determine with certainty? If not, will it likely do so (or more commonly/most often the case)

Theodore Leahy -

Success! I was dubious on the iOpener and after reading the comments, decided to use a heat gun and an instant read thermometer. Slowly got around 150 degrees F and using the suction cup it started opening up. The other tools worked great. I ordered the OEM replacement screen and it included the display adhesive. That wasn't clear to me so I ordered one separately and now I have an extra.


I assumed you would not need to re-calibrate the fingerprint reader since the OEM screen included the reader. But, I did. Note that you don't have to reset the phone to factory settings. Something I read made me think you did. As posted by Venu Reddy above, follow the instructions at https://pixelrepair.withgoogle.com/udfps.

Bill Tolbert -

Fantastic guide. Replaced a Pixel 6 screen that was totally smashed from a face-flat fall outside. Seems to have worked like a charm, and has saved a huge amount of money (and e-waste)! I had to recalibrate the fingerprint reader after installing the new screen (via the tool at https://pixelrepair.withgoogle.com/udfps), and after doing that everything is working as expected. Overall, very satisfied. Thanks to Dominik Schnabelrauch and iFixit!

William Barber -

So fo those struggling to get the pixelrepair tool to recognise there phone. on windows 10/11

Step 1. Try connect using instructions here > https://pixelrepair.withgoogle.com/udfps If it works, Yay! if it doesnt proceed to step 2.

Step 2 > Download the Google USB Driver Zip (https://developer.android.com/studio/run... extract the file to a known location

Step 3 > Go into Fastboot mode and connect your phone

Step 4 > Open Control Panel > Device Manager > Other Devices , Locate the device with the error message , Right click and Update that driver

Step 5 > Browse my computer for Drivers

Step 6 > Browse the location you extracted the Google USB Driver to and Next Next Next

Step 7 > Browse to https://pixelrepair.withgoogle.com/udfps and try again

It should work, the issue is Fast boot appears to use a different driver then the primary OS (which makes sense) the only issue is you cant install the driver until you are in fastboot mode and that isn't mentioned anywhere!

Hope this helps someone :-)

Jim Catelli -

Thank you so so much for taking the time to write out the steps! After an hour of frustration, I found your comment and it worked!!! Appreciate it !!!

Aneta Otylia Siwiec -

The hardest part of this repair is getting the old adhesive out of the track along the edge before putting the new one in. I sprayed some WD-40 into a cup and used the tip of the spudger to apply some to loosen it. I don't know if it helped. Wish I had read the previous comment about using a 2mm jeweler's screwdriver (yes, metal!). That and some Goo Gone or WD-40 should work. I couldn't figure out the coffee filter technique. I used about 15 alcohol prep pads (they include one in the kit). I found a fast scrubbing action with my fingernail jamming the alcohol pad into the track to be effective as a final cleaning. Good luck! Overall, this screen replacement isn't that hard.

Kurt Roskopf -

I purchased this exact screen from iFix-it and the instructions and install were excellent. One major flaw is that fingerprint reader does not even work, almost like it is not even recognized as being present. When the software calls for fingerprint it immediately goes gos to request 4 digit screen lock pin. Very frustrating.

David Blevins -

Pretty straightforwad and P6 is way easier to open than my old P3. One thing to note, when lifting the old broken screen, the small rectangular rubber surround thing which borders the light sensor under the camera stuck to the screen. I didn't pay close attention to this until I was about to install the new one and noticed this part should've stayed with the phone / bottom portion. As others said, cleaning the old adhesive was the hardest bit and I second what Kurt said, 2mm screwdriver + lots of isopropyl alcohol. The bottom frame doesn't seem too scratch easily, seems to be made out of plastic instead of aluminium. Finally thanks to Jim for the UDFPS walkthrough, my Win11 failed to recognise the P6 initially until I followed your instructions :)

L Santoso -

Not good. No good explanation for the blue screens of plastic and how to reassemble. This is half of a guide.

Daniel McKinlay -

Why does this "genuine" screen replacement look so thick to me? It looks like an LCD that belongs on a phone made 10 years ago.

owens87 -

Could you share what 10-year-old phone you refer to?

Davit Zen -

Just finished using this guide alongside the replacement screen and tool kit from iFixit. When I first decided to fix my screen myself, I was worried that I might have struggled along the way, but I can happily say my repair went without issue. Instead of using the included heat pad I used a hair dryer and carefully heated the edges of the phone, I then proceeded to use the suction cup and guitar pick to begin slicing through the adhesive. This part was surprisingly easy and did not take much effort. The hardest part of this repair was adequately cleaning up the old adhesive that comes with the phone, which was more tedious than hard. The new screen fits in perfectly after applying the new adhesive. Just a tip for others looking to take this on, the in-screen fingerprint sensor needs to be calibrated, you can find the tool online by searching for pixel 6 fingerprint calibrator. Overall a very good experience.

Cameron French -

I can see my display but the screen is unresponsive to touch

Daniel Robinson -

Hilfe, mein Bildschirm ist nach der Displayinstallation schwar geblieben. Es kommt aber zu einem klacken, wenn ich die Tasten drücke, d.h. das Telefon hat gebootet. Was kann ich tun?

Stebbke -

Hallo Stebbke, es könnte sein, dass das Display-Kabel nicht fest sitzt oder der Connector verschmutzt ist. Ich würde dir empfehlen, die empfohlenen Schritte zur Problembehebung durchzugehen.

Manuel Haeussermann -

Just want to give my hats off to the IFIXIT team. My wife dropped her phone the day before her phone case showed up. Since she had a history of not dropping her phones....we didn't purchase the add-on warranty. Welp such is life. The last time I had to replace a screen was my HTC DNA way back in the day, and needless to say I really didn't go in prepared with all the truly necessary tools for the job. So in some way's I still somewhat dreaded replacing the screen from past experience. Thankfully the tool kit was mighty impressive and honest to God worth every extra dollar(unless you already have comparable or better tools), and made the screen removal a total breeze, well other then that pesky adhesive remnants. The how-to tutorial was well written and very helpful. The adhesive template was brilliant and well thought out, and worked perfect. The phone is perfect again. Happy Wife Happy Life. Thank you IFIXIT Team!

Joey Rakas -

I learned some things during the process that I wished I knew before I started

1. There are two metal springy things at the bottom corners. You can seen them in figure 12. If your pick slips too far in they can become damaged and they might catch on a sleeve during the adhesive cleaning.

2. The screen connector is hard to reconnect and clip in place. Took me a good 30 minutes of fiddling, applying a suction cup to the back at the start would have made the screen easier to hold.

3. Fingerprint recalibration requires connection to you computer and if you use windows the driver must be installed before hand. Matt M. had a good explanation on how to install the driver. Fingerprint scanner not working after replacing screen. Pixel 6 Pro

Daniel Lutz -

This guide was perfect. Worked as a sharm.

The only note I have is that the guide is not showing you how to reassmble the screen (I see now however, at the bottom of the guide, that one should just follow the guide in reverse order, which makes sense). One thing worth noting though is that there is a "protective" cover over the hole for the front camera, so make sure to remove that before gluing the screen back on the phone (then you wont need to remove the scree a second time and damage the adhesive 😊).

Also, make sure to follow the other posts regarding the fingerprint-reader (install from https://pixelrepair.withgoogle.com/udfps and restart).

Overall, very thorough guide and I couldn't be more pleased with my result.

⭐⭐⭐⭐⭐

Patrik Martinsson -

I installed my new screen, per the instructions above. When I power the phone on, I have no display. Any help would be appreciated. Did I receive a defective screen or do I have more damage beyond the screen? TIA

John C -

Touch is unresponsive after replacement

Juan Carlos Iturri -

Good product. Installed and it works fine. BUT, we are missing some crucial steps. Where is the step to reassemble the screen once you have installed the adhesive? Where is the step to show you how to remove all the strips once the screen is connected? Where is the step to show you how to test the screen before removing the strips and clicking in the screen? I searched a long time for these steps and couldnt find them,. so either theyre missing or too hard to find, either way, this is an oversight. I became quite frustrated with it and could have used the help.

Caspar Redgrave -