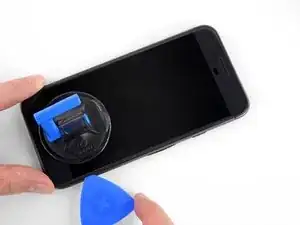
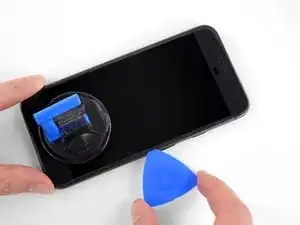
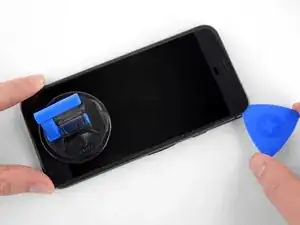
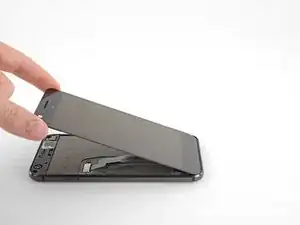
Einleitung

Diese Anleitung wurde von iFixit-Mitarbeiter:innen verfasst und ist keine offizielle Reparaturanleitung von Google. Hier erfährst du mehr über unsere Qualitätsstandards.

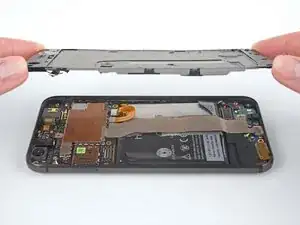
Tausche mithilfe dieser Anleitung den Akku in deinem Google Pixel aus. Bei täglichem Gebrauch hält ein normaler Akku etwa 18-24 Monate, bevor sich seine Leistung deutlich verringert. Wenn das Gerät immer wieder nachgeladen werden muss, oder sich plötzlich ausschaltet, könnte ein Austausch des Akkus die Lösung sein.

Warnung: Da das Display stark verklebt ist und sehr wenig Platz bietet, um Öffnungswerkzeuge einzusetzen, weshalb es bei dieser Prozedur leicht brechen könnte. Folge ganz genau den Schritten und beachte alle Warnungen, dann hast du gute Chancen, dass alles gelingt.

Entlade den Akku vor dem Auseinanderbauen deines Handys auf unter 25%. Eine geladener Lithium-Ionen Akku kann Feuer fangen und/oder explodieren, wenn er versehentlich perforiert oder beschädigt wird.

Wenn dein Akku aufgebläht ist, dann musst du entsprechende Vorsichtsmaßnahmen treffen.

Der Akku ist sehr stark verklebt. Wahrscheinlich benötigst du hochkonzentrierten Isopropylalkohol (mehr als 90%ig), um den Akku von Smartphone zu lösen.

  1. wSZ51FDaEgp4FJpb
    • Schalte das Gerät aus.

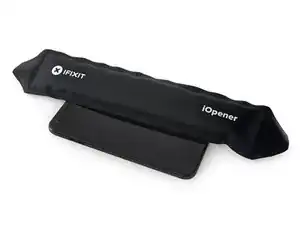
    • Erwärme einen iOpener um das Display zu erwärmen und den Kleber darunter aufzuweichen. Ersatzweise kannst du auch ein Heißluftgebläse oder einen Haartrockner verwenden.

    • Die Flächen in der Nähe der beiden Lautsprecher und der Mikrophone (oben und unten) haben größere Klebestellen. Diese Flächen brauchen möglicherweise eine etwas längere Erwärmzeit. Das Display sollte ungefähr zwei Minuten lang erwärmt werden.

    When reassembling, does the adhesive still hold the phone together when closed or do we need to apply more adhesive?

    Jess Haddow -

    Step 10 addresses this: there should be a plastic sheet that looks like your screen in the repair kit. This is the new adhesive for reassembly.

    Peter Karski -

    Unfortunately also cracked my display on the way in. You have to go pretty deep under the top and bottom of the screen but BARELY in around the sides, especially the corners. If I had to do it over again, I would have either tried a playing card or put some type of depth limit/mark on my pick so I didn’t go more than a few millimeters in.

    Matthew Jastremski -

    Use plenty of heat here and take your time. Start from the top, then the sides. use a gentle prying motion with the picks but don’t go too deep.

    Richard Wood -

    It’s EXTREMELY easy to crack the screen. Just buy a new display module before fixing it. The old screen will be disposable.

    Buyi Yu -

    Don’t even waste your time with the iOpener. I went straight for the hair dryer and opening picks took 30 mins to get the screen off with no issues.

    eric duchene -

    Hair dryer worked for me, thanks!

    David Gault -

    As others have said, the iOpeners didn't work for me at all. I tried microwaving, I tried boiling, but even when the iOpener was too hot to touch the phone didn't get that hot. A hair dryer eventually worked, but took a long time too, and I had to pull quite hard (similar to pulling on a really stuck LEGO brick, I was surprised my screen didn't crack). I also dripped some isopropyl along the edge where I could lift it a teeny bit but not get a pick in, which seemed to get the gap to widen. Once I had an edge up and could start sliding the pick along though everything went much more smoothly. Reading other comments, I bet a heat gun would have been a better tool.

    Mark Fickett -

    If you haven’t purchased this kit yet then stop right here. The difficulty, as stated, is very difficult. This was my first attempted repair. I spent a good hour heating the adhesive and felt good about getting the display off. I even paused to boot the phone to make sure I didn’t damage the screen before flipping it over - it worked fine still! Then I went to pull the display from the top using the picks. Shattered the corner of the screen. $129 for a new screen. At this point, the Pixel 3 is $499. I bought a new phone. Just be prepared to break the screen. Many people mention it in the comments. I felt confident I could do it. I couldn’t.

    Michael Neil -

    do yourself a favor and purchase a replacement screen when you order a battery. it’s impossible to remove the screen without damaging it no matter how careful you are.

    Andrey Gerasenkov -

    100% agree. So glad that I did. My new screen was only £20 from ebay - took ages to arrive as it came from China, but works perfectly.

    Daniel Yeo -

    I managed it - this was my first repair. It’s a lot harder than I was expecting, but totally doable! I recommend just sliding the very edge of the pick around first until you find a corner that starts to peel up. Once you can see under the screen (without bending it, of course!), you can go further in to break the stubborn adhesive globs. It took me just under 30 minutes to remove the screen.

    Peter Karski -

    My tip: Place a hot-water bottle on the screen for 2 minutes. Use the suction handle to lift one edge and insert an opening pick. Use an opening tool to cut through the adhesive at the bottom and place another opening pick in the second corner. Place the hot-water bottle on the phone again and wait 2 minutes. Cut through the sides with the opening tool (if you are focused it's nearly impossible to put this tool in too deep) and do the same on the top of the phone as on the bottom. I was afraid of the high difficulty, but it only took me 15 minutes to remove the screen with no problems. Medium difficulty.

    Dorian -

    I didn’t crack the screen, but somehow the thing wouldn’t power on after. Not sure if it was heat, or if I borked the cable somehow. New screen went in and it works great.

    Chris Jones -

    It IS possible to get the screen off without breaking it, just take your time. I spent about an hour using the included picks along with the iopener.

    That said, the adhesive is a bear to fully remove from the screen without marring it up.

    Kixwooder -

    I didn’t fully remove the old glue; When I put it back together, I melted the old glue (and some new glue) to seal it all closed again.

    David Gault -

    Tip, use a gallon ziplock bag with some hot water (maybe 150 degrees). Place the phone on a towel and fold the towel over and shield the part you aren’t working on, then use the bag for ~30s to apply and re-apply heat as needed. I first heated up the entire phone and ended up separating the screen from the glass (thus breaking the screen). The second time I did it, I just heated up one section at a time and I succeeded in removing the screen without breaking it.

    Daniel Beardsley -

    Couldn’t get it open with anything, including dunking it (wrapped in a ziplock) in freshly boiled water for from 2 to 20 minutes. But then I managed to get it with only minor discolorations along top and bottom edges (which are noticeable when the screen is off or on dark backgrounds).

    What did the trick was setting the heat gun to 100°C and heating it really up close for 2 minutes. 60°C didn’t do squat, but 80-90°C would probably work better, without damaging the screen.

    With that done, the glass required a little bit of force to lift up, force of gravity on the rest of the phone wasn’t enough.

    gelraenua -

    I attempted this with an iOpener and gave up as it didn’t seem to heat it enough to lift the edge of the screen.

    I remembered I had a heat gun at that point (duh, should’ve been what I started with). I had the gun at 350 initially and moved it around relatively quickly. But, discovered that if I lingered a little it discolored the screen (tested and the screen still works where it’s discolored, but it’s slightly off-color at one corner). I ended up using 200 deg (F) instead and moved more slowly. I put slight pressure on with the suction cup while heating the edges and finally got a corner up. Plopped a pick in there and used another pick to slowly cut along that edge while heating where cutting. I kept a pick plopped in each corner as I went. Once I got most of the screen free I grabbed the edges of the screen to keep upward pressure from the glue and heated any places that were still stuck with the heat gun and cut the last strands with another pick.

    TL;DR - The iOpener doesn’t seem sufficient for this job.

    Jonathan Stucklen -

  2. SNAprBArbmqAthSK
    SNAprBArbmqAthSK
    xtOAxqXRYPVSwnBW
    y36IF5Fy3EVmkkBX
    • In den folgenden Schritten wirst du die Klebeverbindung zwischen Bildschirmglas und Rahmen des Pixels auftrennen.

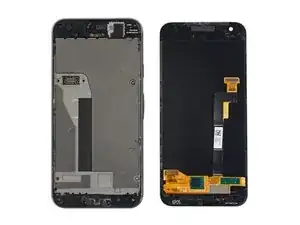
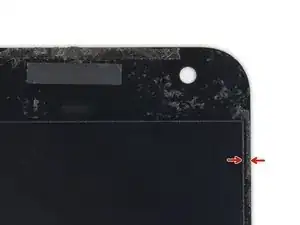
    • Zur Verdeutlichung ist die Rückseite des Displays auf der linken Seite gezeigt. Beachte den schmalen Freiraum zwischen der Seitenkante der Displayeinheit und dem OLED Panel. (Die Einfassungen zeigen diesen Abstand auf der Vorderseite an.)

    • Wenn du ein Öffnungswerkzeug an den Seiten tiefer als 1,5 mm einsetzt, oder oben und unten mehr als 9 mm, kannst du das Display dauerhaft beschädigen.

    For reference, the iFixit opening tool (the blue prybar) has pry hooks of about 1.5-2mm in length.

    You can measure your tools to 1-2mm and mark them on some, and 9mm on others, so that you have an indicator line for depth.

    You can also use the line from the top/bottom and side bezels as a guide for how deep to “slice” with the pick.

    Mr. Porter -

    The display panel consists of two components. The outer component is a glass panel with a digitizer fused onto it, and the second component is a fragile AMOLED panel with electronic circuitry and a ribbon cable that connects it to the phone internals. The digitizer and AMOLED panel both extend to within 1.5mm of the sides of the glass panel. To avoid destroying the AMOLED panel when removing the display panel, start at the bottom (Steps 3 and 4) and do not insert any opening or cutting tools deeper than 1.5mm at the sides or 9mm at the top or bottom (Steps 4 and 5). [Maybe add this text to Step 2 to help prevent others destroying the AMOLED panel].

    Alan Upson -

    Update on my earlier post: my replacement display panel (pre-owned) appears to be a different construction to my original display panel in that the AMOLED panel, digitizer and glass panel are bonded together in some way, so they appear to be a single component. I guess it is possible that my original display panel could have been like this at first, and that I managed to separate the AMOLED panel from the digitizer as I removed the display panel from the phone, but there is no sign of any adhesive.

    Alan Upson -

  3. QvDMk3HRiGKvFAXx
    QvDMk3HRiGKvFAXx
    1OolVnKLfGtoouiD
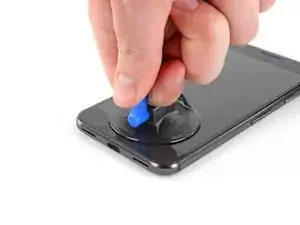
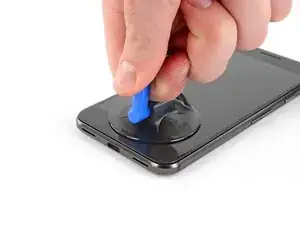
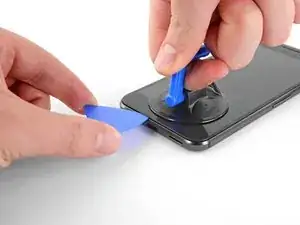
    • Ziehe das Display mit einem Saugheber nach oben und erzeuge einen kleinen Spalt zwischen Display und dem Gehäuse des Smartphones.

    • Wenn dein Display zerbrochen ist, dann beklebe es mit Paketband, so dass der Saugheber besser haften kann und Glassplitter nicht so leicht herausspringen können.

    • Wenn es sich nicht leicht lösen lässt, musst du mehr Wärme anwenden. Sei nicht ungeduldig, es braucht seine Zeit. Wenn du ganz behutsam ein Werkzeug in den Spalt einsetzen kannst, kannst du zum nächsten Schritt übergehen.

    the glass will have to be extremely hot to do this, i was able to achieve it by setting the phone of the heated bed of a 3d printer and setting it to 110 C .

    alex chargeer -

    I used a hairdryer, moving back and forth over the area I was planning on using the suction cup at first, with my finger near the metal chassis so I could feel if it was getting absurdly hot. I would then suction a little, and not see any change. Heat again, suction again, seeing movement, but not enough space to get a tool in. Repeat this several times until you’re just able to get the tip of a tool in there, then continue to gently pull up with the suction cup while gently “slicing” around the edge until you’ve got a few spots free. (I’ve got another tip in the comments on the next step.)

    Mr. Porter -

    This worked like a charm with lots of patience, stopping and drying every step and cutting the glue when I can see it clearly and move further down.

    Krishna Devarakonda -

    Tip one: ONLY FOCUS ON HALF THE SCREEN AT A TIME. As you get further along, you can start moving back and forth, but start focusing only on the upper or lower half.

    NEXT, as I started the slicing process, I would leave a pick in on each of the sides as I got to them, to kind of save my spot in case my pick slipped out. If you feel like you’re not getting anywhere, apply some light heat across the edges of the entire display, depending on how far in you are.

    When you’re on the last few bits, get a headlamp on and hold the phone so you can see in between the screen and rest of the body. As you gently lift the screen, you can see inside and slice the remaining strands and gunked up areas with less fear of damaging other components, because you’ll be lifting them away.

    Mr. Porter -

  4. Lb6JGjOddOUayGRA
    Lb6JGjOddOUayGRA
    xPymBjPditmtgkJt
    GV2xh6XjBM1jPOJk
    • Setze ein Plektrum oder eine Spielkarte in den Spalt zwischen Rahmen und Displayeinheit ein.

    • Schiebe das Plektrum um die Ecke des Displays und trenne so den Kleber auf, mit dem es befestigt ist.

    • Versuche nicht, das Display hochzuhebeln oder anzuheben. Schiebe das Plektrum nur herum, um den Kleber aufzutrennen.

    • Das Display ist äußerst empfindlich. Wenn du dein Display wiederverwenden willst, dann musst du darauf achten, dass du dein Werkzeug nur soweit einsetzt, bis der Kleber aufgetrennt ist. Wenn du das Werkzeug zu tief einsetzt, kannst du das OLED Panel unter der Glasscheibe beschädigen.

    I needed a stronger tool than the provided guitar picks to actually get between the glass and the frame. Had to use a metal tool to get in there. Once I could get in, things went fairly smoothly.

    Only mistake after that was not getting a great seal on the glue when reassembling the phone so now the glass toward the bottom of the screen doesn’t completely stay in place. :(

    Steve Johnson -

    Dang! Metal is a scary choice, but I’m glad it worked out for the most part. That’s good to know. You could try re-heating the adhesive around the part of the screen that isn’t staying in place, and then putting the phone under a stack of books for an hour or so! That might get it to seal up completely.

    Taylor Dixon -

    I got the glass free by using plenty of heat, an x-acto knife to start the opening and playing cards under the glass to break the glue. I did not use the suction cup because it kept feeling like it would break the glass.

    Michael Hendricks -

    +1 to Michael Hendricks. I ended up putting mine in my toaster oven (which worked splendidly), and I did have to use an x-acto knife to get it started. After that, it was possible to continue using the picks, but DON’T EXPECT TO BE ABLE TO REUSE THE SAME DISPLAY. New displays are $35 on ebay. Just get a new one before you start the work or you’ll almost certainly be without a phone for a week.

    Kael Shipman -

    I was super careful based on all the comments to not even get close to touching the back of the screen. But when reassembled I get nothing but a vibration when turning the phone on.

    I used the suction cup, lotsa heat, started from the top and pried screen off towards the bottom just barely teasing the edges with a special pick that I had from previous battery replacements (special pick limits penetration). It seemed to come off unscathed. But the results say otherwise.

    GUNTIS CIRCENIS -

    Woof, like others have said, it’s incredibly easy to ruin the screen in this process. Kind of impossible to tell if you’re getting the adhesive or the screen with your tools.

    Definitely have a replacement if you really want to have a working phone after this step.

    Kris -

    I agree with what other have stated. I tried both the iOpener and a hair dryer but was never able to get the suction cup to pull the glass up at all. I saw other instructions that use a “Thin Metal Pry Tool” to get under the glass. I improvised with some very thin metal I found from some parts I have available and that is able to get under even without heating. You don’t use the metal to pry open at all, just to get under the glass enough to get some thin cards under to remove the seal. The picks are too thick for any of these steps it seems. Just sliding the picks under the glass as shown seemed to be enough bending that I saw some hairline cracks in the glass. But I also damaged the OLED in the process. So, as others have reported, I too ended up with a dead screen. Waiting for my new one to arrive soon.

    I think it would be good to show more information about how you expect this step to work as it doesn’t seem to work as shown here. Or, look up some of the other resources online that work better.

    William Buerger -

    I can’t see any way this can be done without screwing up the screen. I bought a replacement screen and then didn’t have to worry.

    Daniel Yeo -

    Would it be possible to use a specially made opening pick that is protruding no more than 1.5mm from a thicker section that could run along the sides and top of the device to help ensure that the pick would not penetrate more than 1.5mm into the device? If suitably designed, it could probably be made of metal. Are any such specially made opening picks available from iFixit or elsewhere?

    Alan Upson -

    Alan, this is an excellent idea! We have had tools like that in the past, but since every device is different it’s hard to make one pick that will work for every device. You might be able to find something like that somewhere else online, I’m not sure. Another thing you can do is measure your pick and mark 1.5 mm with a marker so you have a visual indication of how far your pick should go in!

    Taylor Dixon -

    No surprise the number of comments in this section. My experience here is slightly different. I took extreme care in screen removal and in the end everything works great! HOWEVER!!! I have the blue Pixel 1 with a white screen. DESPITE using ALL PLASTIC tools I scratched the white off from the back of the phone glass. It’s very noticeable along the top and bottom edges but does impact how it functions. In hindsight I think I could be careful and patient enough to avoid this but I had NO CLUE this was something else to look out for. No on mentions this anywhere. I considered before re-assembly of taking a white paint pen or Sharpie to the glass in an attempt to “repair” but decided that might do more harm than good.

    CJ Allebach -

  5. eXcrvcVBFOyUaHsf
    eXcrvcVBFOyUaHsf
    RxWaXP1YGCThxvZj
    X2gwPYND1eUcf3Ag
    • Schiebe das Plektrum weiter um das Gerät herum, bis der Kleber aufgeschnitten ist.

    • Der Ohrhörer-Lautsprecher am oberen Rand des Displays ist mit einem Gitter bedeckt. Wenn du kein Ersatzgitter hast, dann verliere oder beschädige dieses Bauteil nicht.

    • Sei an den Seiten besonders vorsichtig, hier ist der Rahmen nur 1,5 mm breit.

    there should be two notes here - “while adhesive is still warm, REMOVE ALL OF IT or you would be fcked later.” additionally, “ensure you are not separating the OLED from the glass as this will somehow render the screen completely useless”

    Liz Zelnick -

    Agreed. I just removed the glass from the OLED display…oopss. I’m hosed.

    Joshua Brown -

    Removing the adhesive while it is warm is a great idea!

    Re: removing the glass from the OLED, as long as you aren’t inserting your opening pick deeper than Step 2 recommends, you should be safe from separating the glass and the display panel unless you are using a ton of heat, in which case you might be frying the display anyway!

    Taylor Dixon -

    I didn’t apply enough heat during this process and subsequently separated the digitizer from the glass, instead of the whole assembly from the case. I had 3/4 of the screen free from the case when I became impatient and just tried to muscle my way through the rest of the adhesive. It is important to stop and apply more heat during this process any time it starts feeling difficult to move the pick through the adhesive, otherwise you risk breaking the screen and having to get a whole new one.

    Britton Wickes -

    I got the glass off without cracking anything, but now that it’s back together it doesn’t seem to work. Could it have been damaged from the heat? It flickers green for an instant when plugging in to power or pressing the power button.

    Nicholas Cox -

    Any recommendations on adhesive when reinstalling? I see there is a pre-made adhesive for sale here for $5.99. Don’t know if 3m double-sided tape would work just as well, or what thickness to use. Any tips would be much appreciated.

    Phillip -

    Hey Phillip! I’d go with the pre-made adhesive to save yourself the headache of measurement, cutting, and having a whole roll of 3M tape you might not need. It would definitely work if that’s what you prefer though!

    Here’s a guide for applying the pre-made adhesive that you can follow, or just curb from if you use the 3M tape! Google Pixel Displaykleber anbringen

    Taylor Dixon -

  6. SiwSOToRZBTQifhC
    SiwSOToRZBTQifhC
    2enVDiYLFxSNExtQ
    cO44LDcCh52mDfEq
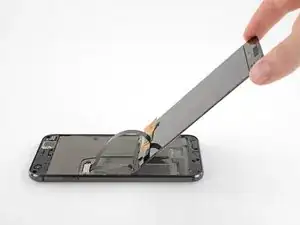
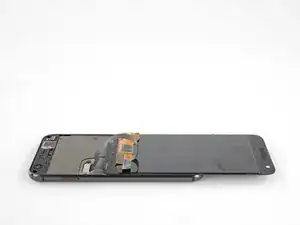
    • Wenn der Kleber aufgetrennt ist, dann kannst du das Display langsam hochheben und vorsichtig über die Unterkante umklappen, so dass es dann wie gezeigt, mit der Scheibe nach unten, liegt.

    • Denke dran, dass überall Kleber ist, du solltest ein Plektrum zwischen Display und Scheibe legen, damit das klebrige Zeug nicht überall verteilt wird.

    • Versuche noch nicht, das Display ganz zu entfernen, es ist noch mit einem empfindlichen Flachbandkabel angeschlossen. Beanspruche das Kabel nicht zu stark, wenn du das Display hinlegst.

    Ruined my Pixel following these instructions. Ribbon cable is at bottom (chin) of phone and not as shown in pictures. My advice take it somewhere and have them replace the battery, that way when they break it it’s their fault.

    John Simpson -

    I’m sorry the instructions weren’t clear, John! I’ve updated the guide to better illustrate where ribbon cable is and how to work around it.

    Taylor Dixon -

    And another note - I used the suction cup to lift the glass. Unfortunately the glass cracked at that point…bummer. I would update this to describe HOW to lift the glass. As in, LIGHTLY lift up with the suction cup while mostly lifting up on the guitar picks to help separate..

    Joshua Brown -

    No, don’t use the guitar picks to lift, those are to “cut”. The suction cup is only to help you get the first pick in, after that, all you’re doing is separating glue so you can lift the screen with your fingers.

    Mr. Porter -

    DO NOT “flip it over vertically toward the bottom of the device, and rest it on its face, as shown. “ unless you want to spend your day getting adhesive off the screen. Instead get the screw driver ready (step 7) before you start this step.

    eric duchene -

    That occurred to me when I reached this step. I used an opening pick (since I already had them on hand) and rested it between the midframe and screen to avoid that very issue. I added it to the guide, now I just hope it gets verified!

    Mr. Porter -

    Gut bewährt hat sich eine Heißluftpistole mit Temperaturvorwahl - möglichst mit optional aufgesteckter Flachdüse. Bei 120-140 Grad Celsius kann man die Wärme zielgerichtet und dosiert auf den zu lösenden Teil des Displays ausrichten. Nach Ansetzen des Saughebers solange erwärmen, bis sich der benötigte Spalt für das Plektrum zeigt, und danach den Displayrand weiter zonenweise vorsichtig erwärmen, bis sich das Display ohne Druck und damit ohne Bruchgefahr abnehmen lässt.

    lovo -

  7. IZLIau4qRsvLEJRI
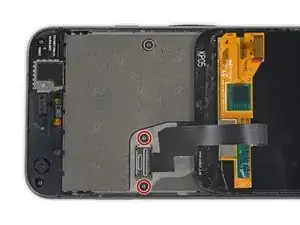
    • Drehe die beiden schwarzen 3,5 mm Torx T5 Schrauben heraus, mit denen Halterung des Displaykabelsteckers befestigt ist.

    • Halte während der gesamten Reparatur die Schrauben gut geordnet und achte darauf, dass jede wieder an ihren ursprünglichen Platz zurück kommt.

    when removing the screen i have scratched the black square up the top left here. (right of the speaker)

    scratched down to the silver component below.

    i broke the screen while replacing my battery, will this brick my phone? or would a new screen still work?

    anarchy_in_oz -

    Hey anarchy, your phone should still be okay! Most of the midframe assembly (including the stuff you scratched up) is there to reduce signal interference and provide structure for the fragile screen, so you most likely didn’t do any bricking! If your cracked screen still functions, you can plug that back in and make sure everything is okay before you pull the trigger on a new one. Hope this helps!

    Taylor Dixon -

  8. XTZjRHITeSTpkjwG
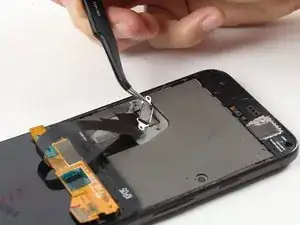
    • Entferne die Halteklammer des Verbinders am Displaykabel mit einer Pinzette.

    • Es handelt sich dabei nur um ein kleines Metallstück, es sollte sich leicht ablösen lassen. (Das Kabel wird im nächsten Schritt entfernt.)

    Using extreme care, another broken screen here. Instead of coming off together, the adhesive separated between the outer glass and the digitizer panel/screen. Both were damaged in the process. Waste of time and money.

    Chris Kahn -

    Yes, me too. I’d like advice as to how to vary the glue heating process for this to not occur. Does the heat need to be applied for longer so the deeper OLED panel releases without pulling from the glass?

    Joshua Brown -

    I spent about an hour and a half working on removing my screen. It took many bursts of heat (from a hair dryer, I lost patience for the iOpener), some suction, more heat, more suction…. etc, until I was able to start moving the pick around. Even then I still applied heat from time to time to help the adhesive move along.

    Mr. Porter -

  9. HC5TYUiDdgFlkimO
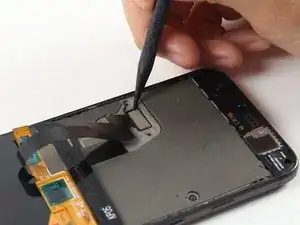
    • Heble den Displaykabelstecker mit einem Spudger hoch und trenne das Display ab.

    • Lasse beim Zusammenbau erst die eine Seite einschnappen, dann die andere.

    • Drücke diese Art von Stecker nicht mit Gewalt hinein, sie könnten beschädigt werden. (Du musst ein leichtes Einschnappen spüren, wenn du weiter drückst, beschädigst du diesen Stecker aber dauerhaft).

    (from other ifixit tutorial. Did not know this-and it is important!)

    To re-attach press connectors like this one, carefully align and press down on one side until it clicks into place, then repeat on the other side. Do not press down on the middle. If the connector is misaligned, the pins can bend, causing permanent damage.

    bgwong2476 -

    Very good to know, thank you!

    Mr. Porter -

  10. OMyrcnDuL4vFOLbN
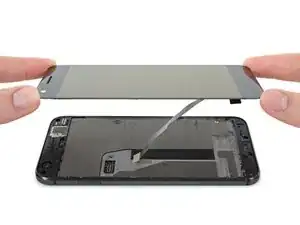
    • Entferne das Display

    • Manche Ersatzdisplays werden ohne die Abdeckung über dem Ohrhörer-Lautsprecher ausgeliefert. Wenn dein Ersatzteil keine solche Abdeckung hat, musst du sie von deinem alten Display auf das neue übertragen.

    • Mache beim Zusammenbau an dieser Stelle eine Pause, teste alle Funktionen deines Ersatzteils und bringe neue Klebestreifen am Display an.

    • Beim ersten Neustart nach der Reparatur wird das Display eine Kalibrierungssequenz durchlaufen. Berühre das Display dabei nicht, es kann sonst passieren, dass der Touchscreen nicht richtig kalibriert wird, was zu Problemen mit der Touch-Funktion führen kann.

  11. eHLmHuSBhlRAkWTT
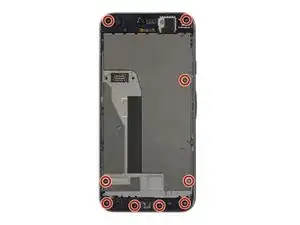
    • Der Mittelrahmen wird von neun 3,5 mm T5 Schrauben befestigt. Drehe sie heraus.

  12. AgEyyrWAyAHCUkZK
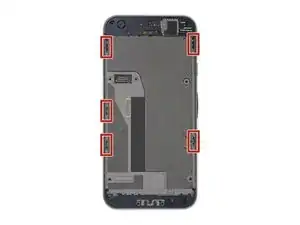
    • Der Mittelrahmen wird von fünf Rasten stark festgehalten. Um diese Rasten zu lösen, musst du wie nachfolgend beschrieben, mit einem Öffnungswerkzeug nach innen drücken.

    There’s also a clip at the top center (near the camera/ earpiece).

    When reassembling, snap the top clip in before you snap the sides. If you do the sides first, then you can’t snap the top in and will need to disassemble and try again.

    Mark Clementi -

    +1, thank you for calling out the top clip. As mentioned, it doesn’t really matter during teardown, but build-up requires you snap this side in first.

    Mr. Porter -

    On the reassembly step, make sure that the little black wire on the right hand side of the phone is tucked away really well. It can prevent the clip on the bottom right from snapping into place.

    Casey Thimm -

    To add to Casey’s comment, the black wire needs to be routed along the gap between the battery and the back/left-hand edge of the rear casing.

    Roman Iwanczuk -

    I would keep a flat razor or an exact-o knife on hand when releasing the midframe from the clips. The tool provided by ifixit does not work well. Even the blue picks would work better.

    Ben Eisenberg -

    Yeah, I wasn't able to jam a pick into the corner, it wouldn't catch. I used the end of the tweezers to lever the midframe up a little bit, and then was able to get a pick in and slide it along.

    Mark Fickett -

    I accidentally severed the ribbon cable for the power and volume button setup during this step. It’s located by the top right clip. It might be worth your while to order power button board when you buy the replacement battery — the boards are like, $9 new.

    Lucas Myers -

    The wording was very confusing for me, but you don’t push on the black part on the inside of the frame, you put a pick or a jimmy in the gap between the midframe and outer case and lever it up.

    David Castro -

    I don’t understand how to release the 5 insert . And I don’t want to destroy my pixel …

    ordinatous -

  13. UeuEgXQwol2Xn3JH
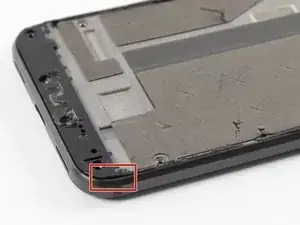
    • Zwänge ein Öffnungswerkzeug in die Einkerbung in der unteren rechten Ecke des Smartphones.

  14. r6xRa2IQm5bLUU1L
    r6xRa2IQm5bLUU1L
    OhZQFAF6lIYhUEJD
    YnhOtWsJvNqY3kC4
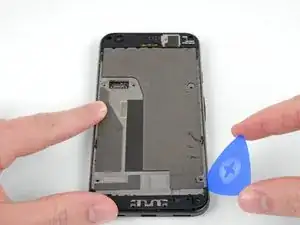
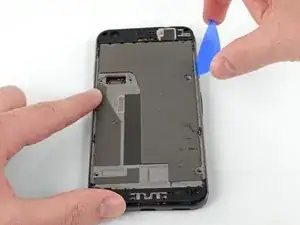
    • Schiebe ein Plektrum auf beiden Seiten des Gerätes in die Fuge zwischen Mittelrahmen und Rückgehäuse, so dass sich die Rasten lösen, mit denen er befestigt ist.

    • Die Rasten lösen sich nicht dadurch, dass das Plektrum an ihnen vorbeigeführt wird, sondern eher durch den Druck nach innen, den das Plektrum erzeugt, wenn es in die Fuge um sie herum eindringt

    • Wenn sich die Rasten einfach nicht lösen wollen, dann versuche an der Kante mit der Hand nach innen zu drücken, während du an ihr arbeitest, oder benutze ein dickeres Werkzeug, z.B. einen Spudger.

    • Versuche noch nicht, den Mittelrahmen zu entfernen. Es gibt darunter noch ein empfindliches Flachbandkabel, mit dem der Ohrhörerlautsprecher an der Hauptplatine angeschlossen ist.

    when removing the mid frame i damaged a ribbon cable at the bottom left. will that prevent my phone from turning on?

    Bryce Thoreson -

    I had no luck using the spudger (too blunt) or the opening picks (too weak). I used a straight blade as shown at about 2:35 in this video:

    https://www.youtube.com/watch?time_conti...

    Todd Koenig -

    +1 for this. The video was really useful - I used a craft knife to release the clips. I found that once I’d done the first two at the bottom end, the rest came easily.

    Daniel Yeo -

    +1 — This video was extremely helpful in visualizing the rest of the steps… I consulted it several times. Thanks!

    Mr. Porter -

    I succeeded in removing with the opener picks, but you just gotta be really patient and determined with the first one. The next ones come pretty easily after that.

    I recommend watching at least part of that video Todd Koenig shared because it helped me to understand how the press-clips interacted with the chassis. (You’re not releasing them by sliding through where they meet the chassis, but that motion will still do the job anyway.)

    Mr. Porter -

    I found the iFixit opening tool (I think that’s what it’s called) WAY easier for doing this. It’s the blue tool that looks like it has two pry bars. I used the pick to pry the frame up slightly and then put the opening tool in with the pry part facing towards the outer frame. Like you were trying to pry the outer frame out. This puts pressure on the side of the mid-frame which very easily popped the clip free.

    Jonathan Stucklen -

    I had more success separating the midframe from the body by prying the midframe and body apart, rather than applying inward pressure.

    David Gault -

  15. rJUW5qXlDvC4bvFS
    rJUW5qXlDvC4bvFS
    V43i2eEDyTfY1Ynh
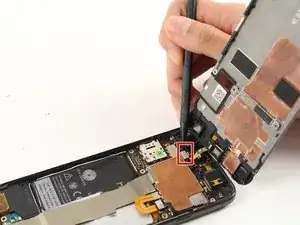
    • Heble mit einem Spudger den Stecker vom Kabel des Ohrlautsprechers hoch und trenne es von der Hauptplatine ab.

    • Entferne den Mittelrahmen vom Gerät.

    • Schließe beim Zusammenbau zuerst das Kabel zum Ohrhörerlautsprecher an und setze die Oberseite des Mittelrahmens ein, bevor du die Rasten wieder einschnappen lässt.

    Rather than remove the midframe, I just propped it up a bit more than 90 degrees from the phone onto a box, just so there’d be one less of these fumbly connectors to redo during reassembly.

    James Ludden -

    Bei einem von mir reparierten Modell (2PW2200) war die beschriebene (per Kabel verbundene) Ohrhörer-Komponente in der Geräterückseite befestigt (und nicht im Mittelrahmen) - das beschriebene Lösen des Flachbandkabels war deshalb nicht nötig.

    lovo -

  16. mrLqkm5k4PMGbX1o
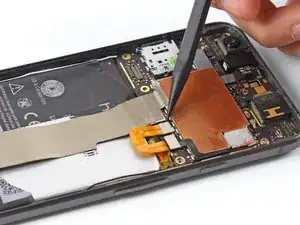
    • Heble das Flachbandkabel zum Akku mit einem Spudger hoch und trenne es von der Hauptplatine ab.

  17. yf6IKHRYOuJgFRUM
    yf6IKHRYOuJgFRUM
    FKJLhyiBMeS4GcPO
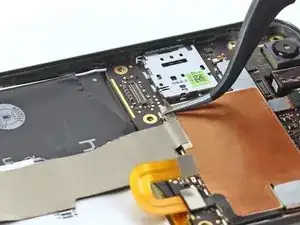
    • Ziehe mit einer Pinzette das silberfarbene Klebeband ab, mit dem das Verbindungskabel zwischen Hauptplatine und Tochterplatine bedeckt ist. Ziehe nur soweit ab, bis der Stecker darunter sichtbar ist.

    • Heble den Stecker mit einem Spudger gerade nach oben und löse ihn von der Hauptplatine ab.

    I found it easier to disconnect the connector with the tape on first and then put up on the connector with the spludger to get the tape off the daughterboard. Trying to peel the tape off with the tweezers was just ripping the tape apart for me.

    Jonathan Stucklen -

  18. 1PpvbCVHPx5JEi4m
    1PpvbCVHPx5JEi4m
    6pFGKJtSMOUUGZen
    2uxXa1vL1NQlDrgj
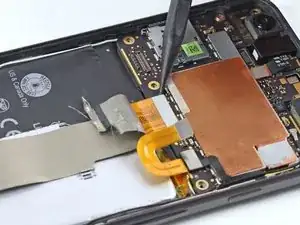
    • Ziehe das Klebeband vom Verbindungskabel an der Seite nahe der Tochterplatine ab.

    • Löse mit einem Spudger das Kabel von der Tochterplatine ab.

    • Entferne das Kabel vom Gerät

    • Achte beim Zusammenbau darauf, dass das Verbindungskabel in der richtigen Position sitzt. Das Smartphone lässt sich nicht einschalten, wenn das Kabel mit der Unterseite nach oben befestigt ist.

    This step can be skipped entirety. Don’t do more work than you have too. just be careful not to bend the cable.

    eric duchene -

    I didn’t remove the ribbon cable from the bottom side. Instead just flipped it over and went on to removing the battery.

    Akimitsu Sadoi -

    Highly recommend skipping this, getting the cable aligned with both ends loose was very hard.

    David Castro -

  19. rX2UtNSmYKRiHF1b
    rX2UtNSmYKRiHF1b
    ssgWyuVSJp6MF2TL
    • Der Akku hat eine Ummantelung, die auch als Zuglasche verwendet werden kann. Ziehe daran, um den Akku abzulösen. Wenn das nicht funktioniert, dann verfahre so, wie unten beschrieben.

    • Schiebe vorsichtig ein Plektrum unter den Akku ein, um so die Klebeverbindung aufzuschneiden.

    • Wenn der Akku sich nicht leicht löst, dann heble nicht zu kräftig. Erwärme die Rückseite des Smartphones mit einem iOpener oder einem Heißluftgebläse, um den Kleber zu lösen.

    • Achte darauf, den Akku dabei nicht zu verformen. Weiche Lithium-Ionen Akkus können gefährliche Substanzen verlieren, Feuer fangen oder gar explodieren, wenn sie beschädigt werden. Versuche möglichst wenig Kraft aufzuwenden und benutze keine Metallwerkzeuge, um den Akku zu entfernen.

    • Verwende den Akku nicht mehr, nachdem er ausgebaut wurde, da er ein potentielles Sicherheitsrisiko darstellt. Ersetze ihn durch einen neuen Akku.

    Don’t mess around here. Use the hair dryer, on the back of the phone for 30 seconds. Battery came out in seconds.

    eric duchene -

    be careful of the black antenna wire on the bottom and right side of the battery, i nearly ripped mine out while prying the battery out, i also recommend routing the cable slightly under the battery so it stays in place, this got me stuck trying to get the midframe to fit for almost half an hour.

    alex chargeer -

    Thanks - this was a good shout, I nearly did the same.

    Daniel Yeo -

    There was a perforated strip down the centre of the jacket, tearing this gave a handy tab to pull on. I heated the back of the phone with a hairdryer for 30 seconds and pulled gently - under consistent tension, it slowly came out.

    Daniel Yeo -

    I pried with a pick a little first, but tearing the jacket and pulling that way got it out super quick with no heat, although i don’t know if maybe the adhesive might decay depending on use.

    David Castro -

    Nach dem ersten leichten Anheben des Akkus an der Geräteunterseite (Mikrofon-Seite) habe ich ein Kunststofflineal o.ä. unter den Akku geschoben und mit der Heißluftpistole die Geräterückseite weiter erwärmt. Mit dem weiteren Lösen des Akkus wurde das Lineal immer weiter unter den Akku geschoben und dieser vorsichtig von der Rückwand abgehebelt. Diese Vorgehensweise vermeidet eine mögliche gefährliche Deformation des Akkus beim Heraushebeln.

    lovo -

    The adhesive on the back of the battery is two narrow strips along the sides, mine didn't have any in the center. So as soon as you pry up one edge it's pretty quick to get out.

    Mark Fickett -

  20. lSIMBFH2S1pGGbMQ
    • Entferne den Akku.

    • Um den neuen Akku einzubauen, gehe folgendermaßen vor:

    • Entferne alle Kleberreste vom Handy und reinige diese Bereiche mit Isopropylalkohol und einem fusselfreien Tuch.

    • Befestige den neuen Akku mit bereits zurechtgeschnittener Klebefolie oder mit doppelseitigem Klebeband. Um ihn richtig zu positionieren, befestige den neuen Klebestreifen erst im Handy, nicht direkt auf den Akku.

    • Drücke den neuen Akku für 5-10 Sekunden fest.

    When wiping adhesive off the midframe, be careful not to get any alcohol on the foam with the little “X”s all over it. The alcohol will dissolve the foam.

    Casey Thimm -

    I didn’t clean off the old adhesive, it seemed sticky enough, so I just press the new battery in and held it - seems ok. Might live to regret that though…

    Daniel Yeo -

    En el caso de la bateria no hay problema el detalle seria en las pantallas tactiles o lcd ahi si puede fallar y dañarse

    LabArso Inc -

Abschluss

Vergleiche dein Ersatzteil mit dem Originalteil. Du musst vielleicht fehlende Teile vom alten auf das neue Teil übertragen oder Schutzfolien vom Neuteil abziehen, bevor du es einbauen kannst.

Um dein Gerät wieder zusammenzusetzen, folge den Schritten in umgekehrter Reihenfolge.

Nach Abschluss dieser Anleitung sollte der neu eingebaute Akku kalibriert werden.

Entsorge deinen Elektromüll fachgerecht.

Die Reparatur hat nicht den gewünschten Erfolg gebracht? Unser Antworten Forum kann dir weiterhelfen.

Taylor Dixon

Mitglied seit: 26/06/18

63211 Reputation

72 Kommentare

I doubt many people can get past step 1 without it being game over. Take special care, read the comments, and other guides as well.

Benjamin Knight -

I broke mine too. Not the glass but the display panel underneath.

For those who are going to try opening theirs: pay extreme attention to the fact that the display panel extends somewhat beyond the bottom edge of the visible part of the display where the cable connects and, if that wasn’t bad enough, the bottom bezel has a !&&* of a lot adhesive on it. Don’t insert plastic opening tools on the bottom corners - if you do that, you will damage one of the unprotected corners of the panel like I did. If I had to do that again, I’d probably start from the top edge instead.

The new screen ended up costing me the equivalent of $80, and I was surprised I was able to walk into a store and buy one at all in a country where Pixel was never officially available in the first place. They didn’t have white ones in stock so I went with a black one.

Gregory Klyushnikov -

Same. Even when being warned and trying to be super careful.

Joshua Campbell -

Another trashed screen. This phone is a difficult one if you have not done one before. I would recommend not even bothering with prying under the sides and just concentrate on the top and bottom. The edges only allow about 2mm at most before you run into the LCD.

Tyler -

+1. Don’t bother trying to save the screen. Just save yourself the stress and buy a new screen on ebay for $35 before you begin. I have never botched a repair and I still managed to break my display on this. Yes, I was super careful, it took me like 45 minutes to finally get the display loose, and when I put it all back together, the display was totally dead.

Kael Shipman -

At today’s pricing just buy a new screen and be done with it.

Jon -

I took mine apart again today because my second battery stopped holding a charge after 1.5 years (also I played too much Pokemon Go) and buying a new phone in 2020 feels like a downgrade. This time I was able to remove the display intact. Took my time, used a hair dryer for heat and pieces of thin cardboard to separate. Also the fact that I probably didn’t do a decent enough job of gluing it down the last time helped.

Gregory Klyushnikov -

Success! I was able to replace the battery in my pixel although it took much longer than expected. I highly recommend using a playing card (or several) to cut through the adhesive as it can fairly easily bend around the fragile components. Patience is needed as it took me nearly an hour to get the screen off, reheating, gently prying and cutting with the card. Once past the screen it was fairly straightforward despite the pre cut adhesive being too long. The adhesive comes back into play during the reassembly prep as it took at least half an hour to remove the old adhesive and prep for the new. Be aware that the foam on the mid frame is alcohol soluble and will dissolve on contact. The new adhesive for the screen took some gentle massaging to line up but ultimately went on without much fight. All back together, it works (hopefully with renewed battery life). I would say allocate at least 2 hours unless you’ve done it before.

josh9623 -

This took me about 2 hours. I was very, very careful, and it was a success! No broken screen.
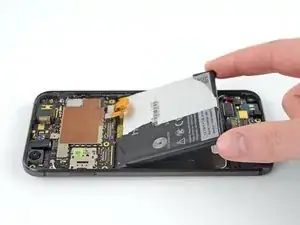
jlteekell -

Worked like a charm! Don’t expect to breeze through this in 30 minutes though. I used a hair dryer rather than the I-opener and was able to easily pry the screen up from the bottom of the phone using the blue opening tool and the suction cup. From there I used the picks to completely release the adhesive from the bottom and the top of the screen. Once the top and bottom were loose I used a playing card to loosen the sides and the screen came right off. For step 14 the picks were too flexible to loosen the clips on the midframe but the spudger did the trick. Requires a bit a patience but it’s not nearly as scary as the comments make it seem. Great product

Anthony -

Took me 3 hours but I was successful. Be careful. Watch a couple of YouTube videos and read the instructions front to back twice before you get started.

Adhesive is !&&* and getting started is challenging. Use a playing card and a heat gun to release the adhesive. I started in the top right corner of the device, used the included replacement adhesive as your guide.

I used the included suction cup, heat gun and an xacto knife to catch that first gap on the corner. Use the included picks to hold the gaps as you work your way around. Pull the playing card through the top and bottom gently, the adhesive will stick to the card.

Take care on the long sides, the edge of the screen is VERY narrow, make a mark along the edge of the card at 1mm. Don’t pry, just slide. Use the heat gun constantly, get the screen hot to the touch.

Once I reassembled the phone the microphone didn’t work. I popped it open again and reattached the ribbon cable on the daughter board. Microphone works now — but it gave me a good scare.

Philip Van Drunen -

While this was definitely a difficult repair, I think that the guide is very thorough. I did this repair in about 3 and a half hours with 4 other friends all working together. We were very careful and cut very shallowly through the adhesive to ensure the safety of the display ribbon. We did however use a video guide to fill in a few of the small gaps not shown in the images here. In the end, everything worked out well, so I would definitely recommend this guide to fix your Pixel battery, as long as you have some help and a lot of time.

Afana Craft -

Broke the display trying to remove it, even after using a heat gun the display was hard to remove. Was successful with replacing the battery. The display I ordered to replace the the broken display I also broke trying to fit into the frame, but It did work for a short time. Have ordered another display and adhesive - have a better idea what to do.

Dale Slaughter -

Success! Used the iFixit heat pad

Took ~3 hours.

Patience working through getting the display unstuck is key I think.

Removing the glue before putting in the new one was a massive nuisance, unlike the photos the glue doesn’t simply peel off, every single pit had to be coaxed off with the spudger. The most effective technique seemed to be kind of pushing it from the edges with the tip of the spudger.

Paul Buxton -

Thanks for the guide. Did this in ~2 hours without breaking my screen (murphy’s law: I ordered a replacement screen to have on standby just in case). PATIENCE was the key word here. Used a heat gun, a heavy-duty suction cup, a guitar pick to maintain the initial gap, and then a playing card to gently cut the glue.

Just focus on the top and bottom of the screen - don’t even fool with the sides, unless you want a broken screen. Once you have the top (or bottom) carefully unseated/unglued, peel the screen back using the suction cup - this will take care of the sides - and then just focus on the other end.
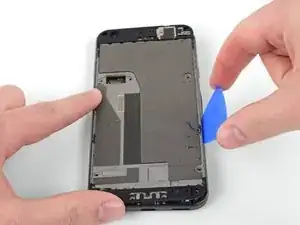
Good luck

Derek -

I replaced the battery and charge port. Phone boots up but no display on the lcd so I guess I broke it. But I see no visible damage at all on the back or front of the screen and the digitizer senses touches. Ordered another screen. Hoping I didn’t break something else in the process or else could be a pain trying to diagnose it. Btw anyone know how to power off the phone without use of the lcd? Holding power button only reboots.
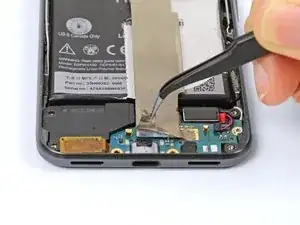
Vince -

Dang it, that’s a bummer. Even if the screen shows no damage, it’s possible that your opening pick went in just a little too far and messed up the display. That said, it’s also possible you could have a different problem! It sounds like you were really careful with the screen, so it could be that your display cable connector just didn’t fully snap into place, or it may have gotten some gunk on it that is interfering with the connection. Hopefully the new display works.

Without the display you can hold the power button + volume down to restart the phone, but I’m not sure there is a way to shut it down. You can always just disconnect the battery, if the phone is still semi-open!

Taylor Dixon -

i did the same - battery works fine and i can hear the phone boot; roommate did a test call and the phone works, but the screen is toast. i ordered a new screen, plugged it in (without attaching the adhesive!) and nada. idk what else to try

Liz Zelnick -

If a new display is still malfunctioning and you’re sure the display cable is properly seated, I’d say something probably short circuited during the repair. It’s hard be certain what happened, but a short circuits tend to happen when cables are unplugged while the phone is powered on. At this point a new motherboard will most likely take care of the issue. (Google Pixel G-2PW4100 Motherboard) I’m sorry things didn’t go well for you both, and I hope you can get everything working soon!

Taylor Dixon -

Vince - Way late but just attempted this and while I think the only issue is the display, I would like to verify it is before opening a $140 part that can’t be returned (Thx, iFixit)— Did the new display solve the problem?

I believe a soft reset can be done by just holding power button 20 s, but release immediately otherwise you’ll start it back up. I did this a few times and felt the vibration upon startup.

Robert Smithlin -

The new display worked like a charm. $140 sounds really steep for a pixel 5.0. Display. I got this one from eBay and it worked just fine. Still working months later. There are other sellers on eBay with comparable pricing.

https://rover.ebay.com/rover/0/0/0?mpre=...

Vince -

This guide was great. The new battery makes me think my phone is brand new with the longevity it has now. I can echo the warning about getting the screen off. I bought the whole ifixit kit for this procedure and my only recommendation is that you use the warmer on both sides before you start to pry off the screen. It is extremely delicate and that cannot be understated. I ended up having to purchase a replacement screen and then dig out all the shards of glass before replacing the battery.
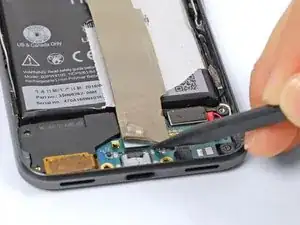
For those who are scared of this procedure, getting the glass off is the hardest part, the rest is easy.

Andrew Gordon -

Important to start the screen carefully. The sides are least sticky but the most difficult. This is because there is 1.9mm of space between edge of glass and the OLED display under the glass. If you keep your pry tool at 30° you will miss the Display. Once you have the screen off the hard part is behind you. Keep this guide close by. Watch videos and don't hurry. Good luck!

Donald Droga -

Excellent guide. Performed a successful replacement without damaging my screen and so far everything seems to work fine.

-Removal of the screen wasn’t as hard as they made it out to be, just gotta be careful.

-Removal of all old adhesive was more difficult

-It was difficult to keep the front camera lens cover clean during adhesive removal . Removal of the old adhesive was the most time consuming part of my battery replacement

-the thin wire that runs down the battery side of the bottom part of the phone got in the way of clipping in the middle frame. I noticed when I was removing the glue that it kinda “bulged” up on the side between the screws. I removed the middle frame again and I had to shift the battery over a millimeter or so in order to place the wire down out of the way.

-Also I have no idea how it was missed in the first place but one of the 9 screws in my middle frame was already loose! Screw # 4 if you count Left to Right, top to bottom in step #11

Henry Scharf -

apparently I screwed something up and missed more “tests” before I placed the screen on the device. 1: It won’t charge. 2: Vibration motor wasn’t working 3: speaker isn’t working. Now the phone is completely dead and I’m waiting on more screen adhesive before I take it apart again.

Henry Scharf -

Check your connection to the charging port module. My guess is that it wasn't plugged back in correctly. Otherwise get one of these. Very easy to replace once the phone is opened up. I had to change mine out because the port wouldn't charge. Mic, speaker,motor and charge port are in this module.

https://www.ebay.com/itm/Google-Pixel-5-...

Vince -

Henry, that is a bummer! Vince is right, there’s probably something going on with your daughterboard. Make sure the long interconnect cable (the one you remove in step 18) is properly connected, and if all else fails, the replacement part he linked (sorry, ours is out of stock :( ) should do the trick!

Taylor Dixon -

Read all of the instructions thoroughly, read all of the comments, watch some videos, TAKE YOUR TIME. Its a great kit but I used a heat gun and it took me 3 hours start to finish. You’ll definitely want to start from the top when removing the glass. Wedge a few guitar picks in there, hit it with the heat again, and keep gently working that glass off.

Richard Wood -

My screen broke while removal, but no issues aside from that. No fault of the review, just be very careful if you are hoping to reuse the screen. They’re cheap on Amazon, just plan on breaking it unless you’re a pro.
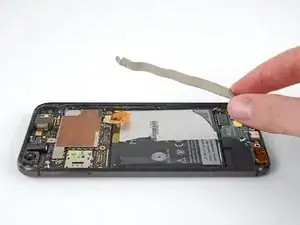
My only recommendation regarding the directions is to really heat the screen up. I progressively heated it hotter and hotter and found that the adhesive really loosened up when an IR thermometer showed the screen to be ~190 F, which is in my opinion a higher than the guides recommended ‘slightly too hot to touch’.

Also, be careful to not get alcohol on the foam under screen liner - it will badly melt it and will make your screen sit wavy.

I found better luck with a wide, flat razor blade to make the initial gap. Be sure to go in at an angle rather than straight down, I went too far down and bent the mid-frame a little bit. A wide blade won’t scratch up the phone frame. But at this point my screen was already broken so take that for what it’s worth.

Jackson Schleich -

Hopefully this will help prevent others from accidentally breaking their screens. This back to back to show what you are dealing with in terms of dimensions. I would pay particular attention to the bottom of the screen where the lcd angles in and extends about a 1/8” beyond the what you are able to see from the front. I think this is where I may have damaged mine. I did not see any physical damage on mine but it definitely doesn’t power on.

https://imgur.com/wR4HUo6

Vince -

Just finished replacing the battery and it wasn’t too bad. Read the comments about other peoples’ mistakes, watch some Youtube videos, take your time, and you’ll be fine. If you’re not good at these things or very nervous, then just buy an extra screen to have on hand and return it if you end up not needing it.

Mark Clementi -

Just in the process of replacing battery…The prying part wasn’t so hard as I’ve imagined…took ~15 mins, and here is a photo of the back of the screen. https://i.imgur.com/W0C2JHl.jpg .See the red rectangle? I might have ‘damaged’ something so be really careful dealing with the lower half of the frame. I’ve re-powered on and display & touch are both good.
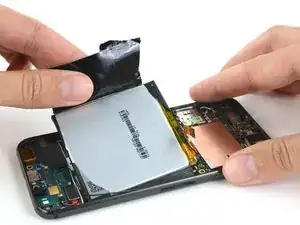
pizzamx -

Took me another ~30 mins to remove the midframe…AFAIC this part is more tricky then removing the screen…just remember to follow the instructions - i.e. apply inward pressure.

pizzamx -

I’m screwed. Screen doesn’t work after replacing the battery. No sure what went wrong…placing order for a replacement screen now :(

pizzamx -

does the phone power on when you hold the power button? ie, does the phone have that short vibration during boot? if not, maybe something isn’t plugged in correctly? if it does vibrate, then yeah, the screen went poop. the latter is what happened to me (it vibrated but and booted up but the screen never lit up) so i replaced the screen and all good (after $40).

Vince -

Hi Vince, unfortunately my phone did boot up, I felt the vibration and it rang when receiving incoming calls…After comparing it with the new replacement I think it was the display cable connector pins that I accidentally broke while plugging the cable. See https://imgur.com/a/SuItoIN and the two panels side by side: https://imgur.com/a/mL6UjGh . If you can see it clearly it might well be the top-right part of the pins that’ve gone missing…It’s really disaster…I’m just over-confident with myself :D Hope this post will help whoever doing this in the future and be reminded that anything can be broken.

pizzamx -

I followed this procedure to replace the power button. Everything seemed to go well, though I may have gone to far in on the bottom (I went basically until the white border turns to display).

When I press the power button, the screen flickers green for an instant. When I first plugged it into my computer, it recognized it as a Pixel, but did not pop up using “fastboot devices”. Now, it isn’t recognized at all by the computer, sometimes saying “the usb device you plugged in has malfunctioned…”.

If I hold the power button for 25-30 seconds, I get the vibration like the phone is powering on, but nothing on screen and still not recognized using fastboot.

Any ideas? Did I short something on the motherboard? There’s a fair chance I accidentally powered the phone on before plugging everything back in as I was testing the power button to make sure it was seated correctly.

Anyway, thanks for this write up and any help ya’ll can offer!

Nicholas Cox -

Nicholas, I’m sorry things didn’t work out! Yours certainly seems like a strange case. I’m going to optimistically guess that your problem is confined to the screen, and hope your computer isn’t recognizing it because of its own problems (you can never trust windows drivers too much haha). I think if I were you I would try a replacement screen, and then if that doesn’t work you can pick up a new motherboard. Hopefully only one of those two parts are the root of your problem. If you do only end up needing one of them, you can return the other! Sorry again about the complications, I hope you can get it worked out! Let us know how it goes!

Taylor Dixon -

Some of my notes:

1. Getting the phone open ( Steps 1-4 ) is the hardest part of this process.

Use a very thin blade or flat head. Must be real thin so you can make that gap.

Start at the top. You are going to create a chip in the frame regardless.

Use the tool opener to slide back and forth to cut the adhesive.

Take the time to heat the edges ( i used a hair dryer ) to soften the glue

2. With Step 12, I used a flat head to open.

Start from the bottom, where you have a small gap to pry up.

Run the flat head along and press the frame outward while lifting the mid section

The clip will naturally fall out and the mid section flip up.

3. Keep the mid section seperate and clean the adhesive. I used my fingernail.

With the LED screen part, be carefui not to touch the LED part too much or scratch too hard on the glass.

It does not have to be 100% clean, just smooth enough.

P.S. My LED screen came out perfect and only damaged on the glass part ( chipped paint work ) You can’t see it when fully assembled. :)

Good luck.

sadfad53 -

Another success here! This repair was a lot less scary than I read it to be. I spent a LOT of time on the top and bottom of the screen adhesive, and essentially didn’t even mess with the thin sides. Once I got the top free and heated the screen enough, the sides just peeled up with the rest of the screen. Taking the old adhesive off was the most time consuming part, as many people here have noted.
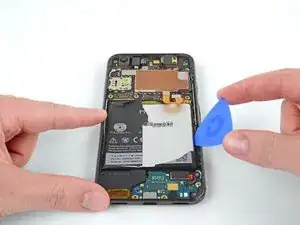
Christopher Guzy -

I read some of the above comments and figured that I would probably break the screen, so I ordered one in addition to the battery. Went through all the steps, put the phone together and booted it up. As it came up I was thinking I got ripped off because my new screen was all scratched up. Then I saw the new screen sitting there in the bag on the table—I had put back my original screen, which obviously works just fine. I’m ordering a new adhesive kit (cheap) and I’ll put the new screen on. The tool kit made the job much easier, battery life is excellent.

Michael Ciarochi -

Chiming in to say I just completed this repair and while the phone turns on normally, my screen is dead (not even a green flicker like one user mentioned). I have the new display on order— does anyone have a good way to be absolutely sure there isn’t some other issue with reassembly? I would hate to open up $135 display only to find it’s not my display after all…

Aside from this issue that I fully admit I knew was a risk because of all the great comments, this guide is very well done. I do have a few suggestions for little traps I found, like the black and white wire around the battery that I nearly pinched after reassembling the mid-board. Very glad I noticed it wasn’t sitting quite even, and found that the wire had been pushed to the side in the way of the support area.

Robert Smithlin -

OK this was my very first phone repair. In the first few steps of removing the screen I used the I-Opener and the pick method on the two ends with the most adhesive and once those were loosened used the “Jimmy” tool to get the thinner sides loose. I had low hopes of the screen working after this repair, but miraculously mine works on power up. 9 screws and 5 clips to hold in the mid frame, OMG is that overkill or what . Needless to say getting those darn clips back in was my biggest snafu. I was getting frustrated with it so I put it down and walked away for the day. Today they popped right in, go figure.

My completion of the 20 step breakdown took almost 45 minutes though, but when you add in the tutorial for cleaning/applying the new screen adhesive the total time is about right.

I bought the kit from Ifixit with everything I needed a good bit ago (doesn’t seem to be for sale anymore), except the screen, which as it turns out I didn’t need.

Confidence and tools to tackle another phone repair soon

colinbetzel -

You chose a really difficult guide for your first repair. Nice job getting it done!

Arthur Shi -

Just wanted to add to the “Success!” side of this repair, as my wife (who is very handy) was able to bang through this without too much difficulty (SO proud of her, I certainly couldn’t do it!), and she’s never repaired a phone before. Honestly, if we had looked at the “difficult” rating, we may not have picked it up, so I’m kind of glad we didn’t!

There is a LOT of adhesive, but she was able to leverage the screen off without a scratch. That was definitely the most difficult part, everything after that was pretty easy with the guide available.

I would definitely recommend taking your time with the display, and concentrate your heating to the top and bottom (the sides are pretty thin with adhesive), but otherwise, give it a shot!!

Jason Greenwood -

I successfully replaced the battery and the ear piece cover, without breaking my original screen. This was my first smartphone disassembly so it CAN be done if you're careful. Kudos to the instructions author as well as JerryRigEverything's teardown on YouTube!
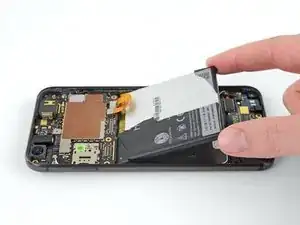
Side note: Forego the iOpener and use a hairdryer instead. It's way better.

Tim Oakes -

You WILL break the screen. Nearly impossible not to do so. I was extremely careful and the display is completely dead. Good Luck

Philip Holyoak -

I used a heat gun instead of the headed bag thing. Took my time and slowly got the adhesive soft enough to get a suction cup to start raising the screen off. I went very, very slowly about all of this and was lucky enough to keep the screen fully intact and functional. There’s an awful lot of adhesive, and I’ll repeat others in saying not to let the screen fool you. The actual piece of screen extends lower than the visible area, which could get you in trouble.

James Ludden -

SUCCESS! (3 hours) - No scratches or damage. My first time disassembling a phone, but I’ve taken apart laptops.

- Skip the pad thing and use a hair dryer. Needs a lot of heat, like every 30 secs

- Start from the top, and use playing cards to get the adhesive out. I used the suction cup and a lot of heat to get a card in at the middle. Be very careful at the start. Adhesive will stick to the card as you work it through. Pull out the adhesive where you can. Don’t intrude into the screen area

- Only go 1mm in on the sides

- For the bottom: Use the black ribbon that runs through the back and sides of phone as a guide. Don’t go above the ribbon. You can use a card from the sides to get a start on a corner, or use a similar suction cup technique to get a card in. Use lots of heat, and take it slow, and you’ll be fine. Watch a few videos to get an idea of techniques.

Brian Jolie -

This is my first time taking apart a phone and I managed to swap the battery without too much trouble. I absolutely destroyed the screen unintentionally, but luckily I had a spare. My only issue now is that there is a little red light in the ear piece that is flashing. Google searches have told me to let the battery charge for 30 mins because it could be fully discharged. It has been an hour now and it is still flashing and unresponsive. Any ideas?

Jonny Weiss -

Jonny, that is a new one! Did you already seal up the phone? If not, I’d go back and check your work—unseat and reseat any connectors you touched, etc. If everything looks good on the inside, you can try booting to recovery mode (by holding the power+volume down buttons) or using a different charger. There is also always the possibility that you got a bad battery! If you purchased the battery from us and you can’t get it working, you can reach out to our customer service team and they can work something out with you.

Taylor Dixon -

No, fortunately I had enough foresight to not screw everything together and readhesive it. I just went back and reseated all of the connectors with no luck. Still same red flashing. Unfortunately I got this battery from someone in person and I’m not sure where they ordered it from. I wish could call them or message them…but all that info is on my phone haha. Thanks Taylor!

Jonny Weiss -

Great guide, used this to replace my battery successfully.

A note that would’ve saved me a lot of time: if you try to test your phone without fully reassembling it, be aware that the earpiece won’t work without being fully pressed down or screwed down. Also, if your digitizer stops working, it might not be the hardware - try turning the phone on and off (NOT rebooting, didn’t help in my case).

Kuhout -

My ifixit battery is two years old. Not happy about that.

I broke the screen like a lot of others. It’s very difficult to get off without breaking.

After I put it back together, my microphone doesn’t work. It DOES work on the telephone, but the speakerphone mic does not work, and my voice recording app gets nothing but silence. Any idea how I can fix that, before I glue it all back together?

…Note: the system WILL work with the display laying on top, not-yet-glued-down. I recommend testing everything out before taping the screen back on. You may be glad you did. Just be very, very careful while the screen is unglued. It’s surprisingly fragile.

mschwage -

Somebody mentioned the daughterboard cable. I’m going to reseat that and see what happens.

mschwage -

Another advisory for folks attempting this repair - my Pixel 1 had come from google as a refurb unit, and the display was not bonded to the cover glass. In retrospect, this explains a number of issues I’d had with the phone. Whoever had put the thing together last also misaligned the cover glass adhesive such that the OLED panel was partially glued down to the inner frame. There was absolutely zero chance of opening the phone without destroying the display as a result.

Mitch Johnson -

I broke my &&^&^$^ screen even trying to jam your fat plastic pick in there. Too cheap to include a functional metal pick? You @%^$$@$# eat out of the pocket of the big producers you profess to save us money from. &&^& you.

Owen Glover -

I’m sorry to hear about your repair experience. The reason we include plastic picks is not due to cost savings, but actually procedural purposes. Metals tools are harder and more rigid—prying with metal tools usually results in irreversible scratches and other damage to the phone glass and frame. Because they are reinforced, Pixel screens are notoriously difficult to remove intact.

Arthur Shi -

I just did this without breaking anything and it wasn’t too hard. Just be very gentle and patient while prying up the screen. I used an incandescent lamp right over the phone to soften the adhesive, then I gently try prying apart all around, then I put it back under the lamp with a wedge applying some force as the adhesive gets softened, and repeated this.

BTW, my screen already had a large enough gap on a side so I was able to get underneath and start prying all around with just my fingernails. Good thing I didn’t trim my fingernails.

Lamp -

Should have read the comments. Didn't realize the connections to the screen extend far beyond the screen below. Broke mine as well, only go about half of the bezel when trying to break the adhesive.

autococker13 -

Hi! My battery won’t charge after reassembly. I’ve tried to put back the original battery, but the issue still persists. Maybe some connector is not perfect. It could be only the battery connector or something else?

nyiriandris -

After replacing both the battery and screen, the phone boots up and the screen works, however the USB port does not work so I can’t charge the battery and the speaker appears to no longer work either. Maybe the connection to the daughter board is not good? Has anyone else run across this? I am fearful of having to dismantle it again (broke the screen the first time - separated the digitizer from the LCD and cracked the digitizer).

Steven Geiger -

Answered my own question. I gave it a second try and did not damage the screen this time! I found the daughter board ribbon cable was loose on the motherboard side. Put it all back together again and all is well! To nyiriandris who asked about the battery not charging afterwards, I suspect the daughter board ribbon cable has a poor connection.

Steven Geiger -

Used this guide + the video in step 14, and the iFixit kit for a successful swap. To remove all the adhesive, I heated the iOpener 3-4 times for 30 sec each, left it on the phone for 2-3 min at a time. Didn’t bother heating the sides. Like others have said, the picks are only for cutting thru adhesive, and the suction cup is only to wedge the glass away from the frame. I used the picks to remove the final adhesive while lifting the glass away.

discmanro -

I cannot recommend that comment about the 3D Printer bed enough! Especially because you can so precisely tune the temperature. I threw my phone on there for both the screen removal and the battery removal to soften the adhesive and it worked like a dream.

I realize not everyone has a 3D printer, but at a 115C for a few minutes the battery came out with just a few prys with the spudger.

Screen was not as easy, but after getting a pick underneath, and putting the phone back on the 3D printer bed the pressure of the pick and the reheating of the adhesive the screen almost magically lifted off of the frame without much trouble at all! I didn’t break my screen!

Benjamin Kuo -

SUCCESS! Not that it was at all easy. Between this guide and the helpful comments above, disassembly wasn’t bad, but reassembly was another thing. I’m nearly 46, and I just can’t see these teensy-weensy connectors to save my skin. Plus by the time you have the connector over the socket, you need x-ray vision to see through the tab (and your thumb) to the connector itself to get it lined up properly, especially with the display cable, which is very recessed. All of this was tedious and irritating, but not too terrible. For whatever reason, though, the screen adhesive included with the battery was just a tad too long for the phone’s body, and so it couldn’t sit flush as it should when the plastic backing was removed. This caused it not to stick where should. I ended up wadding it into a ball and throwing it in the trash. For now, the screen is still loose, but I’ve got a couple of the cut-to-fit adhesives on order. Too bad I have to buy them too, but still— $50 to fix a $650 phone isn’t bad!

Gene DeClark -

Good guide and replacement went well for the most part. I had an issue with phone calls after screen replacement where the screen would be completely black while on a call and took me a while to find out that the small window right above the screen for the proximity sensor is too dark. This is the sensor that turns off the screen when the phone is at your ear, so the phone always thought the phone was at my ear. I had to take the screen off again, scratch off the coating on the window and it works now.

J.P. Gleason -

First phone or tablet I have ever tried to repair. Other than not knowing how it was supposed to feel, I had very few problems following the guide. Great tips and warnings along the way, just make sure you read. I would have loved a bit more discription of how to put it back together like best placement for the double sided adhesive, but would still give it a 9\10.

Brian Van Kammen -

Very simple and straightforward, actually, compared to some electronic hardware I’ve pulled apart over the years. I do have to admit, though, that I had one foul-up… As I was putting away my tools after I got the display back on the phone and verified it was working, I discovered this big pile of T5 screws on my workbench. Yeah, oops. Had to pull the display off again and reinstall all the midframe screws. Kind of glossed over that step. :D :D

Bruce H McIntosh -

Replaced a bloated battery after a Pixel 4 overheated causing the back panel to separate from the phone. While the iFixit toolkit and battery were great, this guide isn’t; the battery is meant to be removed from the back, making most of this guide useless and risky.

The back panel is held on only by (strong) adhesive on the edge and a camera cable. Run a pick under the edge. Leave the camera connected. Unscrew 5 screws on a metal panel securing the black battery connector. Note 1 screw is shorter when removing. Pry up the connector. Peel out the battery secured by 3 pieces of tape on the underside.

Reassemble: No need to risk alcohol. Use 3 pieces of the kit’s longest double-sided adhesive in the original places. Since it’s longer, you can wrap it over the top of the battery to stick the back panel back on. To avoid disconnecting the camera cable, cut the phone edge adhesive in half and stick on in halves inside as much as possible. The back panel is slightly smaller than the phone, so make sure it’s centered.

Patrick Dark -

Hi Patrick!

This guide is written for the Pixel 1 phone, which has a substantially different repair process. If you’re working on the Pixel 4, please use our Pixel 4 guides.

Arthur Shi -

I postponed the replacement of my Google Pixel battery for more than a year...!! Then, when I proceeded, like many of us here, I broke my screen when trying to remove it, despite having been very cautious... Many comments say that even when breaking the screen, the replacement process can proceed and the phone will be back to life (it will boot, make sounds and emit vibrations, voice assistant, etc), and then it’s only a matter of ordering a new screen.  BUT... in my case, after replacing the battery with the one provided in this iFixIt kit, absolutely no sign of life was given by the phone (except maybe a very brief vibration when plugging the charging cable the first time)...

QUESTION...: since the battery stayed dormant in the box for more than a year (about 16 months, and maybe more if we account for the time it stayed in the iFixIt warehouse shelves), is it possible that it died chemically, to the point that even a normal charging operation (plugging the charging cable) can not revive it...??

Thanks!

Steve Legault -