Einleitung

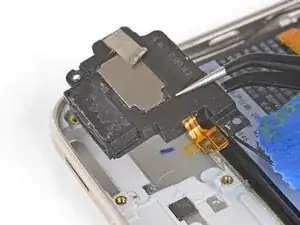
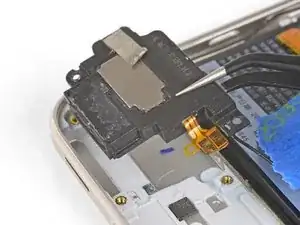
Diese Anleitung zeigt dir, wie du das Lautsprechermodul im Google Pixel XL austauschen kannst.

Das Display des Pixel XL ist nicht verstärkt und daher zerbrechlich. Es ist stark am Rahmen verklebt, so dass eine Reparatur schwierig wird. Die Wahrscheinlichkeit, dass es beschädigt wird, ist hoch, besonders wenn schon kleine Risse vorhanden sind. Erwärme das Display ausreichend und sei beim Hebeln besonders vorsichtig.

  1. JCWIBsMDNLhS3ugB
    JCWIBsMDNLhS3ugB
    IsbHv3IfVrsgV3Yk
    csYWfVjLGAnK2GIa
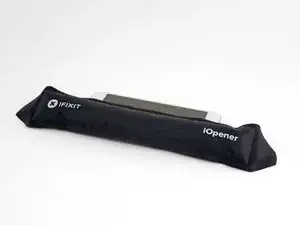
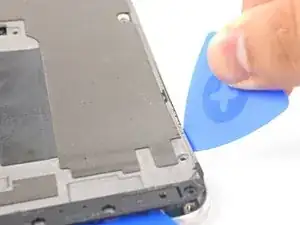
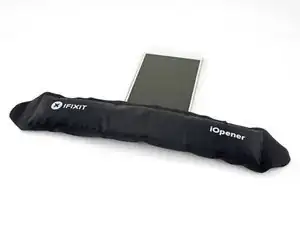
    • Erwärme einen iOpener und lege ihn zwei Minuten lang auf die linke Displaykante.

    • Es geht auch mit einem Haartrockner, einem Heißluftgebläse oder einer Wärmeplatte. Sei aber vorsichtig und überhitze das Smartphone nicht. Das Display und der Akku können durch Wärme leicht beschädigt werden.

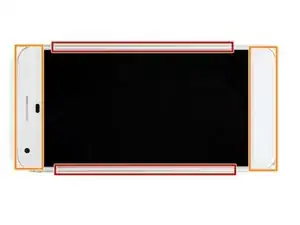
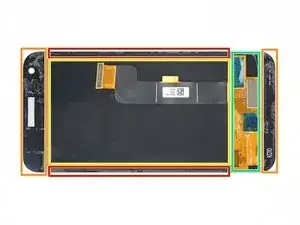
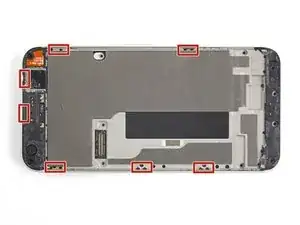
    • Achte auf die Klebezonen, bevor du anfängst zu hebeln:

    • Dünne Klebestreifen am Displayglas

    • Dicke Klebestreifen

    From my experince, it’s better to use a heat gun (if iFixit sold a good heat gun in volume, they should spruik that). Also, heat ALL sides at the same time BUT concentrate on the top part of the phone where the foam adhesive tape is thickest, second on the bottom where the foam is almost as thick. It also helps to use the 2nd & 3rd images in the series to visualise where the adhesive is.

    Jon T. -

    Ty for the advice I prefer heat gun but my first pixel

    Michael Koch -

  2. qASf1QrPQmpGloI5
    qASf1QrPQmpGloI5
    G1uOPFiNFQAx2AYG
    k1w2b3IGML5O5Ltu
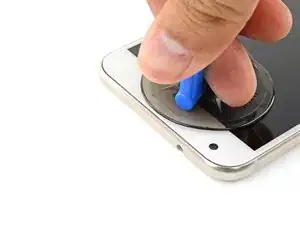
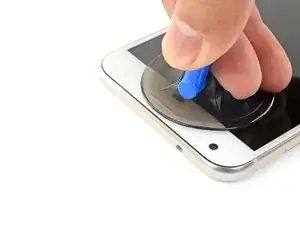
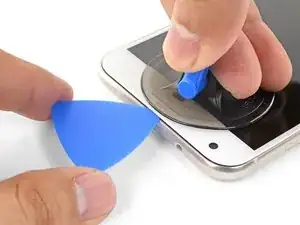
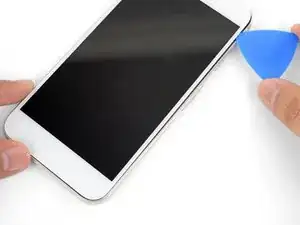
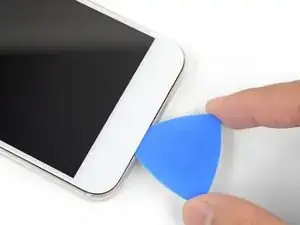
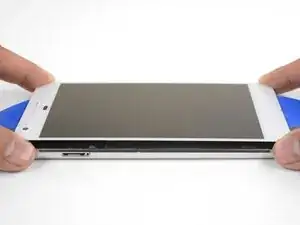
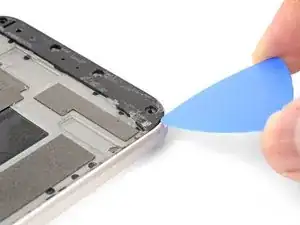
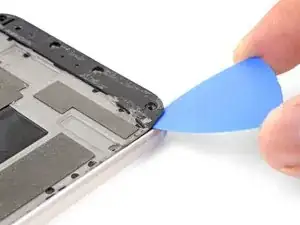
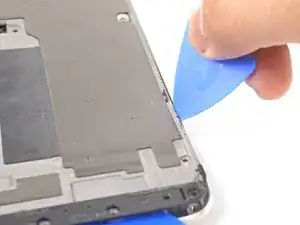
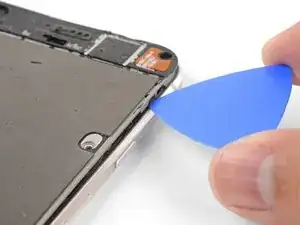
    • Wenn sich der Rand warm anfühlt, dann setze einen Saugheber nahe an der Kante an.

    • Hebe den Saugheber hoch und setze ein Plektrum in den entstandenen Spalt ein.

    • Setze das Plektrum nicht tiefer als 13 mm ein, du könntest sonst die Displayeinheit beschädigen.

    • Wenn es schwer geht, einen Spalt zu öffnen, dann erwärme den Rand nochmals und probiere es erneut.

    • Du kannst auch anstelle eines Plektrums eine Spielkarte benutzen, um den anfänglichen Spalt offen zu halten.

    From my experience, I had to use a thin blade (such as the ones included with the deluxe iFixit repair kit) to slide into the small gap, and cut away at the foam adhesive. Once enough of a gap is created, the picks can then be used to push the adhesive aside - but the adhesive is so thick, especially -as Brewmaster396 observed in the comments below - at the top right corner behind the screen, that the knife is required to cut it. I failed here - cracking the back layer of my screen - because I didn’t take time to cut all the adhesive away from that thick part, and kept trying to pull the screen off. It doesn’t take a lot of pressure to crack - so maybe it’s more a thing of cutting and floating the screen up, not pulling and prying.

    Jon T. -

    Mark the picks with lines that show how deep you can go in that part of the screen. This will help keep you from accidentally hitting the fragile screen

    Matthew Goodwin -

    Matthew Goodwin - Excellent suggestion.

    casper911ca -

    Jon T made a great suggestion about creating a mark on the picks (see above).

    Matthew Goodwin responds with an “Excellent suggestion.”

    Here we are 8 months later and no lines on the picks in my new pro-tech tool kit, not sure why this hasn’t been implemented at this point in time.

    Bob H.

    Bob Hawley -

    Thin, but sturdy pieces of paper (playing cards, bits of paper box packaging) helped me a lot when trying to open my screen. The plastic picks are useful, but very slippery so you should use extra caution when applying pressure with those.

    diplomat -

  3. SMZnqLZpAXo1VRBW
    SMZnqLZpAXo1VRBW
    VsRjq1iUnCfBoJPf
    Wid4niEfNUS4OGlP
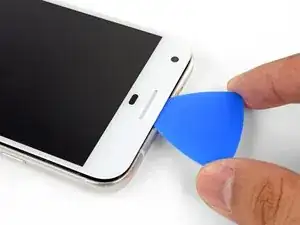
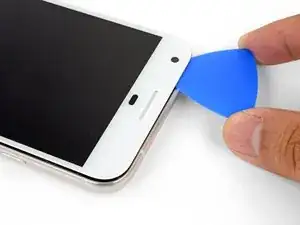
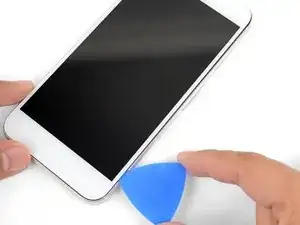
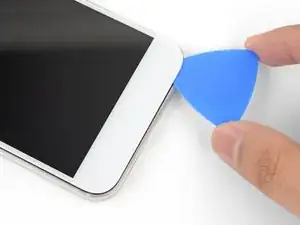
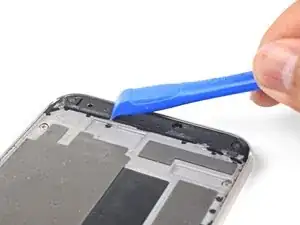
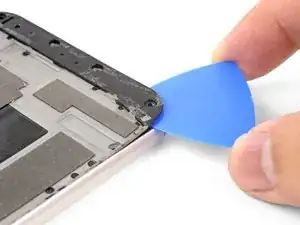
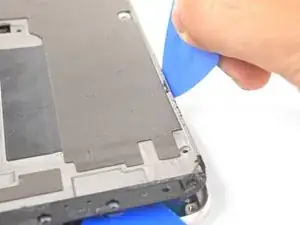
    • Schneide mit dem Plektrum an der Oberkante entlang, um den Kleber aufzutrennen.

    • Achte darauf, dass du nicht tiefer als 13 mm schneidest , du könntest sonst das Display beschädigen.

    • Lasse ein Plektrum in der Kante stecken, damit der Klebstoff sich nicht wieder verbinden kann.

  4. NEbOsdqV3KJ5ZDYJ
    NEbOsdqV3KJ5ZDYJ
    Ea54AOUcRKSxcBPx
    sUVRPYSMABVFCEDF
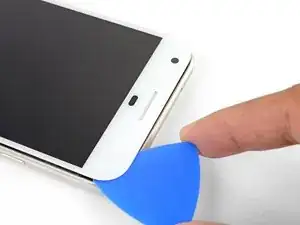
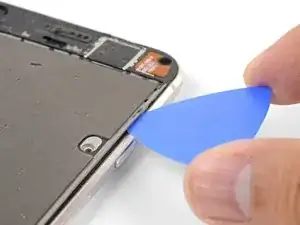
    • Erwärme einen iOpener und lege ihn zwei Minuten lang auf den rechten Rand des Smartphones.

    • Setze ein Plektrum nahe an der Oberkante des Smartphones ein, dort wo du den Kleber vorher schon aufgetrennt hast.

    • Führe das Plektrum um die rechte Ecke herum.

    • Schneide den Kleber mit dem Plektrum behutsam an der rechten Kante nach unten auf.

    • Setze an dieser Kante das Plektrum nicht tiefer als 1 mm ein, du könntest sonst das Display beschädigen.

    • Wiederhole das Ganze an der linken Kante des Smartphones.

  5. DS5CTgYQ5c2wdS6D
    DS5CTgYQ5c2wdS6D
    M3AN6f2NGJ43UVMZ
    • Erwärme zwei Minuten lang den unteren Rand mit dem iOpener.

    • Setze ein Plektrum nahe an der rechten Kante, wo du schon den Kleber gelöst hast.

    • Führe das Plektrum behutsam um die Ecke herum.

    • Trenne mit dem Plektrum den Kleber entlang der Unterkante auf.

    • Schneide nicht tiefer als 8,5 mm, du könntest sonst das Displaykabel beschädigen.

  6. GQmZMQBPF3AkZoqx
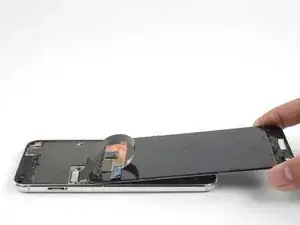
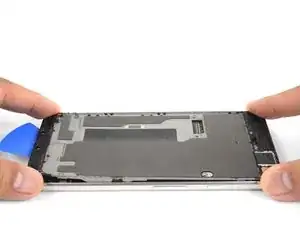
    • Wenn du um das ganze Smartphone herum aufgeschnitten hast, dann hebe die Displayeinheit vorsichtig an den rechten Ecken ein wenig hoch.

    • Versuche noch nicht, die Displayeinheit zu entfernen. Sie ist immer noch mit einem Flachbandkabel angeschlossen.

    • Schneide mit einem Plektrum durch alle restlichen Verklebungen.

    As long as you’ve disengaged the adhesive relatively evenly around all sides, I found mounting the suction cup in the middle (biased a little to the left or right side), helps a lot on this step.

    casper911ca -

  7. PIERGMK3Gtacn6aA
    PIERGMK3Gtacn6aA
    XHJEpWcHnAbJjCvF
    4vLYP1IQBnVBBWRY
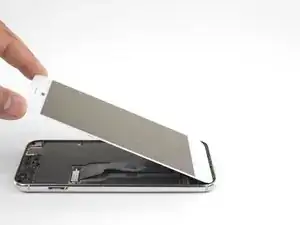
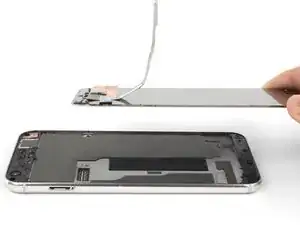
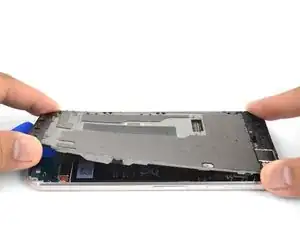
    • Hebe die Displayeinheit am oberen Ende hoch und klappe sie herum, so dass sie mit der Rückseite nach oben auf dem Rahmen liegt.

    • Achte beim Aufklappen der Displayeinheit darauf, dass das Flachbandkabel nicht zu stark belastet wird.

  8. ZZGE4WvqaqrACxPP
    ZZGE4WvqaqrACxPP
    2fAiN1W2cPLIDxRf
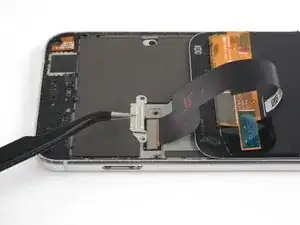
    • Entferne die beiden 4 mm Torx T5 Schrauben, mit denen die Displaykabelhalterung befestigt ist.

    • Entferne die Displaykabelhalterung.

  9. HliwdtsQpkqAcMWj
    HliwdtsQpkqAcMWj
    pI2dWacJFpklo1so
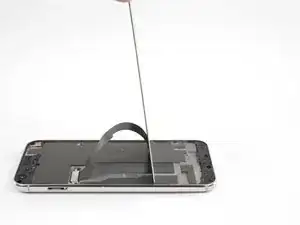
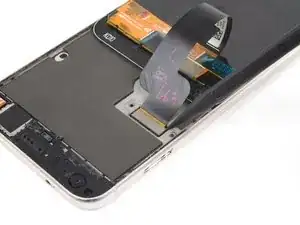
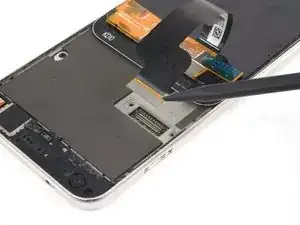
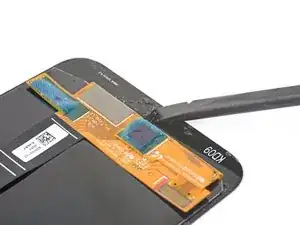
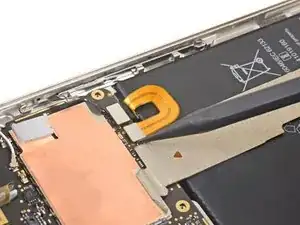
    • Heble mit der Spudgerspitze das Displaykabel hoch und löse es aus seinem Anschluss heraus.

    • Um Druckverbinder, wie diesen hier, wieder anzuschließen, musst du ihn erst an einer Seite sorgfältig ausrichten und herunterdrücken, bis er einrastet. Wiederhole das Ganze für die andere Seite. Drücke nicht in der Mitte. Wenn der Stecker nicht richtig sitzt, können die Kontaktstifte verbogen werden, so dass der Stecker dauerhaft beschädigt bleibt.

    i have to agree with the comment here about the connector. If you press it in the middle, it will bend. Resulting in either bent pins on the motherboard or the display. In my case it was both !

    Richard St.Hilaire -

    Be careful prying up the connector and apply force only from the side as shown in the picture cause in the longest side there are capacitors that can be broke doing the lever ( happened to me Repair missing capacitor near display connection port )

    Daniele Maggio -

  10. 2mnuHXKublYPptTh
    2mnuHXKublYPptTh
    TOKGWQrGUFvol5sE
    tJRxJuCIDcoV4ERh
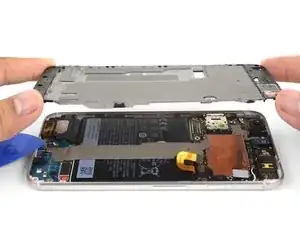
    • Entferne die Displayeinheit.

    • Wenn du eine noch umfassendere Anleitung zum Einbau der Displayeinheit benötigst, dann folge dieser Anleitung.

    • Bevor du eine neue Displayeinheit einbauen kannst, musst du den Rahmen erst von allen Klebstoffresten befreien. Schabe sie mit einem Spudger oder einem Plastiköffnungswerkzeug ab und reinige die Klebeflächen mit hochkonzentriertem Isopropylalkohol, so dass keine Reste mehr anhaften.

    • Wenn du die alte Displayeinheit wieder befestigst, dann achte darauf, dass auch dort alle Klebstoffreste vom Panel und vom Rahmen gründlich beseitigt sind.

    • Schalte dein Smartphone ein und überprüfe alle Funktionen, bevor du Klebeband anbringst und das Gerät wieder verklebst.

    The Parts List does not state you need a replacement display. Is this portion of the Repair Guide copied and pasted from another guide (perhaps the screen replacement guide) or will I need to procure a replacement screen before I attempt to replace the battery?

    casper911ca -

    It is possible to replace the battery without replacing the display, but there is a significant chance you may break the display during removal. It depends on if your display already has micro-fractures, and how stubborn the screen adhesives are. I would personally buy a screen just in case, and return the part if I didn’t need it.

    Arthur Shi -

    Hello, I recently bought a refurb screen off of eBay to fit. The phone was 100% working before and just needed a new display/battery.

    The battery came before the display. I wanted to test the display before doing too much reassembly, so I plugged in the battery, connected the mother/daughter boards with the interconnect cable, and then plugged in the LCD.

    When I press the power button there is the usual single buzz from booting, but the display is completely blank.

    Is the replacement screen DOA, or are there important traces/connections made by fully assembling the midframe and missing screws before testing the LCD?

    If I already have all the ingredients for a fair test of the LCD, then it seems the LCD is bad?

    Like I said the phone worked perfectly before… and if the new battery is dead, I would expect no buzz, or at least a battery graphic?

    John -

    Hi John,

    If the phone buzzed, that usually signifies that it has booted up—having no image at that point usually means some kind of display issue. I would suggest disconnecting the display connector, carefully checking for any debris in the socket, and carefully re-connecting it.

    I’ve also seen a comment in another Pixel guide that suggests plugging in the display connector before the battery. If that works, please leave a comment!

    Arthur Shi -

    battery connector is not accessible without removing the display first………. and reassembling, battery has to be connected first, then the plastic piece and then the display

    Alan Sears -

  11. IigBNtK2OILOOCld
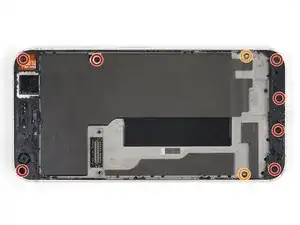
    • Entferne folgenden Schrauben, mit denen der Mittelrahmen an der Rückseite befestigt ist:

    • Sieben schwarze 4 mm Torx T5 Schrauben

    • Zwei silberfarbene 3 mm Torx T5 Schrauben

  12. ZkJJqpKjvBbGcrdk
    • Kunstoffrasten, welche in die Kanten des rückwärtigen Gehäuses eingreifen, halten den Mittelrahmen sehr fest.

  13. 5GatHAD1iNhBg2UG
    5GatHAD1iNhBg2UG
    xWeZKp1SYS4GQ2Bo
    NsfOeQvUBqnEjIMG
    • Finde die Vertiefung in der unteren linken Ecke des Rahmens und setze dort ein Plektrum ein.

    • Schiebe das Plektrum an der Unterkante des Smartphones entlang bis zur unteren rechten Ecke und lasse es dort stecken.

    This step was impossible on my phone as a gap could not be formed at the notch to pry the corner up using either pick or playing card . Flathead micro screwdriver was required causing insignificant cosmetic damage at that area.

    Darren Bass -

    This step takes a few tries, starting with the pick perpendicular to the phone. Eventually, after gentle prying, it will catch the corner so you can slip the pick underneath. Like everything in this repair, it requires you to be exceedingly delicate and patient.

    Damian Matthews -

    Take the tip of the tweezers, insert it in the screw hole near where they show to insert the pick and gently pry up. You should be able to move the plate upwards enough to insert the pick

    Michael hobbs -

  14. NfSuTWeOHmrvseOO
    NfSuTWeOHmrvseOO
    joKE5kWHTsCOYkrQ
    wEGrlmCkwgkmOMhB
    • Setze ein weiteres Plektrum unten in die rechte Kante ein.

    • Schiebe das Plektrum in der Naht langsam nach oben, bis sich die ersten Raste löst.

    • Die Toleranzen sind sehr eng, deswegen kann es schwergängig sein und du brauchst ziemlich viel Kraft. Wenn du Schwierigkeiten hast, dann kannst du probieren, eine Spielkarte einzusetzen und zu verschieben.

    • Wenn du die Raste gelöst hast, dann lasse das Plektrum stecken, damit der Mittelrahmen nicht wieder anhaften kann.

    I found that leaving the pick in the middle, and using it as a lever (think like bending a pipe over one’s knee and the pick in the middle is the knee) to “pop” the top edge up helped a lot more than trying to use more picks to pry this mid layer up…

    Jon T. -

  15. cehEhNBMRcWpfmHK
    cehEhNBMRcWpfmHK
    FUAduUtTI6olJlpK
    • Setze ein Plektrum in die rechte Kante des Smartphones ein und schiebe es nach oben bis zur obersten rechten Raste.

    • Du brauchst das Plektrum nicht tiefer als 2 mm in die Kante einzusetzen. Wenn du es ganz einschiebst, riskierst du einen Schaden an den Flachbandkabeln.

    • Schiebe das Plektrum langsam an der Raste vorbei, bis sie sich vom Rahmen löst.

    • Jetzt sollte die rechte Kante des Mittelrahmens vomGehäuse losgelöst sein. Wenn dass nicht der Fall sein sollte, dann schiebe das Plektrum an der rechten Kante hoch und runter.

  16. mt4oxePhw1AkvvsT
    mt4oxePhw1AkvvsT
    fyZJQLWDHxSFQntS
    2joL1cwEWUDAmsYf
    • Fasse die rechte Kante des Mittelrahmens an den Ecken und klappe die Kante langsam hoch.

    • Wenn sich die linke Kante lose anfühlt, dann hören mit dem Hochklappen auf und hebe den Mittelrahmen nach oben.

    • Entferne den Mittelrahmen.

    • So gelingt der Einbau des Mittelrahmens: lege ihn passgenau in das Gehäuse, drücke ihn dann ringsum fest, bis alle Rasten einschnappen. Wenn alles korrekt durchgeführt ist, dann liegt der Mittelrahmen flach im Gehäuse.

  17. y1vSCynOtHgkqRul
    y1vSCynOtHgkqRul
    yaMQjUnbwaGJw5NG
    ANH5nGcOJINAMcnM
    • Heble den Akkustecker mit der Spudgerspitze hoch und trenne ihn ab.

    • Biege das Akkukabel etwas weg, so dass es sich nicht wieder versehentlich mit der Hauptplatine verbinden kann.

  18. m1AjSAxS535UuTGf
    m1AjSAxS535UuTGf
    qocJQ4V2GfI2SHyn
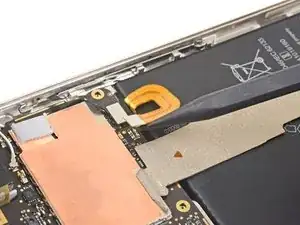
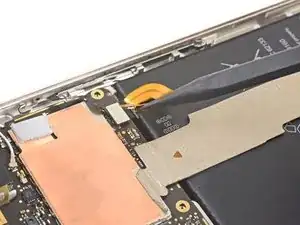
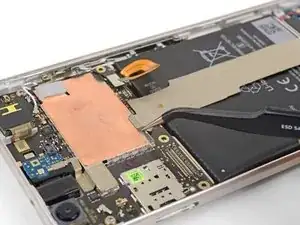
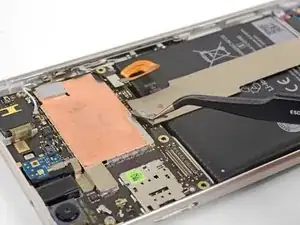
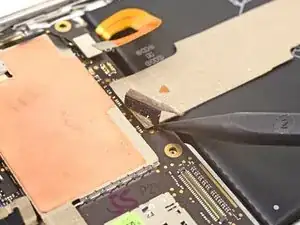
    • Ziehe das Klebeband über dem Verbindungskabel mit einer Pinzette ab.

  19. rGEqkqwFMrBCTKRX
    rGEqkqwFMrBCTKRX
    B66iN6FFLdSirItb
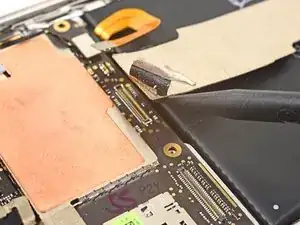
    • Heble mit der Spudgerspitze das Verbindungskabel hoch und trenne es von der Hauptplatine ab.

    • Um es beim Zusammenbau wieder anzuschließen, setze das Kabel richtig in den Anschluss ein und drücke es an einer Seite mit dem Finger nach unten, dann auf der anderen Seite. Wenn es richtig gemacht wird, hält das Kabel fest im Anschluss.

  20. KQIiXRsXDXot5vRy
    KQIiXRsXDXot5vRy
    hyCfrWXyrH6PneH4
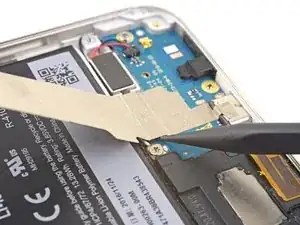
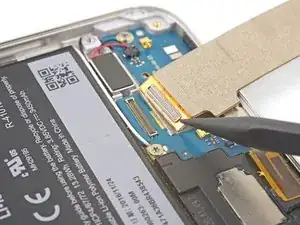
    • Heble das Verbindungskabel mit der Spudgerspitze hoch und trenne das Verbindungskabel von der unteren Tochterplatine ab.

    • Löse das Verbindungskabel weiter von der unteren Tochterplatine ab.

    • Entferne das Verbindungsflachbandkabel.

  21. pQFWHojPpZRRX4XA
    pQFWHojPpZRRX4XA
    EVIUEM3AIF4NMLfZ
  22. 1t3LZcYt4TcFuRvZ
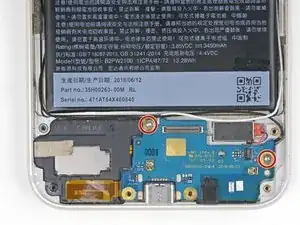
    • Entferne die beiden 3 mm Torx T5 Schrauben, mit denen die Tochterplatine am Rahmen befestigt ist.

  23. vbfaKGekH6GXnHaT
    vbfaKGekH6GXnHaT
    VfVc1eXLMV6IaLBb
    KhNYGXcPPM6AFJlm
  24. nsd6lPNqZIdaBh2V
    nsd6lPNqZIdaBh2V
    uDqZ2a6WNlCYEG4H
    GjqxMZfUjYyHhT3w
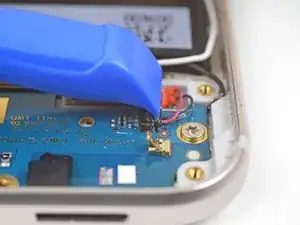
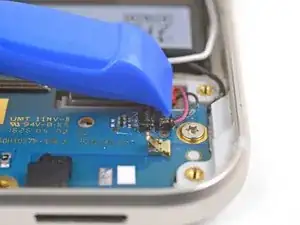
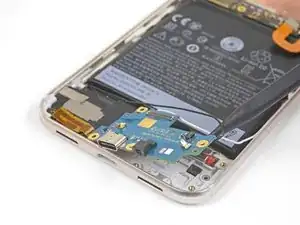
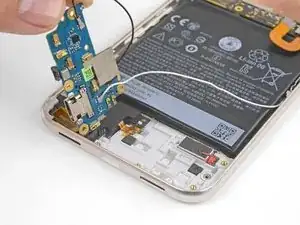
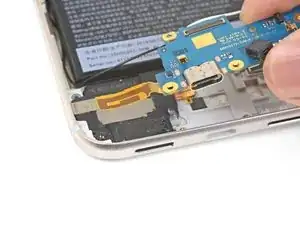
    • Hebe die linke Kante der Tochterplatine langsam hoch und löse dabei den Antennenstreifen vom Lautsprecher ab.

    • Du kannst ein Plektrum unter den Antennenstreifen schieben, damit er sich leichter vom Lautsprecher löst.

    • Wenn der Antennenstreifen zu reißen anfängt, dann höre sofort mit dem Abziehen auf. Erwärme einen iOpener, lege ihn eine Minute lang auf die Ecke und nimm ein Plektrum zur Hilfe, um den Antennenstreifen vom Lautsprecher zu lösen.

  25. igcaJKtmlHyYLQsP
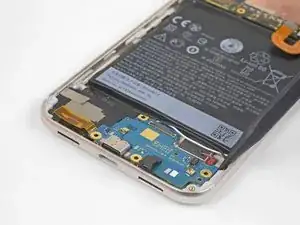
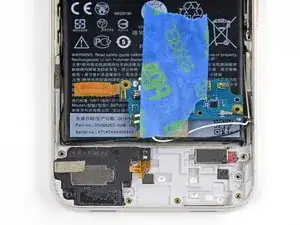
    • Klappe die Tochterplatine über den Akku und klebe sie mit etwas Klebeband fest, so dass sie aus dem Weg ist.

  26. wawSjAOQqUdhuaoA
    wawSjAOQqUdhuaoA
    W3xSHKXulnm6acek
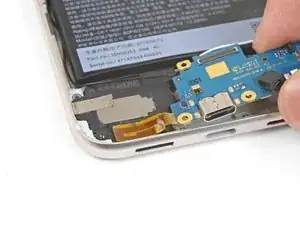
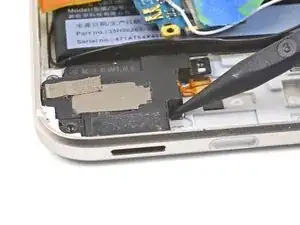
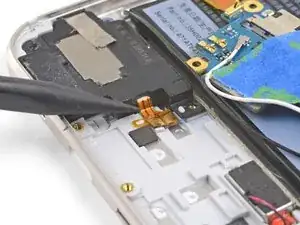
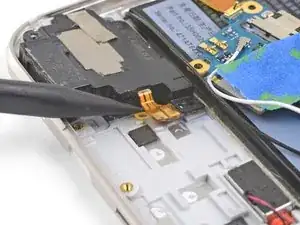
    • Heble den Lautsprecher mit der Spudgerspitze hoch und löse ihn aus seiner Vertiefung heraus.

  27. V6CMW1dDffAIi1TE
    V6CMW1dDffAIi1TE
    JC2Zv3BVFCJdSb6I
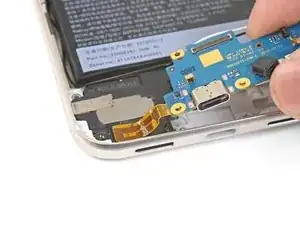
    • Setze die Spudgerspitze unter das Lautsprecher-Flachbandkabel und heble es vorsichtig hoch, so dass es sich vom Rahmen ablöst.

    • Achte beim Zusammenbau darauf, dass das Lautsprecher-Flachbandkabel mit Hilfe der Führungszapfen richtig eingepasst ist. Wenn das nicht der Fall ist, kann der Lautsprecher nicht richtig funktionieren.

  28. 3lNZjAPJasQSGCAr
    3lNZjAPJasQSGCAr
    RQ61xdcXhSKtALGO
    5rWRWAXXORJiA1Tf
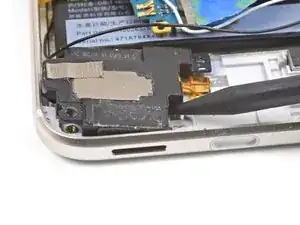
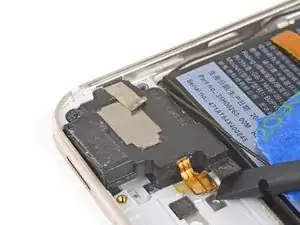
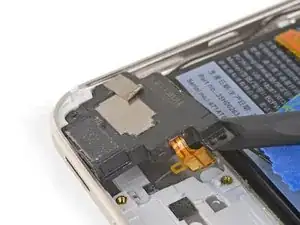
    • Heble den Lautsprecher mit dem Spudger hoch.

    • Entferne den Lautsprecher.

Abschluss

Um dein Gerät wieder zusammenzusetzen, folge den Schritten in umgekehrter Reihenfolge.

Die Reparatur hat nicht den gewünschten Erfolg gebracht? Unser Google Pixel XL Antwortenforum kann dir weiterhelfen.

Arthur Shi

Mitglied seit: 03/01/18

218620 Reputation

11 Kommentare

This guide has been updated!

Arthur Shi -

Great guide! Don’t be like me (on step 14) and sever your power and volume cable while sliding the pick up the right side of the mid-frame.

Colt Stewart -

I’m sorry to hear that! I’ve updated the step to hopefully mitigate that potential damage.

Arthur Shi -

I installed a new battery and screen and now the loadspeaker does not work. I never removed the daughterboard so I'm not sure what I did to cause it not to work. Is there anything else to try before I take it back apart?

stacey davis -

Hi Stacey,

Does the vibration motor still work? Does it charge properly? The first thing I would check is to re-seat both ends of the wide ribbon which connects the motherboard to the daughterboard. Make sure there are no particulates in the sockets.

You can test the phone without the midframe installed—the earpiece speaker just won’t work as it’s attached to the loudspeaker. If you do, be careful not to short anything!
Arthur Shi -

Add me to the list of people who cracked their screen trying to open up the device :-(

In other news: The antenna patch connecting the daughterboard to the replacement loudspeaker isn’t adhering properly. I tried taping it down with electrical tape but it won’t stick. What are my options here? Will superglue work? Does the midframe hold down the patch or is it fully dependent on the adhesive?

Thanks!
Zeev -

Hi Zeev,

I’m sorry to hear about the cracked screen. It is definitely a difficult feat—we’re trying to work out an easier and more reliable method.

The midframe will definitely hold down the patch once it is in place. Make sure that the patch is not creased when you install the midframe. Double-sided scotch tape works well also.

Arthur Shi -

Hi Arthur,

Thanks for the prompt response, really appreciate it. I’ll get rid of the electrical tape on the loudspeaker patch and let the midframe do its thing.

Regarding the guide: I watched several Pixel XL disassembly videos on youtube, and believe that despite copious amounts of glue, the top and bottom should be propped up first, followed by a gentle prying of the sides. The initial entry on the side is what caused me to crack my screen. In any case thanks again for the guide, it was helpful nonetheless.

Zeev -

Yes, that may be a safer option. I’ll look into updating the guide.

Arthur Shi -

What is the function of a loudspeaker antenna patch? I think that it might be the reason that my speakers don't work, since when I replaced the charging port (daughter board) on my Pixel xl I had a lot of trouble getting it to stick to the loudspeaker and in the end I'm not sure that it stuck. The loudspeaker worked before the daughter board replacement, but now it doesn't.

Nachum Silver -

Hi Nachum,

The antenna patch shouldn’t affect whether the loudspeaker works or not. The daughterboard has spring contacts for the loudspeaker. Check that the contacts are aligned and touching the loudspeaker’s patches.

Arthur Shi -