Einleitung

Some possible symptoms which could show that your battery needs to be replaced:

  • Battery percentage remains low, even after charging.
  • The tablet dies when it still has a lot of battery life.
  • The tablet becomes hot after using for a short period of time.

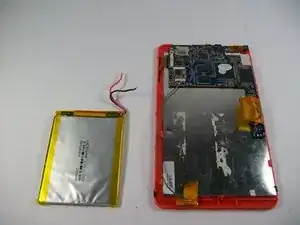
If you experience these symptoms, you might need to get a new battery. This battery replacement guide will walk you through the steps on how to remove necessary components in order to get to the battery. Replacing the battery is a moderate five step process using the necessary tools (refer to tools list).

  1. FNPHGUrKMlA4sZGW
    FNPHGUrKMlA4sZGW
    1mwxWaOGvnBSfRHA
    • Before beginning this process, make sure the device is powered off.

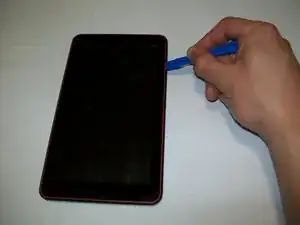
    • Use the plastic opening tools from iFixit to safely remove the screen from the back of the device.

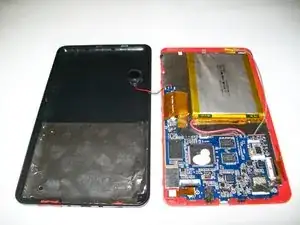
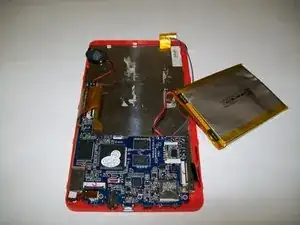
    • Lift and remove screen to reveal the battery and circuit board as seen in the picture.

  2. rkeKZFoYudLEHi1O
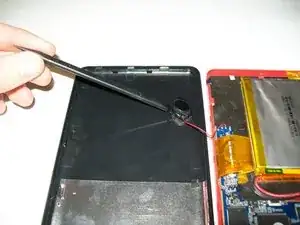
    • Preparing to remove the speaker.

    • Use spudger to remove the speaker from the back casing of the device.

    • Note: Handle with care

  3. hyKLhw1aIv1TZjGV
    • Remove the black strips as shown in the picture from the wires using the tweezers.

    • Be careful of handling, if not done correctly you will need to replace.

  4. LZHeHSt4fifIemaE
    LZHeHSt4fifIemaE
    pwrUSxf4LFIQcThV
    • Carefully use the spatula and spudger from iFixit to remove the battery from the device.

    • Note: The different color wires needs to be reconnected onto the proper terminals on the circuit board

    • Note: here is a how to solder and desolder connections guide to properly do step 5. Wie man Lötverbindungen herstellt und entlötet

    • Dispose of the old battery properly.

  5. 3BWqejjX1fvgmWjm
    3BWqejjX1fvgmWjm
    uxnkqRrRUIJj3KBu
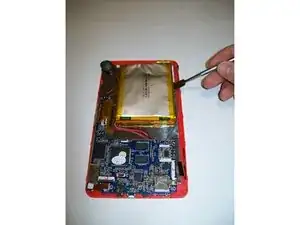
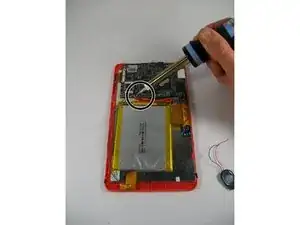
    • Heat the soldering iron to operating temperature.

    • Use caution as to not harm yourself when using the hot soldering iron.

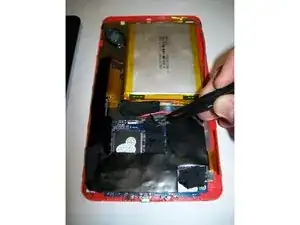
    • Locate the black and red wires on the top of the circuit board.

    • Note: Remember the placement of the red and black wires on the circuit board.

    • Using the soldering iron, apply heat to the shiny solder point on the circuit board (Circled on the picture).

    • Note: Be sure not to break the wire when pulling the wires off. Let the solder melt in order to remove the wire.

    • Be sure to perform this task for both the black and red wires.

    • Note: If the iron is not hot enough, you might encounter unsuccessful removal of the wires. In order to correct this, let the soldering iron heat up completely to try this step again.

Abschluss

To reassemble your device, follow these instructions in reverse order.

Justin Machnik

Mitglied seit: 30/10/15

194 Reputation

0 Kommentare