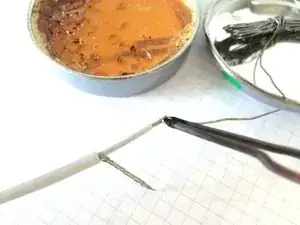
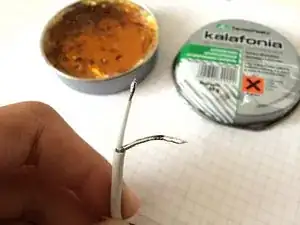
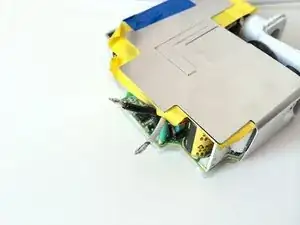
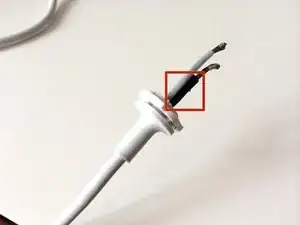
Einleitung

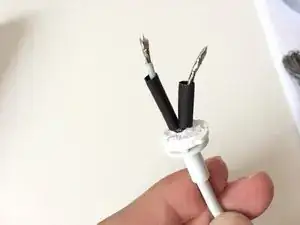
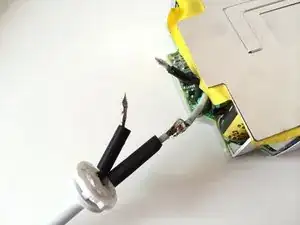
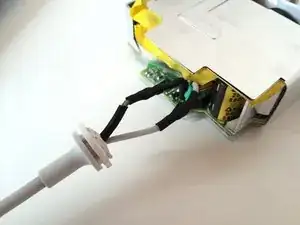
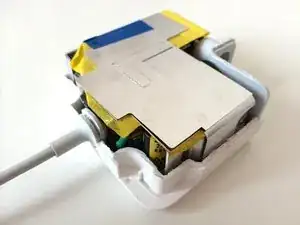
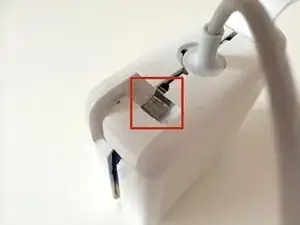
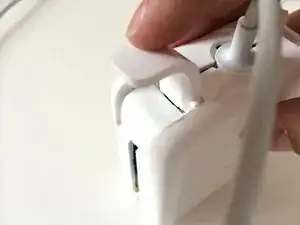
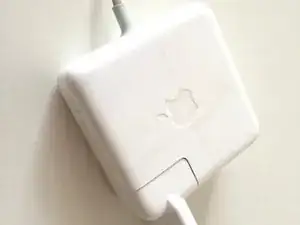
The Apple AC adapter cable often starts to fray/separate near where the cable meets the power brick. This guide shows how to repair it cleanly while maintaining the original look of your AC adapter.

Alternatively, you can follow this guide to replace the cord instead of repairing it.

  1. oDieQo4LLdNdWTUD
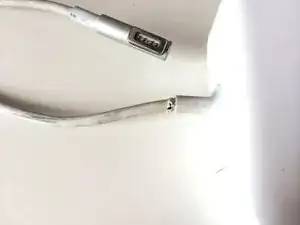
    • The first thing you'll need, is to have managed to break the cable of your MagSafe Adapter.

    Done, that was the easiest part.

    haukest -

    My magnetic connection is intermittent. The gold pins do not appear to make reliable contact. I carefully ground down the face of the corded connector and it fine after that. Not recommended if you are unsure of what you are doing !

    Nic Maennling -

  2. pNpSZgC4JpwnLP3l
    pNpSZgC4JpwnLP3l
    Xf3l4QaQtbpDS3Ip
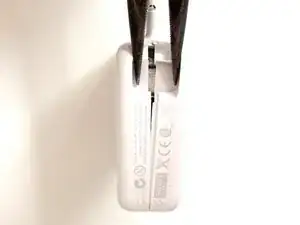
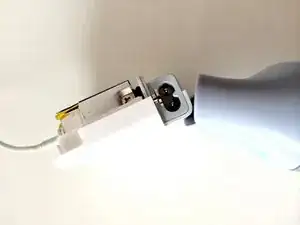
    • Lift up the 2 flaps, and SLOWLY separate the two halves of the casing with a set of pliers.

    • Be careful, as this step can potentially do the most damage to the outer casing. Take your time, and wrap the plier tips with some tape if you don't want to leave any marks.

    • After a good couple of pops, you'll be able to hold it open with your hands.

    First of all, THANK YOU for this! Mac products are terribly expensive and unavailable in my country so I almost died when the cable broke but this guide worked like a charm. Just two comments in case they're helpful for someone else:

    -Takes quite some time to heat up the charger so that it opens, don't be impatient;

    -The long nose pliers make ALL the difference. I was trying to use another kind and they weren't working out, I almost gave up, but then I bought a pair of long nose pliers (quite cheap at hardware stores) and with them it was tons easier.

    Again, thanks!!

    Paula Alvarado -

    Will be heap easier if you use a C ring pliers. It is spring loaded at the handles; when you squeeze on the handle the pliers tips will open up thus popping open the plastic enclosure. I just did it for my repair.

    Chaozhouzi Chaozhouzi -

    A better alternative to the pliers is to use a bench vise to crack the glue bond between the case halves. Wrap the power brick in a cloth to protect against scratches. Place the power brick in the bench vise, with the top of the jaws aligned with the seam between the two plastic case halves. Slowly tighten the vise until you hear the glue bond crack. Change the orientation of the power brick and repeat, until the glued joint is broken all the way around.

    gordonhamachi -

    At first, it seems like a daunting situation, because the adhesive has the enclosure so firmly sealed. However, I went around the entire enclosure with a razor blade at about 1/8th inch depth. Then used a fine chisel bit as a wedge. Inserted it into the crack, rotating it torsionally occasionally, and edged it around the circumference. At some point there is a “CRACK”— but don’t panic, its just the final bits of the adhesive releasing from the enclosure.

    skat1140 -

  3. BGqu1RQKArxtkC2D
    BGqu1RQKArxtkC2D
    VnLSvSigxdrlTvVB
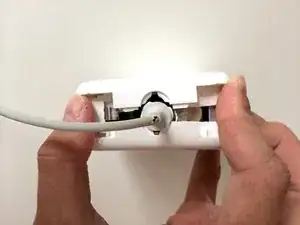
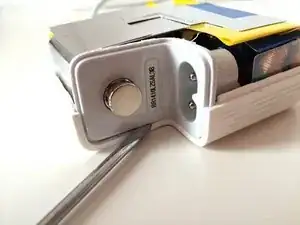
    • Rinse and repeat: now heat the lower part of the adapter.

    • Gently pull the two halves of the case apart.

    Starting here I used a screwdriver in the newly created gap to widen it progressively, as the two sides just wouldn't come apart just like that. It's all glue so you just have to make it snap.

    Loic Nageleisen -

    I never managed to separate the 2 parts on the lower side. But I could still proceed with the follonwing.

    Jean Orloff -

    Hi! By the way wich temperature do you recommend to heat the glued sides?

    eduardo -

  4. kUTo22pMV6upMkaB
    kUTo22pMV6upMkaB
    G1XJN2EMoEhjNrw1
    • Heat the lower part some more—this will loosen the AC Input Connector, which should still be stuck to one of the two sides.

    • Give it a bit of screwdriver action if it's stubborn like mine was.

    Great guide, completed yesterday. I skipped step 5 as the plastic stopper became fully accessible without removing the second part of the case.

    diphi -

    I found no need of this step. With one side off had enough space to operate.

    Wu Ming -

    I agree, this step was unnecessary. There's no need to remove both sides.

    Navy Vet 2015 -

    Thank you,Thank you,Thank you,Thank you

    The part to open the case is the hardest -.-, I get to crack one side after a little struggle but the other took me forever (I saw some videos how easy it was but mine was like dying), my case was damage idc anymore, my hand was bruised & after one whole day of struggling and cutting with cutter & trying again to crack it, I finally got them to open, & I did heat the lower part, & mine was stuborn like yours, that part got stuck & needed more screwdriver actions/ If only I did know that if I could see the wires then there would be no need to open the other side/ but thanks again, tommorow I’m gonna to college to get help from a teacher to solder the wires..,

    Sukii Fu -

  5. doJilNOBUeuYFcln
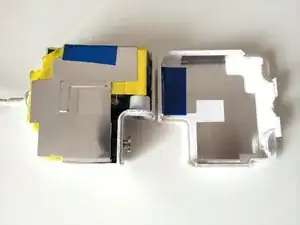
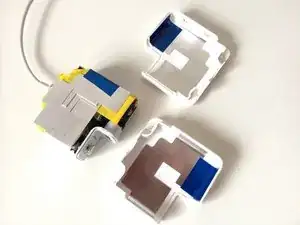
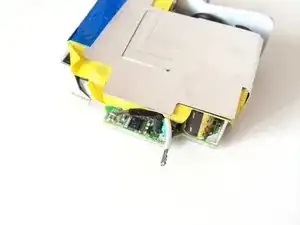
    • If all went well, you should have completely separated the 2 parts of the case from the actual power supply.

    I opened only three sides of the adapter.

    Philippe Leledy -

    When opening the case (after dryer heat it up), I noticed that there are lot of white glues on thin metals and very sticky (not same like the above photos shown). I decided to open, then it torned the outer casting. It's still okay to use?

    exterones -

  6. HBIvoEZlDRTCFxfw
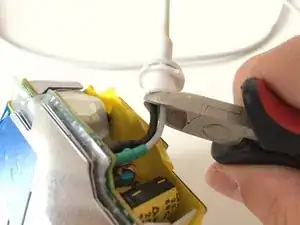
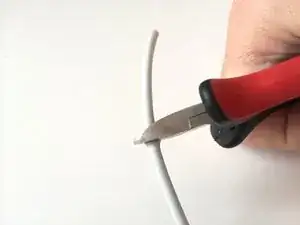
    • Cut both wires as close to the little plastic thingy as possible.

    I did not cut the wires at step 7. For having longer wire ends, I cut them after step 8.

    Philippe Leledy -

    ‘Thingy’ = Grommet

    integritybuilders -

  7. 4BixAO3JDKYCVjjU
    4BixAO3JDKYCVjjU
    TmExsM5Cv5vilBQp
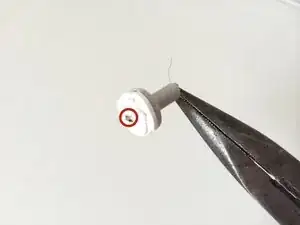
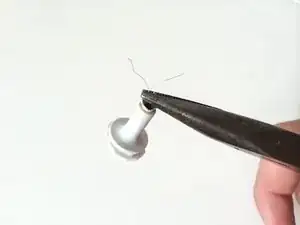
    • To reuse the plastic stopper, using whatever you want (I used a cutting plier), remove as much of the white plastic as to still leave the lip for further reattachment.

    • Using your normal pliers and/or a fine screwdriver/knife, try to jam out a little metal part that is clipping the two wires and attaching them to the white plastic.

    • Next, pull out all the wires.

    Reusing the plastic stopper was a no-go for me, as the innermost part had the cables so embedded (the thing appears molded: no metal clip and no mantle), twisted and compressed inside (checked by slicing the whole thing) that pulling them was physically impossible. If yours is like mine, save some time and drill through the whole thing or mark it as a loss.

    Loic Nageleisen -

    The inner hard white plastic part is molded around the wires (which are first crimped) and onto the exterior rubber reinforcement, so that it's all one piece. I drilled through the wires, but when I tried to open up the hole enough to reinsert the cable, the metal crimp was still there. If you have good pliers and a power drill (I didn't), you can probably make it work. I ended up cutting off the plastic inside and punching out the crimp with an allen wrench and hammer.

    Scott Boyce -

    The metal part that crimps the wire would have been removed whilst carying out the first part of this step :)

    Darie H -

    I pulled out as much wore as I could then I used a power drill and a small drill but and drilled right from the outside through the white plastic pat. Worked great! Also I used a Dremel to cut the white plastic peice. Taking as much as you can off is the best as that space will be helpful for the wire when you solder it back together

    Nathan Muchowski -

    Hi!

    My stopper didn't look like yours: there were 2 different holes for the 2 wires: the one for the central white wire was marked 5 and the black, shielding "wire" was marked 7.

    So instead of drilling the thing into a total mess, I decided this stopper was the bad guy that ruined the wire in the first place, and replaced it altogether by the silicon wonder called "Sugru".

    Sugru also works as a preventive cure of our problem: https://sugru.com/videos/how-to-repair-a...

    Sugru's motto "Hack things better" is in line with iFixit spirit, and I think it applies as I expect my repaired charger to be better than the original, for this problem...

    Jean Orloff -

    Here's the entire link to them: https://sugru.com/tech-gadget/how-to-rep.... They want 15.28 $, and you can hopefully skip the whole procedure.

    moise -

    For removing the white plastic, I used a little metal saw.

    Philippe Leledy -

    Ok, this was a tough part for me. The hard plastic needs to be removed till its flat. I first did this with a pair of garden scissors (the small ones) to cut the bulk away, then filed it down till it was smooth and flat. Then I used the soldering iron to melt the plastic away around the cable. After a bit of melting I saw the metal ring and melted away enough plastic to remove it completely. [BE CAREFUL NOT TO MELT THE SHELL OF THE CABLE AND THE PLASTIC TOGETHER]. I then used a nail (thin) and screwdriver (thicker) to push the cable out of the stopper. Took a while but I was able to remove the old cable entirely and reuse the stopper.

    M Ramdas -

    Just drill it - to remove wire leftovers and enlarge the hole. I did it without checking the comment section, and now I see that many of you got the same idea. It works!

    DKDK -

  8. rYjVpqGbBObtjAUZ
    rYjVpqGbBObtjAUZ
    ZQoLlS3U2rARLQRC
    rMFCnvg4gJ4VjCY3
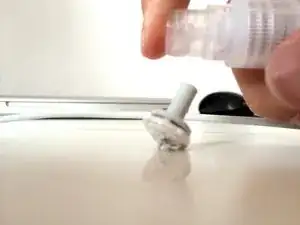
    • The plastic mantle of the wire will still likely be attached to the plastic stopper.

    • To get it out, sprinkle the thing with some rubbing alcohol (or water).

    • Then, push it out with a bigger screwdriver head.

    • This took the most time in my case, so, be patient—it'll give up eventually.

    Here you can also apply heat and it will come out very easy. Great guide!

    Angela Penaherrera -

    Thanks - didn't think of that - will definitely be trying it out next time

    Darie H -

    The plastic grommet part was a little rough and had to drill it out but it does work!

    Peter -

    Couldn't get the stuff out - there was a mix of wire threads, bits of hard plastic and silicon which meant that even a toothpick couldn't get through! Eventually used a power drill on slow speed to gradually drill larger holes - very easy. In order to pass through the two strands with the solder I went up to 4mm. Worked like a charm.

    Frank The Tank -

    I drilled it.

    Philippe Leledy -

    This was an annoying step. I used a utility knife to cut a bit just so I can get a screw driver through with a drilling technique as well. I was too lazy to get a small electric drill, but I image that would work, because the wider part of this is made of a really hard plastic that requires cutting into it a bit to make the whole wider to remove the inner tube

    Mina -

    I had a non-apple replacement psu, and I was able to forcefully pull 5cm (2") of the cable, including the damaged part, through the grommet towards the inside using pliers, before even cutting the cable. So I skipped step 4 -9. Then cut & re-soldered, much easier this way. Works great again!

    Olaf Pfeifer -

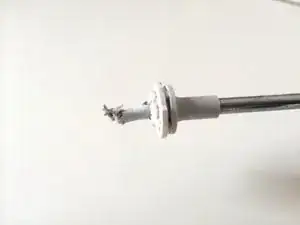
    Here takes patience. More than half an hour for me. Use a power drill at slow speed to loosen things a bit on the hard plastic side. Screwdriver to grind and push out the cable part. More screwdriver to grind out the tiny metal clip. Finally some alcohol and more patience with screwdrivers from both sides to push out the soft plastic mantle. Careful not to brake the upper soft plastic part of the stopper. The outcome is exactly as in the picture: a neat and clean hole through it with enough space to push in the cable.

    Wu Ming -

    Now it's a great time to pull two 4 mm shrink sleeves along the cable: one for the magsafe side, another one for the power supply side.
    If Apple had done that, we wouldn't be here...

    michel.firholz -

  9. TqJvC1Nlfw6vJRcD
    • Now to start prepping the wires:

    • Cut the main wire at a few centimetres away from where the tear occurred. This'll ensure you won't be reusing any damaged piece of the wire.

    After cutting off the damaged part of the cable, insert it into the plastic stopper cleaned in step 8. This way the insertion is easier than making it at step 12.

    Aristarco Palacios -

  10. cRPYoCySfDjVIRtH
    cRPYoCySfDjVIRtH
    4DQgFimbjaEtyhI3
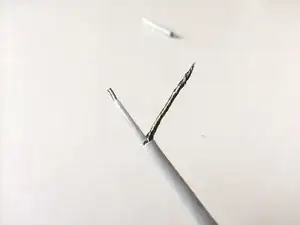
    • Using a utility knife or wire cutters, expose and prep the 4 wires like so.

    I found easier opening up the plastic mantle arounding the wires. I was able to put back wires and opened plastic mantle in the plastic stopper.

    Philippe Leledy -

  11. LDfVZArGW2fO145a
    LDfVZArGW2fO145a
    WOsZmRKy1x1aSZAc
    4ycXOKi1sjDCiuXT
    • Using a soldering iron/gun, apply solder to all 4 ends of the wires.

    Is it okay not to solder the wires anymore?

    Adrian Jimenea -

    I would strongly advise against it

    Darie H -

    >> When applying solder to the wires, do it quickly and sparingly. If you do it too long or feed in too much solder, it will wick into the center of the wires, making them inflexible and it complicates getting them back into the case.

    Scott Boyce -

    Do NOT do it sparingly - as then it won't be able to properly fuse the wires in the adapter with the wires of the outside cable; it shouldn't make more than a few milimeters rigid

    Darie H -

    Be careful when removing the isolation, do not pull the cables or they break from the board. Then you have to solder the new cable to the board.

    Benjamin D. -

    Hey Darie H- a quick stupid question for ya...soldering the wires to the board...the 'core' or main wires running down the center, connect to VO and the outer 'sleeve' of wires connect to GND, yes?

    It's been years and I wanted to make sure my chances were better than 50/50 of Not having to smell the unique odor of burning resisters, diode etc. :-) Thanks!

    Mike McIntosh -

    Hey Mike, usually the outer sleeve is indeed always GND(or -), and the inner wire VDD(or +); there still is a very small change they flipped those, but ... I'd estimate that - esp. in Apple's case to well under 1% xD. [the safest way however is to do it my way (ha!) and not unsolder the wires completely, that way, irrespective of polarity, you're connecting stuff up the way it was before]

    Darie H -

  12. wUFj2Jk1BeyDJMbw
    • Thread the rubber/plastic stopper back onto the wires.

    • Do this AFTER you have applied solder to the tips of the wires.

    • To do this, I sprayed a bit of alcohol on the whole thing, and pulled the wires with the pliers. It required a pretty decent amount of force—but don't worry, the cables should hold without a problem. Just make sure you're pulling both at the same time.

    • Note that I've also added a tiny length of shrink-tube on the exposed wire.

    Here I used a drill with good results and was able to pull in the cables in full jacket with not too much effort.

    diphi -

    I did it before applying solder without issues. You may loose some cable metallic filaments though.

    Wu Ming -

    I preferred to solder the cable directly to the PCB that isn't that difficult.

    michel.firholz -

  13. NpTFLBXtqjsaTy1c
    NpTFLBXtqjsaTy1c
    aoIcNeTWwXTt3w2h
    LCCSNGBfoanndnOW
    • Add 2 lengths of shrink-tube on the 2 wires.

    • Now, solder the 4 wires together.

    • Make sure to connect white to white, and black to the bare metal one.

    • Make sure to do this step really quickly, as the heat-shrink tube will contract from the heat of the soldering.

    • Alternatively, you could just use duct tape—just be careful so it doesn't slide off when you're bending the wires.

    • Move the shirk-tube over the soldering spots, and heat it up. (Mine fell a bit short, so I did end up using a bit of duct tape.)

    I had no shrink tube so I used thin isolation duct tape here, wrapping each cable and solder individually on as much length as sounds reasonable, then wrapping again both together.

    Loic Nageleisen -

    Do you have to use shrink tubes.

    nisthapatel55 -

    If you dare to desolder the wires from the board to solder the new ones directly instead of attaching them to the cut segments, be EXTREMELY CAREFUL not to short the Yellow Capacitor next to them. I shorted it with the soldering iron by accident and a spark flew. When I assembled back the charger, it was dead. Had to buy a new one. Soldering the wires directly to the board is better, but definitely not worth the risk. :(

    Aristarco Palacios -

    thanks for the warning, gotta be carefull tommorow when I will solder them..,

    Sukii Fu -

  14. DeKDiCtIrsT2NxaB
    DeKDiCtIrsT2NxaB
    EHm5BIuQLiWSohfy
    6VhGCiOrg1gVSSB2
    • Set the plastic stopper in its groove.

    • Put the 4 pieces of the wire holder assembly back into place.

    • Make sure the metal part goes UNDER the case, like so.

    Since I couldn't reuse the stopper, I made a simple knot right after the duct-taped part, tight enough to fit in the case but loose enough to not put undue constraint on the cable yet act as a stopper against the case edge. It turns out it's a perfect fit.

    Loic Nageleisen -

    Here's a shot of my ghetto knot stopper (you can see the blue duct tape wrapping the solder section in the back). The loop direction matters for the cable to act as a stopper on itself. It fits like a glove, so be sure not to pinch the cable when closing the case. http://imgur.com/im4FCE6

    Loic Nageleisen -

    I just ordered this part of the adapter and it came with the plastic grommet already on the cable with several inches of the two wires to work with. Putting a screwdriver in an opening and snapping it open is exactly what my husband did and it worked fine, but snap is the right word, I don't have the strength in my hands to do that operation, but he did. Thanks for all this marvelous help, all Mac users need these guides to save money on the components.

    sapresley

    Sherry Morgan -

    Had some difficulty closing the box too. Eventually used a rubber mallet and it did the trick! Now about to add some Sugru to make the repair more permanent

    https://sugru.com/great-for/gadgets-and-...

    Thanks for a great guide!

    Frank The Tank -

    If you have access to a 3D printer, I designed a replacement cord strain-relief part as an alternative to knots, hot glue, or trying to reclaim the original strain-relief.

    The design is available for free here: http://www.thingiverse.com/thing:796146

    Chris D'Annunzio -

  15. FFrryBaCeNBaOQBw
    FFrryBaCeNBaOQBw
    OBU2CXYblqSqNmpJ
    • Close up the case! You're done.

    • I had some issues getting it to clamp back properly—check the part of the case with the groove on the edge for any left over pieces of plastic, and try your best to get them out.

    • You can glue the case back together, or, in my case, since I had none, I used clear duct tape to stick it back together.

    • Make sure you take good care of the wire from now on; make sure it doesn't get bent when you carry it around. :)

    I see you actually say “take good care of the wire from now on….make sure it doesn’t get bent when you carry it around. Well, I have to carry mine around all the time as I am a flight attendant and take my computer with me on my trips because I am also a Photographer and do my editing on my layovers…..SO, my question is…this is the part that goes bad first….Does anyone have any suggestions on how to protect it from bending in my suitcase? and would it be a good idea to put electrical tape on it BEFORE it frays???

    karinamurphy414 -

    @karinamurphy414 I would put a double later of heatshrink about 50mm long each over the cable right where it comes out of the brick. First one and then another over the first after you heat shrink it. Also avoid making the cable have any sharp bends right where it comes out of the brick. Better to loop the whole brick and cables in a 200mm circle to avoid undue stress on where the charge cable exits the brick. Avoid winding the lead around those stupid fold our things on the brick. Designed to make the cable break faster IMHO :)

    Peter Newman -

    Closing the case was a pain: the wings springs must get precisely on place. That was one of the most difficult part.
    And finally, as I explained in step 9 shrink the sleeves on both sides of the cable: Magsafe and Power supply.

    michel.firholz -

    @karinamurphy:
    Always leave a loop before winding the cable along the wings.

    michel.firholz -

    Just a view on the power supply repaired with shrink sleeves and the right way to wind the cable around the wings:
    Magsafe PS repaired

    michel.firholz -

Darie H

Mitglied seit: 20/11/12

4528 Reputation

50 Kommentare

This is an excellent guide! No need to throw 79 € into Apple's throat for something that btw should last longer than just a few years.

alois -

Just did this - it worked for me. Many thanks!

Pyotr -

I did it too, but no current to the mac. I guess there may also be a loan fuse inside?

ola m -

I had to drill out the plastic thing in step 9 to remove the wires. I added a tiny zip-tie on the wires on the inside of the plastic thing to help prevent them from getting pulled out. I ended up using liquid electrical tape because my shrink tubing shrunk while soldiering.

ylojelo -

There is a metallic ring inside the plastic. That little devil has two small claws inserted into the plastic. What I did was dig with the tip of my soldering iron at low temp (just enough to soften the plastic) and pull it off with pliers when I found them. After that it's pretty easy to clean up the hole to let the cable pass. When straightened, the ring and claws look like those donkey ears they used to embarrass bad students, in comics. :)

Aristarco Palacios -

I agree, an excellent guide. I couldn't complete step 9. Instead I used a cable gland M10 including strain relief. Additionally I added a couple heat shrink tubes in different lengths in order to have a stronger cable sleeve support.

Thank you very much for the guide, I wouldn't have known how to repair my adapter without it.

internet turboprinz -

Glad I could help ! Happy chargin' !

Darie H -

excellent! thanks

alex -

Thank you for the guide.really worked :)

nethu -

Excellent guide! The heat gun idea is genius--the heat makes splitting the case much easier. I also like your method of reusing the cable feed-thru, turning it into a grommet.

Here's a suggestion to make the repair quicker and easier: Skip over Steps 4--6. Once you've finished Step 3, you can extract the feed-thru from the case and move on to Step 7. It's quicker that way, there's less risk of damage to the case, and since most of the seam is still intact, there's less to glue back together when you close it up.

ChrisW -

Excellent guide, thanks! Both the guide and the comments were very useful.

Lars Ove Kvalbein -

I have used some fine sand paper to remove minor scarcht on the charger case before reassembling it. Great guide!

cabotanthonyfacebook -

I fixed two broken chargers today - saved $$$. Thanks for the tips!

e43022 -

>Used heat gun on medium & C-ring pliers to open the case. C-ring pliers are the type you squeeze to open (as opposed to regular pliers which close when you squeeze them.) Popped right open w/some decent heat. I was able to do the repair by only opening three sides. Made putting it back together a little easier too.

>Also, some leather gloves to hold the charger while applying heat help.

>Wires in the grommet will come out relatively easily BUT you will need to drill it out starting with small bit and working up to larger.

>Removed the wiring pins from the board and soldered wires directly back after tinning.

> Used a tie wrap and some hot glue to fix the wiring inside the charger.

> I plan to drip a little crazy glue into the outside of the grommet to help keep the wire in place coming out of the charger.

>Clamped both sides of the charger together with some C-clamps and put a little crazy glue between the two half clam shells.

>Check the internal fuse while it's open

>Take you time, Be patient

DonJVen -

Thank you for this guide.

For step two I used an oven at about 190 F/88 C for 8 min and could have gone for longer to make it easier to pry open.

I found steps 4-6 unnecessary, since you can do the soldering by only partially taking off the casing.

The step of clearing out the stopper was the most time consuming by far and the impatient might prefer to give up on the stopper and use alternatives such as sugru molding glue.

I'm concerned that the casing could come loose eventually and so I may resort to zip ties or duct tape for longevity.

Chase G -

A little more heatshrink tubing on the OUTSIDE of the brick before feeding the wire back into the grommet, and another little piece to run up to the other end where the connector is, would help keep it from breaking again too. :)

mjsadvocate1 -

Excellent guide. If you trust your skills, you can desolder the wires from the board but be very careful: there's a cap nearby that might be charged and give you a nice zap.

Aristarco Palacios -

My charger is starting to go, the charging light doesn't always come on te first time, so when the wire eventually breaks Im also going to sleeve the cable with some coloured paracord to make it look nice and also help protect the ends.

Josh Evans -

This is hideous. There are much better tutorials, and few of them are right here on iFixit. I can't believe they let this on here.

zgmorris13 -

zgmorris13 - whats wrong, and link to the better ones?

Haakon Hennum -

Dude, you're f***ing awesome. It saved me 600 Brazillian Reais! The only thing I would add is a shrinking tube on each side of the "outter cable" to avoid some early cable breaking. Cheers mate!

Enrique Fiore -

You can use Sugru, a kind of moldable rubberish glue. I've just followed the steps and I didn't reuse the plastic stopper. Sugru is supposed to play the same role (I hope).

Francisco -

Thanks Darie - a great guide, and it kept my adapter out of the landfill. I used a fine toothed saw to open up the power supply and a drill to scour out the plastic stopper. Keep writing!

cshop -

Great guide man!!! Worked very well. Congratulations.

mr_massini -

My cat chewed the wire down the middle of the cord. Can I just repair at that spot or do I have to take casting off too?

Yolanda Arias -

Looks like you could do this with just steps 9 - 13. Remember to cover the blank soldering spots with shrinking tube. Than cover up the whole cable over the spot with some shrinking tube too.

ezkay -

It worked, but it is realy hard to open that thing. And now i have to glue it back together. Why Apple???

haukest -

Nice tutorial. Got my magsafe working. Now I'm applying some Sugru around the soldered region (which was previously insulated with tape), since I wasn't patient enough to save the plastic stopper. Hopefully it will last.

Francisco -

Thanks so much for the guide, saved me forking out to Apple for a relatively easy fix :-)

Steve Hurst -

You are a pro!

This is a proper way to do it.

Thanks.

pynia -

Just a warning to other people, I thought I was being very careful but something must have made contact during disassembly and blew when I first connected it, so that was over two hours up in smoke. I recommend using a safety cut-off. At least I got some soldering practice in! Thanks for the guide, I would definitely have another go cos I want to get good at repairing things.

Tim Archer -

Done and thanks! The power brick looks slightly frayed but at least it works again. It's really a crying shame that Apple makes these things so hard to disassemble - and it's another crying shame that these cables break so easily at this point. This adapter was half a year old when the cable broke - and that was without using it as a lasso to catch wild horses with! I guess it doesn't like being bent when I roll it up to put it in my backpack, but I always do that carefully.

I'll make sure to reinforce it now before it breaks yet again.

Still, I didn't think this wasn't a "difficult" category repair job. I found it immensely more easy than replacing the home button on my iPhone 4 some years ago.

Long story short, I never got it to work again.

And that was only a medium job :)

luthienmerilin -

Great Guide!! It's marked as "dificult", but was quite easy to fix it. Thanks a lot Darie H.

Augusto Mozzetti -

Excellent guide! It does take time to disassemble but isn’t that difficult if you are familiar with soldering. In step 7 and 8 I opted to use a drill press to drill out the left over cable and enlarge the hole in the plastic bit rather than cut it away. Doing that I was able to slide the cut cable through the rubber boot and plastic stopper before tearing away the rubber outer jacket and stripping/tinning the wires.

edc -

This is a good guide and it worked for me. My cord was frayed near the power supply. Disassemble CAREFULLY! lol I wasn’t so careful and snapped the side of my case a little. The rest of the way was smooth sailing. I didn’t have to wiggle any wires out since I just used a small drill bit to make a hole through the plastic stopper. Also, there was no cutting it off, either. I was able to replace the full piece back in the casing without a hassle. Good luck to anyone else attempting this fix. (^ ^)b

Daniel Carriveau -

The charger I tried to fix today had glue over the entire inside of the case, not just along the seam. It was very hard to crack open, and left the metallic shield that here is seen on the inside of the shell glued to the inner metallic case.

Peter Chubb -

Thanks for your excellent tutorial. Got my casing open (with a bit of elbow grease!) and then had to undertake a quick tutorial on soldering before I could finish the job. Put it all back together AND IT WORKS!! :) Very happy and wanted to say thank you for showing me how its done!

Andrew Forbes -

Thanks for the guide which I found very helpful to repair my son’s adaptor. In my case, the wire was making intermittent contact in the part very near the adaptor grommet, so could not be fixed with out opening it up. I did so in the way you described, but using only gentle brute force. After exposing the two wires, I simply extended them by soldering longer wires to them. I drilled out the grommet, passed the wires and sleeves through it, and applied heat shrink over the soldering points. I closed the case, using clamps to hold it tight while I applied hot glue all around the seam and extra glue where the grommet fits into the adaptor. I happened to have male/female XT-60 connectors and I used those to connect the wires coming from the adaptor to those going to the plug that fits in the mac. In this way, if I ever have any problems with the wire going to the Mac, I can just disconnect the XT-60 connectors and shorten or replace the wire, without ever having to open the adaptor again. Cheers!

John -

QUICK AND DIRTY VERSION part 1

If you have read this far down, and you need a quick and dirty fix without opening the case - then try this. There are only 2 parts to the charger wire - the centre wire which carries the DC positive voltage, and the surrounding wire braid, which is the DC negative/earth. Touching neither will not hurt you, and all you have to do is rejoin them. The break usually occurs at the point where the wire enters the strain relief bush on the charger - this is where is usually breaks, and is usually visibly obvious. If this is so, then cut it off there. The charger has short circuit detection and protection, so it should usually spring back to life if you repair the damage that has either broken the connection, or shorted it. Now carefully cut away the sleeve of the strain relief bush to expose about 12mm of cable sticking out of the charger - this is the critical bit - you need enough to work with.

Ron Bentham -

Part 2

Separate the earth braiding from the centre conductor wire, and then strip back the centre conductor insulation to expose the bare wire of the centre wire. Now do the same with the long wire you just cut off - this time you have plenty to work with. It is logical what to do from here - you have to rejoin the wires - braid to braid and centre to centre, the absolute necessity being no shorts - they must not touch. each other - for obvious reasons. Ideally you would carefully solder them together and repair with heat shrink tubing, but in an emergency use anything you have around - twist the braid wires together and the centre wire together but keep the two of them apart - ie isolated from each other. Use Scotch or whatever. This is strictly a temporary emergency job, but if you are in the middle of the jungle with nothing but a penknife, surrounded by aliens and must get your Macbook charged no matter what, or you will die, then this could save you. You can buy a new charger or do the proper fix later.

Ron Bentham -

My cable is broken near the little plug that goes into the laptop, Can that be repaired as well?

Patricia -

I purchased a replacement cable from ebay for $4. It has not arrived yet, but I will splice it rather than opening the box—should be much, much easier since the other end is OK. https://www.ebay.com/itm/45W-60W-85W-AC-...

jimkeith99 -

It worked, thank you :)

Servet -

We have four macbooks each with chargers failing as above. Two chargers were replaced. One was repaired, using the technique described above. One is in the box waiting for repair. The cords are failing at the end of the strain relief which does not permit repair without taking apart the charger which Apple has made difficult. One of the new charges started showing signs of insulation breakdown. To get more life out of the charger, I made a quick strain relief part consisting of a 25 mm ABS plastic cylinder with an inside diameter of about 4 mm to accommodate the cord and the existing strain relief. I placed a slit in it and 3d printed it (FreeCad/Rostock) and placed it on the existing working cord and filled it with silicon RTV. This will extend the life near the strain relief and will permit a repair down the road to the wire itself rather than taking the brick apart. At the very least it will delay the time to failure. I can post the .stl files if anyone is interested.

Walter Roberts -

I started out by using MacBook Power Cord 5-Pin MagSafe Stecker und Kabel, but could not get the old solder removed. I switched to this guide and used the replacement cord I had instead of removing the plastic stopper in steps 6 and 7. Combining the two guides worked wonderfully!

Sara Mulford -

THANK YOU! Now my cable is working again. It may not be the best solder job (that was my first one) but the guide was easy to follow

Jocelyn Ahlrichs -

Thank it work perfect

and now i dont buy any pirates any more, its a huge differens in quality

Better to fix Appels own

christer -

Thank you , it ´s amazing explanation

furibe -

This worked. My failure was the plug thing. I didn’t drill it out enough, when i went to slide it back over the solders at the end, it wouldn’t fit over the joints or even the shrink tube. As i had a couple of shrink tubes behind it that i wanted to use, i had to cut it off. Now i’ll have to use a glue gun to anchor the cable upon entry. Works though. My first solder job! Thanks

paul biggs -

My case didn't open up completely and cracked on the sides. Heat didn't do anything here. Decided to do it with only the upper part of the charger opened. Used some plastic levers to spread the two pieces of the case.

Janmarc -