Einleitung

Diese Anleitung zeigt, wie das Anschlusskabel/-stecker ausgewechselt werden kann.

  1. laqFIYZ2ydH1KUIP
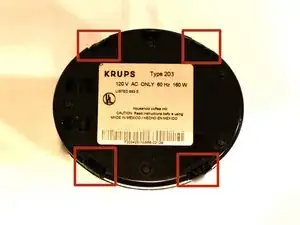
    • In jeder der vier rechteckigen Öffnungen in der Bodenplatte befindet sich ein E-förmiger Clip.

    ARE we supposed to see this ? ,your kidding me -TRY A BLOW UP VIEW :

    rayd32 -

  2. vIGhPvUqm5lPAdte
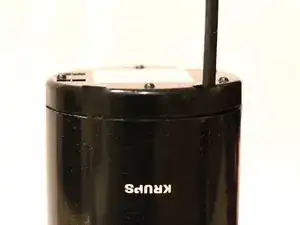
    • Zwänge einen Spudger zwischen die flache Seite des E-Clips und der Außenseite der Öffnung. Heble dann mit dem Spudger den Clip heraus.

    • Achte darauf, dass die Clips nicht brechen, die Mühle hält sonst später nicht mehr gut zusammen.

    Hello I need to remove the base as described here to repair th power cord in side. I got 2 of the clips cleared to lift off the base using the spudger, but just can’t get the other 2 released. Any ideas? Thanks

    Steve Ferrill -

    The red warning above is good as far as it goes, but should mention that not breaking the clips may be impossible. I was able to unclip 3 of the 4, but one snapped (the others were quite a struggle). Part of my problem was that this How-To’s photos show an F203 with all of its clips broken off, which makes for a misleading view of the disassembly, and shows that the author wasn’t able to separate the base successfully, either. The clips actually project from the bottom edge of the body tube about 1/4 inch (0.5 cm) into the base cap. I would recommend anyone attempting this iFixit have a roll of duct tape on hand to secure the base after the repairs are made, at least until you can buy a replacement.

    Krups really don’t want you getting into their budget grinder; they’d rather you throw it away and buy a new one, of course.

    JDB -

    The correct and easy way to remove the base is to use a thin and wide flat bladed screwdriver. You press the blade in between the body and the base from the side at each of the 4 clips. Each clip should easily allow you to pull the base away each time.

    Chris -

    Thanks to the author, even if the instructions are not very clear.

    If anyone got this open without breaking the clips, please post a photo of the two parts in the clip region so that the geometry is clear. I was confused by ‘e-clip’, which is not the right terminology and means something else entirely.’

    razinalim -

    I broke all of the clips. Even after realizing the clip ledge is integral to the *inner* wall of the base. I still could not get the clips to release without jeopardy to the the outside edge of the base’s slots. One has to be able to proceed with conviction and with the right “spudger”.

    I’m going to reconnect the base with epoxy and clamps. I’ll buy a new one in 15 years when the power cord breaks/wears again…!

    Chas Solomon -

    I managed to pry it off without breaking clips. 1. clamp the grinder top between thighs upside down. 2. apply pulling force to the bottom with finger nails (but not too hard to hurt yourself obviously). 3.spudger prying the clip multiple times. When a tiny gap appears jam a triangle prying tip into it. 4. Proceed prying every other clip while keep applying pulling force all the while with finger nail.

    Of course with a big vise this is supposedly easier.

    XDTZ -

  3. veuIcRlHLF46OQY5
    veuIcRlHLF46OQY5
    Zkkss3kwAqrlVIcC
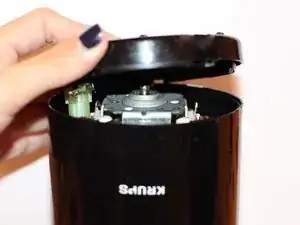
    • Entferne alle vier Clips, indem du jeden nacheinander ein Stück weit anhebst. Irgendwann sind alle Clips so weit heraus, dass du die Bodenplatte ablösen kannst.

  4. jN3v2ZUA12DJ5AMM
    jN3v2ZUA12DJ5AMM
    kTKoh4bHUJRiVVpT
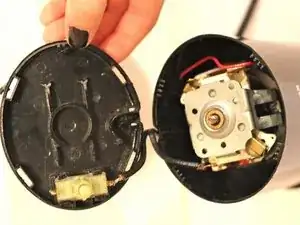
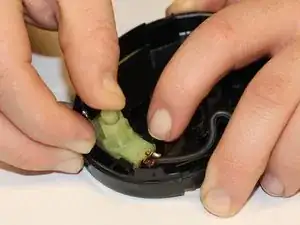
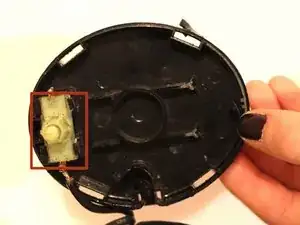
    • Die Auslösetaste ist leicht an der Bodenplatte festgeklemmt. Heble die Rasten behutsam ab.

  5. KCuTEJjWukSrmKfs
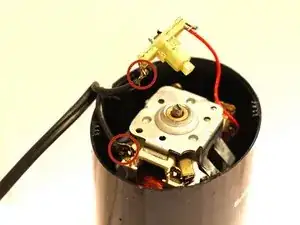
    • Entlöte die beiden Kontakte an den roten Kabeln.

    • Wenn du noch nie gelötet hast, kann dir unsere Lötanleitung helfen.

Abschluss

Um dein Gerät wieder zusammenzubauen, folge den Schritten in umgekehrter Reihenfolge.
Ian Hancock

Mitglied seit: 22/10/14

405 Reputation

0 Kommentare