Einleitung

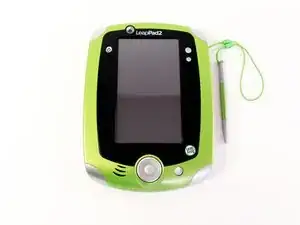
If your LeapFrog LeapPad2 Explorer screen is cracked or damaged, follow this guide to replace it. Be sure to power off the device prior to beginning the guide.

This guide will require soldering equipment and skill.

  1. 5vdqSrsoor5yWP45
    5vdqSrsoor5yWP45
    NmjprrqOrsTTGSMI
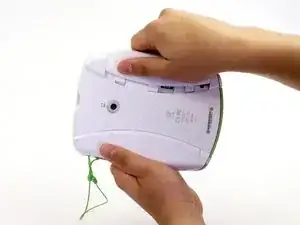
    • Before disassembling your LeapPad, ensure your device is shut off.

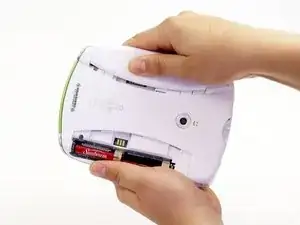
    • Push outward on the plastic side panels to remove and reveal battery.

    • The panels should detach fully from the main device.

  2. XbsNslLqVrf5cPG5
    XbsNslLqVrf5cPG5
    HIfdlg6cqNxhPEDH
    vBffqF6gvB1BvGyv
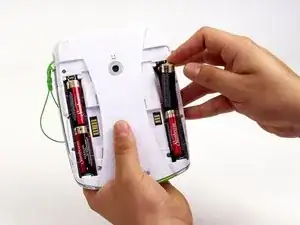
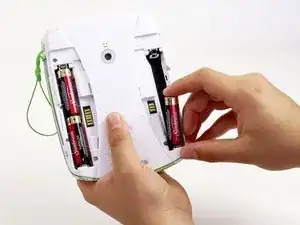
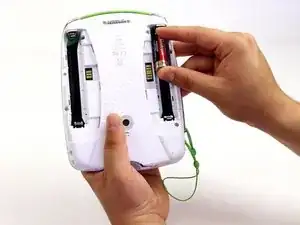
    • Push down from the positive end of the battery towards the negative end to pry the battery up out of its dispenser.

    • Remove all four AA alkaline batteries from the device.

  3. aUTsuld23WvDaohp
    aUTsuld23WvDaohp
    ZwIhDIWaWoPJXYah
    • This step will void your device warranty.

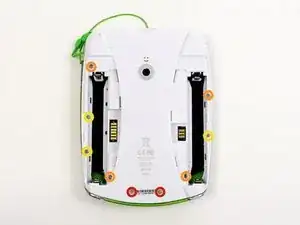
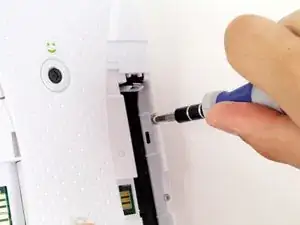
    • Remove the following screws securing the back cover to the main device:

    • Two 10.0 mm Phillips screws

    • Four 4.0 mm Phillips screws

    • Three 3.0 mm Phillips screws

  4. FCgYtUwCAyLV54fw
    FCgYtUwCAyLV54fw
    b3CRvQVU142RCdZ4
    SnaVMPqjykSQtR1M
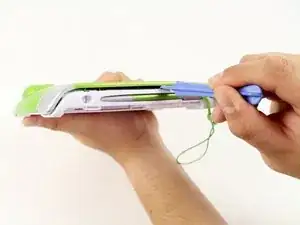
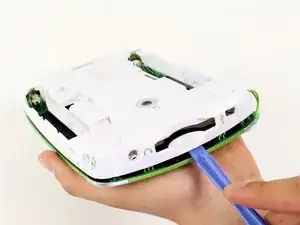
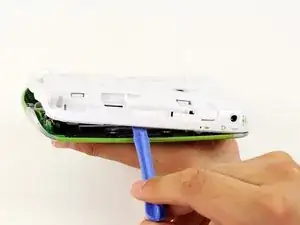
    • Insert a plastic opening tool into the seam between the front and rear covers to detach the back cover from the rest of the device.

    • Move the plastic opening tool around the perimeter of the LeapPad2.

    • Lift up and remove the rear case from the tablet.

    • A butter knife can help when prying the device.

  5. cxvqrupqlX6PhFUZ
    cxvqrupqlX6PhFUZ
    4ys22dxygG5FfG5A
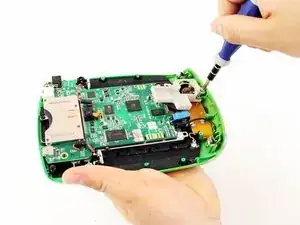
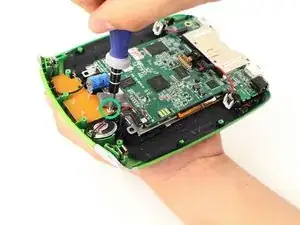
    • Remove the following screws securing the front cover to the main device:

    • Three 6.0 mm Phillips screws

    • Three 7.0 mm Phillips screws

    • Two 10.0 mm Phillips screws

    • Three 7.0 mm Phillips screws (bulkier screw head than other 7.0 mm Phillips screws)

    • The white plastic component holding the speaker must be removed to reach the third 7.0 mm Phillips screw. Refer to Step 2.

  6. vEouZtr14qBOE4fF
    vEouZtr14qBOE4fF
    fjHRbfYJKsEapbUt
    • Unscrew the white plastic piece to expose the third 7.0 mm Phillips screw mentioned.

  7. N43mafaNo6VrAyaR
    N43mafaNo6VrAyaR
    XltsxnmY3ohdG5kS
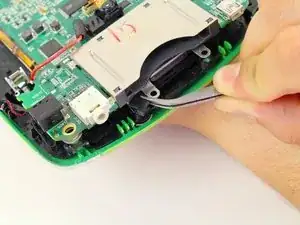
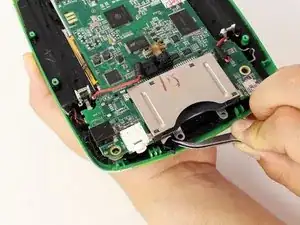
    • When unscrewing the game cartridge screws, you will find a loose black plastic component underneath the game cartridge.

    • Use tweezers to remove the piece.

    • In case the piece falls out unexpectedly, refer to this step to make sure you put this piece back in place during the reassembly of your device.

  8. NSCNbmmSZsAhodee
    NSCNbmmSZsAhodee
    4s1HVj5y2pCFhwGY
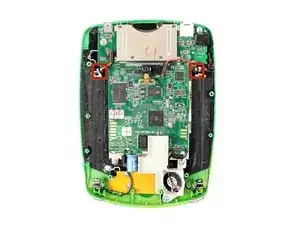
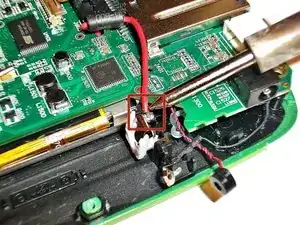
    • Desolder the through hole-components in power plugs on both sides of the device where the batteries were once connected.

    • Do not refer to the pictures in this step for correct soldering and de-soldering techniques. They are solely for illustration purposes.

    • For proper soldering and desoldering techniques reference Wie man Lötverbindungen herstellt und entlötet.

    • Soldering requires the iron to be at hot temperatures and can cause burns. Wear safety glasses as needed.

    • Be extremely careful with the cables in this step as they could melt, burn, or break.

  9. 545WZAqV3me4QYkg
    545WZAqV3me4QYkg
    weIMXbrHQDIKSotU
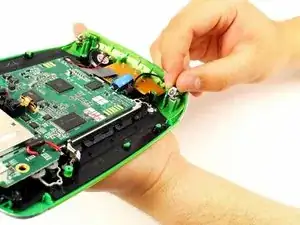
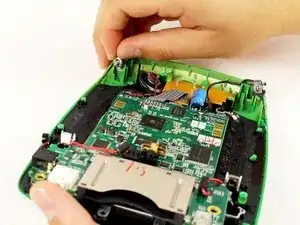
    • Pry the power cables from the device using your fingers or tweezers.

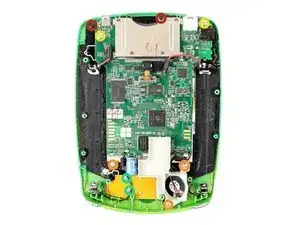
    • Now you should be able to lift up the front cover, leaving you with the motherboard and screen.

  10. XrpxhxUoYrBsDjDV
    XrpxhxUoYrBsDjDV
    SpgIqHqEeZEEDa6F
    KiiPpvFiCJ45ksPe
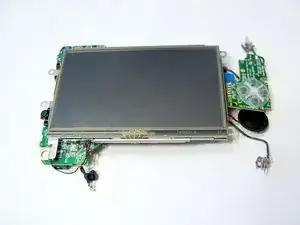
    • Lift the screen from the motherboard by pushing the board out from the three metal tabs.

    • Do not be too aggressive when separating the components, as the parts are still connected.

  11. NhKsUftpqVEnJVfy
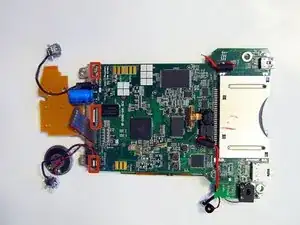
    • Fold screen away from the motherboard along the yellow ribbon, lay the device's components flat open like a book.

    • Do not be too aggressive when separating the components, as the parts are still connected.

  12. xNBJsHEpWLWDSWHE
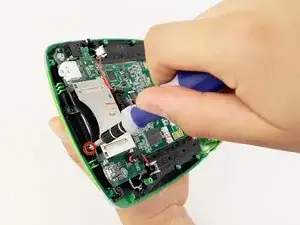
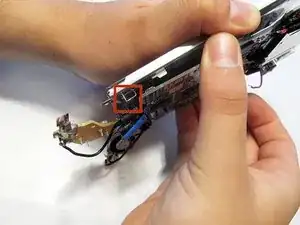
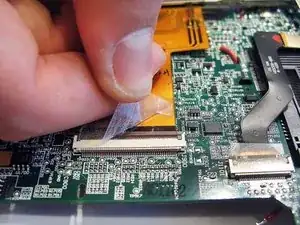
    • Gently remove the tape covering the yellow ribbon connecting screen to motherboard.

  13. YR3HeSFT3acMhcGi
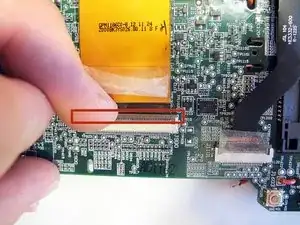
    • To safely remove yellow ribbon, lift up the retaining flap.

    • Removing or reinserting the cable by brute force could damage it.

  14. RyaW1jEUwykZHGik
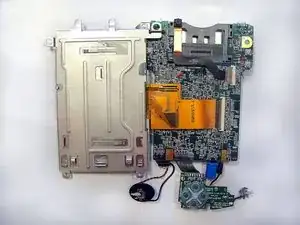
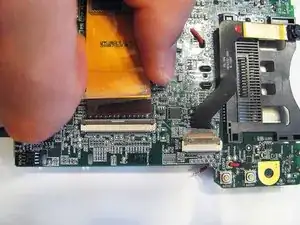
    • Pull the yellow ribbon towards the screen to disconnect the screen from the socket on the motherboard.

    • If the flap is up, as show in the picture, no force should be required to remove the cable.

Abschluss

To reassemble your device, follow these instructions in reverse order.

Nupur Garg

Mitglied seit: 12/04/14

867 Reputation

19 Kommentare

where do you get a new screen from????

Paula Leflar -

We got one on eBay. It was actually a LeapPad (original, not a LeapPad 2 Explorer) that would not boot. I figured the screen would be ok, even if the logic board was bad, and it turned out to be true. Our LeapPad 2 Explorer now works great. Bit of a pain moving the screen assembly from the old model to the new one, but it fits fine and works perfectly.

Jeremiah -

Where do you get a new screen from ??? Please help!

Carmen Nida -

where can I get a screen for the leappad2?

sophia -
No need to desolder positive battery terminals... (on step 8)

They pull straight up just like the negative terminals just a bit tighter..

Easiest way to do this is by using a small diameter screw driver... pass it under the upper metal bend of positive contact and pull straight up..

SiRaDuDe -

yes, correct. siradude, I try your metod and works fine, no need desolder and solder again :) great!!! thank you so much :)

pagosnuevos -

Where can one purchase a LeapPad 2 replacement screen?

Ramsey -

Where can I get a screen for a leappad 2 from please

danahayla1234 -

my son has damaged the power adapter socket on the board and also the power supply lead when he ran off with it still plugged in ! I believe he has broken the wires of the lead as it tested dead ,and also the centre pin of the socket is sloppy /loose the Leap Pad 2 has a 9 volt ,700 milliamp Power Supply Unit (Lead ) which I can get hold of no worries ,but the problem for me is where do I get a new socket from ? and does it solder onto the board ? how would be the best way to repair this please ? help would be appreciated . thanx :)

Dave -

I tester the power supply lead first with my tester ,and found that there was a break in the wires near the jack plug , I also dismantled the unit to check the power socket on the device was not damaged and that was fine ... A. new 9 volt,700 ma centre positive P.S.U from the guys at work solved the problem ,and my son is over the moon with it :) Awesome tutorial guys , Thanks :)

Dave -

I too bought a used LeapPad 1 unit and harvested the screen. If you do this, be aware that the steel frame that holds the screen differs between the first and second generation LeapPad. (i.e. LeapPad vs. LeapPad 2) The screen is held in the steel frame using very aggressive double sided tape. A heat gun or hair dryer will aid in loosening the adhesive on the tape. Be very careful when prying the frame away - it's all too easy to damage the ribbon cable (this is my second attempt). I used a butter knife to gently pry underneath - it's quite challenging. Also, the LeapPad 1 screen had a slightly wider ribbon cable. I had to use a Dremel cut off wheel to cut away some of the frame. Much to my relief, when I connected the new screen all seems to be well and it does work.

Jim -

great tutorial!!! thank you so much. Im trying open the tablet but the problem "THE 2 HIDDEN SCREW ON BACK" LOL thank so mucho for the pictures.

muchas gracias funciono perfecto, no sabia que tenia tornillos escondidos atras, por eso nunca pude abrirla antes :( gracias a estas imagenes pude lograr arreglar el problema con los botones del volumen gracias!

(nota: no se porque apareces ese nombre en los comentarios, "pagosnuevos" yo no lo puse como nombre de usuario pero no se que pasa) jeje gracias.

pagosnuevos -

I would say that if you have a new screen readily available, sure it would probably take 10-15 minutes. In our case, our daughter hit the screen hard and cracked it in half. Has been a bit over a year but today my wife found a used Leap Pad2 that worked but did not read the games. So I used this guide to swap the screens and now we have a happy (and spoiled...) child. The whole process took somewhere in the vicinity of 30-45 minutes once I had all my tools ready. On step number four, the portion where the games go in is probably the most difficult part of opening the case. Overall is was a pretty simple job for someone with some experience but definitely difficult for someone who is not used to dealing with electronics.

avi8torace -

I tried cleaning... its very clean so that didnt help

I tried recalibrating (which is a pain and takes many tries when its NOT calibrated... had to touch the crosses with my finger it wouldnt read the stylus (any idea why?) and it still wont read the place being touched it picks something somewhere else on the page or nothing at all

Tina taitano -

Hi. My leappad works perfect but thebroken screen makes the leappad enter a protection mode. Is there a way to trick the leappad into thinking its not broken?

Roberto Garza -

Can the screen be purchased new? Leapfrog does not sell screens.

tshimuney -

Pay close attention to the highlighted section in Step 13. Just need to gently pull up on the brown strip. If you pull on any of the other areas the connection will come off the circuit board. Possible the water damage I had made it worse but wanted to inform everyone else.

Thomas Loder -

Were can I get a replacement screen for my leap pad

Clifford Yabs -

Dear all, Were can I get a replacement screen for my leap pad2 please?

Diallo -