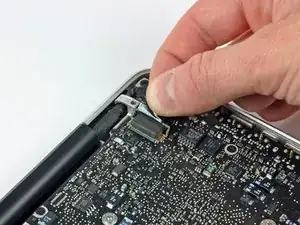
Einleitung

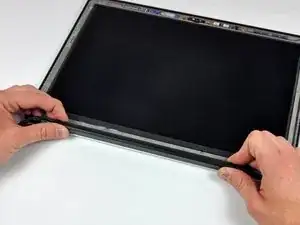
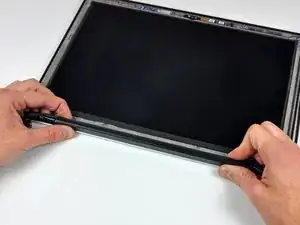
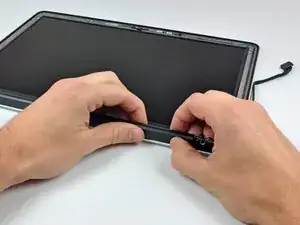
Spare Geld und tausche nur das LCD anstatt der kompletten Displayeinheit.

  1. dOyroxuUBfNu1T4K
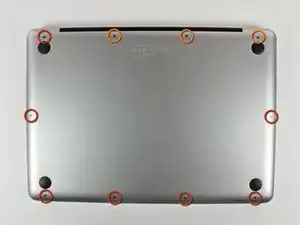
    • Entferne die folgenden 10 Kreuzschlitz-Schrauben, die die Gehäuse-Unterseite des MacBook Pro 13" Unibody befestigen:

    • Sieben 3 mm Schrauben.

    • Drei 13,5 mm Schrauben.

    Compare the short screws carefully before reinstalling them. The shouldered screws go in the holes on the front edge.

    David Kilbridge -

    Before I started removing any screws I took a piece of paper and drew the bottom of the laptop and put a piece of double-sided tape in the spot where each screw goes. That way when I took out the screws, I could put them on the tape so I knew exactly which screw went in which spot. I did the same thing for dismantling the inside on another sheet of paper, then a third sheet for the screen after getting the front glass off.

    mastover -

    I use a similar technique: I print out the iFixit manual for the job, and Scotch-tape down the screws/brackets/cables I remove at each step next to the component descriptions. That way, when I'm reassembling, the bits are taped right next to the photo of where they came from.

    adlerpe -

    That's exactly what I do for all my repairs! It's the best way to keep track of all of the parts ' original location and to make sure that you don't miss any parts during reassembly.

    joyitsjennie -

    Great idea and one I use often

    Thomas Overstreet -

    Excellent idea! Thanks for sharing it here.

    Laura Sharkey -

    I used a 00 that fit but the screws were very tight so I used a tiny paintbrush with some wd40 on it and put it around the edges of the screws. Worked like a charm

    valentinedhdh -

    I use a magnetic mat and place the screws in order on that :)

    Cary B -

  2. bLtKOLyJdyAxkZaG
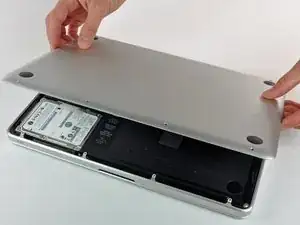
    • Hebe die Unterseite vorsichtig an und drücke sie Richtung Rückseite des Laptops, um die Halterungsclips zu lösen.

    In the introduction you should link fixers to this excellent doc: https://www.ifixit.com/Misc/HD_Software_...

    It is really critical, super easy, and free(!) to clone your existing drive onto the new one you will install. I ran into one error, but SuperDuper! support replied immediately on how to fix it...Thanks ifixit and SuperDuper! (I ponied up the $28 for the software anyway, I was so impressed!)

    Mike -

    Long story short: I drank the AppleKoolAid back in 1984 and have always left the guts of my machines up to Apple - until recently when I needed to swap the SATAs from my original MacDaddy (2009 13" MBPro that I killed in 2018 - coffee + blackout = OOOOPS) into a pristine 2009 MBPro from a Goodwill in North Carolina through eBay. I need the files from iCal and MacMail that can't be opened in my newer machines.

    Well . . . I ain't never done nuttin' like that, before!

    Enter Luke Miani on YouTube. He raves about you guys! So, I watched everything I could, read your site, bought the right tools and at the ripe old age of 72, I sat down, this morning and did the work. Now my original MacDaddy lives in MacDaddy2.0.

    Am I allowed to cry?

    Seriously, I can't thank you enough for your bitchen site and killer tools. I wish I'd'a been turned on to this shizzle 30+ years ago.

    IFIXIT - IDIGIT!

    kath myers -

    HAHAHAHAHAHAHAHAHAHA.

    That was a brilliant read.

    Yes, I came across ifixit a few years ago. Totally helped me out on several occasions.

    Glad your Mac repair journey worked out.

    :)

    Cary B -

  3. B1SUXfcr5fruMavs
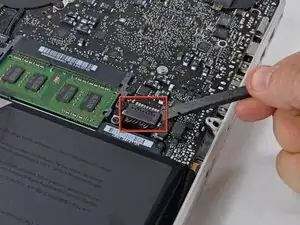
    • Wir empfehlen, vorsorglich den Akkuanschluss vom Logic Board zu lösen, um eine elektrische Entladung zu verhindern.

    • Löse mit der Kante eines Spudgers den Akkuanschluss nach oben, weg vom Sockel auf dem Logic Board.

    Zitat von gansodesoya:

    why is step 3 necessary?

    Just to disconnect any power source to avoid damages by short-circuits.

    MrKane -

    How do you get that battery connector back on? Do you just press it in back in place after you're done?

    Horace Chung -

    yes. I usually plug it in before I screw it down so I can lift the battery a bit and have enough slack to be able to go straight down on the connector, otherwise it comes in on a bit of an angle, which can't be good (though not necessarily bad).

    maccentric -

    This step almost finished me, and I did extensive damage to the battery plug. Fortunately, I later replaced the battery, and the replacement came with a new plug! :) Newbies need to know - 1. The battery plug is like a thin lip on a thicker lip, so you need to pry BETWEEN 2 thin lips to get it off, else you are trying to yank out the socket. 2. Mine was initially VERY tight, and trying to get it out broke the plastic on all sides of plug, even though I was as careful as possible. Luckily, this didn't hurt functionality and I later replaced the battery. AFTER disconnecting once, it was never so tight again,

    Jeff Diamond -

  4. aCHD62J31BaNKjt1
    aCHD62J31BaNKjt1
    pCPfK5moiENgSeGJ
    3aArQDlKLo1KZhmW
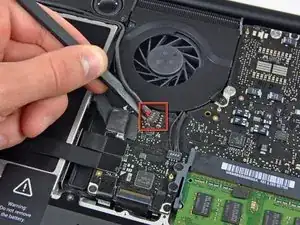
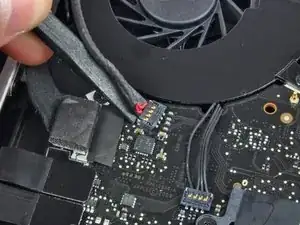
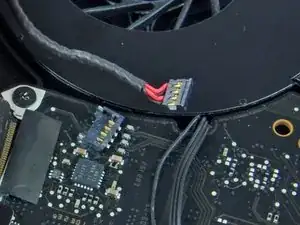
    • Heble den Stecker vom Subwoofer/rechten Lautsprecher mit dem flachen Ende des Spudgers aus seinem Sockel auf dem Logic Board.

    • Sei dabei vorsichtig und hebele unter dem Stecker, so wie gezeigt, und nicht unter dem Sockel selbst. Du könntest sonst versehentlich den Sockel vom Logic Board abhebeln.

    Please Be Carefully With This Step, Because I Had To Resolder It Back To The Logic Board. But There Is A Black Foam Piece Over The Cable You Have To Pry Up, Lift The Foam Piece And Then Try To CAREFULLY Pry Cable Connector

    BWilliams842 -

  5. uCAOWLYpZGiekrxH
    uCAOWLYpZGiekrxH
    wbVS1cJLaQLTTvG4
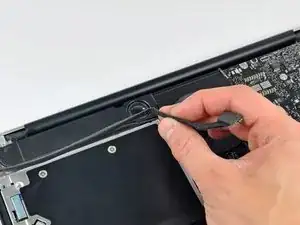
    • Löse das Kamerakabel, indem es gerade aus seinem Sockel herausziehst.

    • Ziehe das Kabel über das Logic Board in Richtung des optischen Laufwerks. Ziehe es nicht nach oben, sonst wirst du den Anschluss kaputt machen.

    • Wenn du ein kleines Stück Plastik am Logic Board findest, das das Kamerakabel am herausrutschen hindert, löse es vorsichtig vom Logic Board. Erhitze es im Zweifel mit einem Fön oder einer Heißluftpistole, um den Kleber zu lösen. Versuche nicht, das Kabel über das Plastikstück zu ziehen.

    • Wenn du trotzdem Probleme hast, nutze die Spitze eines Spudgers und drücke abwechselnd an beiden Seiten des Anschlusses, um ihn langsam aus dem Sockel zu holen.

    Be careful to the piece of plastic that prevents camera cable failing out its socket! Do not force connector! Look at plastic before attempting to remove connector Plastic is partially covered by cdrom flat connector at right of camera cable connector

    Silvio -

    This step is unnecessarily tricky. I’ve tried to make it better by adding images highlighting the plastic stopper thingy and showing a clear arrow of the direction the cable should be pulled.

    However, simply pulling the cable may not be enough to remove it. It sure wasn’t for me. I think there ought to be a close-up of the two little nubbins on the sides of the plug which one uses to wiggle it loose from the connector by gently prying with a tiny flathead screwdriver. I didn’t add that tip because (a) it would have made the instructions longer, (b) I didn’t think to take a photo of it, and (c) using a screwdriver carelessly next to the logic board could scratch or break components on the motherboard. A guitar pick or very small spudger might work.

    hackerb9 -

    @hackerb9 Thanks for your edits and comments! I took some additional shots and tried to clean this up a little for everyone. There should be a lot less confusion now. Interestingly, neither of the two MacBook Pros used for these guides had the plastic retainer piece you folks mentioned, but I left that image in a link so everyone can still see what it looks like if needed.

    Jeff Suovanen -

    Thanks for incorporating some of my edits and for taking new photos.

    Are you the one who took the original photographs? If so, you did originally have the hard plastic retainer as it was in those photos, just obscured by your thumbnail. The glue on the retainer allows it to shift a bit, so it's possible you took out the cable and knocked off the retainer without noticing it.

    Your two frame animation of pulling out the plug is helpful to show the proper direction. Given the number of people who have destroyed their MacBooks from this procedure, I think we should do even better. The instruction would be clearer if it said, “Disconnect the camera cable by sliding it horizontally out of its socket.”

    Also, if you can post a link to a picture without fingers in the shot, I will add an arrow showing the proper direction. (I would have added it to the original, but visually it would have gone through your fingers.)

    hackerb9 -

    P.s. this isn't as important, but where did you hear the tip about the hairdryer? I'd leave that out as firmly peeling it up works fine.

    hackerb9 -

    Negative, I’m not the original photographer. You’re right, I do see the retainer in some of the previous photos, although it wasn’t in any of the images for this particular step. May have been an oversight on the part of the original author! So I’m glad you caught it. I updated the verbiage as you requested. Don’t worry about adding arrows—at this point, if someone ignores both the images and the multiple warnings in the text, that’s no longer a fault with the guide. The heat/hairdryer tip is standard practice for anything that’s secured with adhesive—I hardly ever work on a MacBook of any vintage without using a heat gun at least a couple times. It may not be strictly necessary, but the result is much cleaner and it reduces the risk of accident.

    Jeff Suovanen -

  6. 2CuX4NnYgJAYMCVV
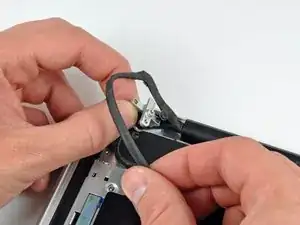
    • Fädle das Kameradatenkabel aus dem Kanal am optischen Laufwerk.

  7. NBScWjQ66kyBbwVp
    NBScWjQ66kyBbwVp
    RokUVKGc3ClkqUDp
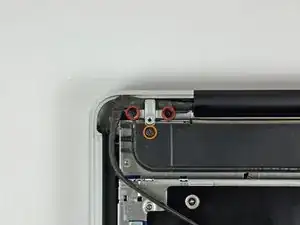
    • Entferne folgende Kreuzschlitzschrauben, welche das Kameradatenkabel und den rechten Lautsprecher an der Gehäuseoberseite befestigen:

    • Zwei 8 mm Schrauben

    • Eine 4 mm Schraube

    • Eine der 8 mm Schrauben wird im Erdungskontakt des Kamerakabels hängenbleiben.

    • Schiebe die Halterung des Kamerakabels unter dem Subwoofer hervor und entferne sie vom Computer.

  8. OtImO3lYHNGS6wlK
    OtImO3lYHNGS6wlK
    eXZKb3KMdjSMZXRT
    qlV2LWOvHQ6PwgLE
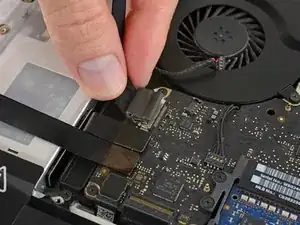
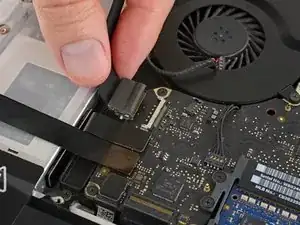
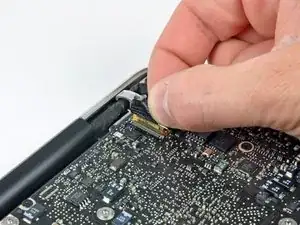
    • Fasse die Plastikzuglasche an, welche an der Sicherung des Displaydatenkabels befestigt ist, und drehe sie zur Seite des Computers mit dem Gleichstromeingang (DC-In).

    • Ziehe den Stecker des Displaydatenkabels gerade aus seinem Sockel heraus.

    • Achte darauf, dass du den Stecker gerade herausziehst, und nicht aus seinem Sockel nach oben.

    Well, my display ended up looking like this after the repair:

    http://i1106.photobucket.com/albums/h366...

    As you can see, there was a light/dark banded pattern along the bottom of the screen, corresponding to the LCD's backlight. In my case it was also accompanied by a constant high pitched whistling noise. I swear to anything that's holy, it was not coming from the fan or the speaker, but rather the motherboard itself.

    Anyway, both these problems went away when I disconnected and reconnected the connector at this stage. I'm saying this on the off chance it helps someone else.

    Jonty Levine -

    It's not to clear but there is a piece of spring steel that rotates away from the main (circuit board side) of the connector....this piece sort of hugs the parameter of the screen cable locking it to the circuit board...both arms wrapped around your brother....looking closely (10x magnifier) at this cable one of the gold connections is slightly oxidized---my display arbitrarily flickers and this symptom is lessened as the temperature increases...I suspect this is the cuase of the screen flashing on/off

    brian62 -

  9. YHI6vB4wCvg23uBM
    YHI6vB4wCvg23uBM
    ZrRKYGFdYuBPK4XV
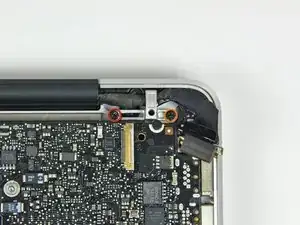
    • Entferne die folgenden beiden Kreuzschlitzschrauben, welche die Halterung des Displaydatenkabels am Gehäuseoberteil befestigen:

    • Eine 7 mm Schraube

    • Eine 5 mm Schraube.

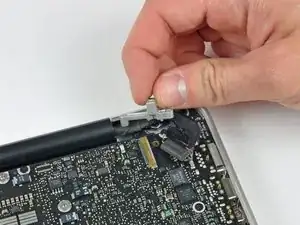
    • Hebe die Halterung des Displaydatenkabels aus dem Gehäuseoberteil.

  10. w4PaV4Ytic61NKUn
    w4PaV4Ytic61NKUn
    TnsXUEecrjPT54HD
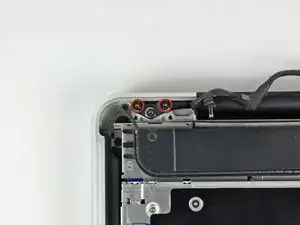
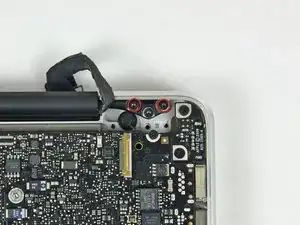
    • Entferne die beiden äußeren 6,5 mm Torx Schrauben, welche jede der beiden Displayhalterungen am Gehäuseoberteil befestigen (also vier insgesamt).

    • Das Modell von Mitte 2009 braucht einen T6 Torx-Schraubendreher, das Modell von Mitte 2010 einen T8.

    Hey folks, regarding the screw/driver sizes: there are separate guides for the Mid 2010 model with the T8 screws. Always use the correct guide for your model to avoid confusion, stripped screws, etc. Hope this helps!

    Jeff Suovanen -

  11. c6INZGJPJQqTlMW6
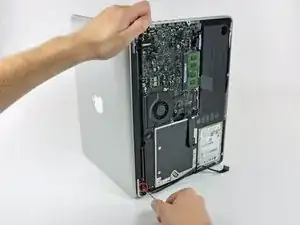
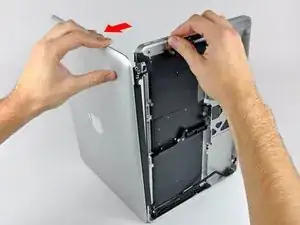
    • Öffne das MacBook, so dass das Display senkrecht zum Gehäuseoberteil steht.

    • Stelle das geöffnete MacBook so wie gezeigt auf den Tisch.

    • Halte das Display und das Gehäuseoberteil mit der linken Hand fest. Entferne dann die letzte 6,5 mm Schraube von der unteren Displayhalterung mit einem Torx Schraubendreher.

  12. rOIast44GfWa55h6
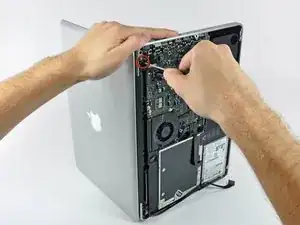
    • Achte darauf, das Display und das Gehäuseoberteil gut mit der linken Hand festzuhalten. Wenn du dabei einen Fehler machst, könnte das Display/ Gehäuseobeteil hinfallen und dabei jedes Bauteil beschädigt werden.

    • Entferne die letzte 6 mm Schraube mit einem Torx Schraubendreher, welche das Display noch am Gehäuseoberteil festhält.

    Removing the screen assembly this way, with the computer standing on edge, is needlessly risky and difficult. By the 5th or 6th time I did this procedure (of perhaps a hundred), it dawned on me that there’s a way, way easier method for the whole lid removal job: 1. After removing the bottom cover and disconnecting power, hang the open laptop, keyboard down, facing away, over the edge of your work table with the lid assembly hanging down, monitor facing toward the table and pushed against the table edge. (If you’re klutzy, tape the main body to the table so it can’t slide around.) 2. With the unit positioned this way, you can easily disconnect the various cables & remove the 6 hinge screws. Now the lid assembly will just be hanging, easy to lift away from the main body without difficulty or danger. 3. Reverse this to put it back together.

    clinton -

    Nice tip, Clinton! I’ll have to try that next time. Do you have photos of how it is done so this guide can be updated?

    hackerb9 -

  13. ZYiiL2jdwOpXXcvJ
    ZYiiL2jdwOpXXcvJ
    niqZhXDVagv6WANS
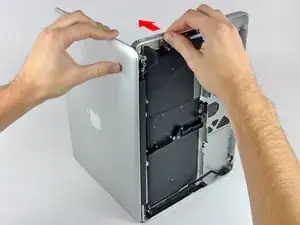
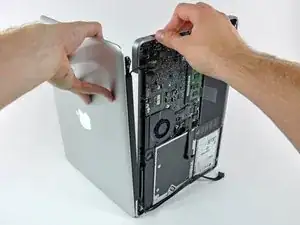
    • Fasse das obere Gehäuse mit der rechten Hand an und drehe es etwas in Richtung Oberkante das Displays, so dass sich die obere Displayhalterung vom Rand des Gehäuseoberteils löst.

    • Drehe das Display ein wenig vom Gehäuseoberteil weg.

  14. ntBnWP6Z11ASxKLP
    • Hebe das Display hoch und weg vom Gehäuseoberteil. Achte dabei darauf, dass sich keine Klammern oder Kabel verfangen.

    Re-assembly hint: Laying the base, keyboard down, on a table top with the hinge side over the edge about 1/2" toward you is a more stable position for re-assembly than trying to do this up on its edge. This has the added benefit of being able to reinsert the torn screws vertically.

    Pete H -

    May be in the wrong place but then please direct me. At this step, can I just take off the upper half (meaning the screen, LCD, and top housing shell in one) and simply replace it with another upper half of the same edition???

    cmackay13stmarys -

    Yes, you can. Thanks what I'm doing now. :)

    Mike Mayaka -

  15. fNRGPjUBW6wKtkIw
    fNRGPjUBW6wKtkIw
    yofUweaceBAADE2l
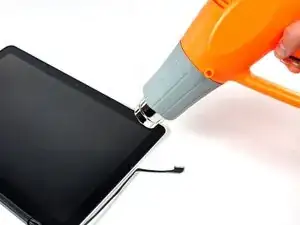
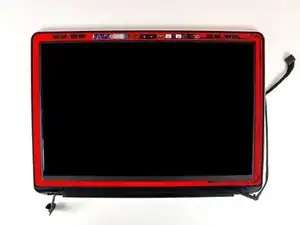
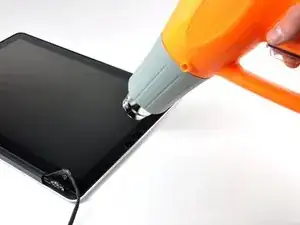
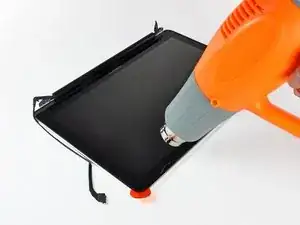
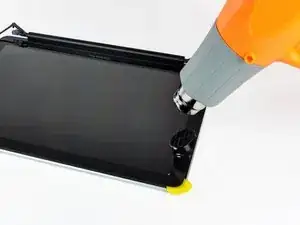
    • In den folgenden Schritten wirst du mit einem Heißluftgebläse den Kleber aufweichen, mit dem der äußere schwarze Rand des Glases am Display befestigt ist. Der Bereich mit Kleber ist auf dem zweiten Bild rot markiert.

    • Fange in der rechten oberen Ecke mit dem Erwärmen des schwarzen Randes an. Stelle das Heißluftgebläse auf niedrige Stufe.

    • Richte die heiße Luft immer weg von der weichen Gummieinfassung um das Displayglas. Wenn du sie erwärmst, kann sie ein wenig schmelzen, so dass sie nicht mehr matt sondern glänzend aussieht. Wenn du sie berührst, kann sie dauerhaft verformt werden.

    • Durch die Wärmeeinwirkung kann sich eine Kondensationsschicht innen auf der Glasscheibe oder außen auf dem LCD bilden. Wenn die Glasscheibe vom Display getrennt ist, kann die Schicht mit Glasreiniger entfernt werden.

    Heating rubber strip it becomes glossy You can turn it to matte using ultrafine sandpaper (very ultrafine!!!) P2500

    Silvio -

    Great piece of advice. Thank you!

    Brian -

    With a lot of heating, for me, it was very hard to get the glass to separate from the case. I had better luck starting from the bottom right as I could grip better onto the case. Three mistakes I made:

    1. Once I got the glass separated, I probably didn't heat sufficiently as I was going around and the glass broke. That made the rest of the procedure miserable. Lesson: pull very gently.

    2. I must have touched one of the tiny bits of glass that fell on the LCD and it scratched the actual screen. :-(. Lesson: vacuum the pieces as you go and be very careful when touching the LCD.

    3. I somehow overheated the LCD screen at the top left and right corners and now the display is all wonky and faded at the corners. Not sure what the lesson is here.

    Athanassios Diacakis -

    First, if using a hair dryer, what setting should that be operated at? It would be much cooler than the heat gun, right?

    Second, the iFixit basic set comes with a small, clear suction cup. Would that be sufficient for this project, or does it require the stronger pull of the other cups?

    Finally, must I reapply adhesive to the case when replacing the glass? Does the original remain tacky and re-bond on assembly?

    contact -

    It's been a while since you asked, but since no one answered and someone else may have the same questions:

    Hair dryers vary a lot, depending on wattage. I would start on low or med, and work my way up to high if necessary. I'd keep the fan on the lowest setting.

    The little suction cup is for removing screens like the iMac, which just uses magnets, and possibly an iPad or iPhone. I would not want to use that for this project, get something about 2" wide with a decent handle.

    The screen should have the double sided glue tape already applied, just remove the backing. I wouldn't get glass that doesn't have the tape on it, big waste of time with little savings in cost.

    Jeff Kamis

    maccentric -

    All I can say for this is don't be tempted to hold the heat gun too close. I ended up burning my LCD the first time I did it and having to replace that when all I was looking to do was replace the cable. I got the glass off holding it about 4/5 inches from the screen and being patient (it took about 5/10 minutes in the end).

    Nick -

    The tape is very sticky and the glass is very fragile but at the same time fairly flexible.....I ended up breaking the glass ans it turned out to be a mess picking up the shards....but in the end a new glass is not too costly. the implication is that heating melts the glue but it is really just double stick tape.....there are some "youtube" videos that are worth a look but I would suggest using guitar picks and not a putty knife which creates a point load that breaks the glass....wear safety glasses!!

    brian62 -

    Be ready to replace the glass (good thing mine was already broken, I ordered one). Wear surgery gloves and protective glasses. Trust your nose, if it smell melted plastic, it’s a good clue to stop the heat.

    Sebastien CHAPUIS -

    It's more easy to do this step before removing the LCD. You have more control of the LCD and is more easy to remove the Glass.

    Felix -

    If you have a glass cover that is severely cracked then the heating gun and suction cup procedure really doesn’t work. Suction cups won’t hold and the already broken glass doesn’t lift. Here’s what I did that made the job easier. Using 2 inch wide transparent packing tape I laid it along the perimeter of the display but not covering the rubber edge. Then I used a 1/4 inch wood carving tool and very carefully removed the glass and 2 sided tape around the metal border. Use as your guide picture 2 in this step that shows where the camera and cable is located. Where the camera is located in the top center the 2 sided tape isn’t located so you can easily lift the glass. The camera cable runs up the right side in a trough in the metal border so when lifting the tape and glass in this area just keep the sharp end flat and it is wide enough it won’t dip into the trough and damage the cable. The tape was very helpful because it kept the glass from splintering and going everywhere.

    joe lochner -

  16. hBnS4vgEs5JIRoIx
    hBnS4vgEs5JIRoIx
    s1j4Zcw5MfRKrQ2A
    5hCYBRF4xQ6k3EWY
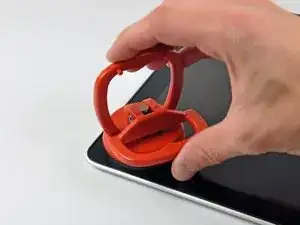
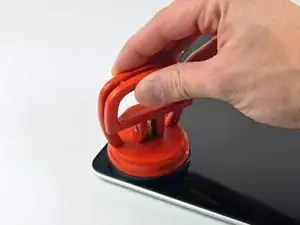
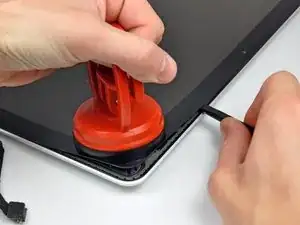
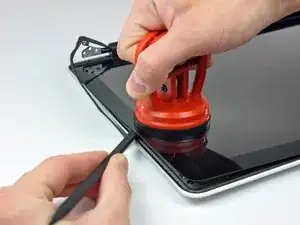
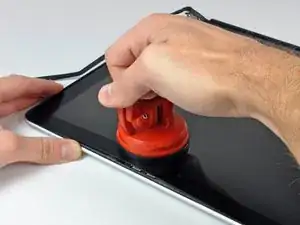
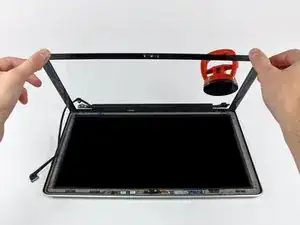
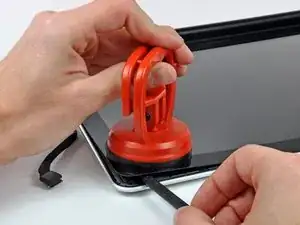
    • Wenn die Scheibe warm genug ist, befestige einen kräftigen Saugheber in der rechten oberen Ecke der Glasscheibe.

    • Befestige den Saugheber nicht auf der Gummieinfassung an der Kante der Glasscheibe.

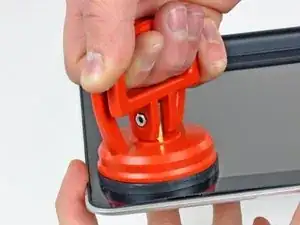
    • Um unseren Saugheber zu befestigen, bringe ihn zuerst mit dem beweglichen Griff parallel zur Glasscheibe an. Drücke den Saugheber leicht gegen das Glas und kippe den beweglichen Griff, bis er parallel zum anderen steht.

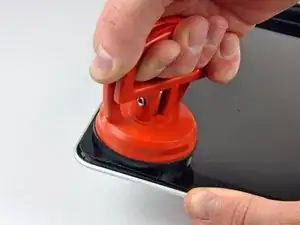
    • Ziehe die Ecke des Displayglases langsam und vorsichtig von der Displayeinheit hoch.

    • Wenn - wie im dritten Bild zu sehen - sich nur die Oberkante der Glasscheibe anhebt, dann wiederhole Schritt 1 und 2, bis du die Ecke des Displays anheben kannst.

  17. RKxoLHIXTeGXjUhS
    RKxoLHIXTeGXjUhS
    E1R4qSk5A2GYRN1M
    mKCLnWmj3KlHSMhP
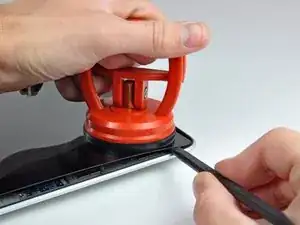
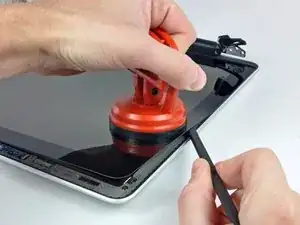
    • Hebe die Ecke des Displayglases behutsam so hoch, dass du einen Spudger zwischen ihm und der Displayeinheit einsetzen kannst.

    • Heble das Displayglas vorsichtig mit dem Spudger aus der Klebeverbindung zum Display hoch.

    • Heble die Glasscheibe einige Zentimeter von der oberen rechten Ecke aus entlang der oberen und rechten Kante hoch.

  18. wjMIswOoRQjrvRB6
    wjMIswOoRQjrvRB6
    bUnYt3DC3aVooSGn
    • Erwärme mit dem Heißluftgebläse den Kleber unter dem schwarzen Streifen am rechten Rand der vorderen Glasscheibe.

    • Bringe einen Saugheber an der rechten Seite der vorderen Glasscheibe an.

    • Ziehe die Glasscheibe hoch und trenne sie gleichzeitig mit dem flachen Ende des Spudgers von der Displayeinheit ab.

    • Arbeite so lange weiter, bis der rechte Rand der Glasscheibe komplett vom Display abgelöst ist.

    • Es kann hilfreich sein, wenn du mit einem Plektrum oder einem anderen flachen Werkzeug verhinderst, das sich die obere rechte Ecke wieder am Display festklebt.

    I ended up breaking my glass panel due to using the spudger. I think if you use something more like a small putty knife you will do better. The spudger puts a lot of pressure in a small spot while the putty knife would put a little pressure over a larger area. Also, if you do break the glass, be sure to get ALL of the broken bits off before putting the new one on. Also, watch out for those broken bits as they tend to penetrate skin quite easily, and stay there for days!

    mastover -

  19. V23K6Ox33qtgxZbp
    V23K6Ox33qtgxZbp
    Wabm3rtIijHbOt2H
    • Erwärme mit dem Heißluftgebläse den Kleber unter dem schwarzen Streifen am oberen Rand der vorderen Glasscheibe.

    • Bringe einen Saugheber am oberen Rand der vorderen Glasscheibe an und ziehe die Glasscheibe vom Display weg.

    • Arbeite weiter sorgfältig am oberen Rand entlang, wobei du beim Auftrennen des Klebers mit dem flachen Ende des Spudgers nachhelfen kannst.

  20. iV5xHmltAJsyAwlF
    iV5xHmltAJsyAwlF
    mgOFOL16iMJfPjWs
    • Erwärme mit dem Heißluftgebläse den Kleber unter dem schwarzen Streifen um die obere linke Ecke der vorderen Glasscheibe.

    • Bringe einen Saugheber in der oberen linken Ecke der vorderen Glasscheibe an.

    • Ziehe am Saugheber und heble vorsichtig mit dem flachen Ende des Spudgers die Glasscheibe aus der Displayeinheit heraus.

    • Wenn du die obere linke Ecke abgelöst hast, kann es hilfreich sein, mit einem Plektrum oder einem anderen flachen Werkzeug zu verhindern, dass sich die Glasscheibe wieder mit der Displayeinheit verklebt.

  21. bCYvUuMntZOJSvZX
    bCYvUuMntZOJSvZX
    EaSCBYIQaSljWPgf
    • Benutze einen Haartrockner oder ein Heißluftgebläse, um den Kleber unter dem schwarzen Streifen an der linken Seite der Glasscheibe aufzuweichen.

    • Bringe einen Saugheber an der linken Seite der vorderen Glasscheibe an.

    • Ziehe die vordere Glasscheibe hoch und trenne sie gleichzeitig mit dem flachen Ende des Spudgers von der restlichen Displayeinheit ab.

    • Setze die Arbeit an der linken Kante des vorderen Displayglases fort, bis sie ganz vom Display abgelöst ist.

  22. VrJiyT3ItB3F1T5Q
    VrJiyT3ItB3F1T5Q
    uMVAONXEACypMEx5
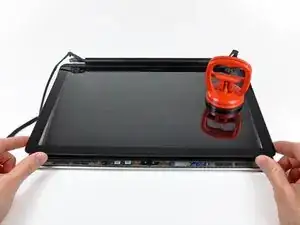
    • Nachdem nun die obere, rechte und linke Kante der Glasscheibe abgelöst sind, kannst du die Oberkante der Glasscheibe langsam anheben und vom Display wegdrehen.

    • Befreie, wenn nötig, die Unterkante der Glasscheibe mit dem flachen Ende des Spudgers aus der Klebeverbindung zur Displayeinheit.

    • Bevor du die Glasscheibe wieder befestigst, musst du die Innenseite de Glasscheibe und das LCD erst gut reinigen. Fingerabdrücke oder eingeschlossene Staubkörnchen sind später sehr störend sichtbar.

  23. ULooAarsjjHwde6M
    ULooAarsjjHwde6M
    NNOXFk6BZIPpToYu
    • Überspringe diesen Schritt, wenn du die ursprüngliche Glasscheibe wieder einbaust.

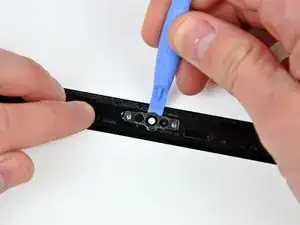
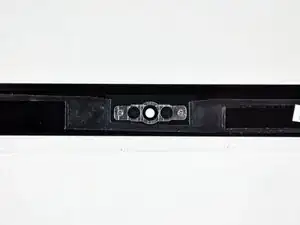
    • Setze ein Plastiköffnungswerkzeug zwischen Glasscheibe und Kamerahalterung ein und schiebe es um die Kamerahalterung herum, bis sie sich ablöst.

    • Vergiss beim Zusammenbau nicht, die Kamerahalterung an der neuen Glasscheibe festzukleben.

  24. yjPq3tiII5t2jQkG
    yjPq3tiII5t2jQkG
    A1Lw4NkGJIWgPUn3
    PuX41lvHqRhQXpiN
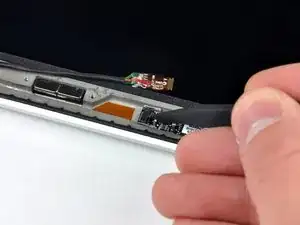
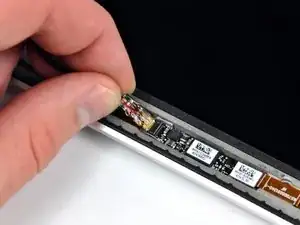
    • Beim Ausbau der Glasscheibe kann das Kamerakabel an der Glasscheibe kleben bleiben, so dass es beim Abheben der Scheibe von der Kameraplatine abgetrennt wird. Wenn das Kamerakabel bei dir noch angeschlossen ist, kannst du diesen Schritt überspringen.

    • Bevor du das Kabel wieder anschließen kannst, musst du erst das Stück Klebeschaumstoff über dem ZIF-Verbinder des Kamerakabels mit der Spudgerspitze ablösen.

    • Klappe den Sicherungsbügel am ZIF-Verbinder des Kamerakabels mit der Spudgerspitze hoch.

    • Schiebe das Kamerakabel in seinen Anschluss auf der Kameraplatine hinein und klappe den Sicherungsbügel mit der Spudgerspitze herunter, so dass das Kabel wieder gut im ZIF-Verbinder gesichert ist.

    • Klebe das Stück Schaumstoff wieder am Anschluss des Kamerakabels fest.

  25. qammBouZspRaLtVw
    qammBouZspRaLtVw
    AGD4lVQZrTBvCIYP
    • Schiebe die Verschlussabdeckung zur rechten Displayseite.

    • Sie sollte sich etwa 7 mm nach rechts bewegen lassen und dann stoppen. Zwinge sie nicht über diesen Punkt hinaus.

    • Achte beim Zusammenbau darauf, dass du sie ungefähr 7 mm weiter rechts als in der endgültigen Position am Display über die Teile hinweg schiebst, die an der Unterkante des Displays vorstehen.

    The plastic tabs of the clutch fit into slots that end up holding the clutch in place. The idea is that you need to slide the clutch to the right to free the plastic tabs from the metal slots in the LCD frame.....then you can separate the clutch from the frame.

    brian62 -

  26. fdGPLNxBhP3aHLQo
    fdGPLNxBhP3aHLQo
    SVbXJVb2u3VAHQMn
    5GtwOiNp41xhKwoK
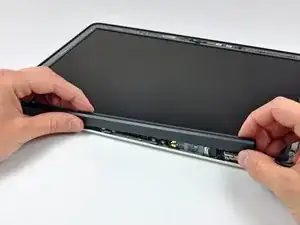
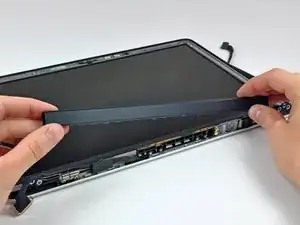
    • Beginne ganz rechts und rüttle die Verschlussabdeckung vorsichtig auf ihrer langen Achse vor und zurück und ziehe sie dabei vom Display weg.

    • Arbeite von rechts nach links und löse die Abdeckung behutsam aus der Unterkante der Displayeinheit heraus.

    • Hebe die Verschlussabdeckung von der Frontblende hoch und lege sie zur Seite.

    • Achte beim Anbringen der Verschlussabdeckung darauf, dass du die Öffnung aufweitest, wenn du sie über die kleine schwarze Zierabdeckung ziehst, die das offene Ende der Verschlussabdeckung verdeckt, wenn sie fertig angebracht ist. Die Zierabdeckung hat empfindliche kleine Befestigungsarme, mit denen sie im rechten Scharnier befestigt ist.

    Highly recommended to remove clutch cover BEFORE heating up glass, because cover is made of very thin plastic and it'll be deformed!

    Basically, I'm removing everything from screen - clutch cover, wifi card, antenna, all plastic bits, and only then proceed with heating and glass removal.

    DigiHead -

    Starting at it's far LEFT end

    Job -

    just slide the plastic cover to the right and it comes right off.

    William -

  27. SVNGrvYVlcjnNf6s
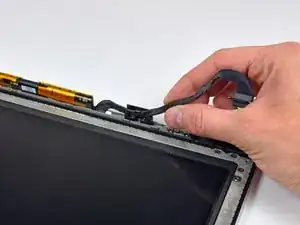
    • Hole das Displaydatenkabel aus seiner Halterung nahe an der linken unteren Displaykante heraus.

  28. OIYc6ljWwZDOnhVL
    • Entferne folgende sechs Schrauben, mit denen das LCD an der Frontblende befestigt ist:

    • Vier 3,25 mm Kreuzschlitzschrauben mit großen Köpfen.

    • Zwei 3,2 mm Kreuzschlitzschrauben mit kleinen Köpfen.

  29. xLUldyiiaenaMltO
    • Versuche noch nicht, das LCD zu entfernen. Die Leitungen entlang der Unterkante sind noch in einem Spalt in der Einlassung für das LCD in der Aluminium-Displayeinheit eingezwängt.

    • Halte das Display senkrecht und neige es soweit, bis du die Oberkante des Displays fassen kannst. Drehe es dann leicht aus der Displayeinheit heraus, achte dabei darauf, dass die Leitungen nicht aus der Unterkante herausbrechen.

  30. QgxlTkRKTXtKWnfT
    • Ziehe das LCD zum oberen Rand des Displays hin, so dass die Leitungen an der Unterkante aus der Einlassung in der Aluminium- Displayeinheit herausgleiten.

    • Es hilft, wenn du das Displaydatenkabel mit einer Hand durch seinen Kanal in der Aluminium-Displayeinheit führst, während du das LCD mit der anderen Hand zum oberen Rand des Displays ziehst.

  31. ZtQBhL6PJvGrxxNV
    • Ziehe das Stück Klebeband vom Stecker des Displaydatenkabels von der Kante des LCDs her ab.

  32. yhmpfYp1olFAXfKB
    yhmpfYp1olFAXfKB
    dLkeDksiZJUHceaM
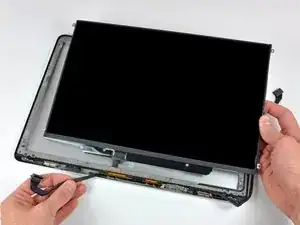
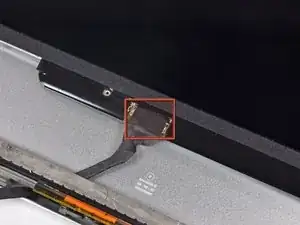
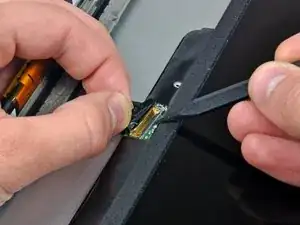
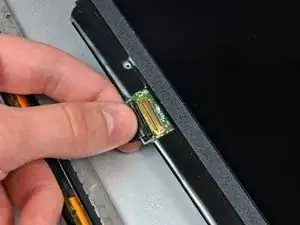
    • Klappe den dünnen Metallhalter hoch, mit dem das Displaydatenkabel in seinem Anschluss auf dem LCD gesichert ist.

    • Ziehe das Displaydatenkabel gerade von seinem Anschluss auf dem LCD weg.

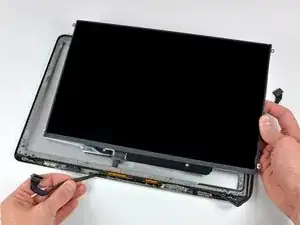
    • Hebe das LCD von der Displayeinheit weg und lege es zur Seite.

Abschluss

Um dein Gerät wieder zusammenbauen, folge den Schritten in umgekehrter Reihenfolge.

Walter Galan

685540 Reputation

6 Kommentare

When I removed the glass, the adhesive pulled up the camera left side gold ribbon cable. I removed the screw securing the small circuit board to the left of the camera and flipped it over. There's a tiny connector there. I had to pull back the gold tape (on the ribbon cable) and carefully feed the end of the gold mylar ribbon cable into the connector. The gold tape then falls over the top of the connector and would normally hold it place if it hadn't lost it's adhesive.

jpcarroll -

As the glass may be broken on these, I found that putting Duct tape across the broken screen helped keep it together better for easier removal. Also you might want to watch the small suction cup that comes in the kit as the metal pull ring melts right out, I had to use my bigger suction cups.

mayer -

consider removing clutch plate before heating, it will melt if your not careful
hebertgreg -

Suggest asking if they purchased a refurbished model. My last client's glass was held on with 30lb 3M shelf tape. No amount of heat or alcohol would remove it. Thank goodness the glass was already broken. I had to work for 2 hours to remove all of the glass, and old adhesive is not wanting to come off with elbow grease and alcohol. Going to try using tiny, careful amounts of goo-gone. Don't want anyone else to ever have to deal with this on future repairs (Client is a traveler, and accident prone)
Brent Hillyer -

It's more easy to do the Step 15 first, before removing the LCD. You have more control of the LCD and is more easy to remove the Glass.

Felix -

Hi I am looking to just replace the lvds cable how do i do it.. Do i need to take glass off of screen?

sferri1988 -