Einleitung
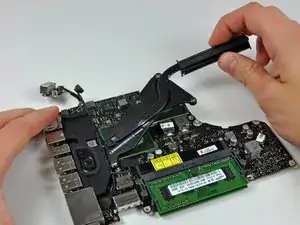
Entferne den Kühlkörper, um bessere Wärmeleitpaste aufzutragen.
Werkzeuge
Ersatzteile
-
-
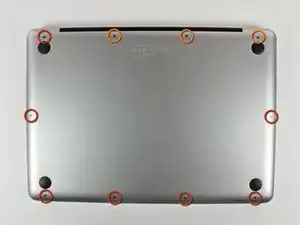
Entferne die folgenden 10 Kreuzschlitz-Schrauben, die die Gehäuse-Unterseite des MacBook Pro 13" Unibody befestigen:
-
Sieben 3 mm Schrauben.
-
Drei 13,5 mm Schrauben.
-
-
-
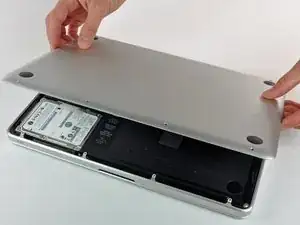
Hebe die Unterseite vorsichtig an und drücke sie Richtung Rückseite des Laptops, um die Halterungsclips zu lösen.
-
-
-
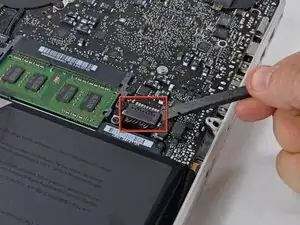
Löse mit der Kante eines Spudgers den Akkuanschluss nach oben, weg vom Sockel auf dem Logic Board.
-
-
-
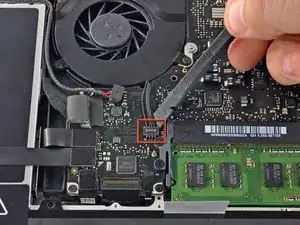
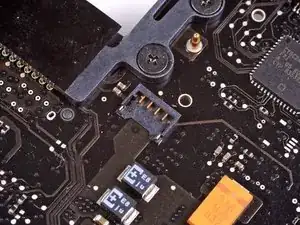
Benutze einen Spudger um den Verbinder des Ventilatorkabels aus seinem Anschluss auf der Hauptplatine zu lösen.
-
-
-
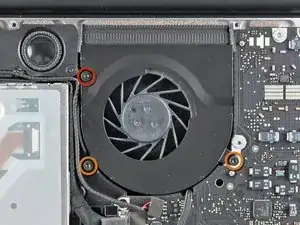
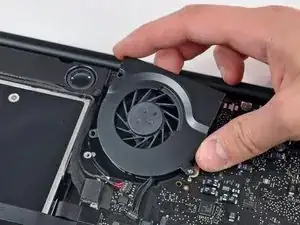
Löse die folgenden drei Schrauben:
-
Eine 7 mm Torx T6 Schraube
-
Zwei 5,4 mm Torx T6Schrauben
-
-
-
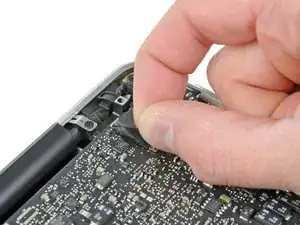
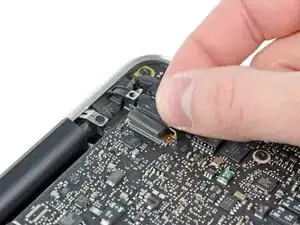
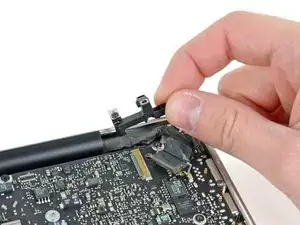
Fasse die Zuglasche am Sicherungsbügel des Display-Datenkabels an und drehe es in Richtung der Seite mit DC-in Buchse.
-
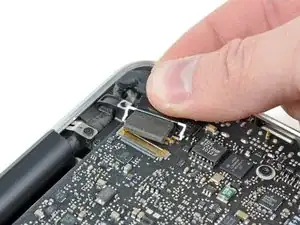
Ziehe den Verbinder des Display-Datenkabels vorsichtig direkt aus seinem Sockel heraus, parallel zum Logic Board.
-
-
-
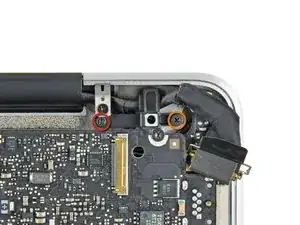
Drehe folgende Kreuzschlitzschrauben heraus, die die Befestigungsklammer des Display-Datenkabels am Gehäuse sichern:
-
Eine 8,6 mm Kreuzschlitzschraube
-
Eine 5,6 mm Kreuzschlitzschraube
-
Hebe die Klammer des Display-Datenkabels aus dem Gehäuse.
-
-
-
Heble die Verbinder vom Subwoofer und rechten Lautsprecher mit dem flachen Ende eines Spudgers vom Logic Board.
-
-
-
Ziehe den Stecker des Kamerakabels in die Richtung des optischen Laufwerks, um es vom Logic Board zu trennen.
-
-
-
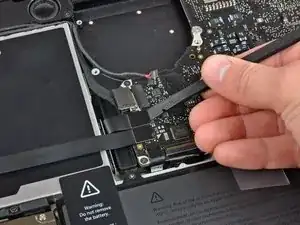
Heble die Verbinder vom optischen Laufwerk, von der Festplatte und vom Trackpad mit dem flachen Ende eines Spudgers vom Logic Board.
-
-
-
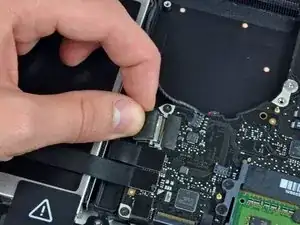
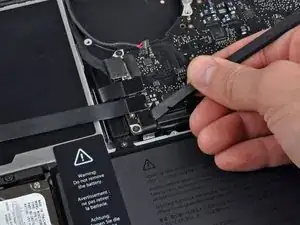
Hebe die Sicherungsklappe am ZIF-Verbinder für das Flachbandkabel der Tastatur mit dem Fingernagel oder einer Spudgerspitze hoch.
-
Schiebe dann mit dem Spudger das Flachbandkabel der Tastatur aus dem Sockel.
-
-
-
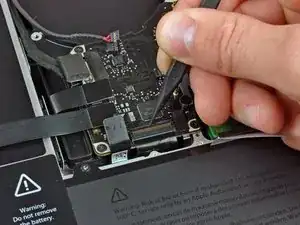
Ziehe das kleine Stück schwarzes Band vom Sockel des Flachbandkabels der Tastaturbeleuchtung ab.
-
-
-
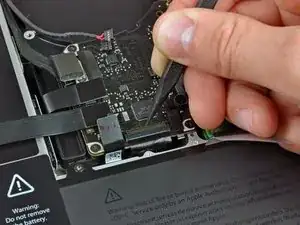
Hebe die Sicherungsklappe am ZIF-Verbinder für das Flachbandkabel der Tastaturbeleuchtung mit der Spudgerspitze hoch.
-
Schiebe dann mit dem Spudger das Flachbandkabel der Tastaturbeleuchtung aus dem Sockel.
-
-
-
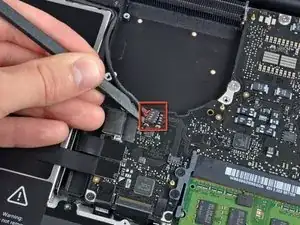
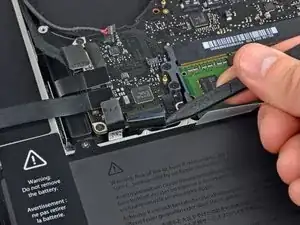
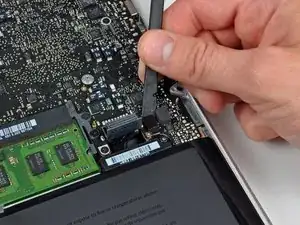
Heble den Verbinder des Kabels der Akkuanzeige mit dem flachen Ende des Spudgers aus dem Logic Board.
-
-
-
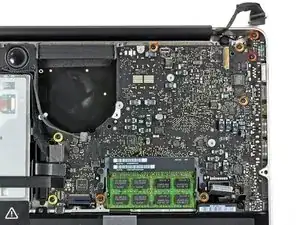
Entferne folgende Torx-Schrauben:
-
Zwei 7mm T6 Torx Schrauben an der DC-in Platine.
-
Fünf 3,3 mm T6 Torx Schrauben
-
Zwei 4 mm T6 Schrauben
-
-
-
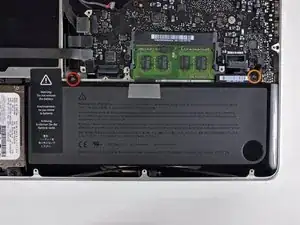
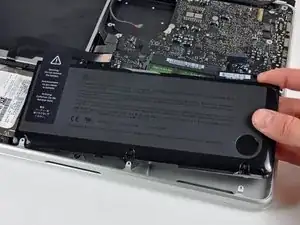
Entferne folgende TriPoint Schrauben, die den Akku am oberen Gehäuse befestigen:
-
Eine 5,5 mm TriPoint Schraube
-
Eine 13,5 mm TriPoint Schraube
-
Hebe den Akku aus dem Gehäuse.
-
-
-
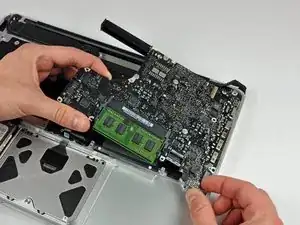
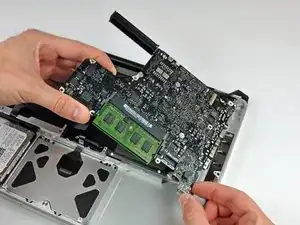
Hebe das Logic Board am linken Rand hoch, bis die Ports aus der Seite des oberen Gehäuses frei werden.
-
Ziehe das Logic Board von der Seite des Gehäuses weg, achte dabei darauf, dass sich die DC-in Platine nicht verfängt.
-
-
-
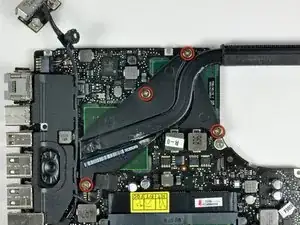
Entferne die vier 8,5 mm Kreuzschlitzschrauben, welche den Kühlkörper am Logic Board befestigen.
-
Um dein Gerät wieder zusammenzubauen, folge dieser Anleitung in umgekehrter Reihenfolge.
5 Kommentare
I enjoyed the process and the fixit guides are great. But I had one potentially fatal issue with the heat sink replacement guide (to apply thermal paste ). The guide says to "Pull the display data cable connector straight away from its socket" when it should say "gently pull it to the right in order to dislodge it from the socket, never pull upwards". I pulled it upwards because I did not realize that it was a "sideways" socket, and almost broke the socket and had a blank screen on startup (gently righting the bent socket with a tweezers fixed it).
Very glad you're able to fix the connector :)
Thank you for this write up. I was able to change out a bad logic board on my mid 2010 macbook pro that my ex wife had ruined with a spill of a soft drink. The heat sink on the new-used logic board was in worse shape than the original heat sink, so I had to swap them out. Wouldn’t have been able to do that without this guide. Once again, many thanks on helping to get new life into my 10 year old macbook pro :D
having difficulties after changing my thermal paste, unable to get the MacBook to boot up. Tinkered around a bit and it booted up for one go then a few keys were not working so I had to reconnect the cable again then the laptop went off again. Please help.


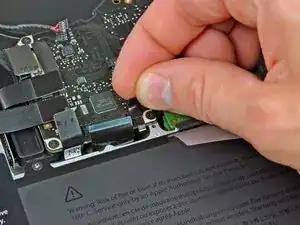
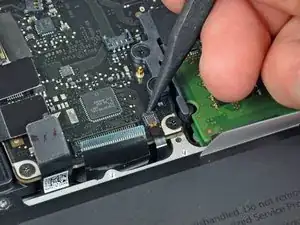
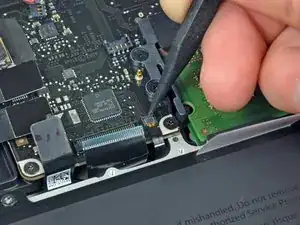
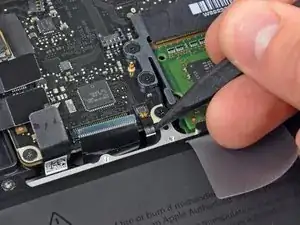
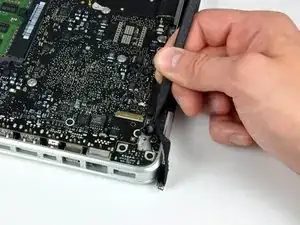


Compare the short screws carefully before reinstalling them. The shouldered screws go in the holes on the front edge.
David Kilbridge -
Before I started removing any screws I took a piece of paper and drew the bottom of the laptop and put a piece of double-sided tape in the spot where each screw goes. That way when I took out the screws, I could put them on the tape so I knew exactly which screw went in which spot. I did the same thing for dismantling the inside on another sheet of paper, then a third sheet for the screen after getting the front glass off.
mastover -
I use a similar technique: I print out the iFixit manual for the job, and Scotch-tape down the screws/brackets/cables I remove at each step next to the component descriptions. That way, when I'm reassembling, the bits are taped right next to the photo of where they came from.
adlerpe -
That's exactly what I do for all my repairs! It's the best way to keep track of all of the parts ' original location and to make sure that you don't miss any parts during reassembly.
joyitsjennie -
Great idea and one I use often
Thomas Overstreet -
Excellent idea! Thanks for sharing it here.
Laura Sharkey -
I used a 00 that fit but the screws were very tight so I used a tiny paintbrush with some wd40 on it and put it around the edges of the screws. Worked like a charm
valentinedhdh -
I use a magnetic mat and place the screws in order on that :)
Cary B -