Einleitung

After extended use, bulbs often burn out. Replace the flash assembly using this guide. For safety purposes, please remove the battery before working with any electronic components.

Please note that this guide requires soldering. For more information on how to solder and desolder connections, please visit this guide.

  1. wlsHSqs5cS3KCUtb
    wlsHSqs5cS3KCUtb
    dGieTBEeRImnJDgU
    lJuByySbwRZPyuI2
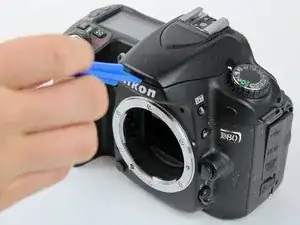
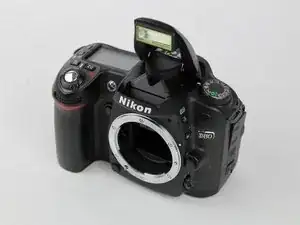
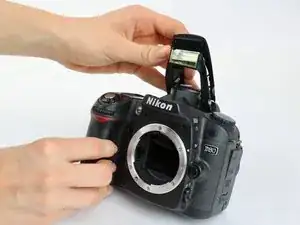
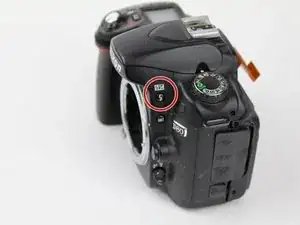
    • Press the highlighted button to pop the flash up.

    • Otherwise, use a plastic opening tool to gently lever open the flash by inserting the tool into the gap between the flash and the camera.

  2. DrPsZ3bMaEq5J6wj
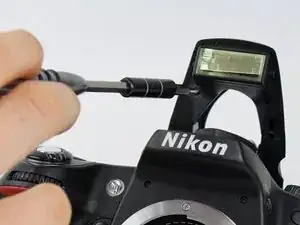
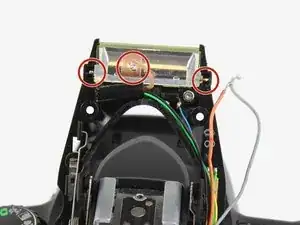
    • Use the #00 Phillips-head screwdriver to remove both 4.20 mm screws by rotating the screwdriver to the left.

  3. GECbYtOvnysddZy5
    GECbYtOvnysddZy5
    R6quF4WxD5jJvHAo
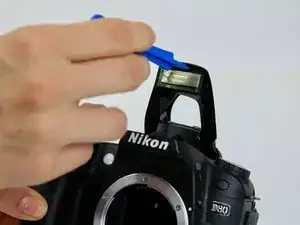
    • Using a plastic opening tool, pry open the cover.

    • Be advised, some plastic struts may snap off when you remove the cover.

  4. GZHwA6av5EXTbdOn
    GZHwA6av5EXTbdOn
    LdYDi13lkIAYOPwf
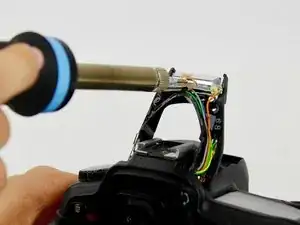
    • Using a soldering iron, desolder the orange, tan, and gray wires from the flash assembly.

    • For more information on how to solder and desolder connections, please visit this guide.

    • Use caution while using the hot soldering iron.

  5. nyAakIJEu56KIRH4
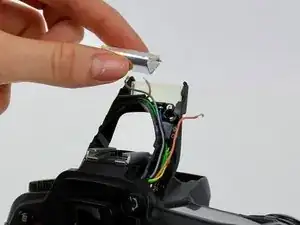
    • Gently remove the flash assembly from the casing.

    • The surface may still be hot, so grab it with caution.

Abschluss

To reassemble your device, follow these instructions in reverse order.
Kevin Horwedel

Mitglied seit: 09/10/17

190 Reputation

0 Kommentare