Einleitung

Hier wird der Austausch der wichtigsten Tasten gezeigt. Vorher muss noch der Akku ausgebaut werden.

  1. klktHCVYwld2jPbu
    • Schalte das Gerät aus, du könntest es sonst beschädigen.

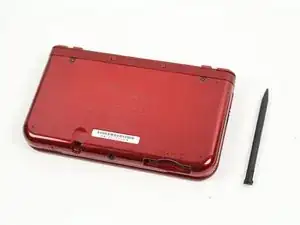
    • Lege den 3DS mit dem Boden nach oben. Entferne Game Card, Ohrhörer, Ladekabel, Stylus und was auch sonst noch verbunden ist.

  2. ItsctXxYnpWHaGbE
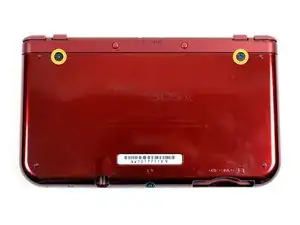
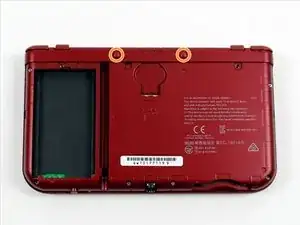
    • Drehe die beiden schwarzen JIS #0 Schrauben auf der Rückseite heraus.

    • Die Schrauben werden von Unterlegscheiben festgehalten und lassen sich nicht ganz entfernen.

    My experience indicates that a JIS #1 is more appropriate here.

    John Menden -

    Same here, much more appropriate.

    Jack Wilson -

  3. DQAtfmJFRLFufoBV
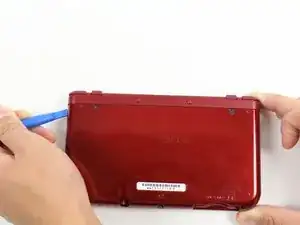
    • Wenn die Schrauben frei sind kannst du den Rückdeckel lösen.

  4. OrrGelvrQqNI2rLT
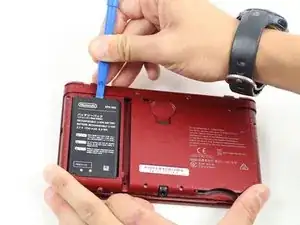
    • Der Akku befindet sich links. In der Mitte oben ist eine kleine Lücke, hier kannst du mit einem geeigneten Werkzeug (nicht aus Metall!) hebeln.

    Also you should remove any SD card at this point

    James Grant -

    Does this battery work on a NEW 3DS XL model?

    Froggy The Frog -

    This guide is for the New 3DS XL, which is called the 2015 3DS XL here on iFixit. If you're asking about the 3DS replacement battery advertised in the iFixit store, I believe it works for both new and old models.

    BabblingFishes -

  5. DUAGVrPBZH2kSFmX
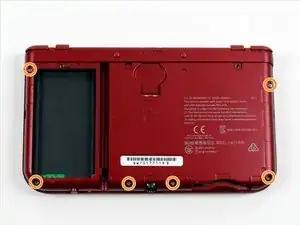
    • Entferne die sechs JIS #000 Schrauben entlang des Rands der inneren Abdeckung.

    the heck. on step 5 im using the 000 screwdriver from the kit and i am destroying the screw, yes going counter clockwise.

    the j000 and 000 don't work. im using the toolkit from your site and i don't see a JIS #000 just J000 and 000

    edit: so the j00 works.

    stephankranenfeld -

  6. CqtQrBq1UVS5NOnj
    CqtQrBq1UVS5NOnj
    SyI4bvwapenObtqE
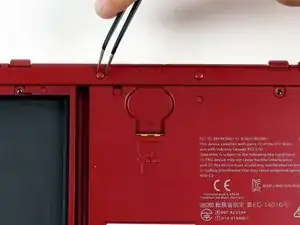
    • An der Oberkante befinden sich zwei Gummiabdeckungen. Ziehe sie vorsichtig mit einer Pinzette heraus.

    • Darunter befinden sich zwei JIS #000 Schrauben die du ebenfalls herausdrehen musst.

    A #0 worked better for me than the #00

    Lucas M -

    All 8 screws from Step 5 to 6 are the same size and should be pulled out using a #000 screwdriver.

    Alan Chen -

  7. ZXCVQWXB2kUYeuky
    ZXCVQWXB2kUYeuky
    wFoiR1vv4vgoZNmX
    B2DUVioeWeWTCGim
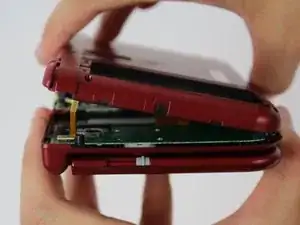
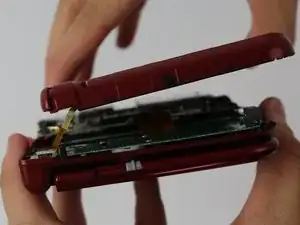
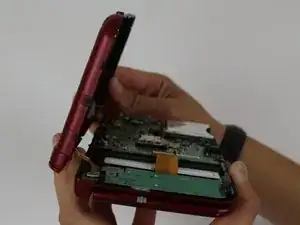
    • Um die Abdeckung abzunehmen musst du sie vorsichtig hoch und weg vom Gelenk heben ( damit die Ohrhörerbuchse frei wird). Schwenke sie dann in Richtung des Gelenks um an die Platinen zu gelangen.

    • Entferne die Abdeckung nicht ganz. Sie ist immer noch mit der Hauptplatine durch empfindliche Flachbandkabel verbunden.

  8. Ja5TKnRYba4DhrKd
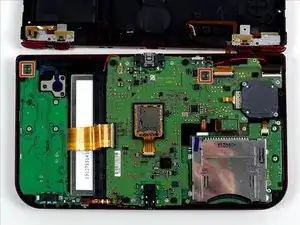
    • Löse die Verbinder der Flachbandkabel zu den L/R/ZL/ZR Tasten von der Hauptplatine, entferne es dann ganz.

  9. iIcAUVm1JrV16YUo
    iIcAUVm1JrV16YUo
    WoGlRBjKvmtOaPM5
    XMISKy6ODIuDDL3p
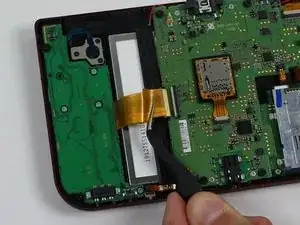
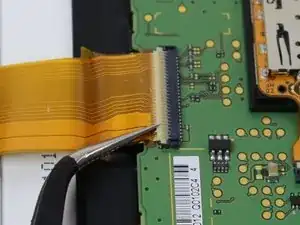
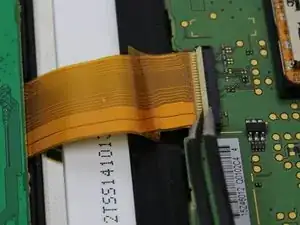
    • Finde den Verbinder am Flachbandkabel der linken Tochterplatine zur Hauptplatine (es ist das breiteste). Klappe den Sicherungsbügel am ZIF Verbinder mit einer Pinzette nach oben.

    • Ziehe das Kabel mit einer isolierten Pinzette aus dem Sockel.

  10. DRRwAIOAxOYbQ5Rw
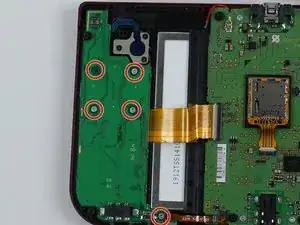
    • Entferne die fünf 3 mm JIS #000 Schrauben an der linken Tochterplatine.

  11. MIXKCI3lwwyhcvQw
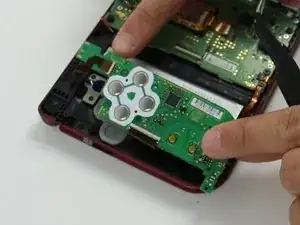
    • Drehe die Platine vorsichtig um. Entferne das blau-schwarze Flachbandkabel auf der Rückseite.

  12. pajNkbCJQDPqrsAg
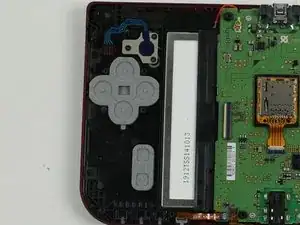
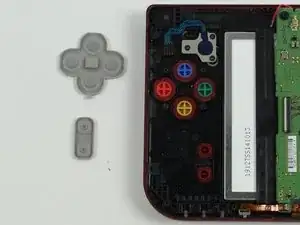
    • Entferne die graue Gummiabdeckung um die Tasten freizulegen, oder die graue rechteckige Abdeckung für die Start/Selecttaste.

    • Entferne die Tasten mit der Pinzette.

    • Achte beim Zusammenbau darauf dass die Tasten korrekt sitzen und leichtgängig sind.

    It would be good to show photos how to carefully peel off the membrane, so that the contacts can be cleaned, or replaced. This is shown in white on the PCB on photo 11. I put further details further down where someone asked a question. This applies to other 3DS models too

    Andrew -

Abschluss

Um dein Gerät wieder zusammen zu setzen folge den Schritten in umgekehrter Reihenfolge.

Kobbe Farwick

Mitglied seit: 02/04/15

1968 Reputation

10 Kommentare

do the smaller new 3ds colored buttons work in the new 3ds xl?

itsandy14 -

It will work, since the only difference between them is the size of screen and shell, but size of buttons and other pieces should be of the same.

CheatJoker -

If anyone else comes on this, I can confirm the small 3ds buttons do not quite work right they are slightly smaller and the cut outs that keep the buttons from spinning around are not the same

Mark Damien English -

Can someone provide further information about replacement of the entire C stick?

Or is it just as simple as pull the ribbon carefully, take the old one out and put the new one in?

CheatJoker -

The set of screws on the secondary panel are giving me trouble. I think I might be stripping them... Is it normal for them to be screwed on so tight? I don't want to pay 85 bucks just because I need to press my B button harder to make it work...

Ben Fuqua -

One of the screw of the second set was also giving me trouble. Just press firmly and turn very slowly. As they are not supposed to be touched by the consumer, I suspect they put a kind of sealant to make them harder to unscrew.
Alex Lebeau -

One thing to note is that the kit that I received from ifixit had the c-stick nub attached to the board. As such, you'll want to remove the c-stick instead of disconnecting the ribbon.

Jason Thompson -

Would be cool to provide in every section a place where users can offer a paid service to repair devices other users are afraid to repair.

theoctopusride -

Does annyone know what is wrong with my new 3ds xl... So all buttons work fine BUT the a button needs alot of pressure to work. Tried to clean it but idk still needs way more pressure than the rest…

TMHate MK -

I had the same problem, the A button especially was very temperamental and had to push it very hard to trigger. I watched a video yesterday which showed carefully peeling the transparent membrane off with tweezers to get inside the metal domes (it's very sticky so was difficult to get it to start peeling, but comes away carefully once you manage to get it started, just don't peel too hard that it rips). This is what holds the 4 metal domes in place. I then cleaned them as there was slight corrosion in there. I then pushed the membrane down and reassembled where it now works perfectly. I then did the same with the D-pad which worked but didn't always trigger when it clicked but would it you pushed them slightly harder and they are working perfectly.

One tip, if possible, don't completely remove the transparent membrane. just peel it enough to gain access, so you can push back down .if you peel it completely you'll have to realign it perfectly, and if it doesn't line up they won't work. The tolerance is tight!

Andrew -