Einleitung
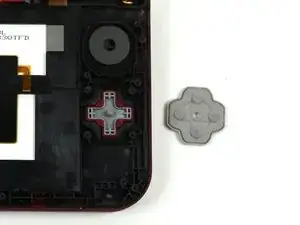
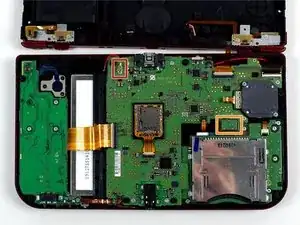
Hier wird der Austausch des Steuerkreuzes gezeigt.
Werkzeuge
Ersatzteile
-
-
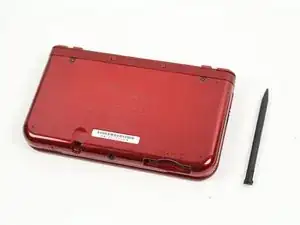
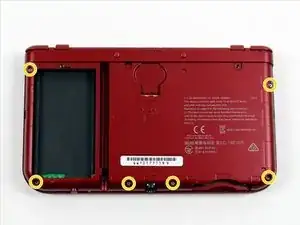
Lege den 3DS mit dem Boden nach oben. Entferne Game Card, Ohrhörer, Ladekabel, Stylus und was auch sonst noch verbunden ist.
-
-
-
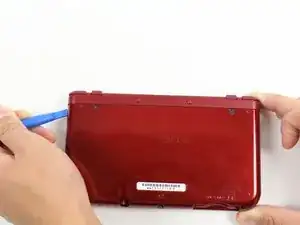
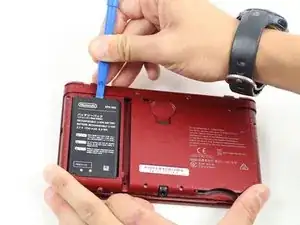
Der Akku befindet sich links. In der Mitte oben ist eine kleine Lücke, hier kannst du mit einem geeigneten Werkzeug (nicht aus Metall!) hebeln.
-
-
-
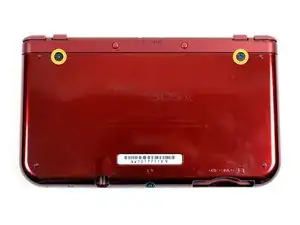
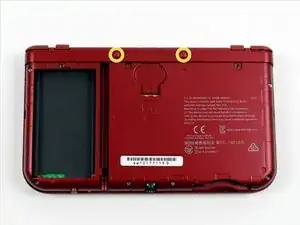
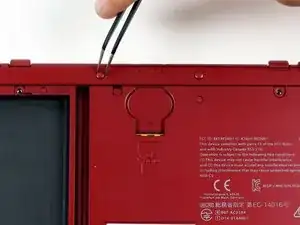
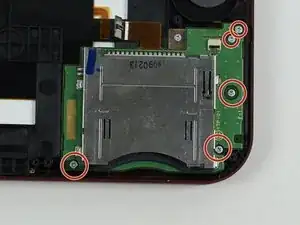
An der Oberkante befinden sich zwei Gummiabdeckungen. Ziehe sie vorsichtig mit einer Pinzette heraus. Darunter befinden sich zwei JIS #000 Schrauben die du ebenfalls herausdrehen musst.
-
-
-
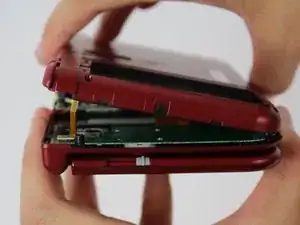
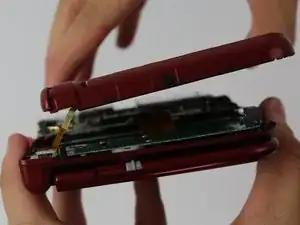
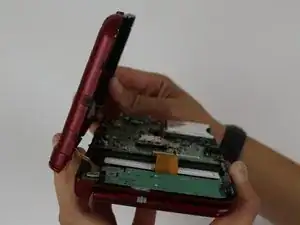
Um die Abdeckung abzunehmen musst du sie vorsichtig hoch und weg vom Gelenk heben ( damit die Ohrhörerbuchse frei wird). Schwenke sie dann in Richtung des Gelenks um an die Platinen zu gelangen.
-
-
-
Die beiden Verbinder zu den Flachbandkabel der L/R/ZL/ZR Tasten können mit einer Pinzette gelöst werden. Dann kannst du die Abdeckung ganz entfernen und zur Seite legen.
-
-
-
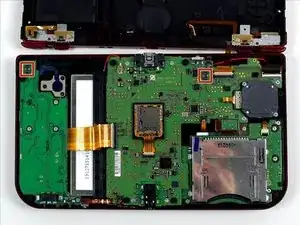
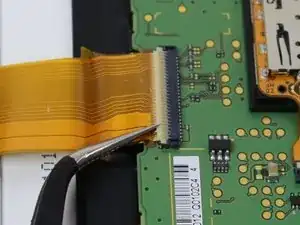
Klappe den kleinen scharnierartigen Sicherungsbügel am ZIF-Anschluss des Flachbandkabels zum Schiebepad mit einer Pinzette hoch.
-
Schiebe das Flachbandkabel aus dem Anschluss heraus.
-
-
-
Hebe das Gehäuse des Schiebepads nach oben und entferne es. Es klemmt vielleicht ein bisschen, sollte aber nicht zu viel Kraft benötigen.
-
-
-
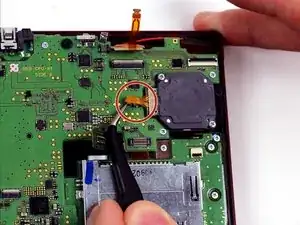
Finde den goldfarbenen Stecker mit dem roten Kabel oben links auf der Hauptplatine. Ziehe den Stecker vorsichtig mit den Fingern nach oben heraus.
-
Löse den Verbinder des einzelnen Flachbandkabels mit der Pinzette.
-
-
-
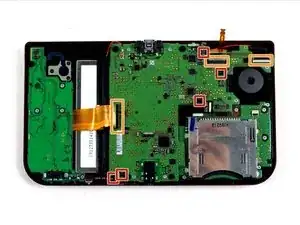
Löse mit der Pinzette vorsichtig die fünf markierten ZIF Verbinder auf der Hauptplatine.
-
Drei Verbinder haben einen Sicherungsbügel. Klappe ihn hoch und löse die Verbindung.
-
-
-
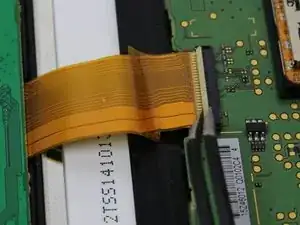
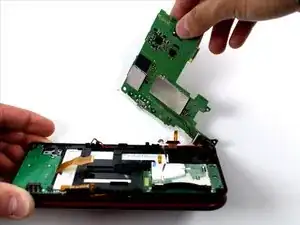
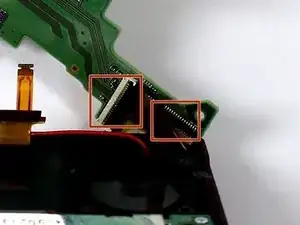
Schwenke vorsichtig die Hauptplatine um 90° in Richtung des Gelenks um zwei weitere ZIF Verbinder auf der Unterseite der Hauptplatine freizulegen.
-
Beide haben Sicherungsbügel die hochgeklappt werden müssen. Der längere links ist schwarz, der kürzere rechts weiß. Klappe sie hoch und löse die Verbindung.
-
-
-
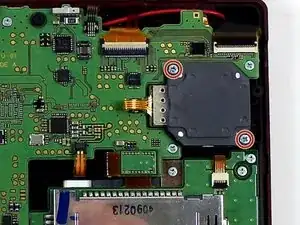
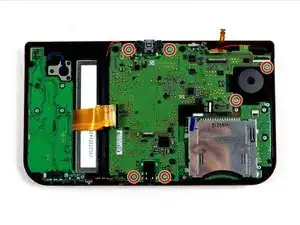
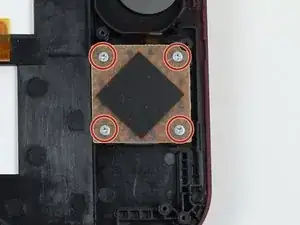
Entferne die vier JIS # 000 Schrauben an der quadratischen Platte.
-
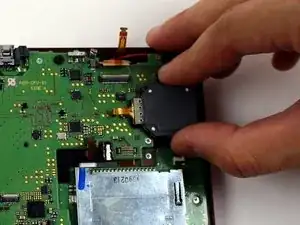
Hebe die Platte nach oben heraus.
-
Um dein Gerät wieder zusammen zu setzen folge den Schritten in umgekehrter Reihenfolge.
10 Kommentare
FYI: Under Tools you state a Philips #000 is needed but in the instructions you have JIS #000.
Submitted an edit! I corrected some of the bit sizes in the instructions as well (in our repair, a #00 was never used).
FYI: Under Step 13, you missed 1 ribbon cable that also needs to be detached in order for the motherboard to be separated. It is the tiny IC housed in a small PCB near the bottom left of the C-Stick. In fact, this little ribbon gets separated and reattached throughout your guide pictures starting with step 8. Here is a link to the ribbon in question (Note: Pic borrwed from Step 12 which highlights the red cable. Look for my lighter arrow which shows the missing ribbon): http://i.imgur.com/0V7QI4i.jpg
Joe -
Thanks for the tip! The ribbon cable has been added to Step 12. Feel free to edit it to add anything specific about the procedure.
Total lack of information in these fix instructions about the new black zif connectors. The ones we have all be used to for years are mention in detail (eg. the one for the toddle stick). But nothing about the new ones that supply the home button, mic etc. I have today totally wrecked a customer’s new 3DS XL as a direct result of following this guide. As these new zifs were not mentioned I thought (stupidly) they should just be flipped up but obviously this destroys them. Whoever makes these guides would know these clips to be a problem but neglected to warn would be fixers about them (was it deliberate as I cannot think why you would neglect such a crucial fact). I am still not sure how they operate -. Yours felling stupid for trusting ifix and also very let down.
esmall23 -
Apologies; I'm neither an iFixit employee nor do I usually fiddle with circuitboards.
That said, you'll notice that there was a warning about these ZIF connectors on step 13. I've moved the warning to the topmost bullet and added more detailed information concerning the connectors. Let me know if you have any questions!
