Einleitung
Diese Anleitung zeigt, wie ein defekter Akku in der Nintendo Switch Lite ausgetauscht werden kann.
In der Switch Lite sind JIS-Schrauben verbaut, zur Not passen aber auch Bits für Kreuzschlitzschrauben. Sei aber sehr vorsichtig und beschädige die Schraubenköpfe nicht. Die Bits von iFixit können auch für JIS-Schrauben verwendet werden.
Entlade den Akku aus Sicherheitsgründen auf unter 25%, bevor du mit der Reparatur anfängst. Das reduziert das Risiko, dass sich der Akku entzündet oder explodiert, falls er versehentlich während der Reparatur beschädigt wird. Wenn dein Akku aufgebläht ist, musst du entsprechende Vorsichtsmaßnahmen treffen.
Hinweis: Das Abschirmblech klebt durch die Wärmeleitpaste ein wenig am Kühlkörper. Wenn das Abschirmblech ausgebaut wird, muss die alte Wärmeleitpaste entfernt und neue aufgetragen werden.
-
-
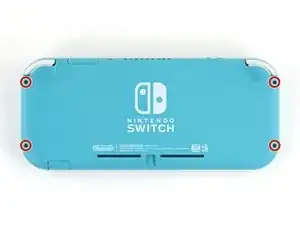
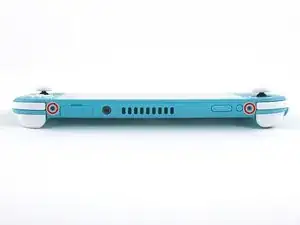
Nimm einen JIS 000 Schraubendreher/Bit oder ein Original PH000 Bit von iFixit und entferne folgende JIS-Schrauben, mit denen die Rückseite oben und unten befestigt ist:
-
Zwei 3,6 mm lange Kreuzschlitzschrauben an der Oberkante des Gerätes
-
Zwei 3,6 mm lange Kreuzschlitzschrauben an der Unterkante des Gerätes
-
Passe auf, dass die Schraubenköpfe nicht rundgedreht werden. Drücke das Werkzeug fest nach unten und arbeite langsam. Wenn die Schrauben nicht herauskommt, dann versuchen es mit einem anderen Bit.
-
-
-
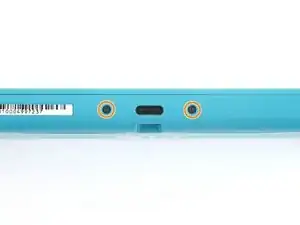
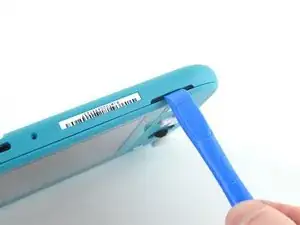
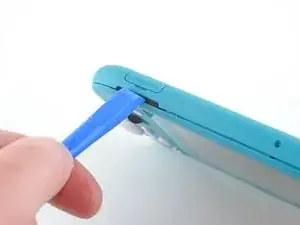
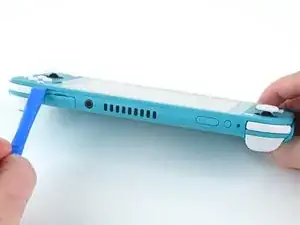
Setze ein Öffnungswerkzeug in die linke Öffnung für den Lautsprecher an der Unterseite des Geräts ein.
-
Verdrehe das Werkzeug, so dass sich die Rasten lösen, mit denen die Rückseite befestigt ist.
-
-
-
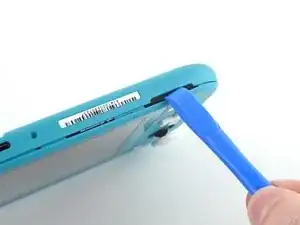
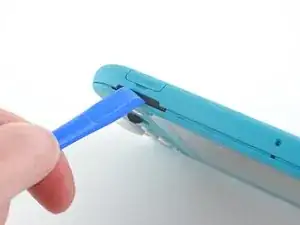
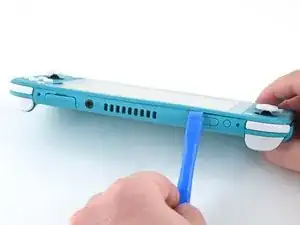
Schiebe das Öffnungswerkzeug um die untere linke Ecke herum, so dass sich die Rasten auf der linken Seite des Geräts lösen.
-
-
-
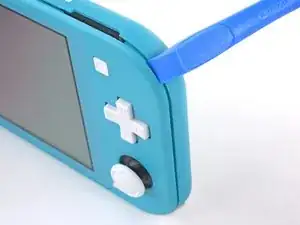
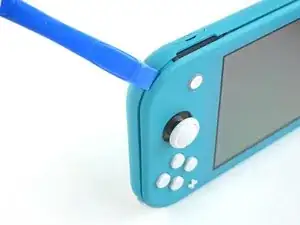
Setze ein Öffnungswerkzeug in die rechte Öffnung für den Lautsprecher an der Unterseite des Geräts ein.
-
Verdrehe das Werkzeug, so dass sich die Rasten lösen, mit denen die Rückseite befestigt ist.
-
-
-
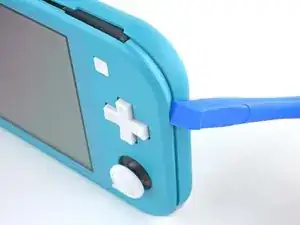
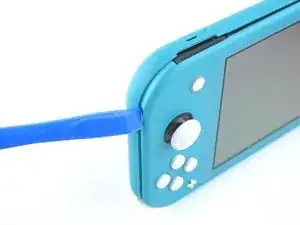
Schiebe das Öffnungswerkzeug um die untere rechte Ecke herum, so dass sich die Rasten auf der rechten Seite des Geräts lösen.
-
-
-
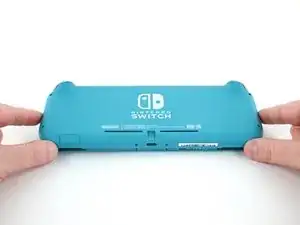
Schiebe das Werkzeug weiter am Spalt an der Oberseite des Geräts entlang und heble die Rasten auf.
-
-
-
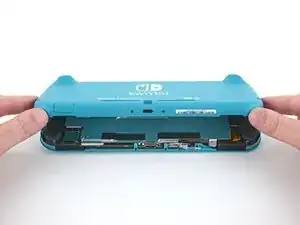
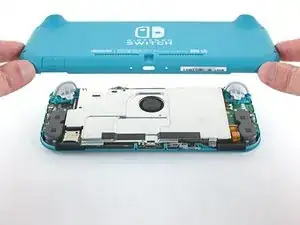
Hebe die Unterkante der Rückseite an und klappe sie wie ein Buch auf.
-
Entferne die Rückseite.
-
-
-
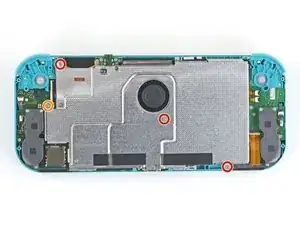
Nimm einen JIS 000 Schraubendreher/Bit oder ein Original PH000 Bit von iFixit und entferne folgende vier JIS-Schrauben:
-
drei 3,1 mm Schrauben
-
eine 4,5 mm Schraube
-
-
-
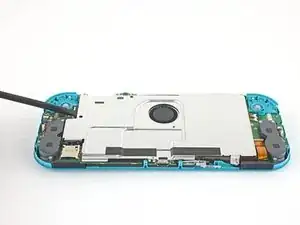
Hebe mit dem Finger oder einem Spudger das Abschirmblech hoch und entferne es aus dem Gerät.
-
Entferne das Abschirmblech.
-
-
-
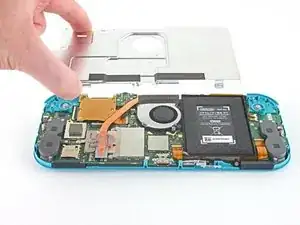
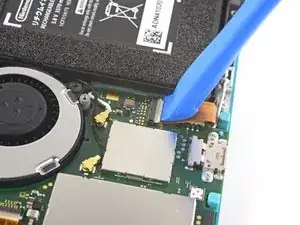
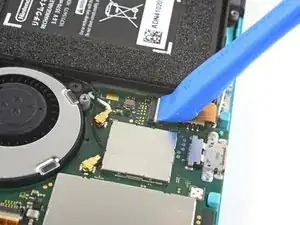
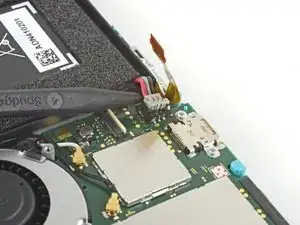
Klappe den kleinen, scharnierartigen Sicherungsbügel am ZIF-Verbinder des Verbindungskabels auf der Hauptplatine mit dem Fingernagel oder einem Öffnungswerkzeug hoch.
-
-
-
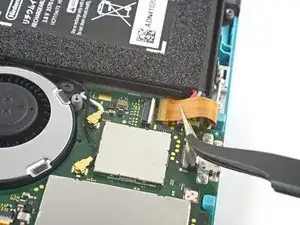
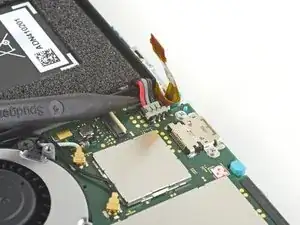
Schiebe das Verbindungskabel mit Hilfe einer Pinzette aus dem Anschluss auf der Hauptplatine heraus.
-
-
-
Heble den Akkuanschluss mit der Spudgerspitze gerade nach oben aus seinem Anschluss auf der Hauptplatine heraus.
-
-
-
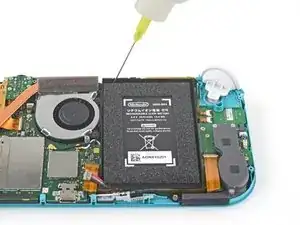
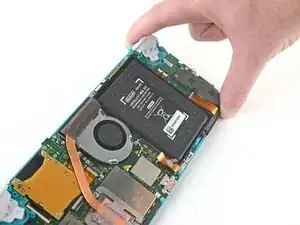
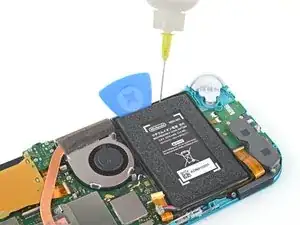
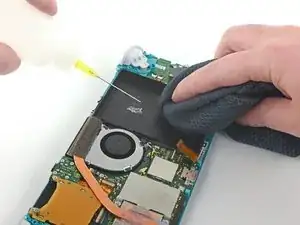
Lasse ein paar Tropfen Klebstoffentferner oder hochkonzentrierten (mindestens 90%iges) Isopropylalkohol in die Oberkante an der Vertiefung für den Akku laufen, so dass der Kleber geschwächt wird.
-
-
-
Kippe die Oberkante des Geräts hoch, damit der Isopropylalkohol unter den Akku laufen kann.
-
Lasse den Alkohol 1 - 2 Minuten lang einwirken, um den Kleber zu schwächen.
-
-
-
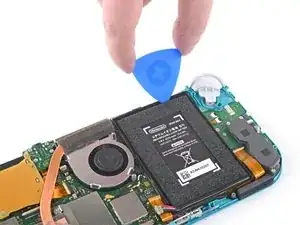
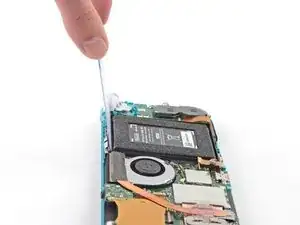
Setze ein Plektrum in den Spalt zwischen Akku und Akkufach ein.
-
Beginne den Kleber aufzuschneiden, indem du die Spitze des Plektrums behutsam unter dem Akku schiebst sie und unter der Kante entlang führst.
-
-
-
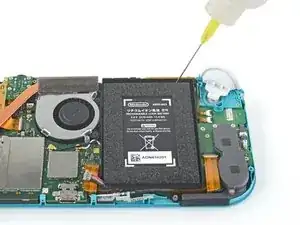
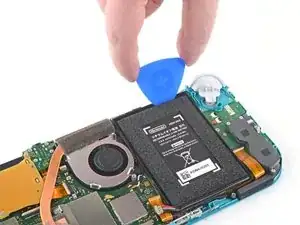
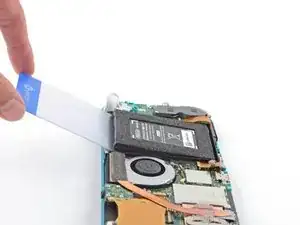
Lasse das Plektrum stecken und gib noch ein paar mehr Tropfen Klebstoffentferner oder Isopropylalkohol in die Vertiefung für den Akku hinein.
-
Kippe die Oberkante des Geräts hoch und lasse den Alkohol wieder 1 - 2 Minuten einwirken, um den Kleber aufzuweichen.
-
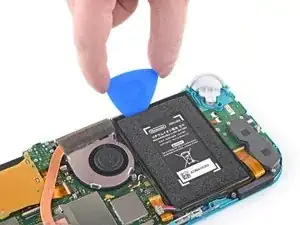
Schiebe das Plektrum weiter an der Oberkante des Akkus entlang und schneide noch mehr vom Kleber darunter auf.
-
-
-
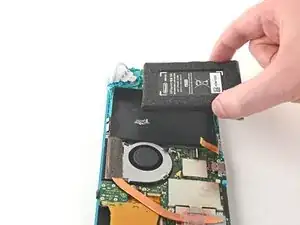
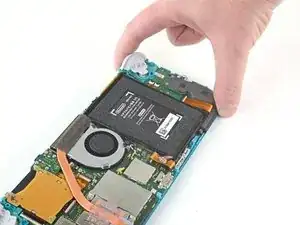
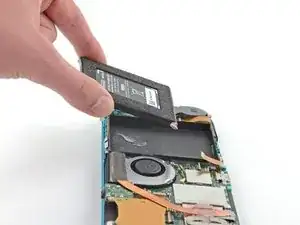
Wenn genug Platz entstanden ist, dann schiebe eine Plastikkarte unter den Akku und heble ihn langsam hoch.
-
Entferne den Akku.
-
-
-
Entferne alle Klebstoffreste im Akkugehäuse mit Klebstoffentferner oder Isopropylalkohol und einem Mikrofasertuch, bevor du den neuen Akku einbaust.
-
Wenn dein neuer Akku noch nicht mit Klebestreifen versehen ist, dann hilft dir diese Anleitung beim Anbringen von vorgestanzten Klebestreifen auf der Unterseite des Akkus.
-


Um dein Gerät wieder zusammenzubauen, folge den Schritten dieser Anleitung in umgekehrter Reihenfolge.
Nach Abschluss dieser Anleitung solltest du deinen neu eingebauten Akku kalibrieren.
Entsorge deinen Elektromüll fachgerecht.
Lief die Reparatur nicht wie geplant? Probiere zunächst einige grundsätzliche Lösungen oder frage in unserem Nintendo Switch Lite Forum nach Hilfe bei der Fehlersuche.

14 Kommentare
Hello!
I am preparing to repair my daughters nintendo switch light. It has stopped charging out of no where. I have all the tools, I just can't find the battery anywhere. Where would you recommend buying it from?
If you are still looking Ifixit sells one themselves Nintendo Switch Lite Akku
Thanks for the guide. Battery replacement kits are now available on Amazon: https://www.amazon.com/Nintendo-HDH-001-... (they weren’t in November! I was also looking for this during that time)
Unfortunately, the battery was much harder to remove than I expected. I did use a lot of isopropyl alcohol, but the adhesive they use really was giving me a lot of trouble. I should’ve wisened up and googled other adhesive removal methods or tried a new approach other than prying with the spudgers.
Well, now the LCD now has what looks like pressure damage in the bottom left where I’d imagine a lot of the prying pressure went. It is much more noticeable when the screen goes all-white, and not too bad with darker colors.
I don’t blame iFixit for my mistake of course, and it is really disappointing that Nintendo used the amount of adhesive that they did. But I hope this comment can serve as a warning to others attempting this repair to be more gentle even if it’s refusing to come off.
vmgm -
Yikes! Sorry to hear this. How did you pry with the spudger exactly? If you kept it around the top edge of the battery well then I would assume it wouldn’t damage the screen, but if you inserted the end of the spudger deeper in the battery well and used that point as the fulcrum, then I could see that putting a lot of pressure on the back of the LCD.
@craiglloyd I did an embarrassing amount of spudger prying pretty much everywhere along the top/bottom of the battery, I actually broke a few spudger tips in the process so that might reveal something about my approach…
But, I’m starting to think it may not be LCD damage after all, but rather some isopropyl alcohol caught behind the screen– During my prying, the Switch case was getting pretty heavily warped, so maybe some of the alcohol (that I definitely used in excess) slipped in and got sandwiched under the screen? I started to notice this since the blotches seem like they’ve moved over time. Here’s an image of the screen now https://imgur.com/DjYmFnJ (and the dark gray blotch along the leftside isn’t a shadow, white spots in bottom left I thought were pressure damage)
It’s still very usable / not noticeable on black colors and thanks again for the guide! I can give the screen more time to see if it improves at all, or maybe try going back in and trying to see it is trapped alcohol that can be released
vmgm -
Have the marks faded over time? We have had the ame issue and believe it is the isopropyl alcohol :/ we didn't use loads but found there was a gap at the bottom of where the battery is held which clearly let some of the alcohol through. I'm really hoping it will evaporate over time but not sure :/
Sadly no, the marks are still there, and haven’t been motivated to try to fix yet. I’ve seen some videos online where people can coerce trapped isopropyl alcohol out without having to take a screen apart, but have been hesitant to try out some of the methods.
vmgm -
Any way of fixing the discolored left corner screen issues? I did a battery replacement and a very small portion of the lower left color is discolored.
Mike -
All my screws got stripped any ideas on how to remove?
Almost A Mammal -
A Y0 screwdriver seemed to work better for me.
Tommy Morrill -
What type of screw driver do I use to un screw the screws and which way
Luca Capito -